The first page considered the preparation work, including setting-out, masking-off and cutting of the tactile units, while the final page documents the finishing work and provides links to further sources of information.
Mixing the adhesive
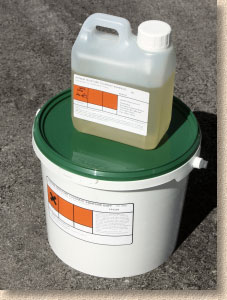
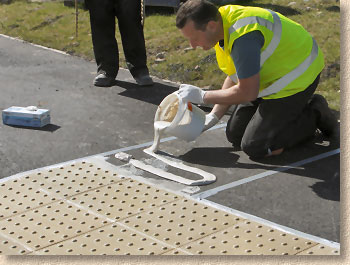
The adhesive used for this installation is a Moisture Tolerant resin system, which is a two-part resin and comes in pre-batched quantities sufficient to cover at least 1.6m², to suit the packaging of the supplied Tactiles. The base resin is contained within a pail, while the activator resin comes in a separate container.
This particular adhesive system is colour-matched to suit the tactiles being installed. So, for this project using buff tactiles, the base resin is buff coloured, while for, say, a red blister tactile installation, a red-hued resin would be supplied.
Both the individual components and the mixed adhesive are known skin irritants, therefore operatives should ensure bare skin is covered by wearing gloves at all times when using the adhesive.
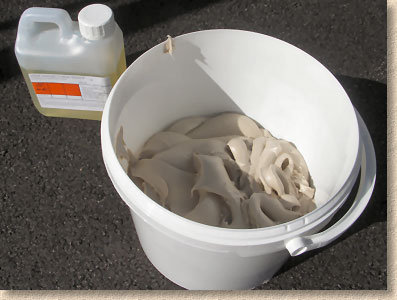
The activator is poured into the pail containing the base resin and thoroughly mixed using a mechanical paddle stirrer. There is no minimum time for mixing: the obvious physical differences between the transparent activator of the coloured base make it fairly obvious how well the mixing is proceeding, and, generally speaking, roughly 3 minutes of vigorous mixing, ensuring the paddle gets right into the edges of the pail, will produce a thoroughly mixed adhesive.
As with all adhesives, it is critical that the two components are completely mixed, and a few extra seconds spent ensuring all of the base has mixed with all of the activator is time well spent.
The working life of the adhesive varies with ambient temperature: longer on cold days, less working time when it's warm and sunny, but, even on a hot summer's day, the adhesive should have at least 20-30 minutes of working time. Accordingly, the adhesive is not mixed until 5 minutes or so before it will be used.
Tools should be cleaned off using an old rag and white spirit.
Laying the Tactiles
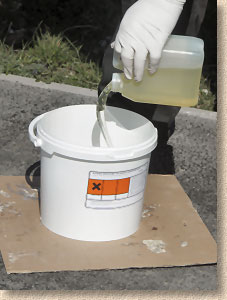
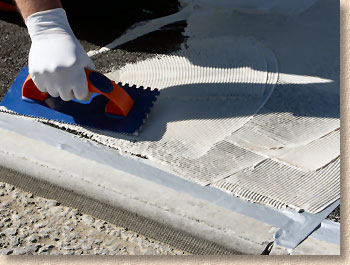
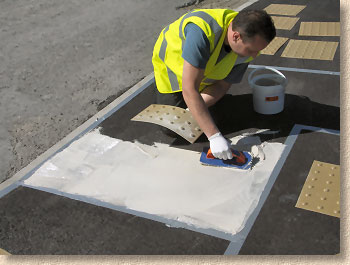
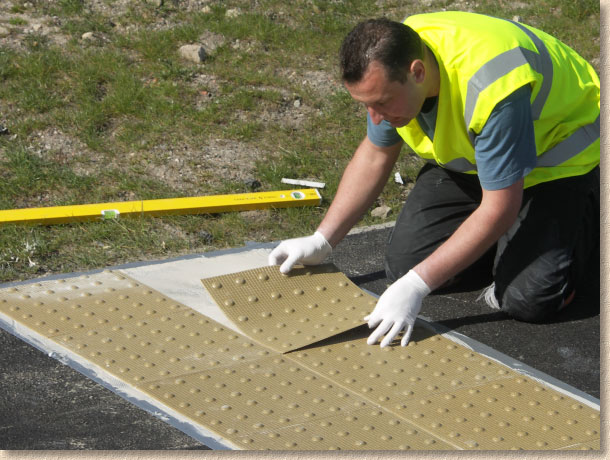
The laying operative pours mixed adhesive from the pail directly onto the substrate, and proceeds to spread it over the surface evenly, using a notched trowel and ensuring the adhesive covers the whole area, right up to and slightly over the edge of the masking tape.
Only enough adhesive to cover an area of two tile width is spread at any one time. This prevents the laying operative having to overstretch when placing the tiles and allows him to keep close to the work, which aids with placement accuracy.
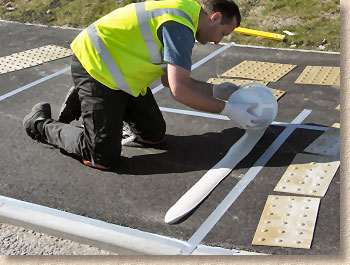
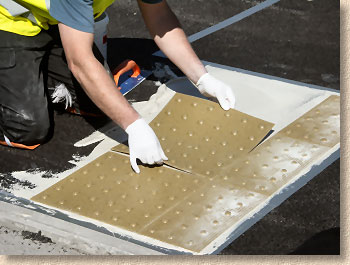
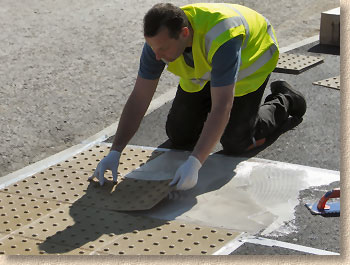
Once an area has been covered with adhesive, the individual tactiles can be placed. The first tile is lowered onto the adhesive and lightly pressed down to settle it into the adhesive without trapping any air beneath.
Don't press the tile too hard otherwise the adhesive is simply squeezed out at the edges. The intention is to ensure that the whole of the base of the tactile is in contact with the adhesive.
As shown in the photograph opposite, the flexibility of the tactiles allows them to be "rolled" into place, excluding any air pockets in the process, while allowing millimetre-perfect placement with the masking tape and the adjacent tiles.
Place the tiles carefully: it's considered bad practice to lift a tile once it's been set onto the adhesive, as this weakens the bond between substrate and adhesive, and between the adhesive and the tactile. If a tile does need to be lifted for whatever reason, it's best to refresh the adhesive and re-trowel it before re-placing the tile.
A further area of adhesive is spread and trowelled out. Notice how the adhesive pail has been inverted to allow its contents to run out onto the substrate, and notice how many tiles have been laid: each pail of adhesive should be sufficient for at least 10 individual tactiles.
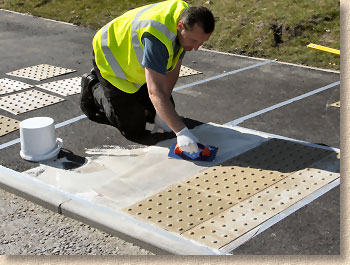
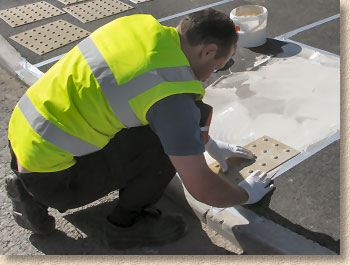
As the first pail of adhesive drains and is spread by the laying operative, a second pail is prepared by his mate so that the laying process is not interrupted.
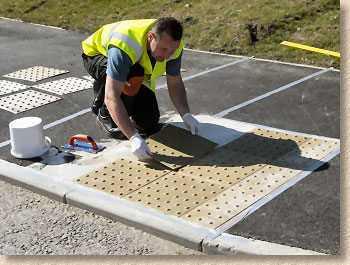
More adhesive is spread, roughly two tiles width at a time, and the laying continues with the operative carefully placing each tile and very gently settling it into the adhesive bed with it squeezing up between the joints. Any spillages or snots are removed immediately using a rag and white spirit.
The operative also recommends having spare gloves available, as any adhesive that finds its way onto the gloves during the laying process is likely to be transferred to the face of the tactiles when placing subsequent tiles. It's easier to change gloves than to have to repeatedly wipe-down spills and snots. Notice the box of replacement gloves in the photograph on the right, below.
And so it goes: mixing the adhesive as it is required, spreading it over an area not greater than two tile widths, carefully, very carefully, placing the individual tactiles and pressing them gently into the adhesive bed, making sure of full contact and taking care not to squeeze-up the resin between adjacent tiles.
This crossing comprises approximately 3.5m² of tactile paving and the installation took approximately one hour. Admittedly, the weather was most obliging. but two fully-trained operatives working for the local authority report that even on a wet winter's day, they would be able to install this type of crossing in about the same time. Frost or snow would prevent installation, but thanks to the new moisture-tolerant adhesive, fitting to any substrate, be it bitmac, concrete, flags or block paving, can be done most days of the year. The supervisor for Wigan MBC Highways reports that their full installation cost is less than £90 per square metre, which is considerably less than the cost of installing pre-cast units, and they really appreciate the ability to have the footpath fully open to pedestrians within a few hours.