Introduction:
Pouring mortar into joints is one of those notions that everyone has considered at some point in the paving career...if only it was possible to get a mortar wet enough to pour but not so wet that the heavier sands and lighter cements separate, leaving a lumpy uncooperative mass as the bottom of the watering can beneath a dirty, cement-tinged liquid. Near-constant agitation was normally required to prevent the inevitable separation, frantically stirring the canful of sloppy mortar until literally seconds before pouring it into the joints, yet still being left with a clump of sandy sludge in the can once all the pourable content had been dispensed.
Thankfully, significant improvements in mortar additives and tighter control of sand and cement particle sizes has come to the rescue and there are now several proprietary mortars that can be freely poured from a watering can or spouted bucket, with none of the problems described above. Unamazingly, these 'pourable' mortars just happen to be identical to the slurry systems described elsewhere .
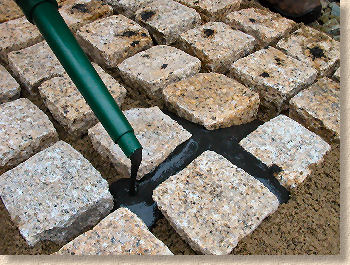
Opposite: Instarmac jointing being poured on a commercial project
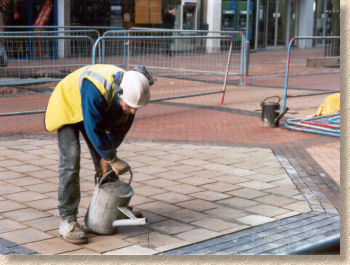
Poured jointing is best suited to wider joints, and it requires a reasonably steady hand. After all, the whole point of pouring instead of slurry-application is to avoid all that time-consuming cleaning work. If the operative responsible for pouring the jointing mortar has the DTs or a nervous twitch, any such advantage may be lost. Even when the operative has nerves of steel and is as steady as a rock, pouring is relatively slow and back-breaking work. There's a need to be close to the work to monitor just where all that mortar is going, and this inevitably involves being hunched over for long periods. On the plus side, there's little or no cleaning to be done and the joints are usually well-filled as the liquid mortar finds its way into every nook and cranny, much like a slurry.
Tools:
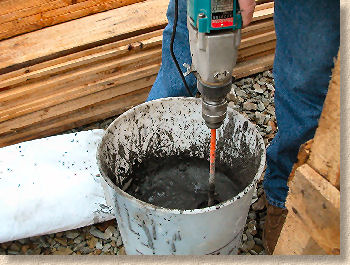
- Mixer (rotary/cement) or Powered agitator/stirrer
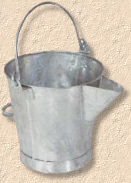
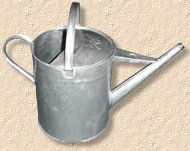
- Watering can or spouted bucket
- Mixing bucket
- Trowel
Technique:
The key to successful poured jointing is getting the consistency of the mortar just right. Too stiff and it won't flow; too wet and it sploshes about everywhere. While most manufacturers give a recommendation for the quantity of water to be added to each bag of product, this may need "fine tuning" to achieve the perfect consistency for the task in hand. Also, bear in mind that wider joints are easier to fill than narrow joints, and steep gradients usually require a stiffer mix to prevent it all ending up at the bottom of the slope.
The mortar is mixed in a bucket using a powered agitator of stirrer to thoroughly mix the dry powder with the added water.
Normally, the water is added to the powder rather than the other way around.
Most manufacturers recommend a mixing period of 1½ - 2½ minutes to ensure there are no 'clumps'.
Work the agitator into the corners of the mixing vessel to ensure all of the powder is mixed.
To prevent the liquid mortar escaping, any free edges should have the joints 'stopped' using sand, clay, dry mortar or other suitable material. These 'stops' can be removed once the mortar has stiffened or cured.
Once mixed, the liquid mortar is transferred to a watering can or spouted bucket and then carefully poured into the open joint. The can/bucket is moved backwards along the open joint, leaving a filled joint in its wake. Precise control over the angle and speed is required to ensure that the joints are filled but not overfilled, and that the mortar doesn't slop over or splash onto the adjacent paving.
Work methodically. On larger setts and flagstones, it's usually best to fill all transverse joints first then fall back and complete the longitudinal joints (or vice versa). However, with smaller cubes, it's often easiest to fill trans- and long- joints at will, filling all the joints in one area before moving on.
Clean off any spillages immediately. Scrape off any heavy deposit using a pointing trowel; use a small hand-brush to sweep off residual material and then a wet cloth to thoroughly clean the surface.
The mortars tend to stiffen fairly quickly, with a typical working life of around 20 minutes. Traffic (including pedestrians) should be kept off the jointed pavement for at least 24 hours. Follow the manufacturer's recommendation for vehicles: with the notable exception of fast-set mortars, it's usually considered best to ban all vehicles for at least 5 days.
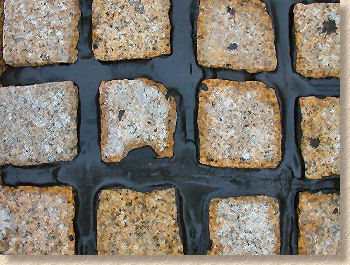
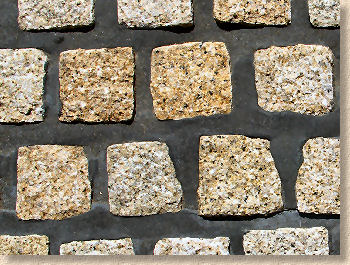
Although most poured mortar joints are left with what might be termed a "natural" finish, it is possible to strike the joints once the mortar has started to stiffen. However, with the relatively short working life, judging just when is best to strike the joints is something of an art and is often allotted to a second operative, allowing the first operative to continue pouring without interruption.
Examples:
Comments:
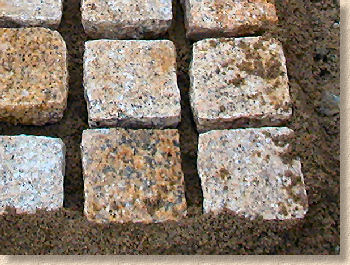
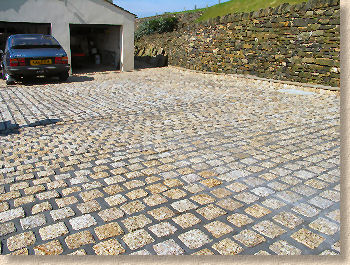
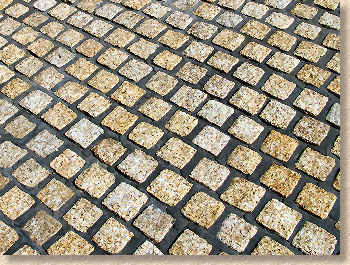
Poured mortar joints are worth considering when there is a genuine concern regarding cleaning the pavement surface were a slurry system to be used. It is most commonly used with cropped granite cubes, where the rough surface of the paving units can render them difficult to clean effectively. However, it can also be used with other pavings, as long as there is a reasonably wide joint (not less than 10mm). It's a good choice for use with reclaimed yorkstone flags, as it thoroughly fills the often erratic joints without compromising the surface in anyway.
For anyone attempting poured mortar jointing for the first time, a 'practice panel' is most strongly recommended. It can take some time to get a feel for how the mortar flows from the can, and how quickly (or slowly) the can needs to be moved along the joint to get best results.
Other pointing and jointing pages...
- Introduction
- Terms & definitions
- Pointing Styles
- Spacers for Paving
- Cement Mortars
- - Hand Pointing
- - Pointing Riven Flagstones Using Coloured Mortar: A Case Study
- - Wet Grouting
- - Dry Grouting
- - Slurry Grouting
- - Steintec Tufftop Slurry Grouting
- - Gun Grouting
- - Poured Grouting
- Resin Mortars
- - Polymerics
- - GftK Polymerics: A Product Study - VDW 840+
- - Romex Polymeric Mortars: A Product Study
- - Jointex Polymeric Mortar: A Product Study
- - Slurries
- - GftK Slurry Mortars: A Product Study - VDW 800 Permeable
- - GftK Slurry Mortars: A Product Study - VDW 850
- Re-jointing paving
- Pitch Jointing
- Loose Fill Jointing
- - Stabilisation
- Alternative Jointing Materials