Introduction:
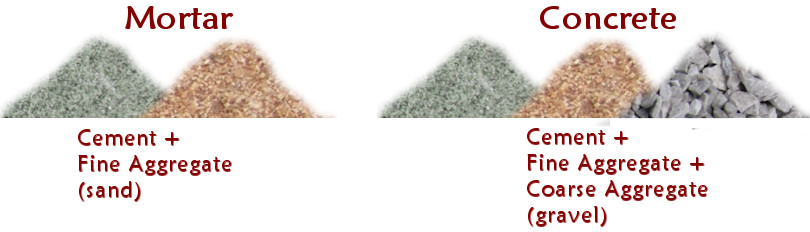
For everyday definition purposes, a concrete is a cementitious material containing aggregates of sizes greater than 5 mm, whereas a mortar is a cementitious material containing aggregates of sizes less than 5 mm. The term "mortar" comes from the Latin mortarium , the name given to the trough in which the material was mixed, as in "mortar and pestle".
In fact, the Romans had a rudimentary but highly effective concrete made of a volcanic ash sourced from Pozzuoli on the slopes of Mt. Vesuvius and slaked lime , hence the term Pozzolanic cement. Cement technology goes back even further, to the Ancient Greeks and Mesopotamian civilisations preceding them, but it was the Romans that developed concretes sufficiently to construct concrete-filled walls, known as "opus caementicium" , cementitious terracotta flooring, "opus signinum" and even used their concretes in building the Pantheon, which still stands today, a testament to their skills.

However, it was the patenting of Portland Cement by Leeds-based Joseph Aspdin in 1824 that led to the development of the reliable, high-strength concretes and mortars that are used throughout the world today. Named Portland Cement because of its similarity in appearance to the highly-admired building stone from Portland Bill in Dorset, it is manufactured by heating a slurry of limestone or chalk with clay in a kiln, and grinding the resultant clinker to a fine powder and adding gypsum.
This page details a general purpose mortar that can be used for pointing paving or for other everyday building work, and also describes a high strength granolithic mortar for patching concrete, benching manholes, filling those awkward little corners, or for screeding over an existing base.
In the concretes category, a medium-strength concrete for use in laying concrete bays, drives and paths etc., will be considered as will a cementitious bedding mix , used for laying patio flags and the like.
Mortars
Mortars are used throughout the construction industry for a variety of purposes, including brick-laying, bedding of small concrete component such as ridge tiles, and for the sealing of certain types of paving. It has a host of different names; the public often wrongly refer to it as 'cement', while on site it may be called 'Gobbo', 'Compo', 'Wallop', 'Muck' or much worse. Here, a general purpose mortar for paving use will be described.
Contact with wet cement can damage skin and/or eyes. Always wear protective gloves before handling, and avoid contact with the eyes, or uncovered skin.
See the Working Safely page for more details on safe working practices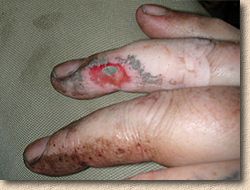
Wash off immediately, if cement, or a cement-based material, comes into contact with your skin. Some people may experience 'cement burns' if wet cement is left in contact with the skin for prolonged periods. Not fatal, but quite painful!
General Purpose Mortar
More formally known as a Class II mortar, this is a good all-round mortar for buttering and pointing flags, laying brickwork and rigid block pavements, and everyday patching/repair jobs.
Mortars for bricklaying are divided into 5 classes, as shown in the table opposite, ranging from Class I, the strongest, to Class V, the weakest. Three mix types are indicated...
- Sand, Lime plus Cement (Lime acts as plasticiser)
- Sand plus Masonry Cement (masonry cement contains plasticiser)
- Sand, Cement plus plasticiser - the mortar most commonly used for paving works
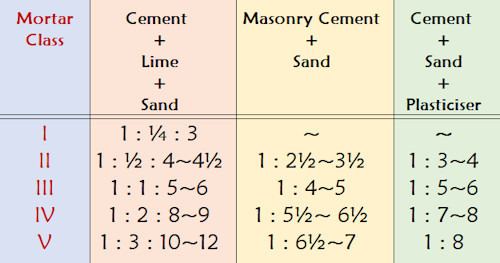
As can be seen, a decent mortar mixture consists of 4 units of building sand (aka 'soft sand') to 1 unit of ordinary portland cement. This could be reduced to 3 parts sand to 1 part cement for high traffic areas, but, for most paving work, a 4:1 mix is perfectly adequate.
See Aggregates page for further details on the different types of sand
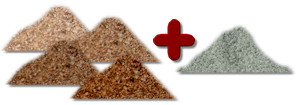
4 x Building Sand Plus
1 x Cement
Mixing Mortar
The sands and the cement have to be thoroughly mixed by hand or in a mechanical mixer before adding any water - do not use dirty water, or water from puddles or ponds, as this could impair the final strength of the mortar. Similarly, keep any sugar-containing liquids, such as soft drinks, well away from the mix - sugar, even in small amounts, seriously impairs the setting ability of the cement.
Mixing by Hand

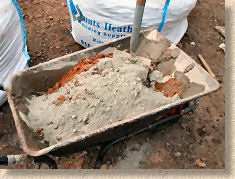
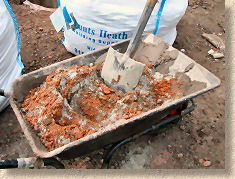
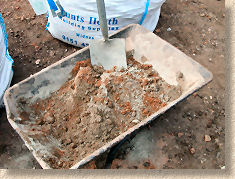
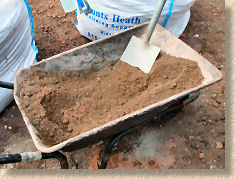
When mixing by hand, the sands and cement are heaped up on a mixing board or in a wheelbarrow and repeatedly turned over and over until thoroughly mixed. The colour of the dry mix will change as the cement is distributed throughout - there should be no 'streaking' of cement, and no clumps of pure sand or pure cement.
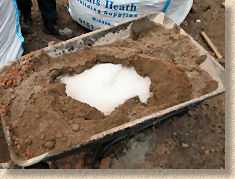
Once the dry ingredients are mixed, the water can be added. If any additives are being used, such as a plasticiser (see below ) or a frost-proofer, they are normally added to the water, and then mixed in, rather than being directly added to the dry ingredients. A "well" is formed in the centre of the mixed heap, water added to it and then folded in. More water is added a bit at a time and folded in until the required consistency is attained. This should be when the mortar is thoroughly mixed but is able to stand in peaks, like whipped cream; too wet and it just makes a mess, too dry and it's almost impossible to work.
Mixing by Machine
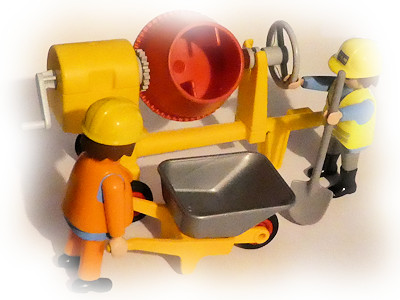
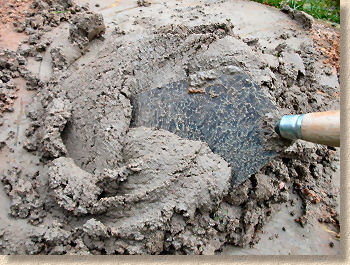
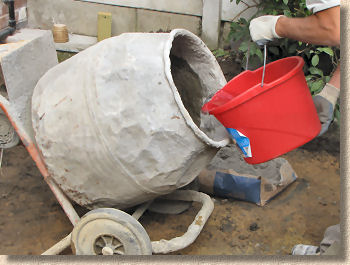
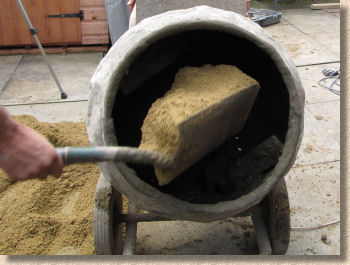
When using a mechanical mixer, make sure the drum is turning (ie: it's running or switched on) and then add half a bucket (2 or 3 litres) of clean cold water (with added plasticiser if being used) to the empty drum before adding the dry ingredients in sequence. Add 4 measures of sand then 1 of cement, followed by 4 sand. Add another splash of water if necessary, then another cement, the sand, and so on until the required quantity is in the mixer. This ensures a more thorough mix than adding, say, 20 measures of sand and then 5 measures of cement.
Once the mixer is filled and the dry ingredients are thoroughly blended, more water is added to the revolving drum, a bit at a time, until the required consistency (slump) is achieved.
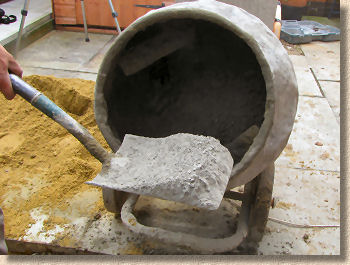
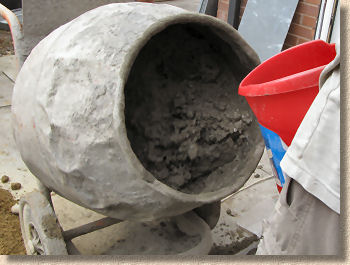
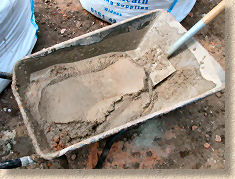
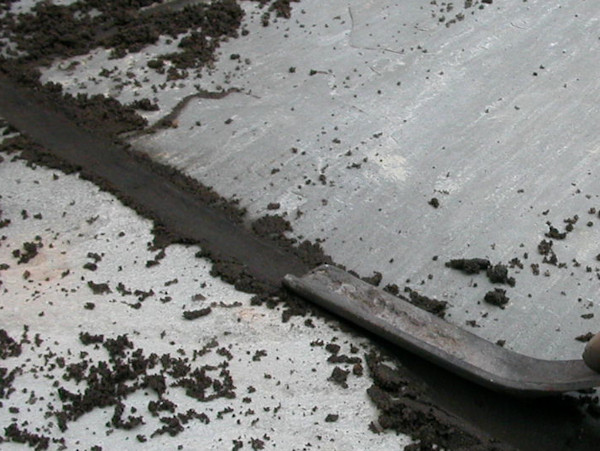
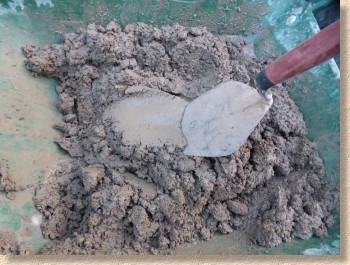
When correctly mixed, the mortar should be of a consistency that will stand in peaks on a trowel, but spread easily when required. A common test of suitability is to 'slash' the mortar with the edge of a trowel. If the mortar is too stiff, the edges of the slash will crumble; if the mortar is too wet, the slash will close itself, but if, like Goldilocks' hod carrier, you've got the mortar just right, the slash will stay intact.
For wide joints in paving or for stonework, either as paving or as walling, a coarser mortar is often preferred - replace half of the building/soft sand with grit/sharp sand. You will probably find that a coarse mortar such as this requires less gauging water to achieve a working consistency than does a bricklaying/general purpose mortar.
2 x Building Sand plus
2 x Grit Sand plus
1 x cement
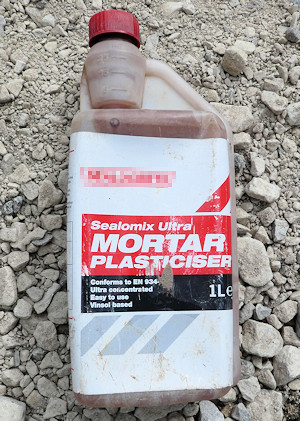
Plasticisers and other Additives
Plasticisers reduce the amount of water required to mix a mortar and improve its workability, rendering it 'stickier', more pliable. Proprietary plasticisers are usually some form of soluble resin salt, often dark brown in colour and readily available at builders' merchants in liquid or powder form. You should follow manufacturers' instructions regarding dosage - adding 'extra-to-be-sure' does not have any added benefit and may weaken the mortar, but, generally speaking, the liquid forms are added at the rate of 250-300 ml per 50kg of cement, and the powdered forms at 20-30g per 50Kg cement. Liquid plasticising agents are usually stirred into the gauging water before being added to the mix, whereas powder forms are normally mixed in with the dry ingredients before the gauging water is added.
A trade tip often employed when a proprietary plasticiser is not available for whatever reason is to use a very small squirt of a detergent, such as wash-up liquid, but no more than 2ml per litre of clean water.
Other mortar additives include strengtheners, air-entrainers, frost-proofers, dust-proofers, accelerators and retardants, and dyes (see below). We often add a measured dose of SBR additive to our pointing mortars during the mixing which act as a bonding and strengthening agent, although this is not essential.
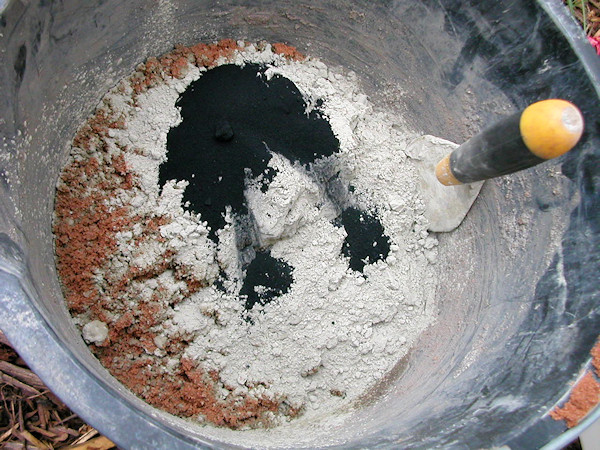
Making a coloured mortar
If you are mixing a coloured mortar, add the cement dye to the dry aggregates and mix in thoroughly before folding in the gauging water. Alternatively, ready-mixed coloured mortars are available at most builders' merchants. We find that a black mortar, either made with a cement dye, or bought as a pre-pack, works well with natural stone and the riven types of patio flags, making the paving stand out, rather than the mortar. If using cement dye to make a black mortar, try to use a silver or very light coloured sands, as they require less dye to achieve a good black shade, than do the red sands.
Lime mortar
Lime mortars are not commonly used for paving projects, although they were once used to point flagstones. Nowadays, their use is more or less limited to walling and vertical stonework applications and projects requiring 'traditional' materials.
However, some contracts will specify a lime mortar bed for pavements that are likely to experience vehicle overrun. This is because of the legitimate concern that a bed of clean sand could be disturbed or 'flow' if it gets too wet or too dry. A mortar or concrete bed could be too rigid and could crack when trafficked, and there is the added complication of a cementitious bedding material sticking to the underside of the paving units, and therefore requiring labour-intensive cleaning of the units if reinstated.
A lime mortar, on the other hand, has sufficient plasticity to enable the paving to be easily laid but, once laid, the free lime in the mortar reacts with carbon dioxide in the environment, turning into calcium carbonate and stiffening the mortar sufficiently, without setting rock hard or sticking to the paving. Note that for jointing, cement should be added to a lime:sand mortar in the proportions indicated in the table above. This is to ensure the jointing is hard enough to withstand trafficking and weathering.
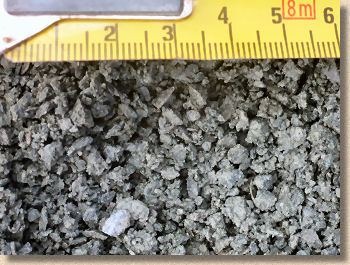
Granolithic mortar
Granolithic mortar is really a fine-grade concrete. It is used extensively in the construction industry, for making up small areas of concrete and for benching in sewers and manholes, where its hard-wearing properties, its ability to be applied thinly (as thin as 6mm in certain conditions) and its low cost make it a popular and resilient surface. It can be used for steps, or anywhere else that a hard, smooth, concrete-like finish is required, including screeding-over existing concrete floors.
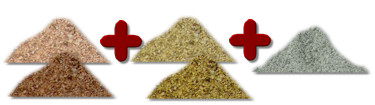
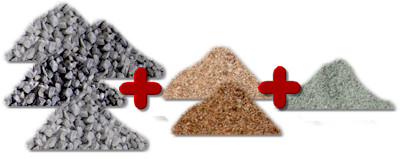
Known as 'Grano' in the trade, it is composed of a fine, hard aggregate, often, but not exclusively a granite or a limestone. To this is added a small amount of sand, and ordinary portland cement.
Mix together 6 units of Grano with 1 unit of sand and 2 units of the cement. Mix dry, as above, before adding water. Plasticisers, strengthening agents and dyes can be added as required. It can be mixed by hand or in a mixer. The finished mix should be quite stiff, as this consistency is easier to finish.
The mixed grano should be placed with a trowel, or spade for larger quantities, and smoothed with a trowel or steel float. The small quantity of sand increases the amount of matrix (known as 'fat') available to create a very smooth surface. The smoothed surface can be marked with the edge of a trowel to imitate crazy paving or blocks. This mortar should start setting within 2 hours, faster in summer, slower in winter. It should be protected from foot or vehicle traffic for at least 48 hours.
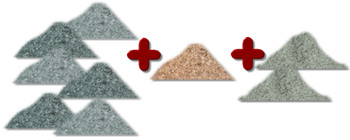
6 x Grano Dust plus
1 x Building Sand plus
2 x Cement
Wash off all tools when finished - mortar is much easier to remove when still wet than when it has set.
For floor screeds or repairing existing concrete, the old surface should be thoroughly cleaned, preferably with an Acid Etching Fluid, to remove all loose material and surface contamination. After etching/cleaning, the surface should be primed, with a proprietary bonding agent, SBR or PVA, before laying the granolithic mortar, which should be at least 20mm thick. The surface of the fresh grano is tamped to level, and/or screeded, as shown on the Screeding page, and then smoothed with a steel float. For indoor usage, the surface can be left smooth, whereas for outdoor applications, the surface should be 'dragged' with a stiff brush to roughen the surface texture and increase traction.
Concretes
The following section considers some basic information about concrete and its uses.
Concrete is a whole science in itself, and so coverage on this site has to be limited to the basics as they are found in the hard-landscaping sector of the construction industry. There are literally hundreds of websites and publications that can bore you rigid with the more intricate technicalities of concrete, so if what follows doesn't fully answer your queries, a simple web search is almost guaranteed to take you to some place that is overflowing with information.
So, in the paving and drainage trades we tend to use two main methods of defining or specifying the concrete to be used on any particular project.
There are Prescribed Mixes , which give a 'recipe' that should produce a concrete of a given strength, and there are Designated Mixes , which rely more on the skills of accredited batch plants to produce a concrete they know to be suitable for a certain task, such as, say, supporting drainage pipes or creating a hard-standing.
Just to complicate matters, we also talk of Standard Mixes , which are essentially a shorthand way of describing a Prescribed Mix. So, for instance, we have ST1 which is a concrete of roughly C7.5, and ST4, which is roughly C20.
As with much else in the building game, a lot of this argot seems designed to make it confusing for anyone outside the industry.
When a larger quantity of concrete is required, or when the plan is to use the concrete as a surfacing material , it may well suit the pocket (and the back muscles!) to have the concrete delivered ready-mixed. However, when only small quantities are required, less than 1m³, then it may be more suitable to mix on site, either by hand or in a mixer.
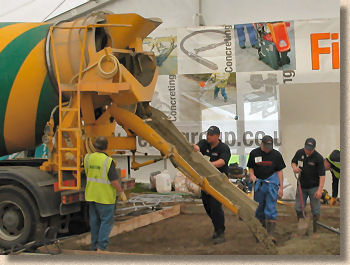
Ready-mixed concrete
Ready mixed concrete (RMC) is preferable for quantities of 1m³ or greater. By mixing each delivery in one operation, the batch-plants can guarantee the strength and slump (a measure of how 'wet' a concrete is), ensuring that all the concrete cures to the same colour, that it is of a uniform strength, and that the ratio of fines to aggregates is correct. The only drawback to ready-mix is that it may start to set before it can all be used.
See the Prescribed Mix Specifications page for technical information on the ratios of materials used in the preparation of Prescribed Concrete Mixes.
Sources
There are two sources of ready mixed concrete.
Firstly, the national concrete companies with local depots that deliver and discharge, such as Hanson, LaFarge, Cemex and Aggregate Industries. These companies will supply a given quantity of concrete of guaranteed strength, and leave you to do the hard work. They will deliver any quantity you require, from 1 m³ upwards, in multiples of half cubic metres. Many will offer free, technical advice - look online for local depots.
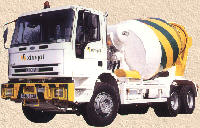
Note that ready-mixed concrete is sold by volume (m³) and not by weight. The concrete wagons usually carry 6m³, or sometimes 8m³, and you may be charged £25-£50 for each cubic metre not carried.
There are also "Volumetric Concrete" suppliers, also known as 'mix and move' contractors, who mix the quantity of concrete required on their specially adapted wagons, and then barrow, convey, or pump, the concrete to exactly where it's required.
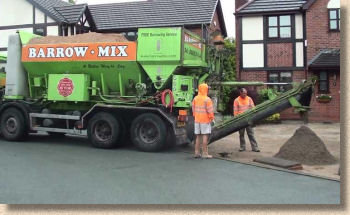
Depending on the supplier, this concrete may not always meet the exacting quality standards required by the larger national contractors and/or for commercial projects, but it is usually more than adequate for smaller jobs and domestic use. Expect to pay more per m³ for the 'mix and move' option than the delivered ready-mix, but then, they are doing a lot of the hard work for you! These suppliers can also be found online.
Strength
When ordering concrete, you may be advised by the technical staff to order a Prescribed Mix , such as C20P or a special-purpose Designated Mix , such as PAV2 for hardstandings and drives.
Concrete is graded in strength using a system based on the compressive strength after 28 days of curing. This generates a value in Newtons per square millimetre (N/mm²) which results in mixes being referred to as, for example, C7.5 or C20, which means that a particular mix will achieve a minimum compressive strength of 7.5N/mm² or 20N/mm² after the 28 day curing period. Weaker, bedding concretes are usually Class 7.5, or C7.5. Strength grade increases up to very strong, C40 or higher concretes for civil engineering purposes. For most hard-landscaping purposes, a C20 mix is usually adequate. This is roughly equivalent to the old 4:2:1 mix.
It's also worth noting that the new European standards introduced on December 1st 2003 complicate the simple strength classification described above, but the "older" spec terms will continue to be understood by the trade for many years to come.
Slump
It is also necessary to specify how 'wet' the concrete should be when delivered. 'Wetness' is measured in mm of slump; that is, how far a given measure of the concrete will slump or slip in a cone test. For bedding purposes, a semi-dry mix is best, as it gives a longer working time, and prevents the bedded paviors from 'floating' and losing their level setting. For haunching and general purpose, a 50mm slump is fine, and for a pourable, sloppy concrete, order a 100mm slump mix. Delivery wagons usually carry extra water on board that can be added to the mix if it is too dry or stiff. If the concrete is too wet, you're stuck with it!
NOTE: The addition of too much water to a designated mix can weaken the end-strength - try to order the correct 'slump', so that the batch plant can guarantee 28-day strength.
Slump, consistence and the cone test are discussed in much more detail on the All About Slump page
Mixing on site
Small quantities of concrete can be mixed on site. generally speaking, if more than 2m³ of concrete is required, it will always be brought in as Ready Mix; if 1m³ or less is required, it will usually be mixed on site; for quantities between 1m³ and 2m³, the end use, site conditions, access and cost will be weighed-up and a decision made one way or t'other.
Although concrete can be mixed by hand, on boards or in a wheelbarrow, it is much, much, much easier to use a powered mixer, and a more regular, consistent mix will be achieved. Mixing more than ¼m³ by hand is bloody hard work - 0.25m³ of fresh, unset concrete weighs in at around two-thirds of a tonne, and that two-thirds of a tonne will need to be turned over at least 5 times to ensure all the ingredients, the sand, cement, gravel and water, are thoroughly mixed. Two-thirds of a tonne lifted and turned 5 times comes in at over 3 tonnes ... and that's a minimum figure!
Two regularly-specified concretes for general paving work are known as ST1 and ST4. The ST1 is equivalent to a lean-mix C7.5 mix, described on the Concrete Mixes page, while the ST4 is a medium-strength mix equivalent to a C20 mix. Typical uses for each - the ST1 might be used as a bedding for kerbs or edgings while the ST4 would be used as the haunching.
ST1 - C7.5 Concrete
A low strength (lean mix) ST1 concrete for general use.
Mix 6 units of 14-20mm gravel, with 3 units of a grit sand and 1 unit of ordinary portland cement.

6 x Gravel plus
3 x Grit Sand plus
1 x Cement
ST4 - C20 Concrete
A medium strength ST4 concrete for general use.
Mix 4 units of 14-20mm gravel, with 2 units of a grit sand and 1 unit of ordinary portland cement.
4 x Gravel plus
2 x Grit Sand plus
1 x Cement
In some parts of the country, sand and gravel are supplied in a mixture known as 'ballast'. For non-critical uses, this can be used as a straight replacement for the sands and gravels; so, in the above mix designs, 9 units of 'ballast' would replace 6 units of gravel and 3 units of sand, or 6 units of 'ballast' would replace 4 units of gravel and 2 units of sand.
Mix all these aggregates together before adding any water, plasticisers, strengtheners etc.
The finished mix should be wet, but firm, not sloppy. Use a bucket or similar to measure quantities, rather than relying on variable 'shovelfuls'. This is especially important when mixing a large quantity of concrete in separate batches, as it will maintain a consistent strength and finished appearance.
For larger quantities of concrete, consult the table on the Concrete Specifications page for more information on the required quantities of each of the aggregates.
Mortar/Concrete for use as bedding layer
We often mix our own bedding material for use on projects such as patios, paths and driveways. It is a simple 'lean-mix' mortar/concrete with sufficient cement content to 'set' but not to become as hard as iron. This is a useful property as it prevents the bedding material becoming fluid or loose, causing pavement movement, and it also prevents the bed being mined or eroded by ants or groundwater. However, because it does 'set' hard, it is essential that each paving unit is firmly bedded, and there is no movement whatsoever in the bedded unit. If the paving is still rocking once the bed has set, it will continue to do so, as the bed cannot accomodate minor movements in the paving units, as a normal sand-bed does.
Cement-bound bedding is NOT recommended for use beneath flexible block paving
Fuller details regarding bedding materials can be found on this page