Uses
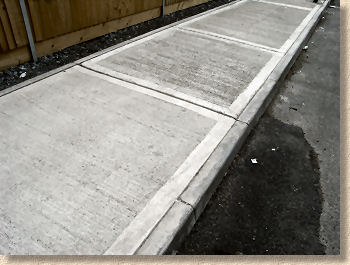
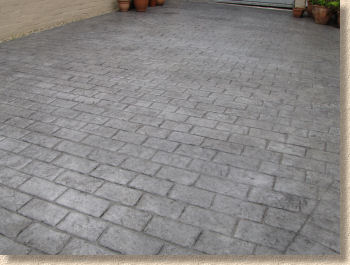
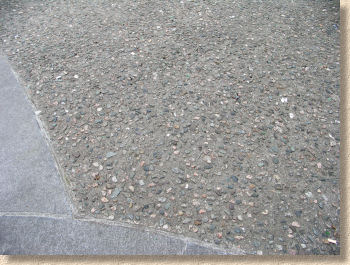
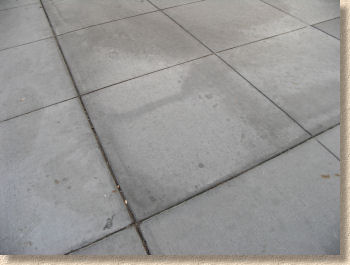
Concrete is often overlooked as a potential pavement surface, mostly because of its lack of colour or interest, although the decorative patterned concrete is becoming more popular and cementitious overlays offer a huge range of colours, patterns and textures.
Plain concrete can be very useful in areas where a decorative look is not required, such as caravan hardstandings, shed and garage bases or dog kennels. It is utilitarian and quite cheap. By combining plain concrete with a decorative edging, such as a brick edging, it can be made to look quite attractive.
Modern concrete technology has led to the development of fibre reinforced concretes that create high-strength pavements without the need for steel reinforcement mesh. Your local ready mixed concrete supplier will advise on the most suitable type and strength of concrete for your project.
Construction
Sub-grade
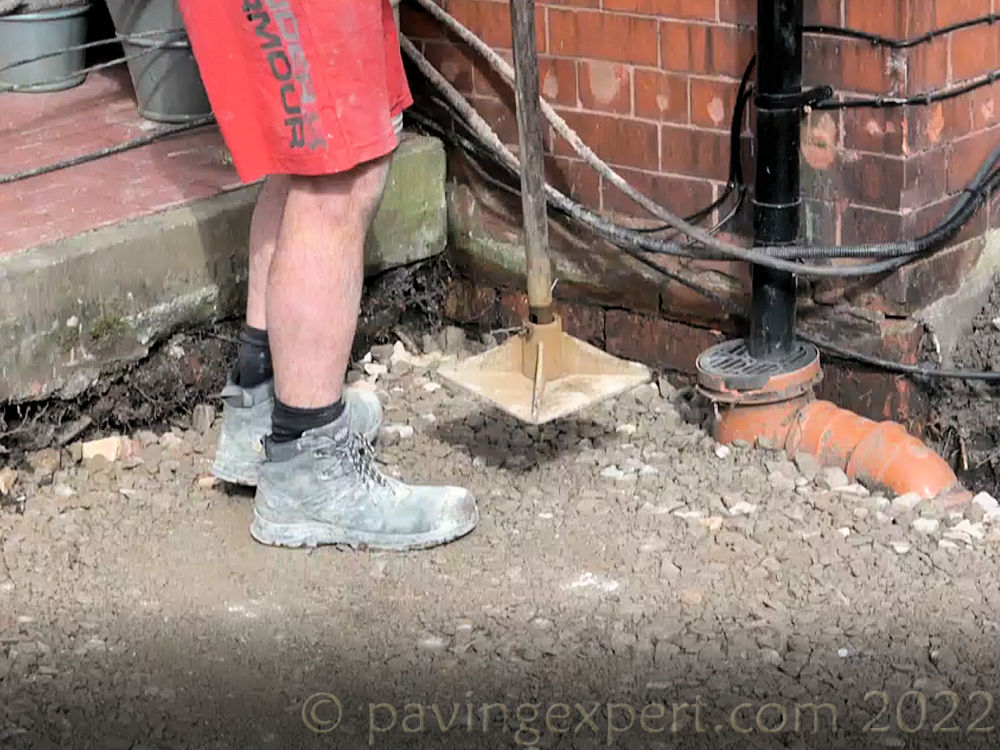
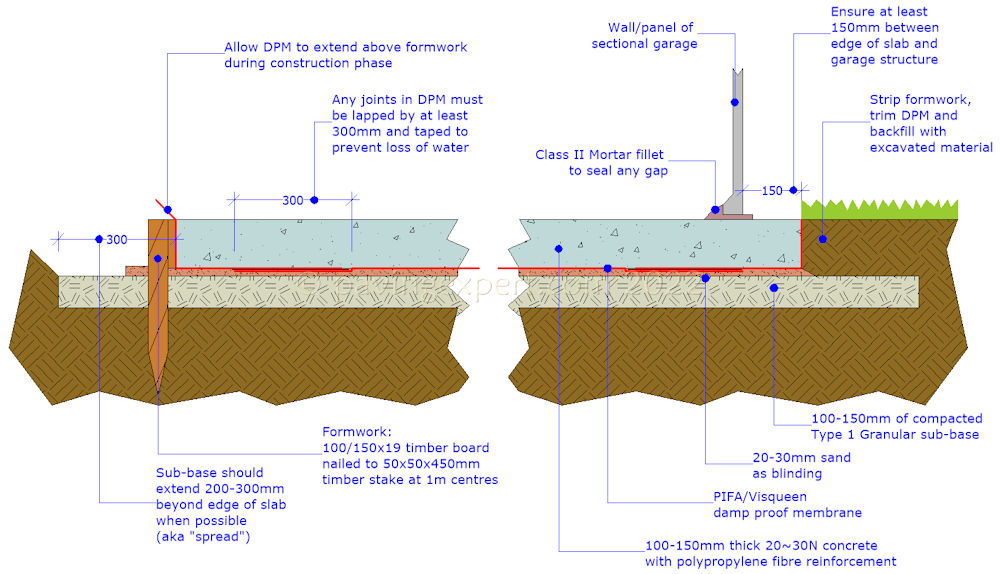
The surface needs to be dug off to a depth of at least 100mm, or whatever depth is required for the proposed concrete slab. Remove all weeds and other unwanted organic matter. Excavate any soft spots and fill with compacted sub-base material. If the area of the paving is troubled with weeds, it may be necessary to treat the excavated sub-grade with a general weedkiller such as Glyphosate, but it is unlikely any weed will be able to penetrate the upper layers. If an edging is required, this is the point to construct it. Brick edgings, plain or decorative edging kerbs , or cobbles laid lengthways are all suitable. Temporary formwork or shuttering can be used where no decorative edging is required.
See also Sub-grades page
Sub-base
Given good ground, mass concrete can be placed directly onto a damp-proof membrane over the prepared sub-grade. For heavier applications, or on bad ground, it may be advisable to construct a sub-base of compacted granular material or lean-mix concrete beneath the actual concrete slab, or to lay a sub-base over a geo-textile . On soft or unreliable ground conditions, a sub-base will help spread the load of a mass concrete slab, but in such conditions it's best to obtain a professional opinion from a civil or structural engineer. Local Authorities will advise on local conditions and reputable companies.
Preparing to Lay
Concrete paths should be 75-100mm thick, whereas drives, garage bases or hardstandings should be at least 100mm thick. For heavier use, such as large vans, use a 150-200mm thick concrete slab. Concrete slabs intended for exceptional loads, such as commercial yards, lorry parks etc., will be at least 200mm thick and should be specifically designed as they will probably require a sub-base of at least 100mm thickness, and steel reinforcing mesh or a fibre-reinforced concrete.
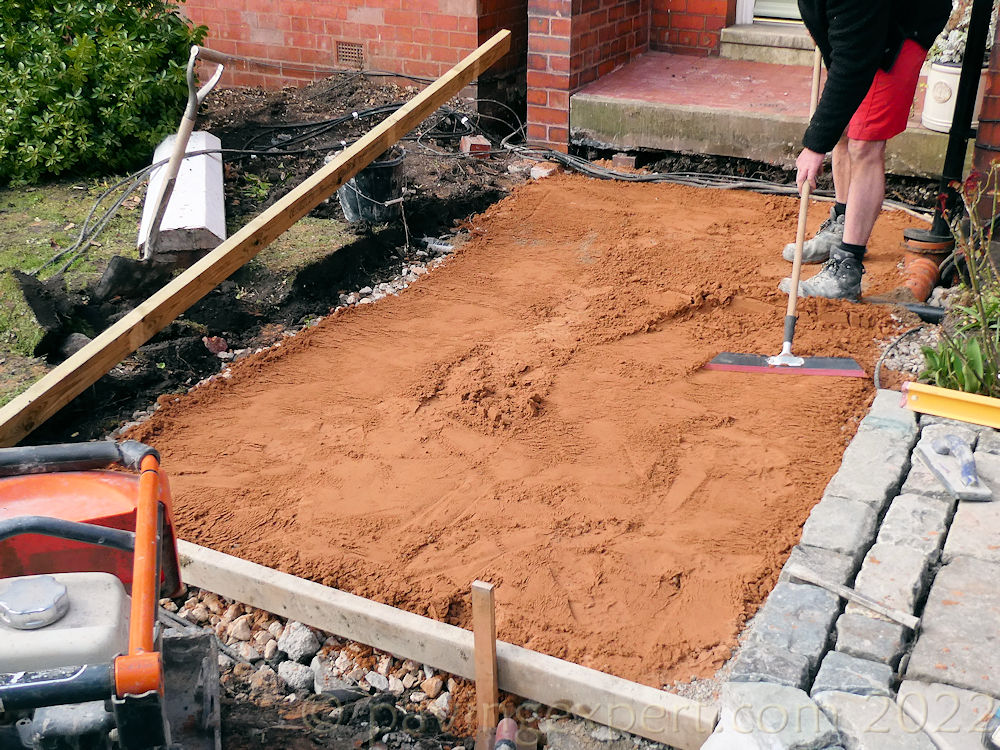
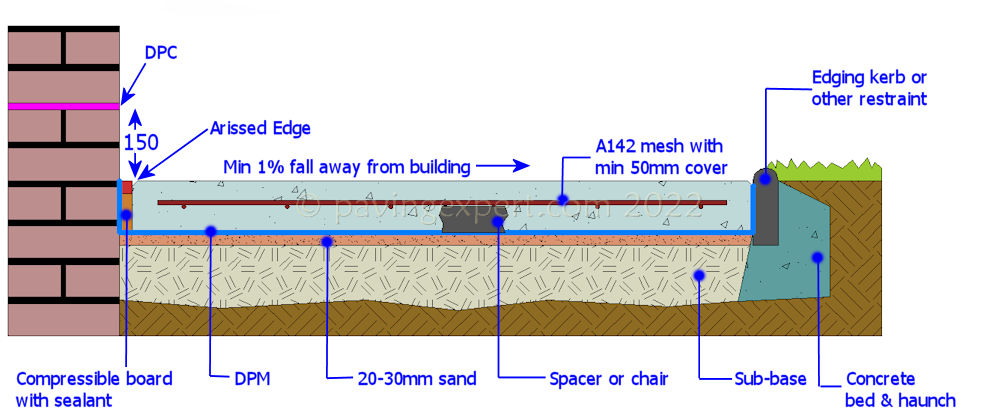
The sub-base must be thoroughly compacted and then it should be covered with what is known as a "sand blinding", which is a thin (20-30mm thick) covering of soft sand (building sand) which provides a smoother surface on which the DPM can be placed, and with a far lesser risk of it being accidentally punctured.
The edges of the proposed slab will need to be contained. This can be achieved by means of:-
- use of existing walls
- construction of permanent wall, edging or kerb
- erection of temporary formwork or shuttering
It is essential that this containment is in place before placing the concrete.
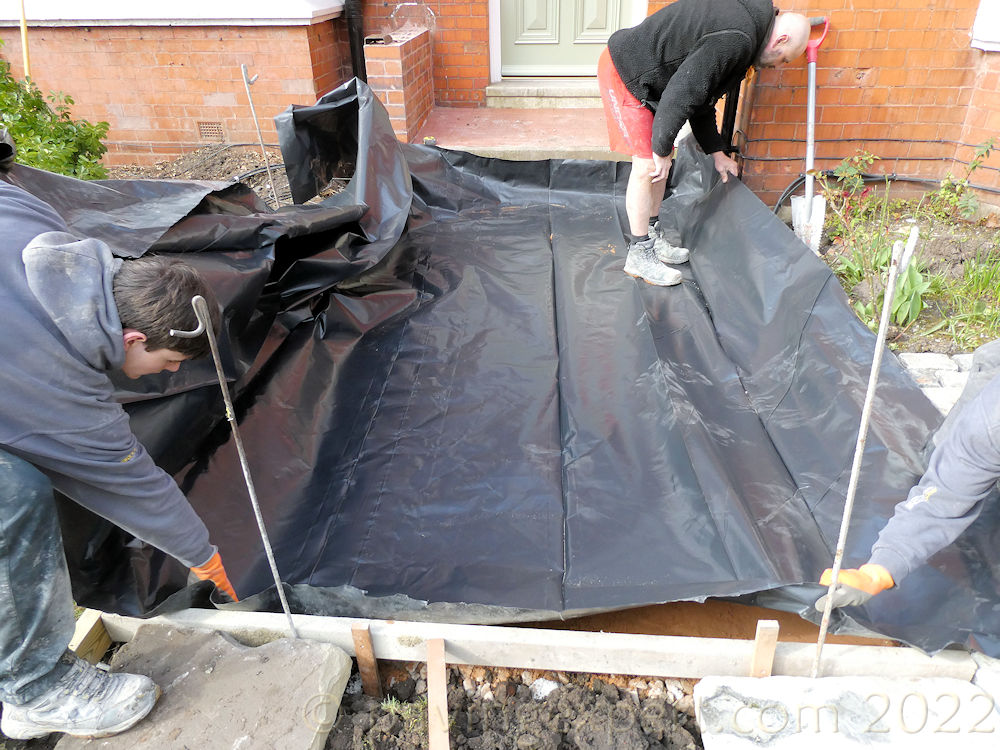
Damp proof membranes
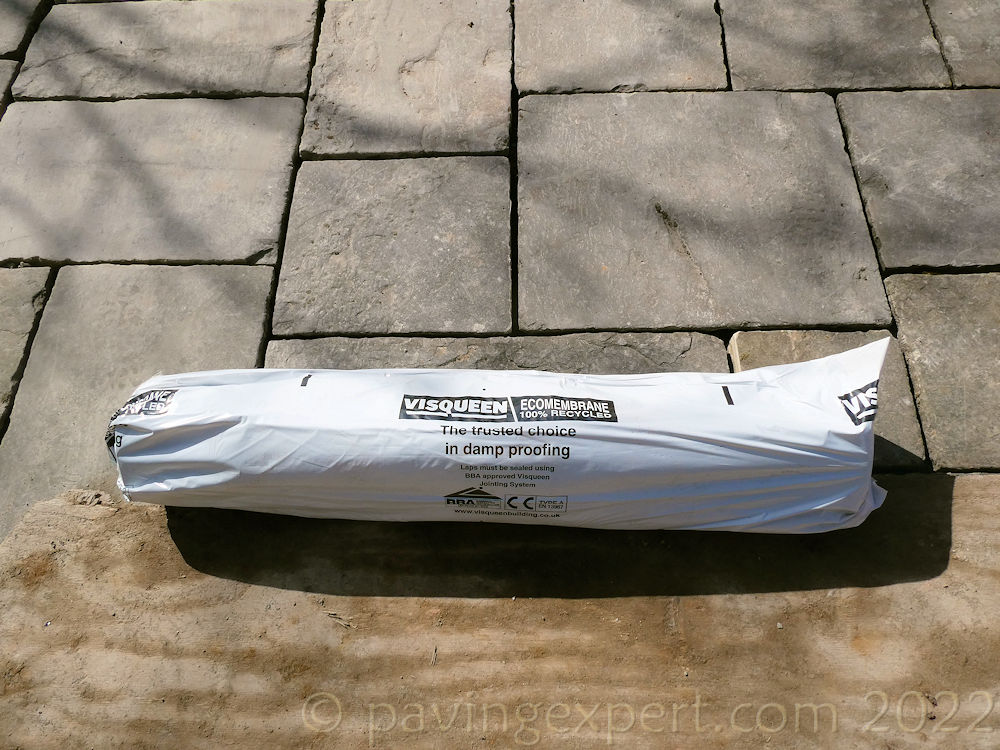
A damp-proof membrane (dpm) should be laid out before placing the concrete. There are numerous membranes available to suit a variety of requirements. Builders' merchants normally carry 'visqueen' or PIFA 1200 as an off-the-shelf product, as it is much used throughout the construction industry.
The purpose of the dpm is two-fold: Firstly, to protect the underside of the slab from attack by dampness and aggressive salts (such as chlorides) or other chemicals in the sub-base or sub-grade, and damaging the concrete, unseen, from beneath. Secondly, a dpm prevents the newly poured concrete from drying out too quickly (de-watering) because of water absorption by the sub-base or sub-grade, which will adversely affect finished strength and can cause hundreds of tiny surface cracks.
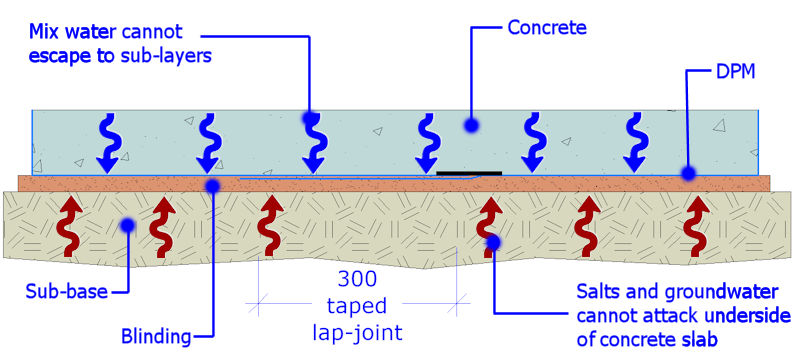
Any 'laps' required in the membrane should overlap by at least 350mm, and preferably be taped down to prevent ingress of ground water or egress of mix water.
Note also that, initially, the DPM rises up the sides of the slab and projects beyond the top. Usually, there is a reasonable excess of the DPM, extending 100-300mm or more beyond the top of any shuttering or formwork. This will be trimmed down once the concrete has hardened.
Reinforcement
Reinforcement in concrete is used to ensure that the cracking which always occurs does not threaten the structural integrity of the concrete. Fuller coverage of this subject is given on the Reinforcement page.
Movement joints
Movement joints (expansion joints, contraction joints, isolation joints, crack control joints, etc.) are used with concrete slabs to protect the slab itself from cracking, to accommodate the inevitable movement of the slab and to prevent excessive forces being transmitted to adjacent structures.
Their uses and construction are more fully explained on the Joints for Concrete page.
Buying Concrete
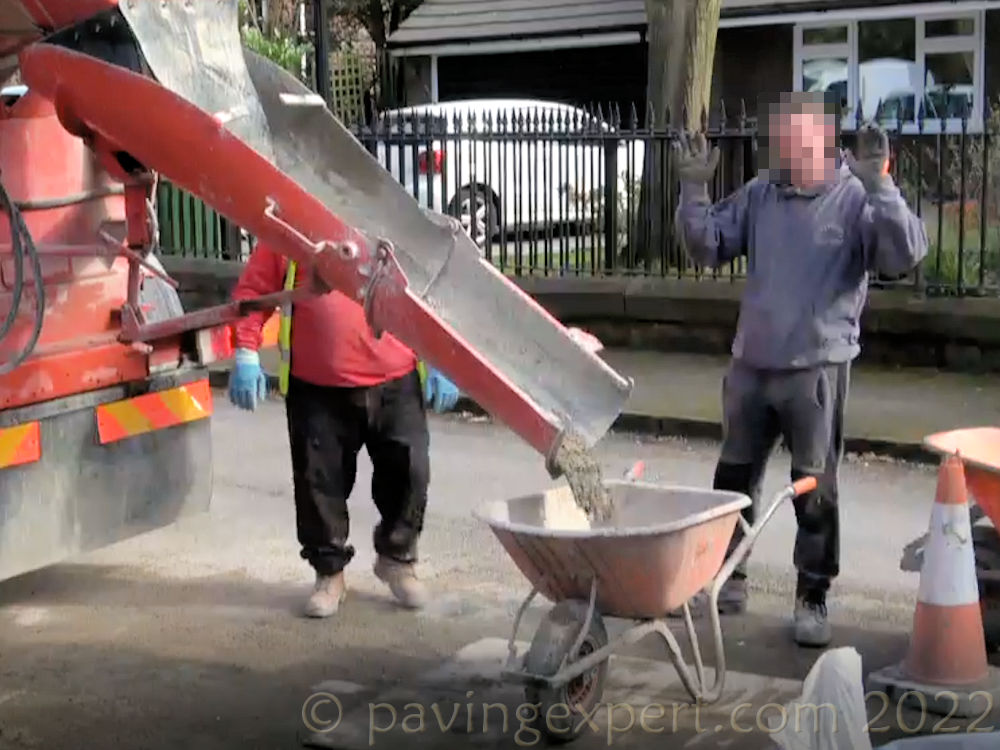
Concrete is bought by metric volume. To calculate the required amount, simply multiply length in metres by width in metres by depth in metres to calculate a volume in cubic metres. Ready mixed concrete companies usually deliver in multiples of half-cubic metres, so "round-up" your calculated quantity accordingly. There is often an excess haulage charge on part-loads, so check with the supplier.
Use this calculator to calculate the quantity of concrete required for a rectangular area
The concrete should be reasonably wet to make handling and levelling as easy as possible. Use at least a strength C20 mixture (20N/mm² cured strength after 28 days) with a 50mm slump (a measure of 'sloppiness'). The ready mixed concrete supplier will understand these references, and the delivery wagon usually carries extra water that can be mixed into the concrete before pouring, if the mixture is too stiff. However, bear in mind that adding further water to the prepared mix can affect the cured strength of the finished concrete and may invalidate the strength guarantee of the supplier, leaving the contractor responsible for any remedial work.
Working the concrete
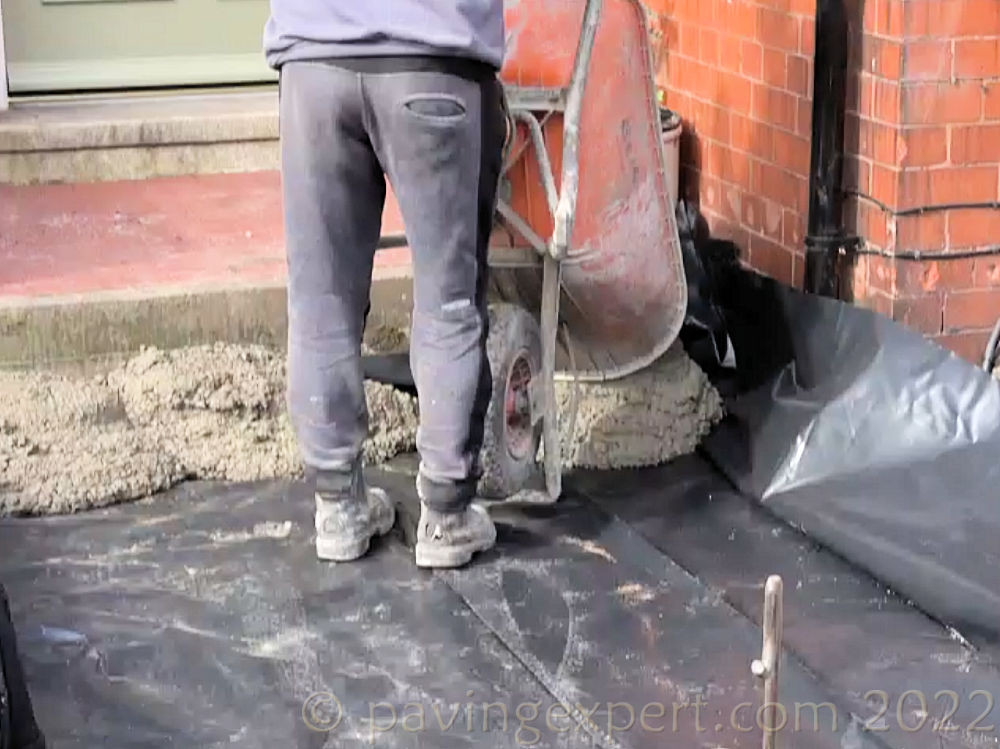
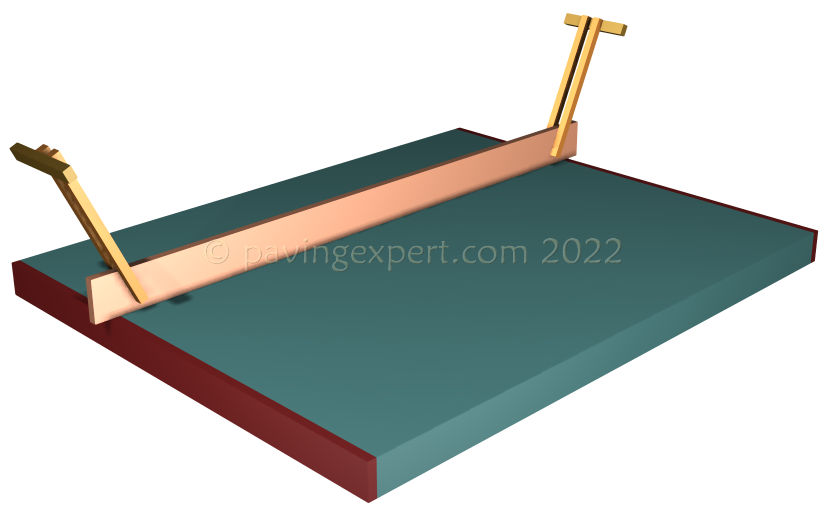
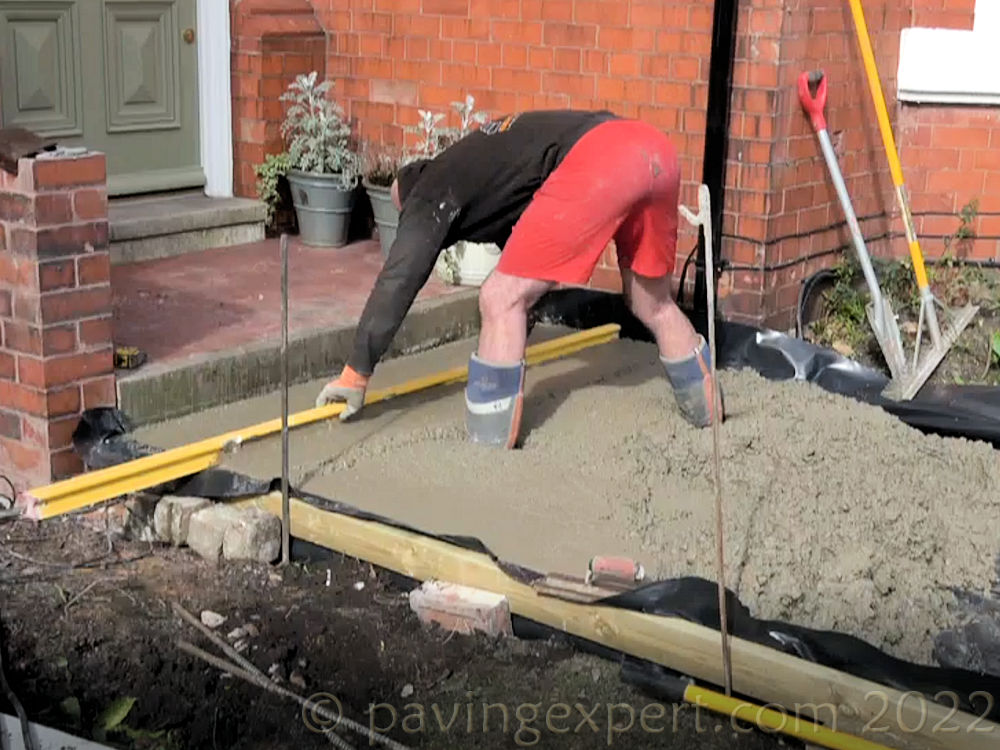
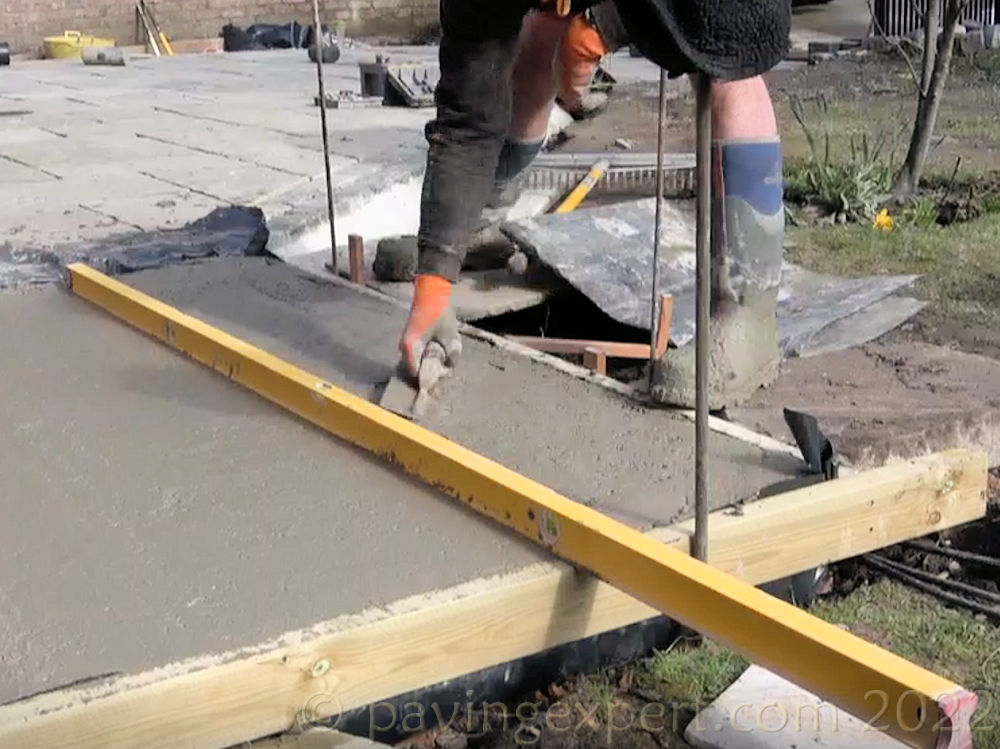
A shovel or a strong rake is used to roughly level out the wet concrete, and then a straight-edged timber can be used to tamp down the concrete to the correct level. Tamping helps eliminate air pockets being trapped in the body of the concrete and also helps to push the hard aggregate into the concrete, bringing sufficient of the matrix to the surface to make smoothing (floating) easier.
Vibrating poker units can be used to expel most of the unwanted air pockets, and so-called 'Bug Rollers' are useful for making sure any hard aggregate is pushed into the concrete, although this is more important on PIC than plain concrete.
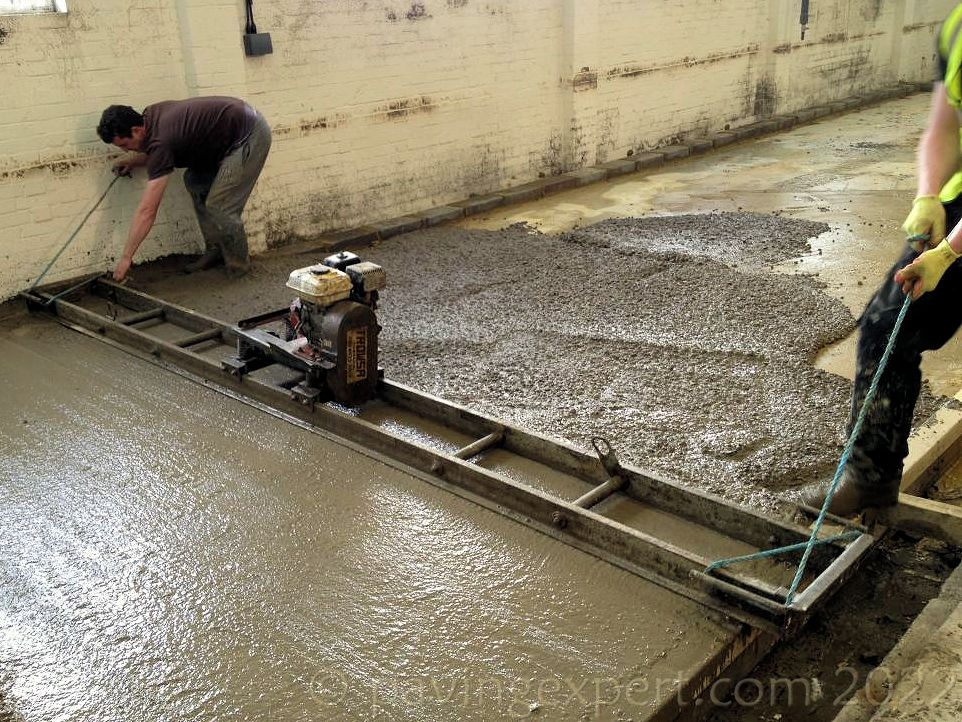
For larger projects, Hire Centres can supply Vibrating Beam Screeds and Roller Strikers that are dragged over the roughly levelled out concrete, vibrating it to eliminate air pockets, pushing surplus concrete in front of the beam, and levelling, all in one operation. 3 or 4 passes with a beam screed is usually sufficient to give an acceptable finished level, with a tolerance of ±6-10mm. Remove any surplus concrete that builds up in front of the tamp or beamscreed.
Finishing the concrete
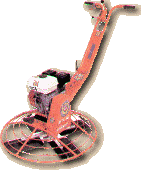
A reasonably smooth surface can be obtained by repeatedly tamping wet concrete, but for a finer finish, the surface should be smoothed using a steel float trowel. This is best done when the concrete has started to stiffen as part of the hardening process, as the float trowel leaves fewer trowel marks. Hand floats, also known as Bull Floats, are fine for small areas where a near-perfect finish is not essential. Long-reach floats can be used on larger areas, and for that perfectly smooth finish, a power float is the tool for the job. These are awkward, heavy machines, available from Hire Centres, but are not recommended for use by DIY'ers.
Judging exactly when to commence floating, either with hand tools or with a power float, is an art in itself, and is gauged from years of experience; too soon and the trowel marks will never disappear, too late and the concrete might not 'rub-up' to a close finish.
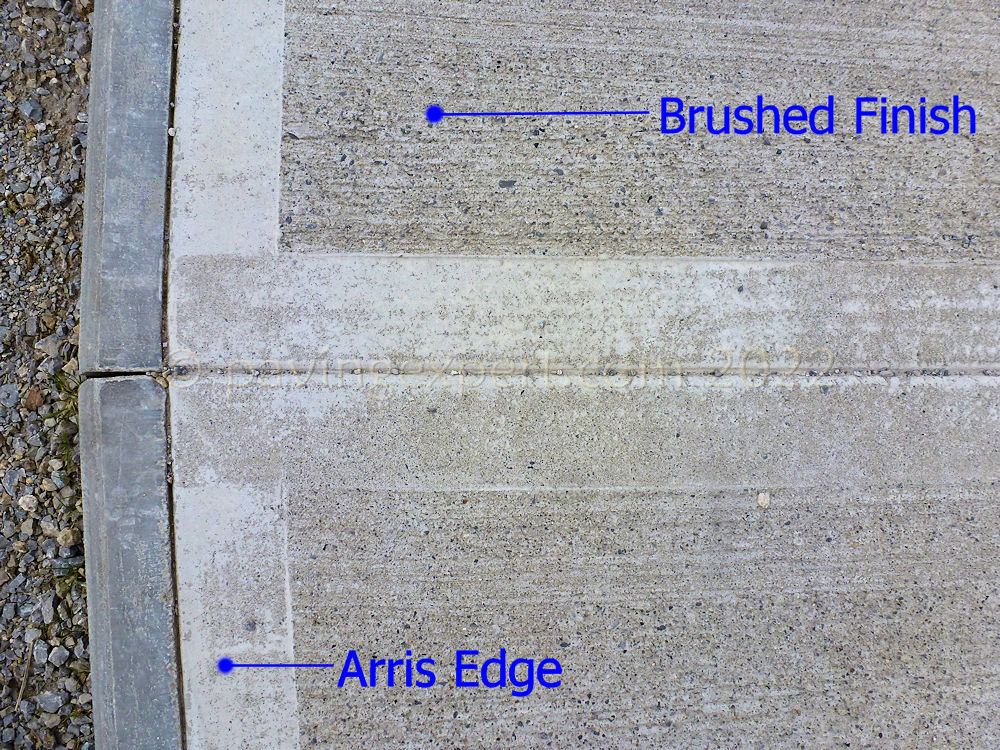
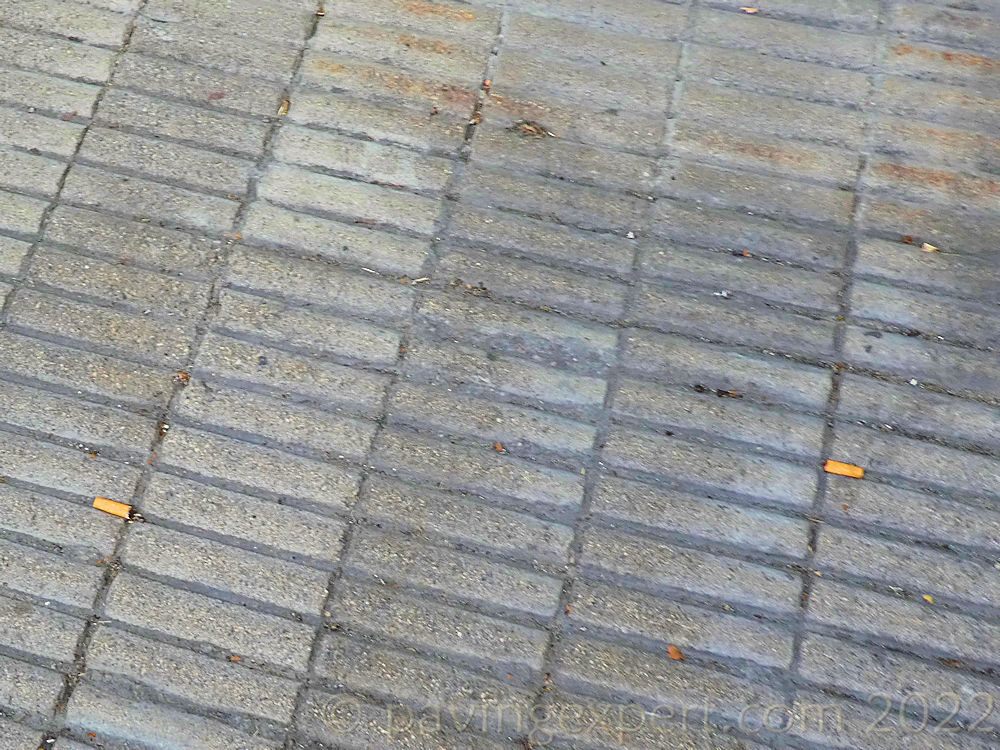
A perfectly smooth concrete surface can become quite slippy, especially outdoors in wet or icy conditions. It is recommended that once the surface has been smoothed with the float trowel, light brush strokes be made over the surface, transverse to the direction of travel, to improve traction once the concrete hardens. A soft bristle brush is fine for this job as the 'grooves' should be around 1mm in depth.
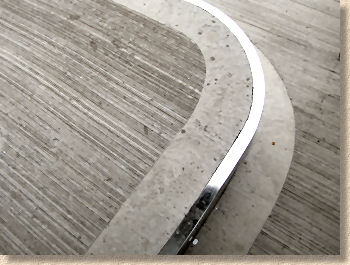
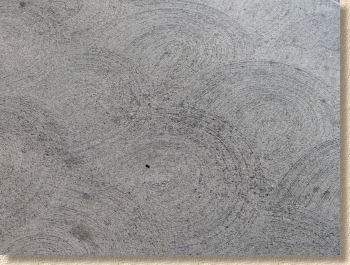
Alternatively, Texture Rollers can be used to imprint a simple pattern.
Curing
On light-use applications, such as driveways, garage bases and the like, there is a tendency to leave the concrete, once the finishing has been done, to harden and cure at its own pace. It is usually checked after 10-12 hours, just in case any immediate repairs or 'rubbing-up' is required, and while this may be satisfactory for small jobs, larger slabs, especially those where the final strength is critical, require careful management of the critical first stages of curing if they are to meet their design targets.
There are two crucial factors that need controlling in the first 24-72 hours of curing:
- drying by evaporation
- temperature fluctuation
The simplest way to prevent the concrete drying out too quickly is to keep it damp. This can be achieved in various ways, but the most commonly used are:-
- continuous fine misting - can be difficult to set up and may weaken the surface
- covering with plastic sheeting - cheap and effective but can trap evaporated water between the slab and the sheeting
- spraying with a plastic membrane - relatively expensive, but becoming more popular as it produces near-ideal conditions. The membrane can be peeled off after a few days.
Temperature control is only a serious issue when there is a risk of the ambient temperature falling below 4°C. Temperatures above 20°C tend to cause drying-out to occur at too fast a rate, and this can be controlled by the measures outlined above, and/or by shading.
In winter, freshly poured concrete may be protected with hessian sacking, straw or polystyrene to insulate the slab overnight. It is unusual for concrete to be poured in harsh weather conditions, that is, when the ambient temperature is below 4°C and falling, unless there are extenuating circumstances. Additional space heating may be provided in such situations to keep the ambient temperature above the 4° threshold.
Completion
It is said that concrete takes 28 days to achieve its design strength. While this is true, it does not mean that the slab cannot be utilised during that period. In most cases, a concrete slab should be kept completely free from all traffic for the first 48 hours. After that, foot traffic can be allowed onto the slab, with care, but it should not be open to heavy foot traffic or slow-moving vehicles until 5 days after pouring. For heavy usage, such as highways, runways, ports or commercial yards, it may be 10 days before the slab is ready to take traffic.
Formwork and shuttering can be removed from a concrete slab after 24 hours, although it is often left for 3 days unless there is a need to examine the edges. Care must be taken when striking the formwork to avoid damaging the concrete which will still be 'green', as we call it in the trade.
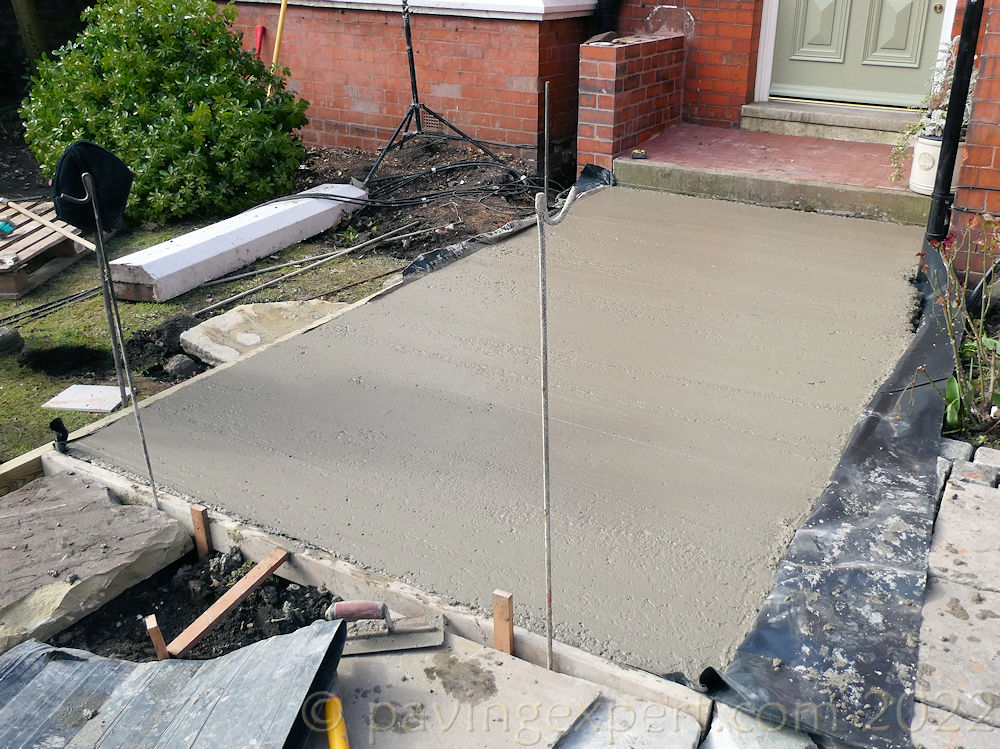
Enormous thanks to Brockstone Landscape Construction of Liverpool for allowing the concrete slab pour to be photographed
Construction Drawings
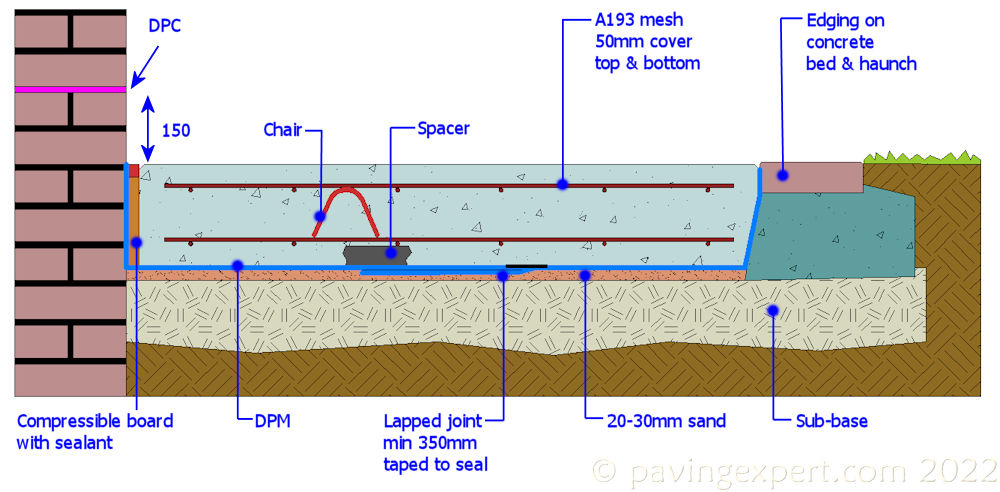
These are typical cross-section details for concrete slabs. Although reinforcing fabric mesh is not essential in concrete slabs, it does strengthen the concrete and is something we always recommend. Fibre reinforcement may be used in place of, or in addition to, the steel mesh in the plain slabs. The 100mm thick slab normally has a single sheet of mesh, while 150mm and thicker slabs will have two layers of mesh, "top and bottom", each with at least 50mm of cover.
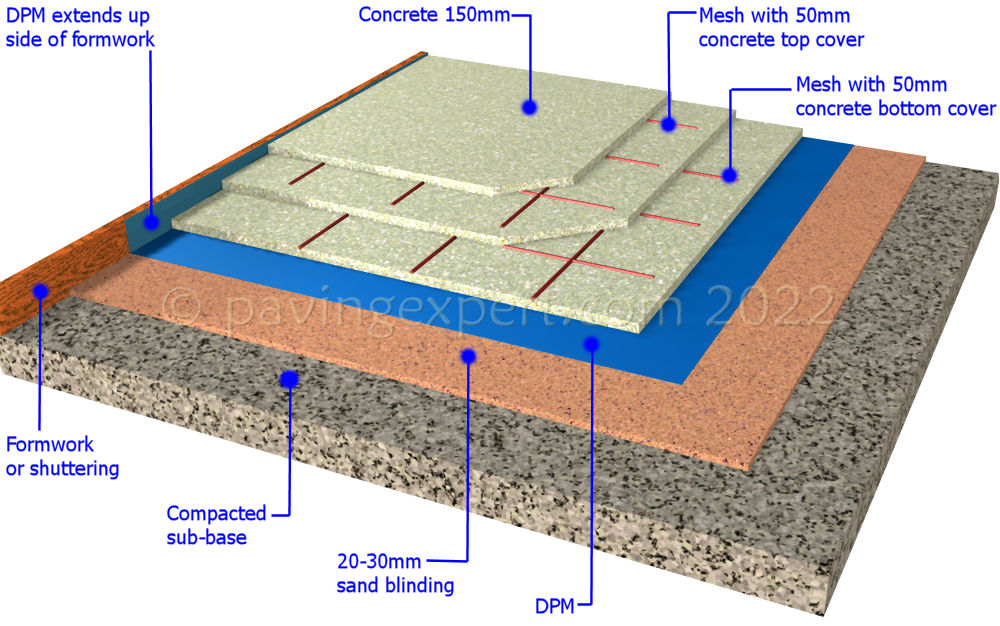
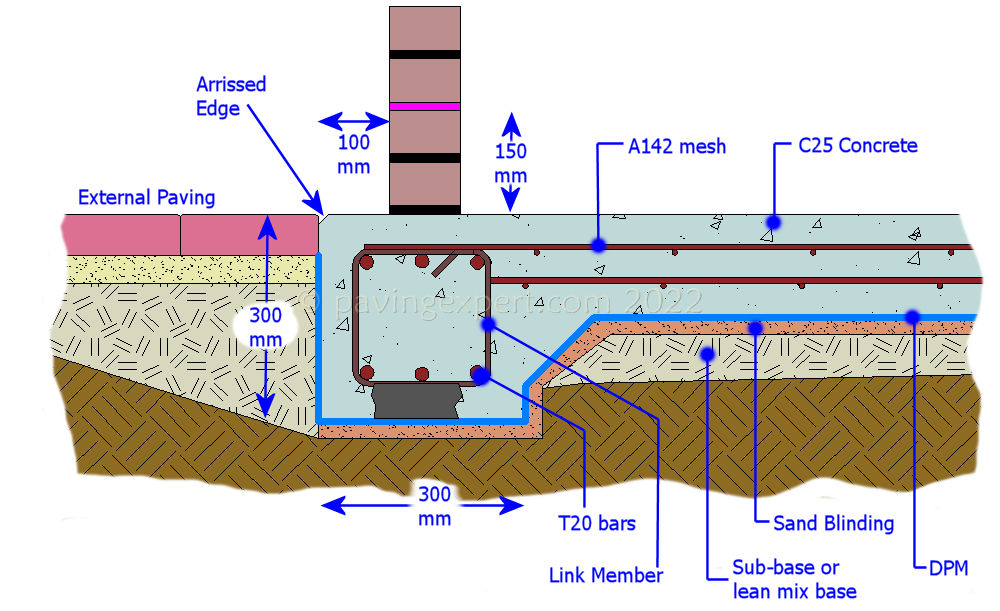
Pre-fabricated sectional garages can often be erected on a simple 150mm slab, such as that shown above; this keeled slab is the type of raft foundation that may be used with a single brick construction garage.
Pros and Cons
- Reasonably cheap and quite simple to construct.
- Whilst not the most attractive type of pavement, a well laid concrete area should give many years of maintenance free service.
- Try to avoid the use of de-icing salts as these can attack the surface of the concrete.
- Must be properly drained to gullies or other suitable drainage points.
Pricing Guide