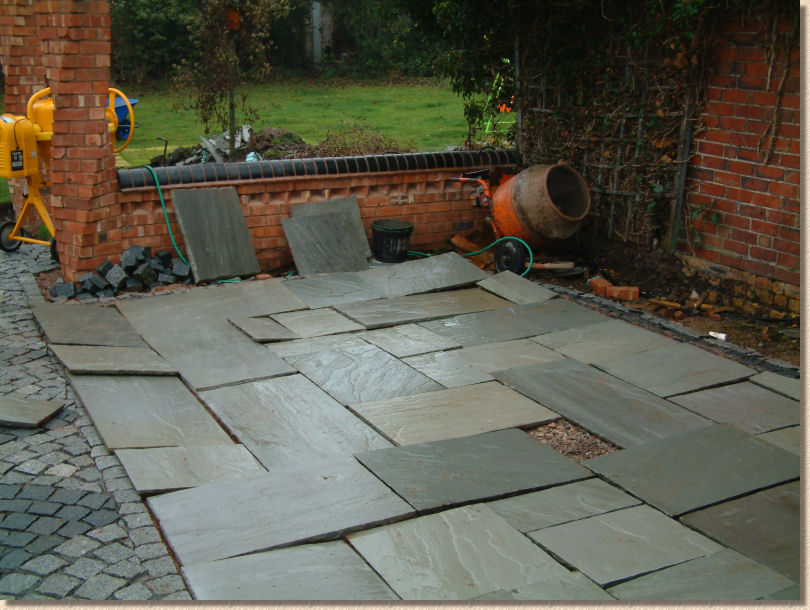
Flags and setts
Mick O'Callaghan completed his patio project in the Spring of 2005.

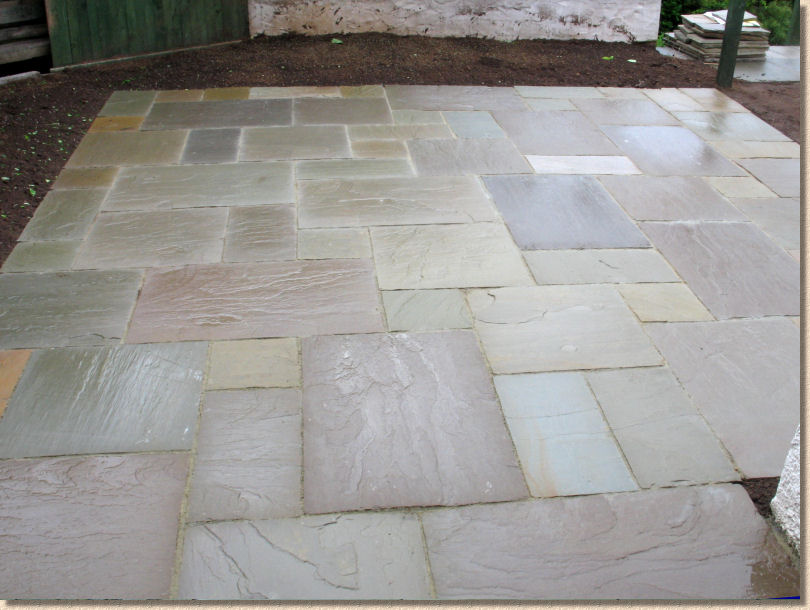
Raj Green Patio
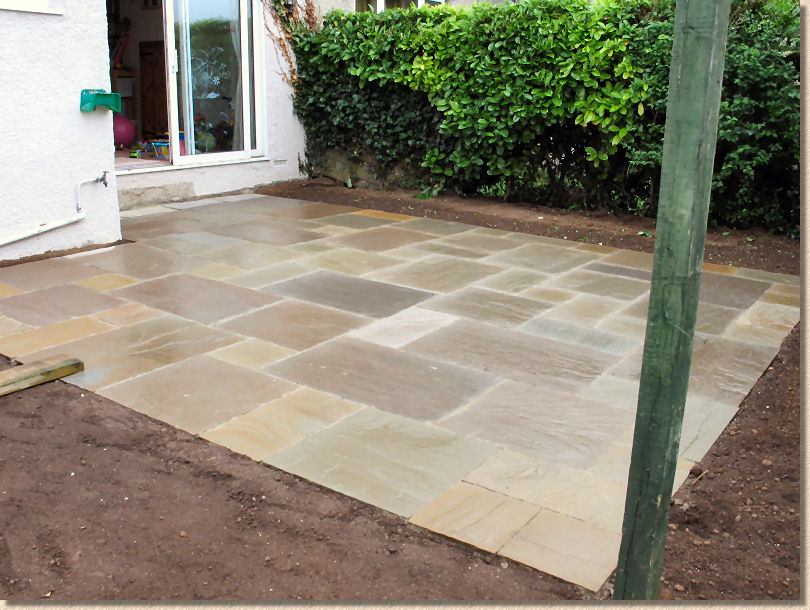
A cpuple of images from Adrian Bright showing the patio of Rajpur Green sandstone completed in early summer of 2005, despite the weather!
Tim Summers' Patio
"Sometime back in April 2005 I started to lay a patio, with the excellent advice that you had given on your site. I eventually got it done then pretty much forgot that I said that I'd post some pictures of it. I've dug around the Brew Cabin forum and found my original topic to refresh your memory.
Well, I finally managed to get myself a new digi-camera and take a few pictures of the finished article. It's been finished for months now so it's lost some of its initial sparkle and it's weathering in nicely at the moment. These pictures were taken without any 'tarting-up' or cleaning of the patio, just exactly as it was as of 9:00 this morning when I left for work. It comes up a treat if I get outside with a stiff brush just after it's rained.
If you don't mind I'll attach a few pictures on here as you seemed interested, even though I'm sure you see patios every day and this is nothing spectacular to say the least. If you want to include them on your web site in the DIY Section then please feel free."
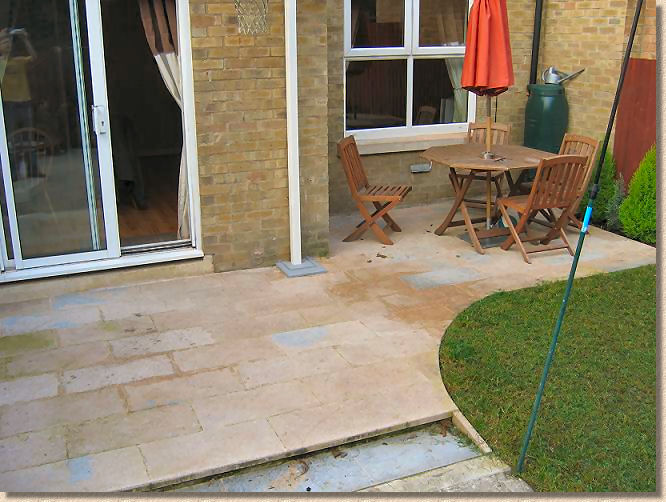
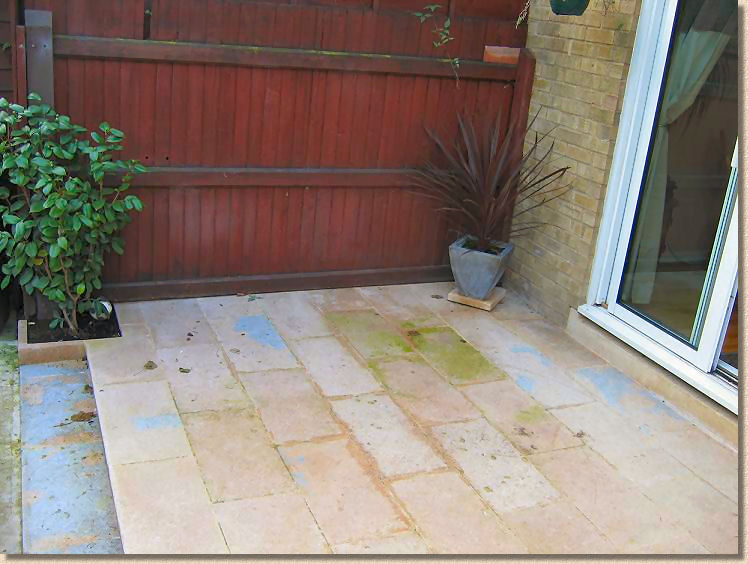
"The first photo (above) is showing the finished article, here you can see the patio as a whole (missing some on the left hand side). As you can see I've put in a step to make it different than just a flat area, and this also shows the curve that I included just to stop everything looking so square.
The second photo above shows the left hand side of my patio. As you can see it's not the cleanest at the moment! Here you can see that I've also included another 'feature' by building in a little planting area. This obviously didn't need to be here but I thought that it added something a little different, and personally I think that it's turned out pretty well. The slight blue/grey areas on some slabs are not spillage of something, it's actually part of the stone."
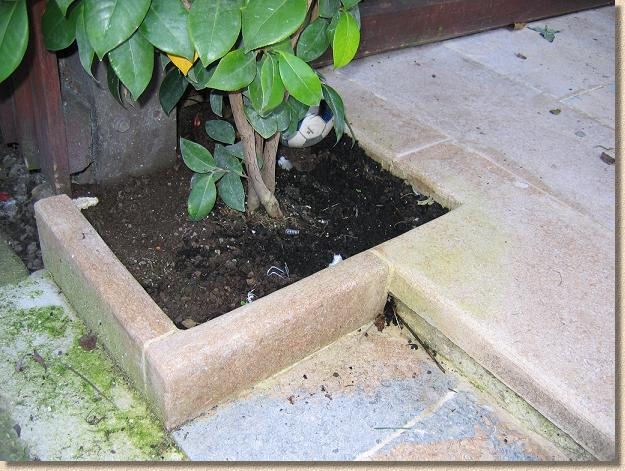
"Above image shows the little planting area in more detail (unfortunately I forgot to move my little lad's ball from behind the plant). Here you can see the step, and how I made the area. I think that you can see that I've rounded off the sharp edges of both the step front and around the planting area. It was initially done purely for cosmetic reasons, but it's also better incase my little boy trips over and bangs his head on the edge.
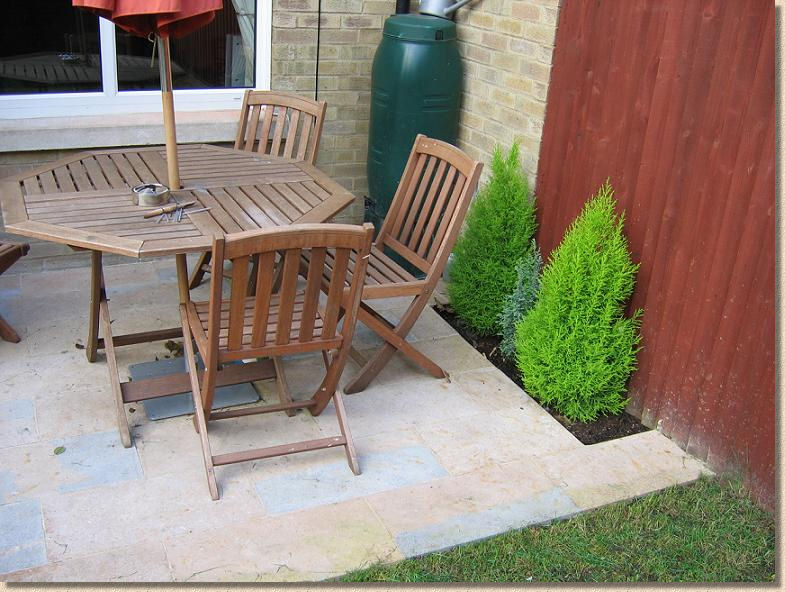
Below is the right hand side in slightly more detail. I've also included a little area here and popped a few little conifers in, just to brighten it up a little and stop it from looking so hard."
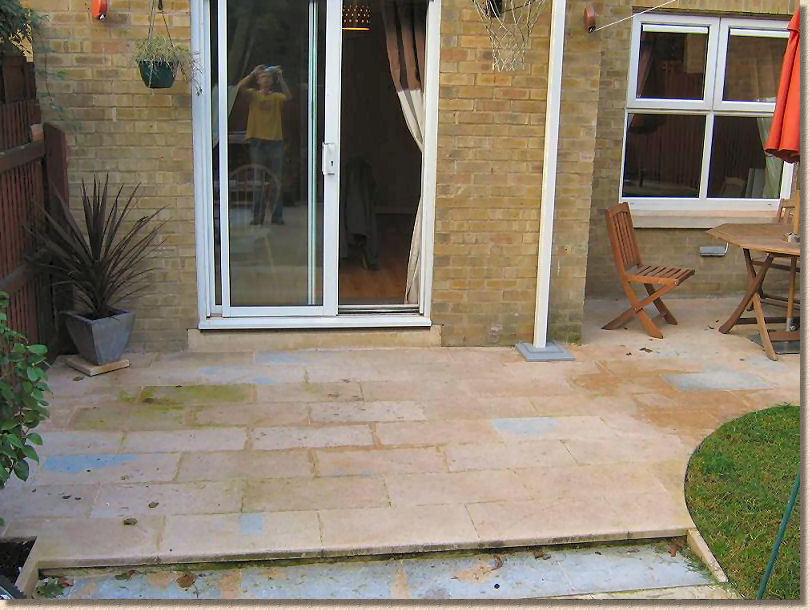
"Again, a general picture of the patio showing most of it, and also unwittingly a reflection of myself taking the picture! Obviously I won't be giving up my day job to become a photographer, or even a builder/patio layer for that matter. Just noticed on this picture that I'd not mentioned that on the right hand side of the step I've included a little triangle section just to pull everything together and make it 'balance' and as the grass slopes up slightly it gives it a cleaner finish, sometimes I feel it's the little things that make a big difference. It would have been easy not to put it there and leave it open but a 5 minute job of cutting and securing makes a big difference."
"That's the lot. I've got a few more that I took on an old (35mm film) camera that I've yet to get developed showing what it looked like before, and during, but I've not yet got them developed and scanned in. Believe me though when I say that it's a massive improvement! It used to be a fair bit smaller with the big old council looking slabs and a mixture of other random slabs that the previous owners seemed to just randomly throw down. As soon as we bought the house it was one of the first things that I wanted to get changed. I'm pleased with it anyway.
Thanks very much to you and your website for helping me all through the process as I've never ever attempted to do anything like this before. I've even got my 'falls' correct wich was one of the most satisfying part of the first rainfall watching it gently roll towards the step and grass, and not having any puddles laying around afterwards.
Very many thanks
Tim."