Introduction:
The two most common examples of Threshold Drainage would be:
- Where paving meets an entrance to a building
- Where paving meets a public highway or neighbouring property


Threshold drainage usually involves a linear channel drain , with slot drains being preferred at doorways and standard channels being used at pavement boundaries. However, some installations may be dished channels , built-in-situ shallow channels or even just an open infiltration drain .
This page looks at the two main uses as detailed above.


Driveway Threshold
Drainage at a property boundary or public highway
There is a growing trend for driveways to be installed with a length of linear channel drain at the threshold where it meets the public highway, whether thats a footpath or a carriageway. This has largely come about as a response to the legislation introduced in 2008 which effectively (or ineffectively, to be more precise) banned surface water being discharged from a private driveway onto a public highway unless planning permission had been granted by the local authority.

At first sight, this may seem like a wonderful idea, and when such installations are properly installed, which means they are connected to a suitable outlet such as a soakaway, a land drainage leach field or a swale, it *is* a wonderful idea, but in far too many instances, the linear channels are connected to nothing. They are, in fact, a con. "Phantom Drainage", I call it.
Phantom Drains

Some of this stems from the incompetence of installers. They see their competitors installing linear channels at the threshold, and decide they should do the same. They're not sure why, but if that bugger from the other side of town is doing it, then so will they.
This is then combined with a complete lack of any real understanding, either of drainage, of SUDS and soakaways , or of the legislation.
A linear channel is installed and they tend to follow one or other of the following strategies:
- Leave off the end caps so water can escape to....err....well....just escape.
- Cut or pop a hole in the base of one unit and that will allow the collected water to....errr....drain into the ground beneath? Is that what happens?
The real eejits may well use both strategies just to be sure.
What actually happens is usually determined by which bodge was used originally.
Lose the End Caps
The End Caps are 'plates' that are supposed to be fitted to the open end of a line of linear channels to prevent collected water escaping unchecked.
When end caps are omitted, the surface water tends to leak out, at first, and to penetrate the immediate surroundings, most often the sub-base (assuming there is one!), which very quickly becomes saturated and runs a greater risk of settlement, movement and/or general failure.
Over time, the escape route tends to silt-up with the litter and detritus which finds its way into the linear channel, and so the quick escape route to the sub-base is blocked. The channel fills with water, more silt is collected, and, eventually, it all just overflows onto the public highway, which defeats the original intention of the legislation.


Result: FAIL
Drain to ground
This method relies on a hole being cut or popped-out of the base of a section of channel (some channels have pre-weakened discs in the base to facilitate easier removal for connection to sub-surface pipework), and then it is assumed the surface water will simply drain away into the sub-layers and present no problem to the property owner.
Except, as mentioned above, this usually results in saturation of the sub-base and possibly the sub-grade, which reduces the CBR (load carrying ability) and thereby increases the risk that there will be settlement, movement, or wholesale collapse of the immediate area.


Result: FAIL
Warning to homeowners:
Its worth noting that these potential failures take time to develop, months or even years, but plenty of time for the cowboy installer to make off with the money and to deny any responsibility when it does all go wrong.
As previously stated, when installed *correctly * linear channel drains at the threshold of a driveway are an ideal method of dealing with surface water by intercepting it before it reaches the public highway and directing it to a suitable outfall.
When a contractor is employed to install a driveway and the design proposal features a threshold linear channel drain, it is imperative that the client determines just where the collected surface water will be disposed. Is it to go to a soakaway? Will it go to another suds installation such as a rain garden or a swale? Will it be connected to the existing drainage system, and, if so, has planning permission been obtained?
Bear in mind, when it comes to dealing with surface water from any pavement on a residential property, it is the property owner that is responsible, not the installer.
So, if the linear channel overflows and the local council spots it, its not the contractor that will get their backside kicked: its the unaware householder, and it is them that will be liable for any fines or penalties, plus the potential costs of any remedial work deemed necessary.
Suds-compliant driveway solutions:
To comply with the legislation, surface water collected from a driveway (this does NOT apply to patios or paths) has to be dealt with on site. This typically means sending it to a suds application, and of the various solutions available, soakaways are the most popular option.
Note: surface water from a driveway may be directed to an existing drainage system on condition that planning permission is obtained in advance. Local authorities WILL charge for considering such consent and they are increasingly minded to reject all but the most intractable of situations. Patios, pathways and any other paving lying behind the building line (the front of the building) are exempt from this legislation.
So here are a couple of soakaway designs that might be useful when deciding what to do with the surface water from your paving project.....
Soakaway beneath a garden area:
This option is suitable for use when the soakaway will be located beneath a garden, a lawn or other such area of open ground not subjected to traffic. It also assumes that the ground is reasonably free-draining and that no overflow from the soakaway cell to the existing SW system would be required.
The size of the soakaway can only be determined once the permeability of the sub-grade is known along with the total size of the area being drained. For what tend to be relatively small projects (under 200m²) all this can be quite a complex calculation for a novice, and it often seems to be a lot of unnecessary mathematics to end up with the same result each time: namely that a single or a double 'crate' installation will be more than adequate.

Soakaway beneath the driveway:
This option requires meticulous construction to avoid settlement but, with care and attention to detail, along with proper compaction of the backfill, it's an ideal solution for projects where garden space is limited for whatever reason.
Once again, it is assumed that the sub-grade is reasonably free-draining and that the construction will entail a single or double crate installation.
Note that the pipework beneath the driveway connecting the linear channel to the soakaway is fully surrounded with good quality clean, pipe-bedding material which, as you'd expect, if fully compacted or, when the pipework is shallow and/or for extra security, can be encased in a lean-mix concrete.
Further, the backfill area can be covered with a geo-grid , a tough, plastic mesh which will help minimise any settlement or movement caused by the backfill.

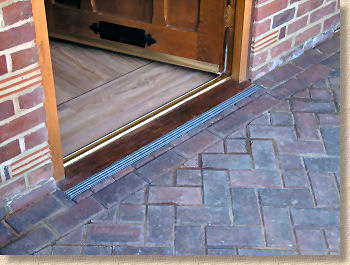
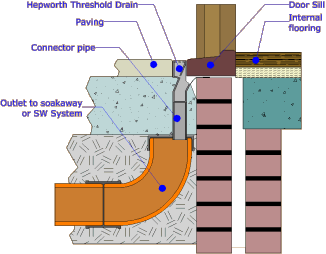
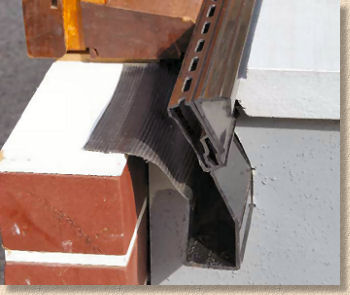
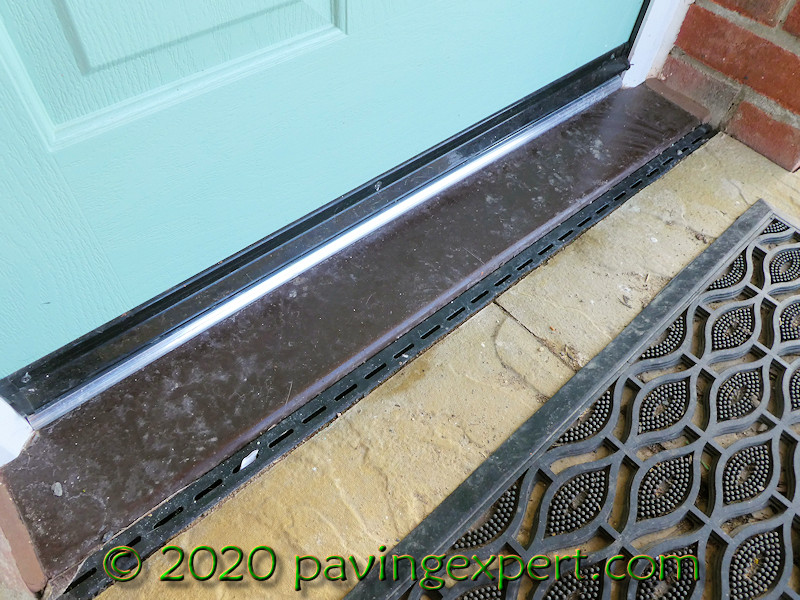
Doorway Drainage
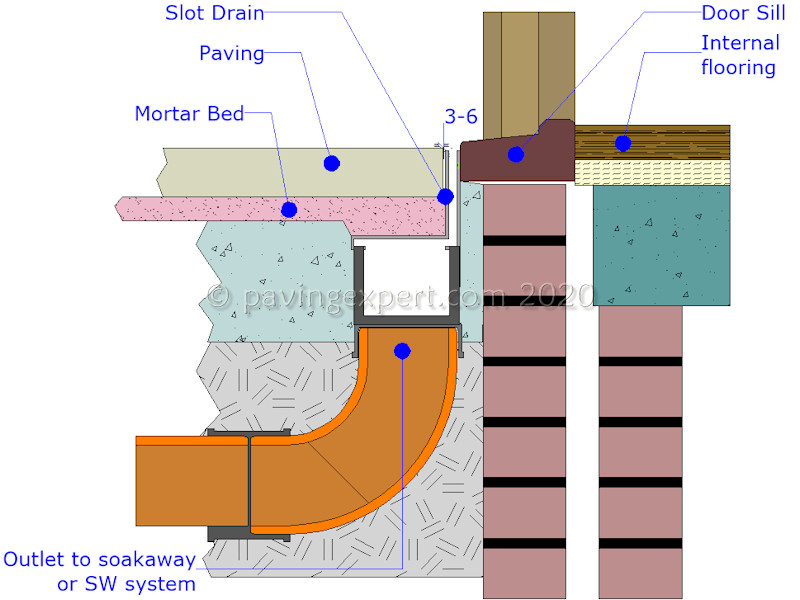
Level threshold interceptor drainage solutions
Traditionally, paving is laid at a level that is at least 150mm below DPC level, which is usually equivalent to internal floor level. However, Document M of the Building Regulations requires level threshold access to be provided to all new buildings, and a growing number of homeowners like the idea of having a step-free level walkthrough from the lounge or conservatory onto the patio. This can present a problem at thresholds: how to provide a flat access without running the risk of surface water finding its way into the property?
The use of a threshold drain is usually a 'failsafe' measure, installed to prevent any accidental flooding of the external paved area spreading into the property.
Ideally, the paving should always fall away from the property, as per normal, as it is never a good idea to rely on a threshold drain as the 'main' drainage for an area of paving. However, there are the inevitable instances where use of a threshold drain as the only drainage outlet on a paved area is unavoidable. In many such cases, it is often possible to engineer an alternative, albeit at additional cost and inconvenience, but such solutions are always to be preferred to relying solely on a threshold drain.
While not always necessary, the use of threshold interceptor drainage is a simple solution that will protect property without compromising the aesthetics.
The following photos and diagrams illustrate just a few of the more popular solutions....
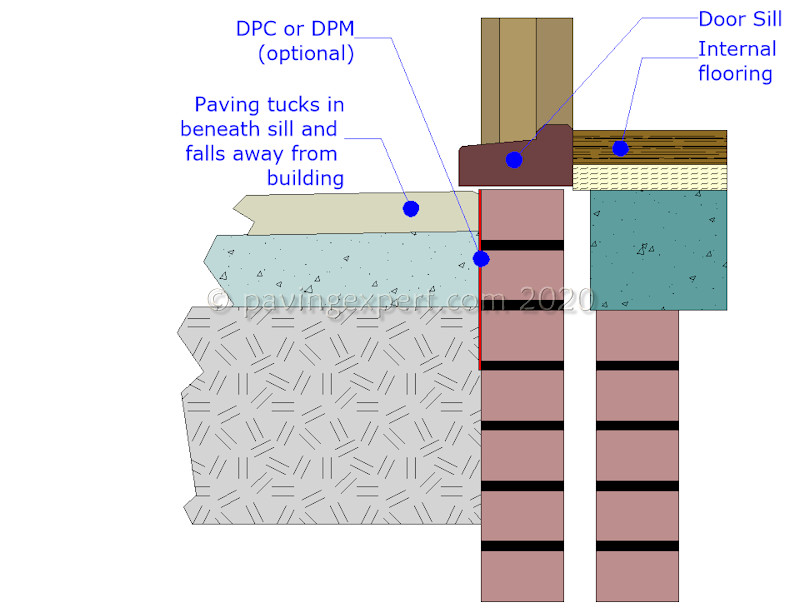

Simply sloping paving away from the threshold is the 'bare minimum' option and should only be used...
- When it's a relatively narrow doorway, ideally no more than 1m
- When there really is no other option
In all other scenarios, one of the following design solutions is a much better choice...
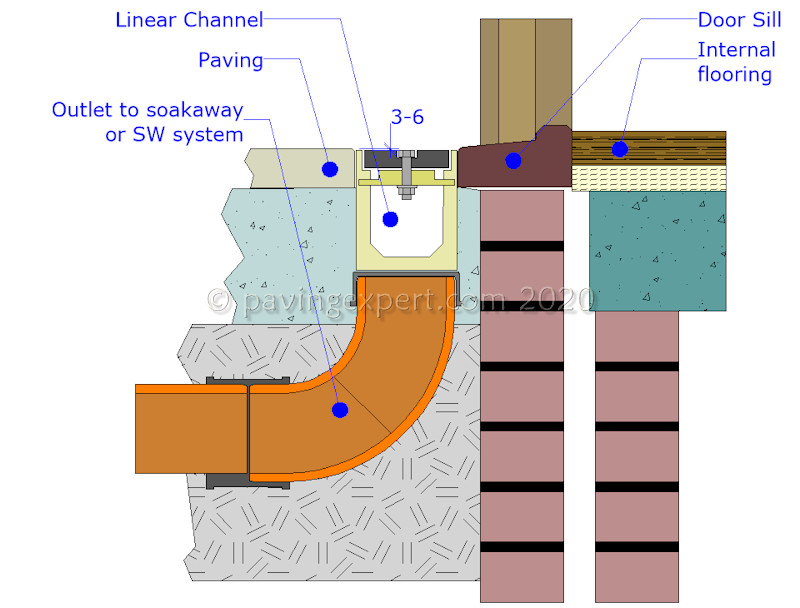
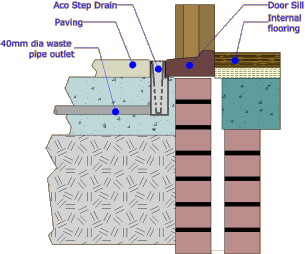
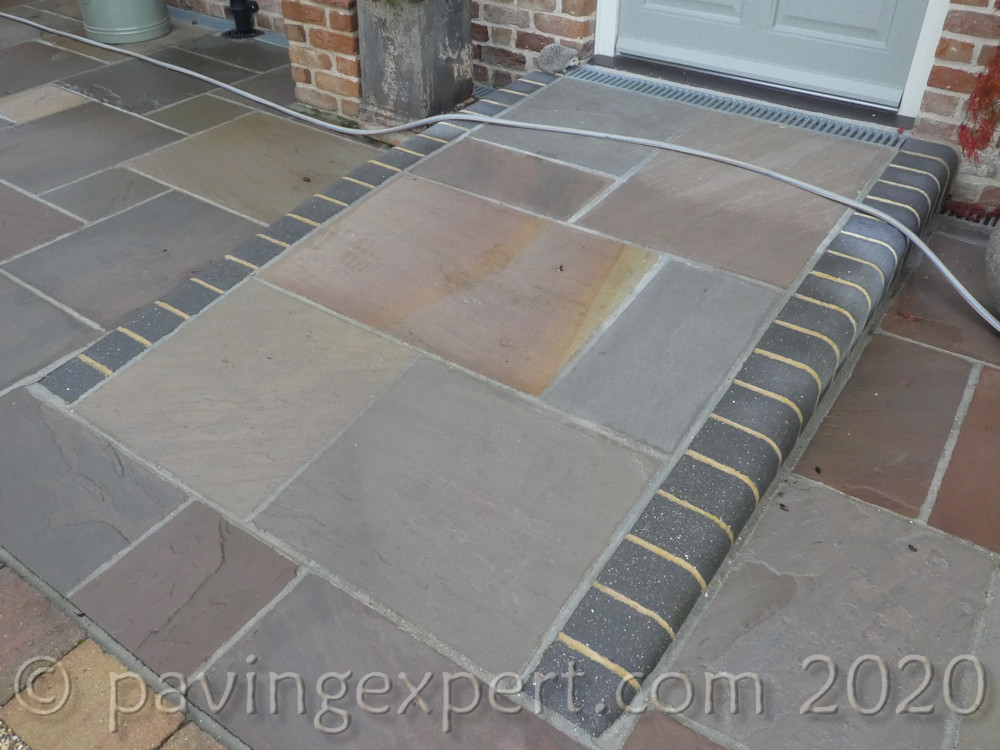
A standard linear channel can be used on wider doorways or longer runs of paving where some form of interceptor drainage is required. This option is wideley used, possibly overused, in situations where the paving slopes towards the building, combining the client's wish for a 'level access' at the patio doors with the installers' need to provide effective drainage for a larger area of paving.
For enhanced defence against moisture or damp penetration, how about this elegant solution combing a ramped access AND a linear channel - best of both worlds!
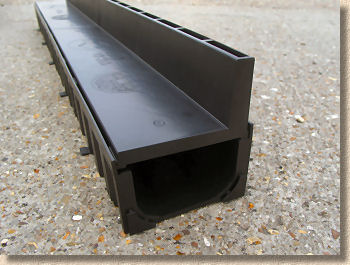
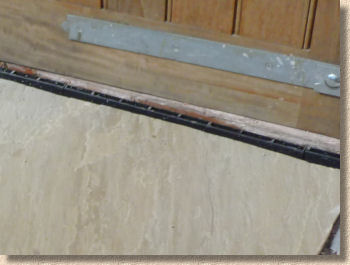
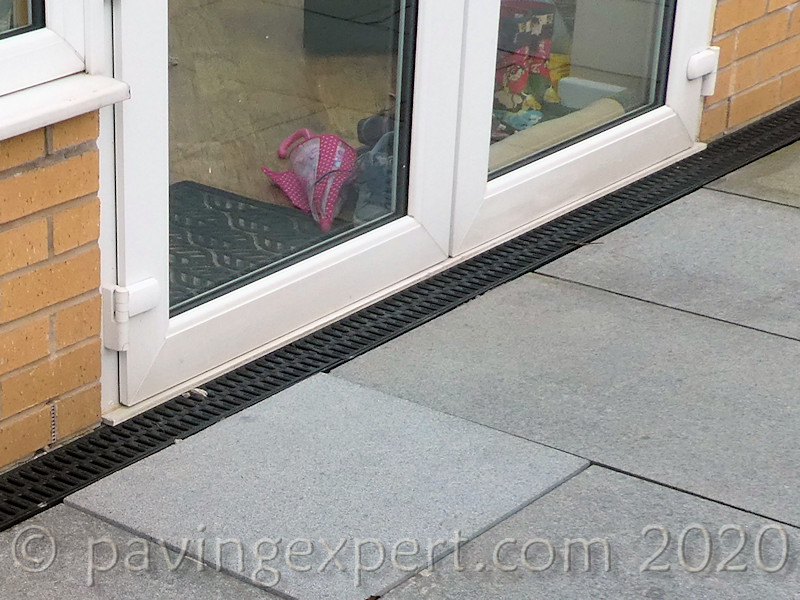
A more discreet variation on the linear channel design would be to use a slot drain, which is basically a linear channel with a much narrower opening at the top.