
The installation was observed and documented independently by pavingexpert.com during July 2011.
A common theme for discussion and questions on pavingexpert.com is what to use for jointing a flagstone or sett patio. The pros and cons for cement mortars and resin mortars are made elsewhere on the site , but for a simple patio, very often the simplest choice is to use a so-called polymeric mortar . This is, essentially, a selected fine aggregate (sand) that has been pre-coated with a chemical that acts as a form of glue and begins to harden when exposed to air, or moisture, or both.
There is an ever-growing roster of these polymerics on the market and it seems that hardly a week goes by without another wonder product appearing. Some of these may well be perfectly good products, but the feedback received via the 'phone and by email indicates that some of them are little better than using stale crusts from a bacon butty as a jointing material. However, how many have been independently tried and tested? Pavingexpert.com decided it was time to have a closer look at one of the better products to see how it works, how it's used, and how it looks when done.
Previously, this website has looked at a commercial grade slurry resin mortar from the German manufacturer GftK and been impressed with the results. The patio grade product distributed throughout Britain and Ireland via the approved reseller, NCC Streetscape , has been on the (very) shortlist of recommended jointing materials for some time now, and so it was agreed that the new formulation known as VDW 840+ would be the guinea pig for this product study.
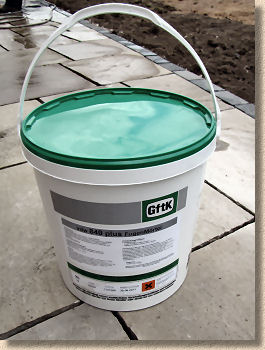
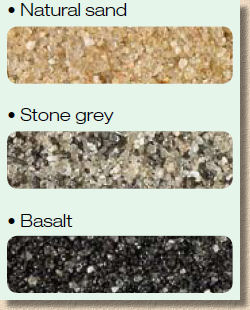
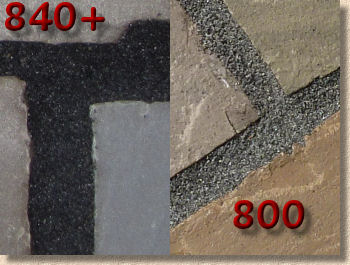
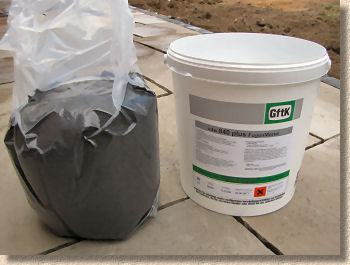
The mortar comes pre-packed in an airtight poly-bag that is housed within a sturdy plastic pail, complete with carrying handle. Each pail contains 25kg of the pre-coated polymeric mortar in one of three colour options: Natural Sand, Stone Grey and Basalt. It's worth noting that the aggregate used for VDW 840+ is finer than that used in some of the commercial resin mortars from GftK and the Basalt, in particular, is noticeably different in both colour and texture to that of, say, the epoxy-based VDW 800 Basalt.
How to use
One of the improvements to the new formulation VDW 840+ polymeric mortar is that it can be used wet or dry. The project below takes advantage of this by using both techniques to complete the jointing to a residential patio.
Experience shows that, for larger areas, using the wet slurry method is faster, cleaner and much easier on the back muscles. The dry trowel-in method is better suited to finicky details such as where joints abut garden or soil, step edges, and places that might be inaccessible to a slurry. Both techniques are described more fully below.
Where to use
VDW 840+ is a pedestrian grade polymeric mortar. While it goes hard, and is more than capable of withstanding the attentions of a power washer or being trundled over by the occasional ride-on mower, its chemistry means it never really achieves the same strength correlation (ie: the combination and interaction of compressive, flexural, tensile , and cohesive strengths that make for a good commercial grade mortar) needed for any pavements that are trafficked by vehicles or lots of pedestrians. In essence, it's designed as a patio jointing product.
There is a good selection of alternative resin jointing mortars available from NCC Streetscape that are ideally suited to driveways, to public areas or even for highways and heavy vehicle hard-standing, but VDW 840+ is the baby of the family and best suited to garden and patio projects.
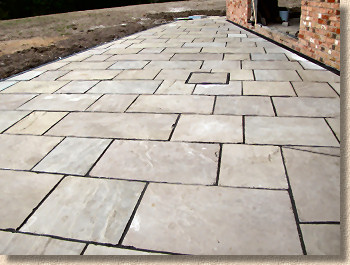
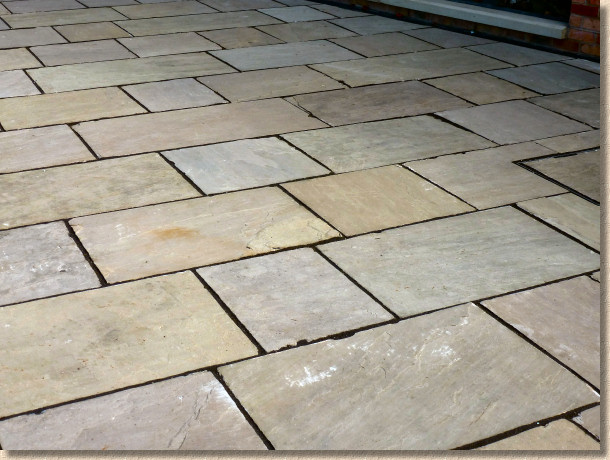
So, for this case study, we shall be jointing a residential patio constructed using Indian Sandstone (Raj Green, if you must know). The patio will only ever have to contend with foot traffic from the family and their friends, but there is a mid-size ride-on mower which is kept in the store room, and this will traverse the patio a couple of times each week during the growing season.
Preparation
The patio measures approximately 90m² and it should be possible to joint the whole area in one session.
Obviously, the surface needs to be relatively clean and free from any detritus prior to jointing, so a simple sweeping would normally suffice. The joints need to be empty (obviously!) and at least 20mm deep, roughly the depth of most of the imported patio flagstones in this country. A visual check of the joints is made to ensure there are no stray fag ends or other undesirables trapped within the open joints.
One of the true advantages of using VDW 840+ is that it works best when applied to a wet surface. For far too many years, jointing in Britain and Ireland has been delayed while we wait for a dry day, which can be something of a rarity in the autumn or winter months, but with VDW 840+ , the fact that the surface is damp or that it's raining (as long as it's not too heavy) is no impediment to getting the job finished.
And another benefit of this is that the paving can be washed down immediately prior to jointing, ensuring the surface and joints are clean and effectively pre-wetting the surface!
Pre-wetting
If the surface is not already wet as a result of washing down as part of the preparation, it should be thoroughly soaked at this stage, before applying the mortar.
Although VDW 840+ can be applied 'dry', it is much easier to spread the mortar when it is wet, and there are other benefits. When applied as a wet slurry, the mortar becomes self-compacting and self-levelling so there is no need to tool the joints. Further, it has been found that, by using the wet technique with VDW 840+ , it is possible to eliminate any residue from the patio surface, leaving the flagstones looking as nature intended.
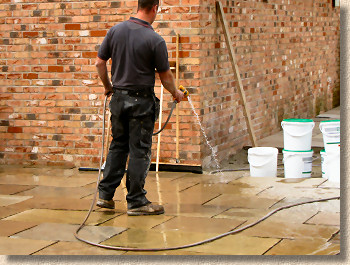
Simply hosing down the surface is the best way to pre-wet the surface. As will be shown later, a hose is pretty much essential to the procedure so it makes sense to use it to pre-wet the surface.
Each 25kg pack of the mortar should cover around 10m² of this type of flagstone, so pre-wet at least 15-20m² There's no benefit in pre-wetting a larger area as the surface may well dry off before the work reaches it.
It's more or less impossible to over-wet the surface at this stage, so don't worry that you may be applying too much water.
Using the VDW 840+
The VDW 840+ is supplied in 25kg pails which are opened by removing the distinctive green lid to reveal a vacuum-packed poly-bag of the ready-to-use mortar within. The poly-bag is lifted to where the mortar is required, slit open along the top using a sharp craft knife, and the contents scattered over the pre-wetted surface.
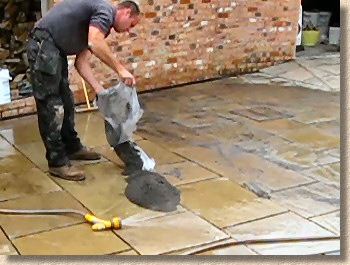
It's important to note that, once opened, the VDW 840+ starts to cure. This curing is a relatively slow process and even on a warm day the mortar should have a working life of at least a couple of hours, which is more than enough time to joint an area of paving. However, the downside of this is that surplus mortar can't be re-bagged for use on another day.
Once a pack is open, either use the mortar or be prepared to bin it. As with most other polymeric mortars on the market, it's not possible to use just a trowelful or two and save the remainder. Use it or lose it, as they say!
Spread the mortar
The mortar is soaked with even more water from the hose to turn it into a slurry, a sloppy, flowing soup that can then be moved across the surface of the paving using a squeegee. Again, it's important to note that it's not possible to use too much water, and most installers find it best to keep the hose spraying the mortar until it is all moved into the open joints.
Experience shows that a rubber-bladed squeegee is the best tool at this stage. It pushes the slurry to where its required, chases it into the joints, and is a superb tool for scraping off any excess from the surface, ensuring that you can get 25 kg of jointing from 25kg of mortar and not have to waste any of the product as dust or residue.
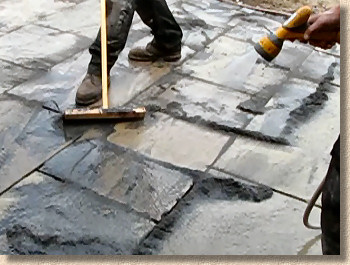
The mortar moves quite freely as long as it is wet and it finds its own level within the joints. More importantly, as a self-compacting mortar, there is no need for the operative to crouch down to press the mortar into the joints. All work is done from an erect position using a long-handled squeegee for maximum ergonomic benefit and minimal tiring of the operative.
Cleaning Off
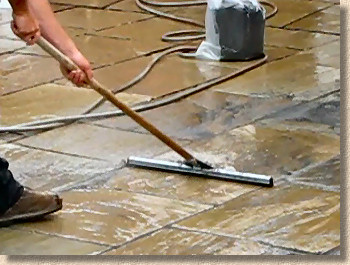
Once a batch has been spread as far as it will go, the squeegee is used to remove as much as possible of any surplus material from the surface, pushing the salvaged mortar towards unfilled joints. The fact that it's practically impossible to use too much water, it is actually safe to use the hose or sprayer to wash off any surplus remaining on the surface.
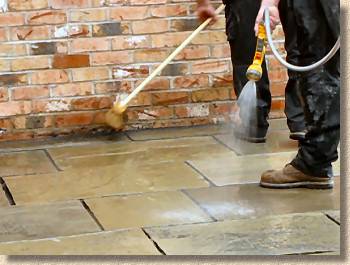
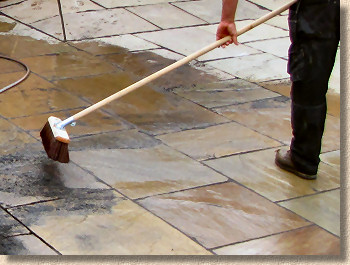
This contractor likes to use a soft brush to sweep off any surplus mortar, combining it with the water spray to thoroughly clean the surface and the adjacent walls.
Pay particular attention to the nooks and crannies that are typical on a riven stone surface. If the water spray and brush don't shift any remaining accumulated mortar, use the point of a trowel to scrape it free and then continue brushing.
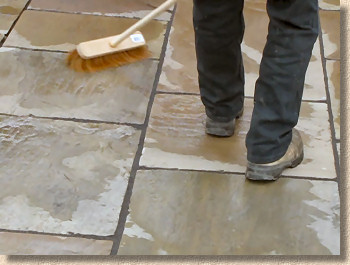

As the surface dries, return to it with a soft brush and use it to dust off any last few grains of mortar that have managed to cling to the surface. Remember, any mortar remaining on the surface WILL set hard and be almost impossible to shift, so attention to detail at this stage will save hours of unnecessary labour later on.
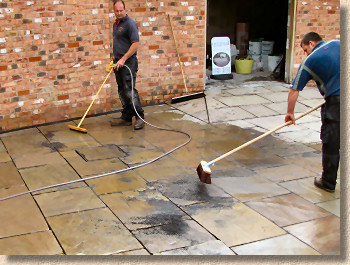
Each gang will find their own preferred way of working. This two-man gang found that the best use of their time came by having one operative focus on wetting, spreading and scraping clean with the squeegee, while the second operative focused on using a medium and soft brushed to progressively sweep clean the surface.
A single operative would work best by spreading a single pack, washing off, spreading and washing off a second pack, then returning to the area of the first pack to sweep clean before going back to the 'face' and working a third pack...and so on and so forth.
Dry use - hand finish
As mentioned previously, VDW 840+ can be used 'dry'. In theory, it could be brushed into joints without using any water but this is a slower process and requires the operative to compact and finish the joints by pressing with a trowel or a pointing bar. Further, brushing in dry can result in a small amount of the polymeric binder remaining on the pavement surface as a residue.
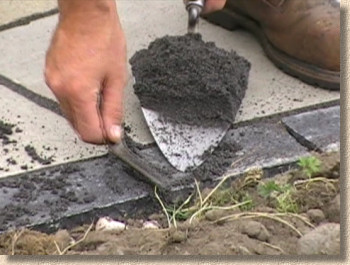
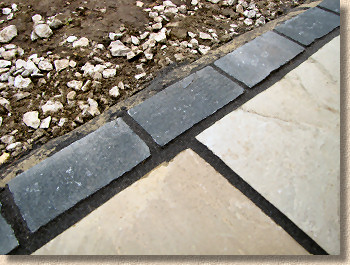
There are occasions, however, where dry use and finishing by hand makes perfect sense. On this project, the outside edge of the patio where it abuts the garden area has been edged with a limestone sett. The open end of the joints between adjacent setts allows the slurry form of the mortar to flow out, wasting the mortar and leaving an untidy unfinished appearance to the joints.
This can be overcome by filling these joints with unwetted VDW 840+ taken straight from the pack and feeding it into the joints using a trowel.
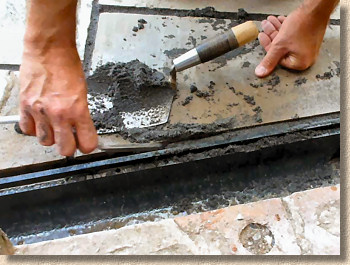
Similarly, where the paving lies against a linear channel, as shown above, hand finishing minimises the amount of mortar lost into the channel. Note how the grating has been removed to facilitate cleaning spilled mortar from the channel.
As with slurry-applied mortar, the surface of trowelled joints will need to be brushed clean and this is best done using a soft hand brush and movements that are diagonal to the joint itself. To prevent any resinous residue, this contractor pre-wets the surface before trowelling-in the dry mortar as he has found that this prevents the polymeric binder penetrating the surface of the stone and so guarantees a finish which matches that of the main area.
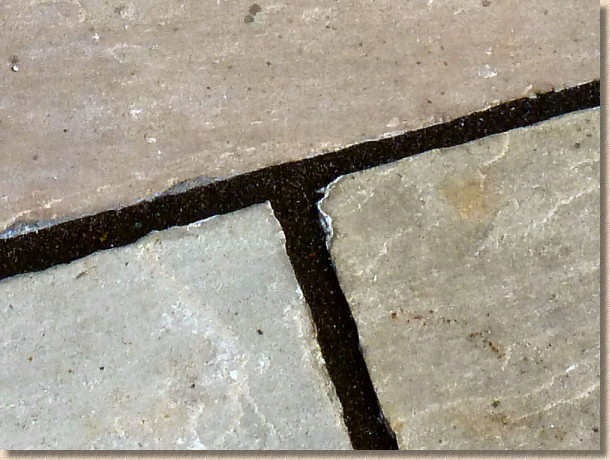
Finishing Off
If required by the client, the mortar can be tooled using standard pointing irons or the blade of a trowel, but experience shows that there is no real structural benefit obtained by this additional task. The mortar is self-compacting and the careful brushing to clean the surface tends to create a smooth finish which lies just below the surface of the flagstone and really doesn't need any extra work. However, some clients do seem to prefer the smoothed surface, even if no-one else will ever notice it!
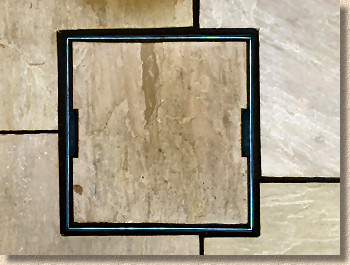
Where the mortar has been used around access covers to inspection chambers, manholes or even gully gratings, it's good practice to lift out the cover or grating within a couple of hours of jointing to ensure that it isn't 'glued' into the frame by any mortar that has found its way into the joint between cover/grating and frame.
Use a soft hand brush to remove any mortar attached to the side of the cover or the inside of the frame, and then simply re-fit the cover to maintain safety.
Coverage and curing
Coverage is obviously dependent on joint width, joint depth and the plan size of the flagstones, but on this particular project, with flags of 450/600/750/900mm by 560mm and 25mm thick, the contractor reported that a total of 8 pails were used to joint 90m², giving a coverage rate of approximately 11¼m² per pail or 2.2kg/m².
Overnight, even in cold weather, the mortar will harden sufficiently to allow careful foot traffic the following day. When ambient temperature is 20° or higher, careful foot traffic can be allowed onto the pavement in as little as 6-12 hours.
Completed Project
Overall, it took around 90 minutes to completely joint and clean this 90m² patio, and that includes the hand-finishing to the sett edges and the linear channel.
We reckon about half the time is spent actually jointing and half doing the cleaning, which is nothing more than repeated sweeping. The work can easily be carried out by labourers or DIYers as there is no great skill involved as long as they have an eye for detail and can be trusted to thoroughly clean the paving.
Remember: any mortar left on the surface, no matter how small an amount, is probably there for good (unless you buy the special solvent used for 'accidents').

Further Information:
Contact NCC Streetscape:

Tel: +44 (0) 1257 266 696


![]()


Client:
Mr & Mrs Lee, Cheshire
Paving Contractor:
Original Stone Paving Co. - York
Video:
Residential Application - Cheshire Patio

Other Product Studies featuring VDW mortars: