Introduction:
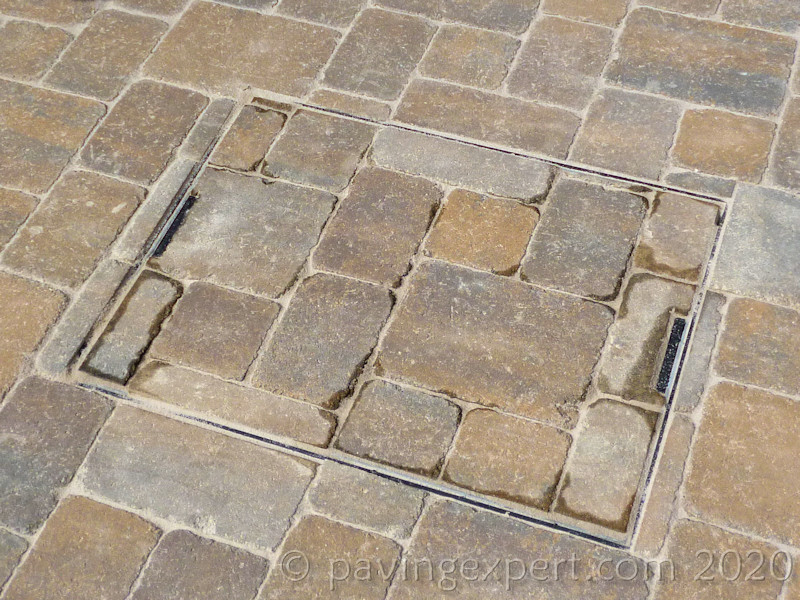
Recess tray covers are a common feature found on all sorts of paving projects, from patios and driveways through to city centres and retail parks. They convert a potential eyesore into an integral part of the paving, disguising the utility and maximising the amenity.
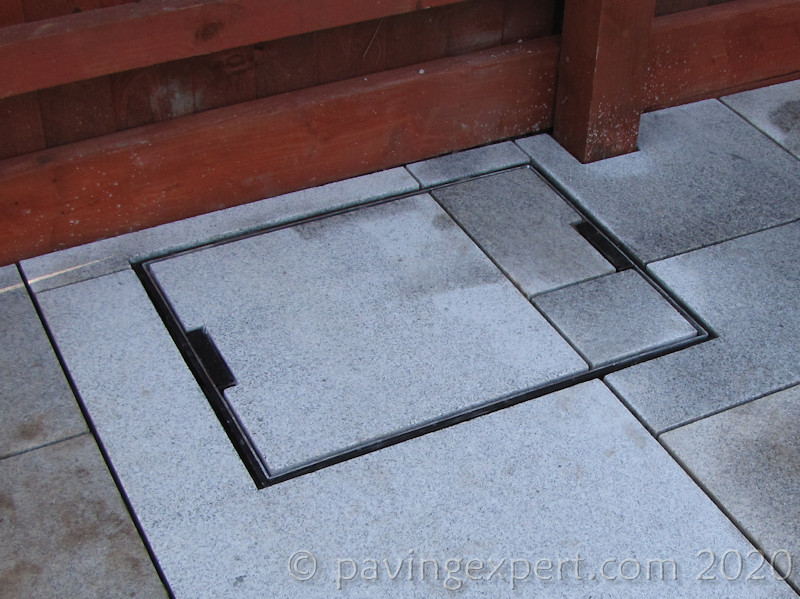
For many, fitting a recess tray cover is simply a matter of fixing it on a mortar bed over an Inspection Chamber or Manhole and filling it with paving to match that on the “outside”. The better installers will even make the pattern of the paving match that around the obstacle and thereby render the cover even less noticeable, less of a potential eyesore. After all, that’s the ultimate aim, isn’t it? To ‘camouflage’ the cover, have it blend in, as seamlessly as possible, with the rest of the paving.
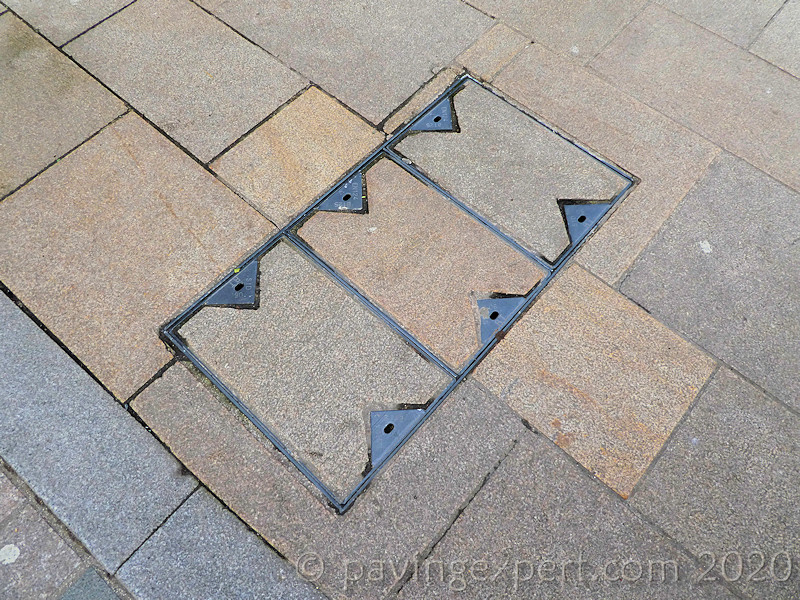
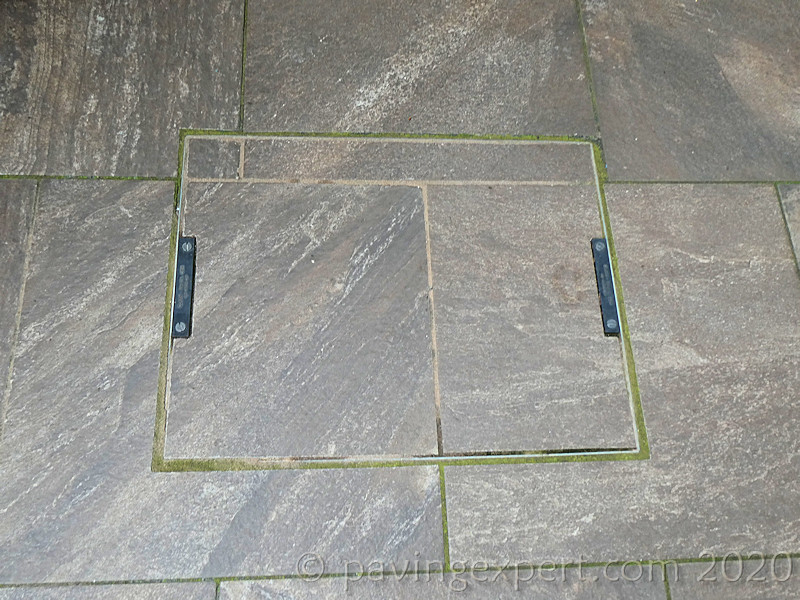
This page considers just how the paving should be fitted inside the tray component of the Recess Tray Cover. All too often, incorrectly fitted paving becomes loose, and instead of being discrete and inconspicuous, it becomes the infamous ‘sore thumb’ and draws attention to itself. Similarly, the paving in some trays remains damp for far longer than the surrounding areas, and, again, the soggy tray becomes the focal point rather than being low-key and unnoticeable.
Types of Infill:
By considering the type of ‘infill’ to be used within a recess tray, an appropriate build-up can be determined, a construction that is best suited to ensure any paving or surfacing remains intact, competent yet unassuming. There are two main strategies: infill that is impermeable, and infill that is designed to be intentionally permeable.
Impermeable:
*May be permeable or impermeable, depending on construction method
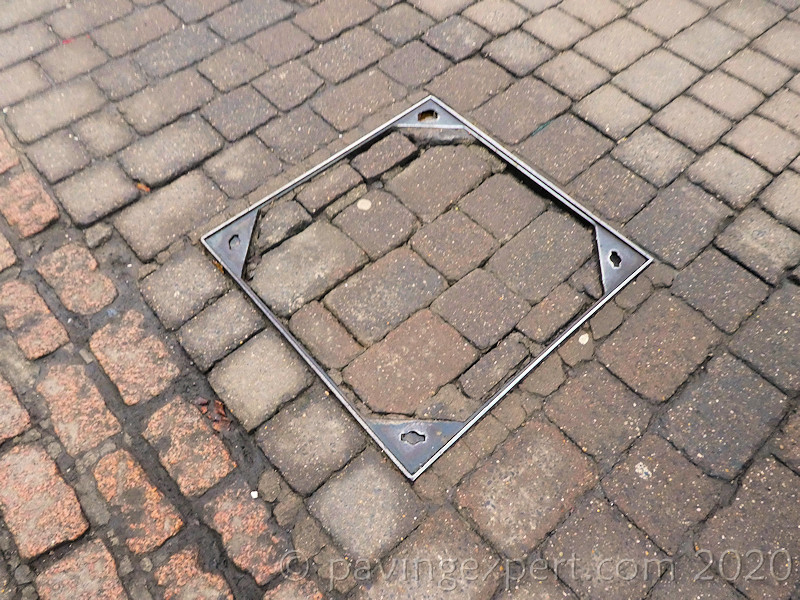
We could be picky and declare that some of the paving types listed as being impermeable could actually be installed as permeable, which is fair comment. Block or Brick Paving is a good example: the traditionally installed concrete block or clay brick paving is slightly permeable, as some surface water (nor a lot, admittedly) will pass through the sand joints and into the laying course, but both concrete blocks and clay bricks can be laid on a mortar bed with mortared joints, which renders the paving impermeable.
The permeability, or lack thereof, should determine which one of the methodologies would be more appropriate.
What’s the Difference?
Why do we have differing methodologies? Surely it’s just a matter of plonking the chosen paving into the tray and away we go, isn’t it?
It’s precisely that approach which results in the failures discussed above.
The key difference is that, for the impermeable paving choices, any surface water will, ideally, be directed across the pavement surface and off to some suitable drainage point elsewhere. Admittedly, some surface water will probably find its way into the gap between tray and frame, but, for design purposes, we assume water will flow across the cover. Meanwhile, for permeable paving options, and the non-paved options listed above, the surface water will pass through the paving, descend via the bedding and need some way to ‘escape’ from the containment of the tray into the chamber below and thereby avoid any waterlogging or saturation of the paving within the tray.
What’s required?
The good news is that it’s not a matter of sourcing a tray set that is suitable for one methodology or the other. It’s the same ‘kit’, with a couple of simple and minor modifications for the permeable option.
The impermeable methodology uses a standard tray set with no modifications. Everything is fitted exactly as shown on the Installing A Recess Tray Cover page.
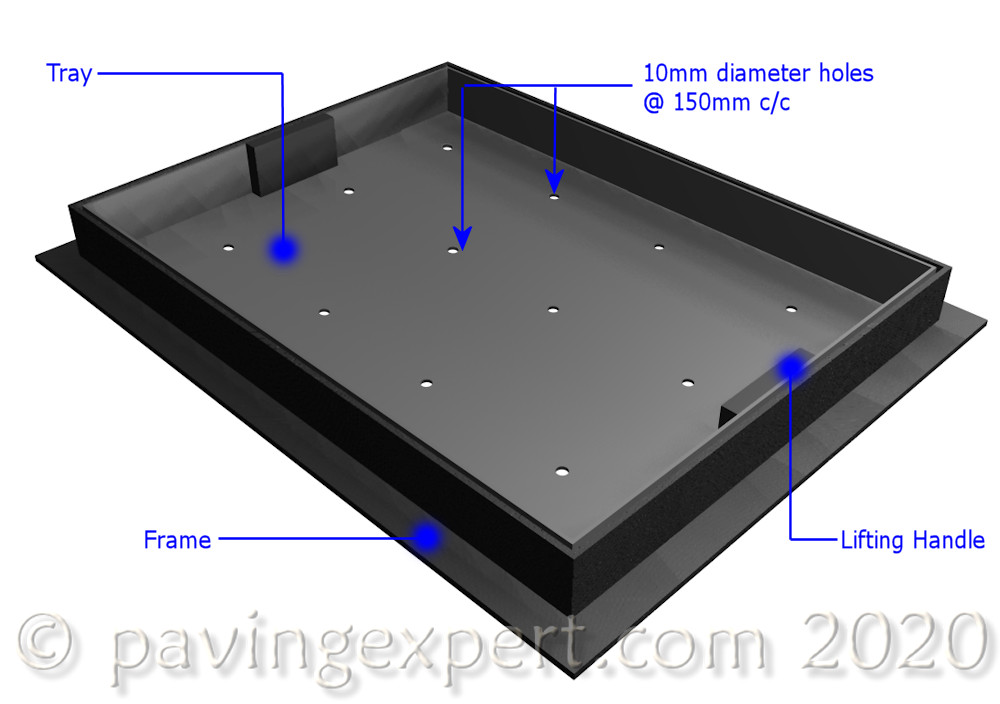
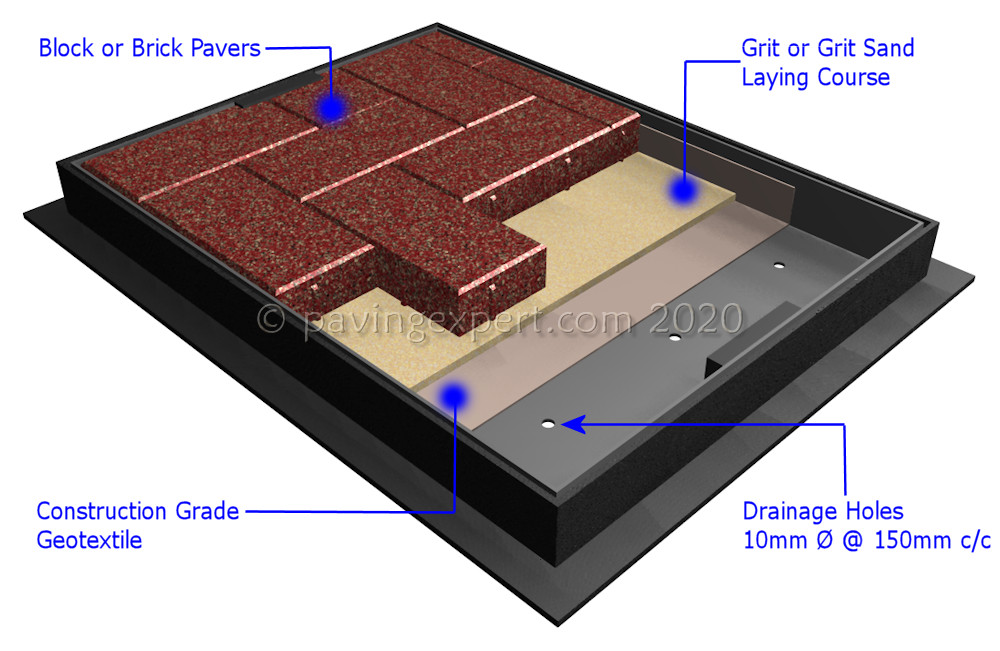
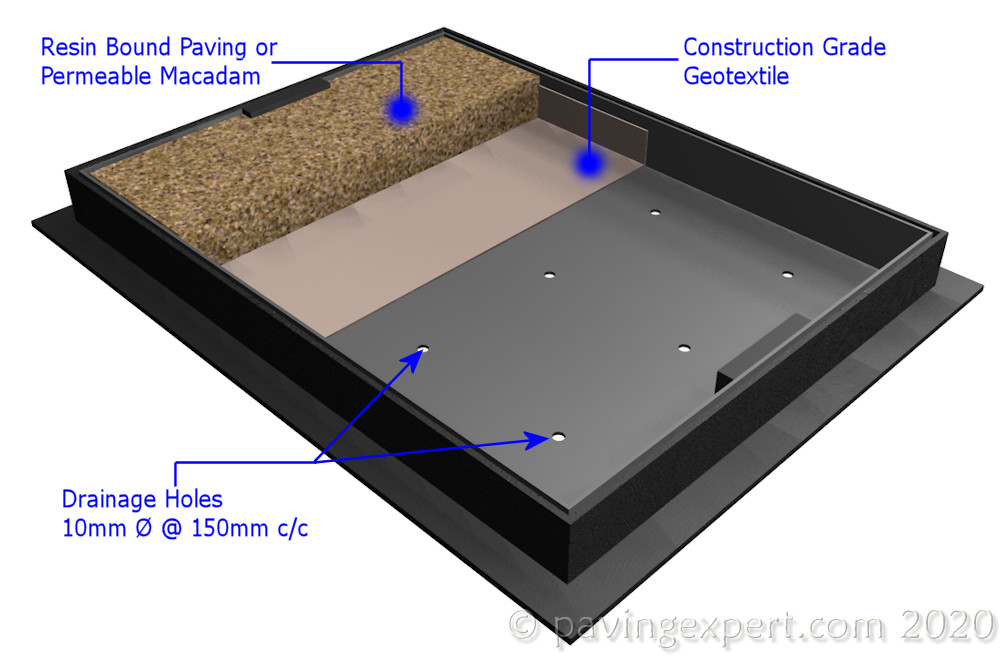
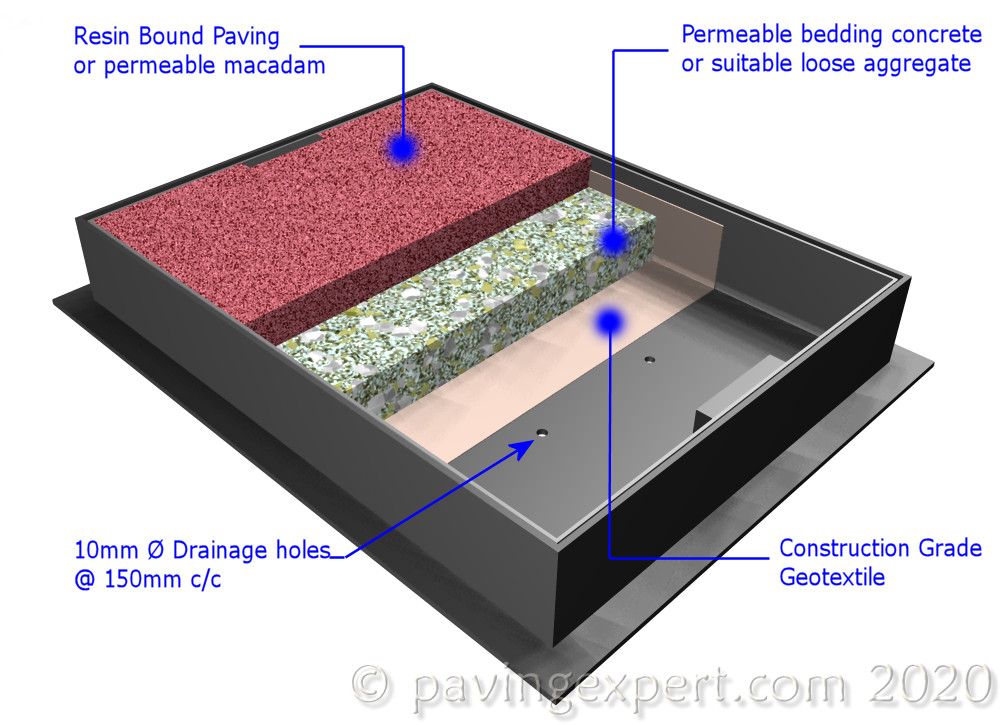
The aforementioned modifications required for the permeable option are nothing more than a few holes drilled into the base of the tray to facilitate drainage of any water collected by the tray, and then lining the tray with a construction grade geotextile to prevent any bedding material (or loose aggregate) being washed out from the tray.
The number of holes required, and the spacing between them, will vary depending on the size of the tray, but a standard 10mm diameter hole is usually adequate, and an ideal separation of roughly 150mm between holes. Use a good quality HSS drill bit to drill the holes prior to fitting the tray to the previously installed frame.
The next modification is the geotextile lining, which is intended to prevent loss of bedding or laying course material, or, in the case of loose fill (bark/grass/soil/etc.), loss of the fill material itself.
A reasonably tough, non-woven, construction grade geotextile (so NOT a landscape fabric) should be used, cut to shape, tucked-in at the internal corners and, if necessary, held in place by sticky tape until the infill paving or other loose material retains it securely. Ideally, none of the geotextile should be visible at the top of the tray, which can be achieved by neat and accurate trimming to finish the sheet material 20mm or so from the top edge of the tray.


The Infilling:
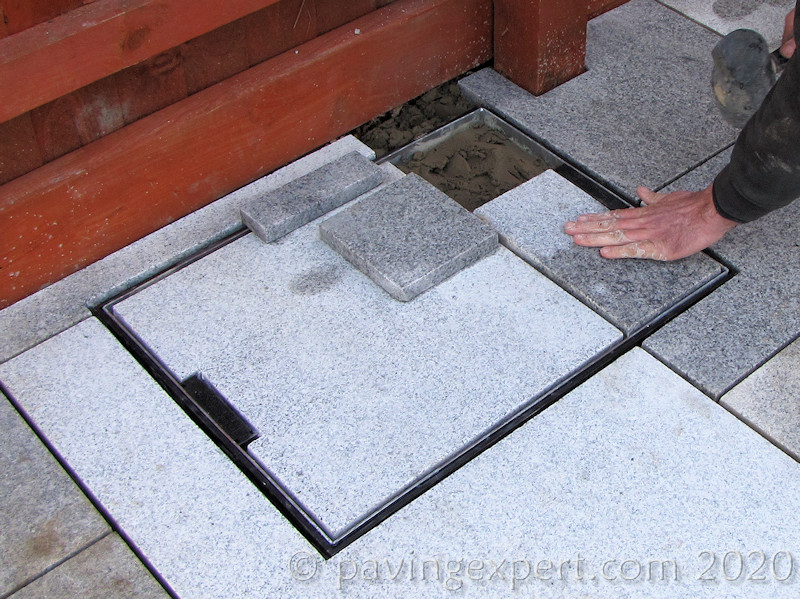
Once any necessary modifications have been made to the tray, it can be filled with the chosen paving or loose material.
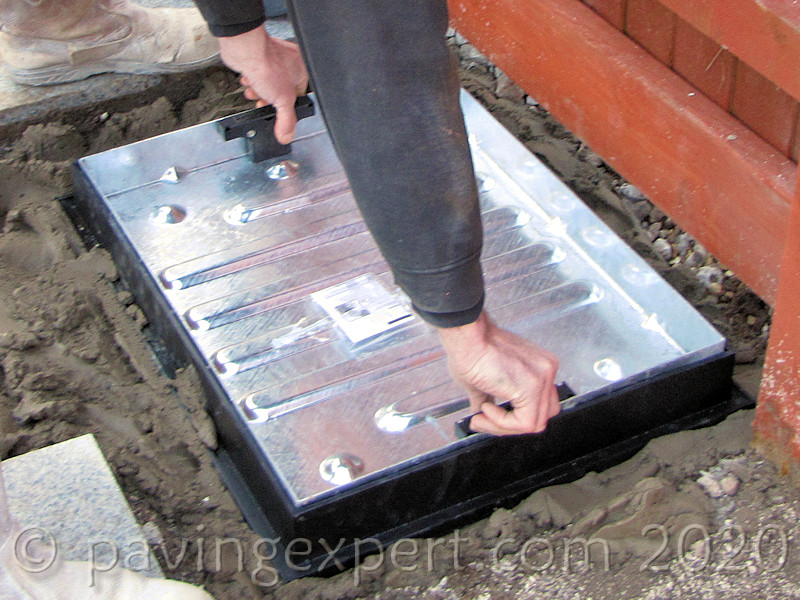
The frame component of a cover is usually fitted in advance, either before the paving itself is laid or positioned once all of the surround paving, other than any cut pieces, is in place. Typically, the paving or surfacing outside the cover set is pieced-in first, although, for certain types of paving, the offcuts are used for the tray infill in order to maintain the style and layout pattern, and thereby render the completed tray that little bit less noticeable.
Impermeable infill:
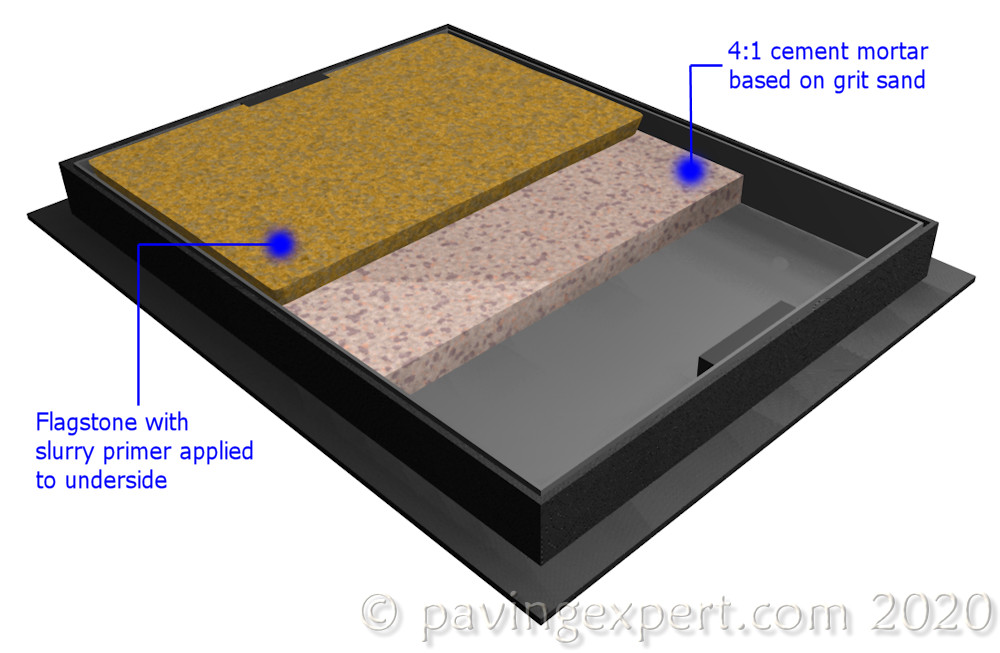
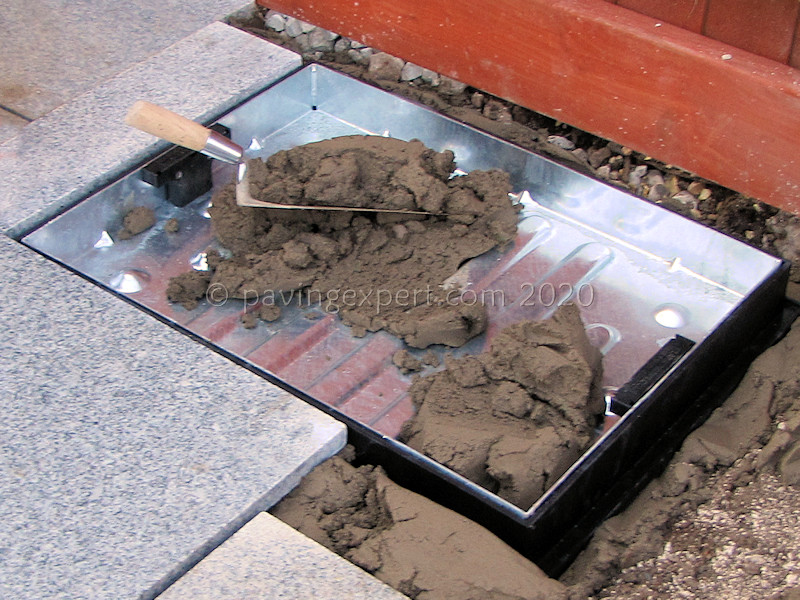
Most of the rigid and/or impermeable installations rely on fixing the paving onto a bed of mortar.
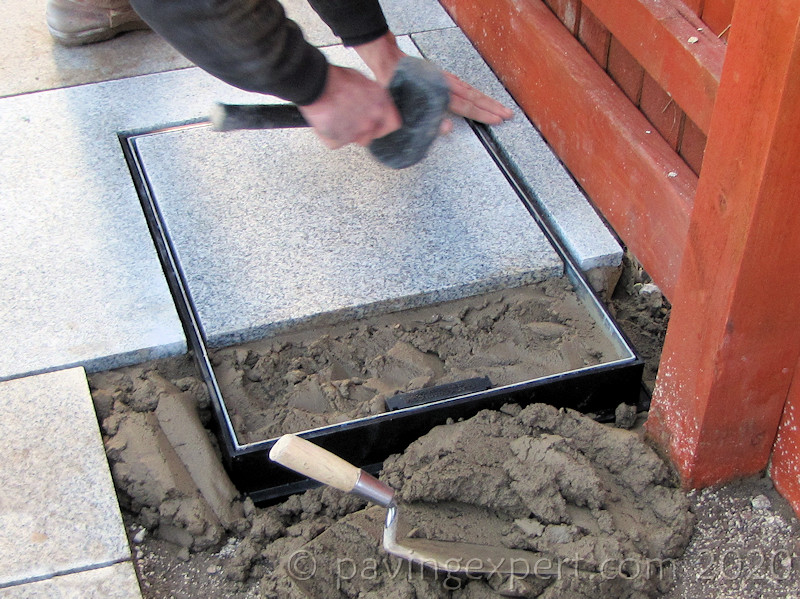
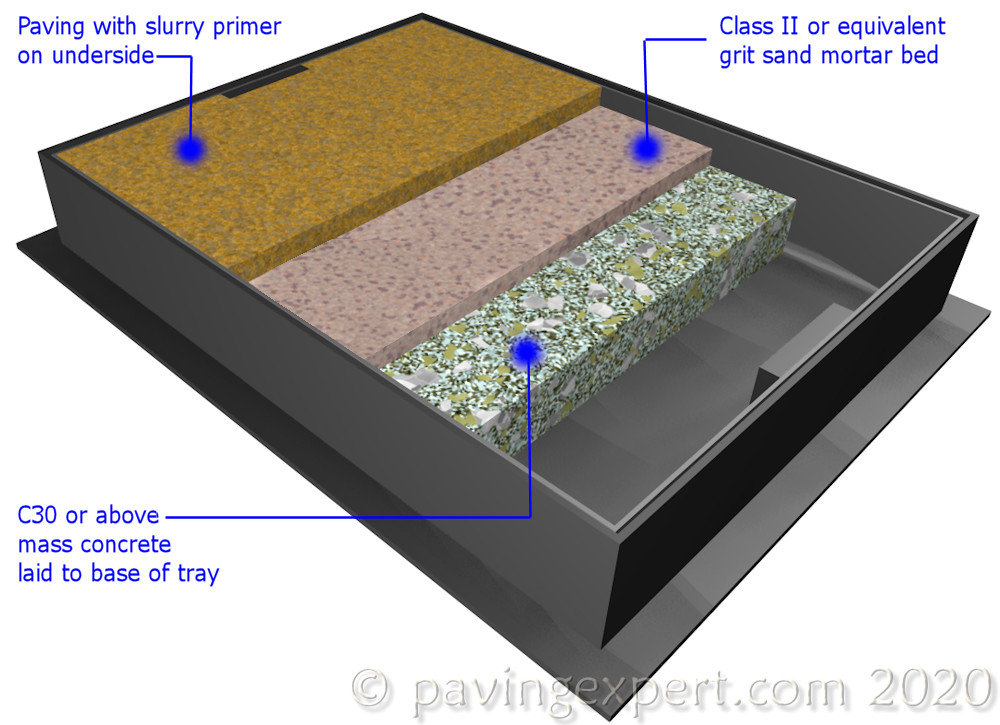
To ensure rigidity of the tray, a reasonably strong mortar is preferred, something like a Class II mortar, so 3:1 or 4:1, and usually based on a gritty sharp sand rather than a softer building sand. To ensure firm adhesion, a bond bridge slurry primer is used on the bed face (underside) of the paving elements, and they are tapped down to level.
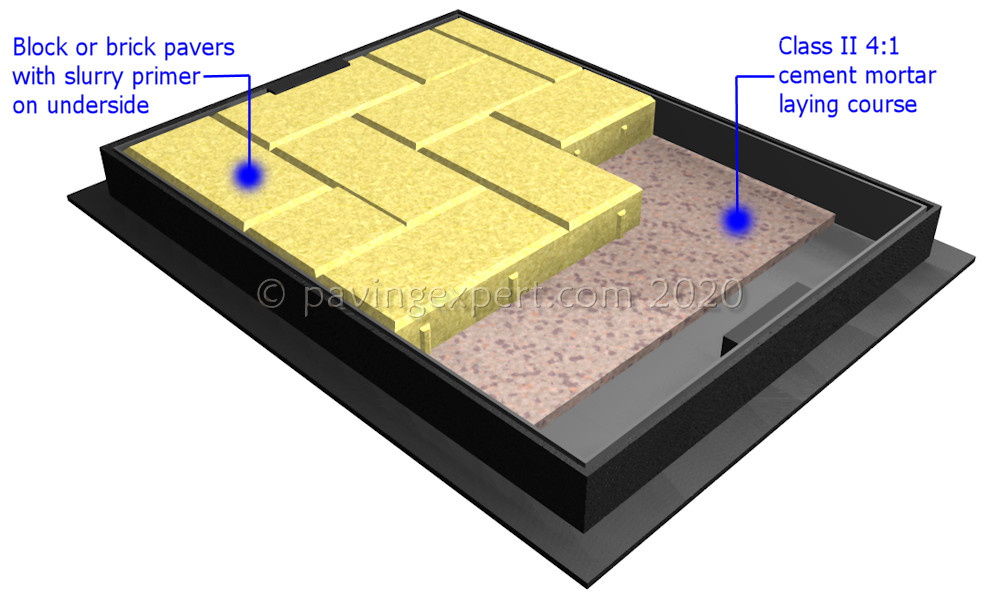
On deeper trays, attempting to lay a 20mm piece of flagstone or porcelain onto, say, 60mm or 80mm of wet mortar can be awkward, and in such cases a partial infill of a concrete is sometimes used to reduce the depth of the mortar bed to something more manageable. It’s best that any such concrete and the mortar bed act as one layer, with no day joint between the two, and therefore the stiff (25mm slump or less) concrete should be placed and compacted immediately before the mortar bed is placed, so that it cures and hardens as one.
Permeable infill:
By definition, the paving, surfacing or infill of a flexible and/or permeable installation do not typically rely on a fixed mortar (although, for some permeable applications, a permeable bedding mortar could be used).
Most such installations rely on the use of a grit sand or a clean grit as the bedding layer. This is what would be used for block or brick paving, permeable paving and cellular pavers. Exactly as is done for standard paving installations, a layer of the loose bedding material is spread over the base of the prepared tray, levelled off, and the paving installed, trimming as necessary, and then jointing on completion.
Bound permeable materials, such as resin bound paving and some permeable macadams, will often be laid directly into the tray, filling it completely. However, some of the more expensive resin bound options will attempt to reduce the quantity of costly material required by partially filling the tray with, say, gravel or a permeable bedding mortar before laying the standard 20-25mm covering of the decorative surfacing.
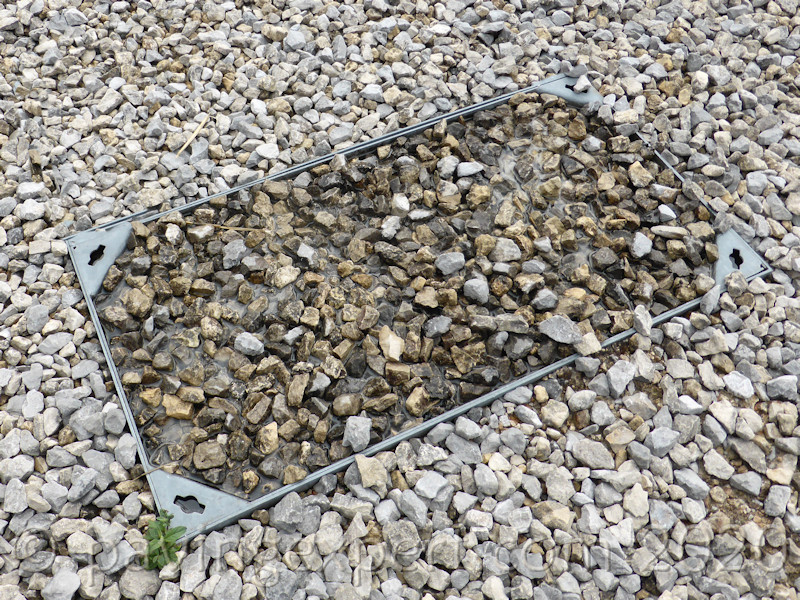
Trays to be infilled with loose materials, such as gravel, shingle, decorative cobbles and pebbles, or similar, and those to be infilled with loose organic matter such as bark, soil or grass, are prepared in the same way as would be done outside the tray. Loose material is simply poured into the prepared tray, spread and levelled until full. Turf can be laid onto a free-draining growing medium such as a sandy soil or a compost mixture.

Summary:
Success with Recess Tray Covers relies, at least in part, on having the correct preparation and the most appropriate bedding material. By ensuring rigid installations have the right mortar for bedding and jointing, and that permeable or flexible installations can properly drain themselves of surface water, there’s no reason why a Recess Tray Cover shouldn’t give many years, if not decades, of trouble-free service.