Introduction:
Nowadays, there's a lot of interest in permeable pavements and this interest is only going to grow as more clients become familiar with the general principles and as legislation gradually edges developers ever closer to compulsorily using permeable surfacing of some form on all new developments, whether they are residential housing estates, commercial retail parks or even industrial areas.
Formpave are one of the true innovators of permeable paving in Europe and beyond, having been involved in its development and promotion for over two decades, back to a time when many other manufacturers thought the idea had little appeal and were quite content to leave the field, and the expensive development, to Formpave .
So, who better than Formpave to illustrate just how a reasonably typical concrete block permeable pavement (CBPP*) is constructed?
* In North America, it's known as PICP - Permeable Interlocking Concrete Paviors
The Basics:
The manifold excellent reasons for using concrete block permeable paving are explained elsewhere on the site , but this page focuses on what has to be the most commonly asked question about concrete block permeable paving (CBPP): just how difficult is it to install?
The short answer is that it isn't. The techniques are incredibly similar, if not identical to those used for conventional block pavements. What are different are the materials. At every level of the pavement structure, the precise types of materials used are subtly distinct from those used on standard constructions.
So: the sub-base is chunky, angular and has no fines, which ensures there are plenty of gaps and voids for water storage and drainage; the bedding layer is much coarser than the usual sand to allow water to pass through unimpeded; the blocks themselves are specially designed to create wider-than-normal joints to swallow the water as soon as it hits the surface; and the jointing is, like the bedding, much, much coarser so all that water can simply drain straight through.
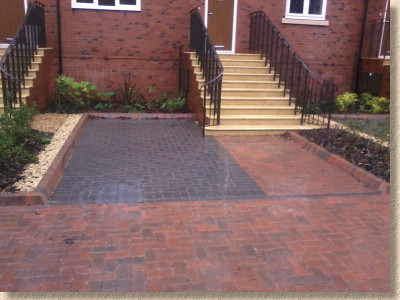
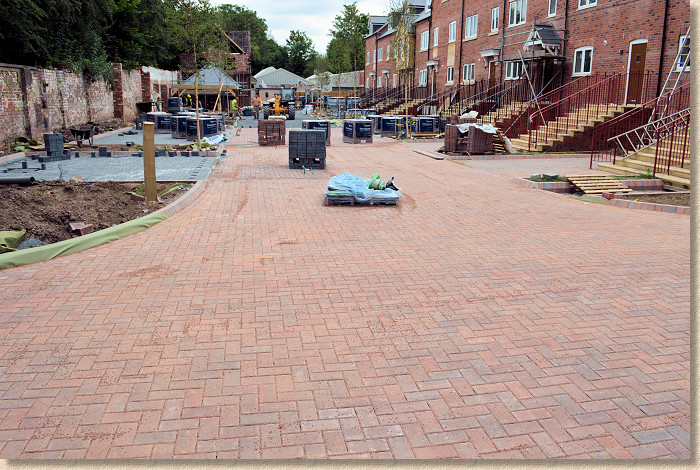
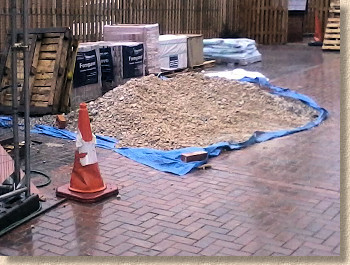
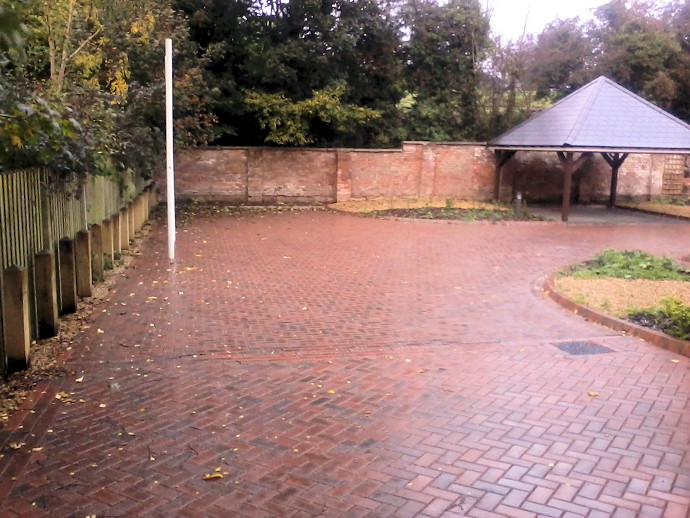
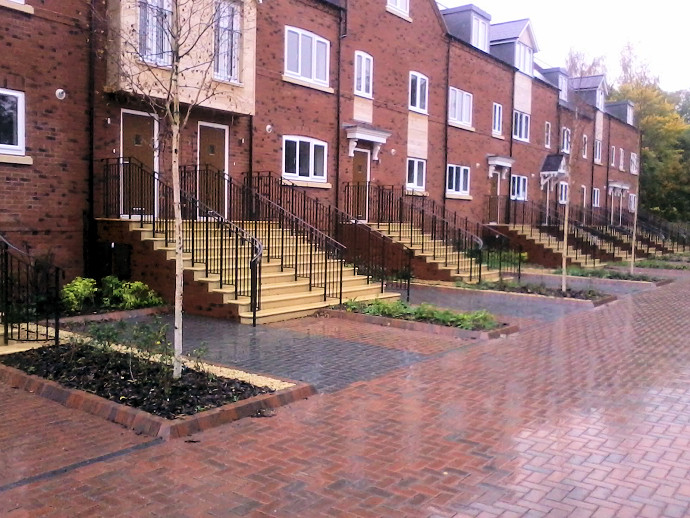
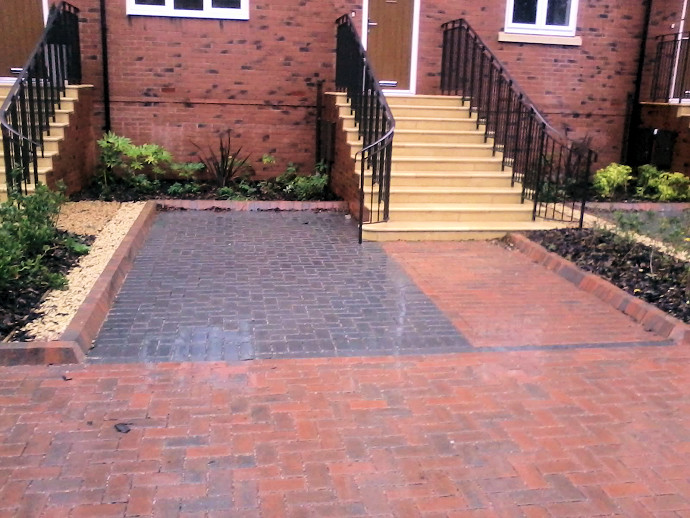
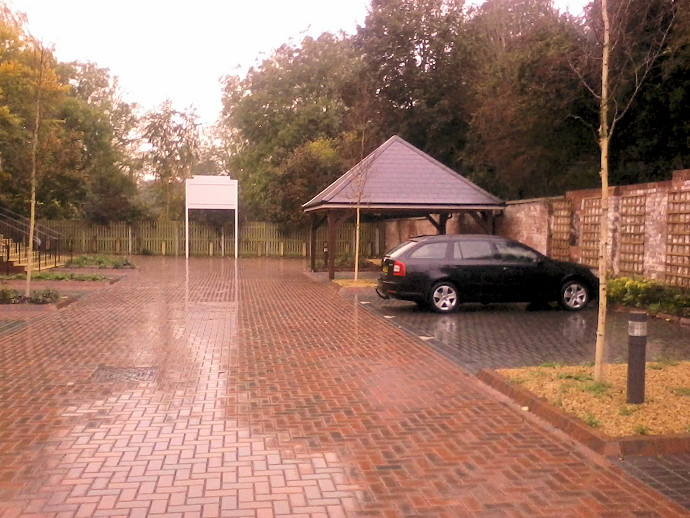
For the remainder of this page, we'll follow the installation of a concrete block permeable pavement and look at each layer in turn. To get a comprehensive overview, we'll feature two projects: a new home development and a supermarket car park. The housing development is in Belbroughton, Worcestershire which was constructed during the summer of 2014 and uses the excellent Formpave products, Aquaflow, Aquapave, Ecogranite Cobbles with Forest Edging , totalling around 1,200m² in total. The supermarket car park was undertaken for a large national brand at one of their sites in eastern England and makes extensive use of the 80mm Aquaflow blocks.
Regardless of the scale of the job, the principles remain the same, whether this was a 50m² private driveway or a 20,000m² retail car park. The reason for using these particular jobs is that they are big enough to provide plenty of opportunity to take relevant and useful photographs but without being so big that it becomes difficult to follow what is happening and where.
Excavation and preparation:
If the question about the difficulty rating for CBPP is the most commonly asked via this website, then 'depth of excavation' is a very close second. There is a lot of confusion regarding just how deep the dig should be, and most of this confusion arises because there is no set answer. The required depth is partly determined by how the pavement will be used ( tanked or infiltration system), and partly by the rate at which water can be removed (to the ground or elsewhere). Luckily for us, Formpave have a team of bright and dedicated engineers who can do all the hard sums for us and give us a specification to follow.
Incidentally, for a residential driveway, a sub-base depth of 250-300mm would typically be adequate for most sites on well-drained ground.
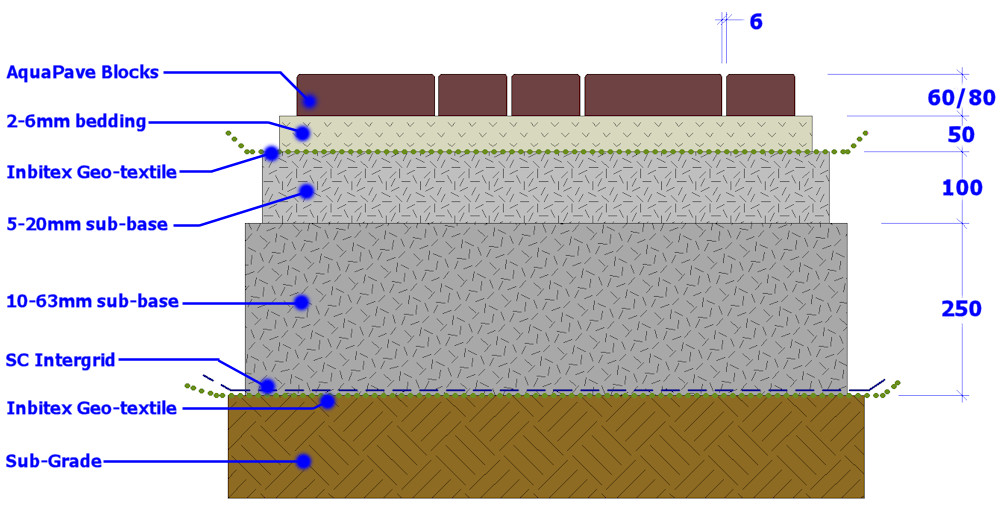
Taking into account the ground permeability (determined by on-site soil tests) it was calculated that, for the housing development site, the sub-base would be 350mm deep, so, overall the build-up would be as shown in the cross-section opposite.
With a sub-base of 350mm, a 50mm laying course and 80mm blocks, that gives a formation level of 480mm below finished pavement level.

Retaining Edges:
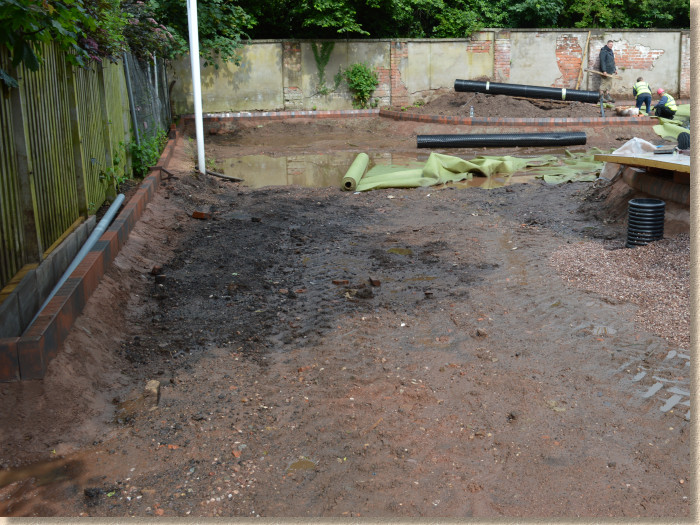
Once excavation is complete, the sub-grade is levelled out and compacted in preparation for the build-up.
As with conventional block pavements, the edges need to be held firmly in place to maintain the strength and integrity of the pavement once it's finished. Kerbs, edgings and any other retaining structures are typically installed before the close graded aggregate sub-base is placed. Existing walls are usually fine as retaining edges, but any new edgings/kerbs need to be securely fixed, so laying them on concrete with adequate haunching is the most popular solution.
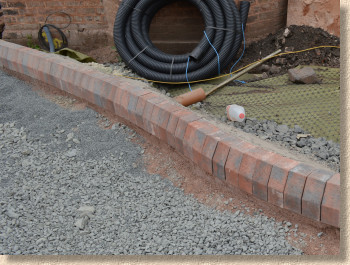
Often, the aesthetics of the project will influence the choice of retaining edges. This is exemplified by these projects where the supermarket parking areas were sub-divided using simple flat-top 200mm deep edging kerbs , while on the more stylish housing project, the colour-matched half-battered Kerb Blocks were used when upstand was required, with the attractive Forest Edging Kerbs used at crossovers and other flat boundaries.
Whatever is used, note how they are laid on and haunched with concrete to ensure they provide a fixed and robust restraint at any free edges. Not, also, how the front, pavement facing edge of the kerbs are trimmed of any excess concrete, so they present a flat, non-projecting face against which the pavement can be laid.
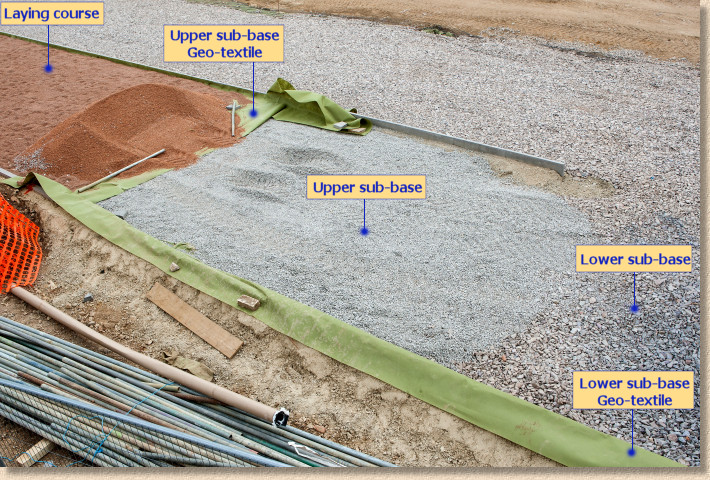
Geo-Synthetics:
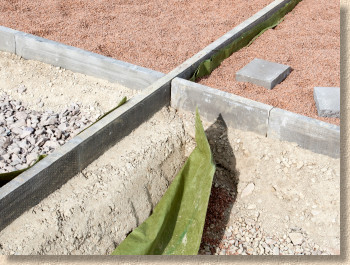
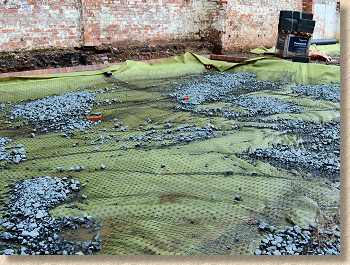
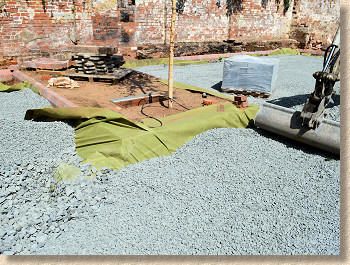
A permeable, non-woven geo-textile is laid over the prepared sub-grade. This acts as a barrier by preventing the sub-base aggregate being lost into the sub-grade beneath. On both projects featured here, the geo-textile is the green sheet at the base of the build-up. Note, too, how it is usually brought up the sides of the build-up, even where walls or kerbs are present
Over the top of the geo-textile, a separate geo-grid is laid to beef-up the lower levels. The geo-grid is much tougher than the geo-textile and has excellent tensile strength which helps minimise potential 'spread' by keeping the sub-base intact. In the images below, note how a blinding of the sub-base material has been used to weight down the textile until such time as the full sub-base can be placed. This helps prevent it being whipped up and out of position by the wind.
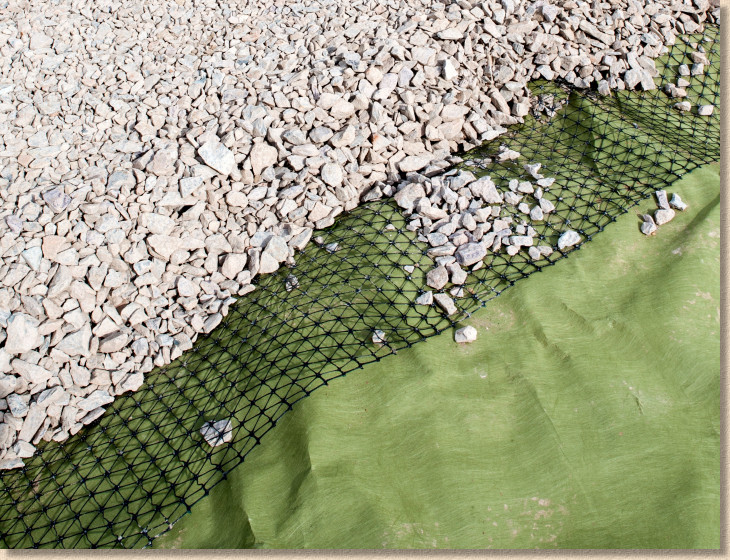
Both the geo-textile and the geo-grid are specified as part of the build-up. On larger areas, such as this, the individual rolls or sheets need to be overlapped to maintain integrity.
On most installations, a second geo-textile wil be positioned between the upper sub-base and the laying course. This is done to prevent trickle-down of the bedding into the open-textured sub-base layers which can result in uneven settlement of the uppermost layers.
The specific design for each site will stipulate when such a membrane is required.
Additional Inputs - Roof Water
Concrete Block Permeable Pavements have a fantastic capacity to deal with the surface water from an area larger than that they cover. On some projects, areas of impermeable paving (such as macadam or concrete) will be drained onto CBPP and so benefit from the savings accrued by not having to install traditional linear or pipe-and-gully drainage.
However, on many new developments, one of the most popular 'add-ins' for CBPP is for it to take in the roof drainage from adjacent properties.
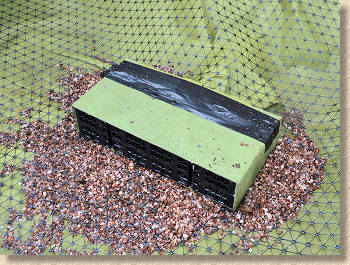
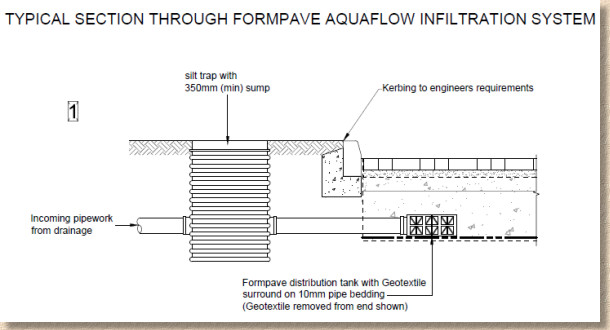
Above ground level, nothing is different. The gutters and downpipes are identical, but once below ground, instead of directing all that collected surface water into a local sewer to overwhelm the local Treatment Works, it is piped first to a simple silt-trap to remove particles which could, over time, clog the permeable sub-layers of the pavement, and from there into 'Distributor Boxes' which enable the silt-free water to enter and seep through the CBPP sub-base.
Sub-base:
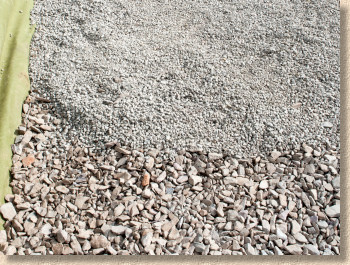
The close-graded aggregate used to create the sub-base is also a specified material. This is delivered to site direct from the quarry ? it is rarely, if ever, available from a Builders' Merchant or a DIY store. It is NOT Type 1, MoT, DTp1, Crusher Run, reclaimed concrete or anything else. It is a special type of crushed rock often known as Type 3 Close Graded Aggregate (CGA) and it has no fines (no dust or sandy material).
It is typically 10-60mm and/or 5-20mm in size, very angular, very hard, inert and, as already hinted at, there are NO fines. None. If it looks like Type 1, it's the wrong stuff and needs to be sent back!
On many projects, the sub-base will comprise two layers: a lower layer of the10-63mm stone overlain by an upper layer of the smaller 5-20mm stone. This build-up was used on both the supermarket project and the housing project although different depths were used to accommodate the different traffic levels.
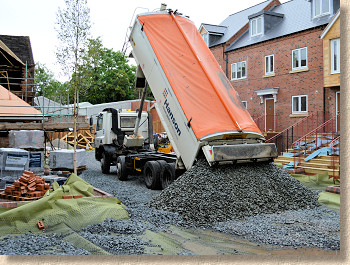
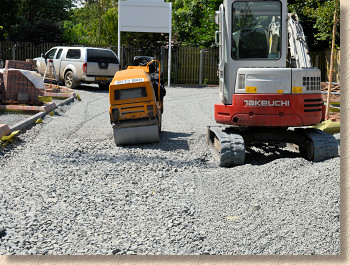
The 10-63mm CGA is spread over the geo-textile and geo-grid. This is typically done using an excavator because shovelling and raking such a chunky stone is not for the faint-hearted. A mini-digger, a backhoe excavator, or a 360° tracked machine can be used, depending on the scale of the site. On the housing project, a 5 Tonne mini-digger with a wide ditching bucket is used to spread and level the aggregate.
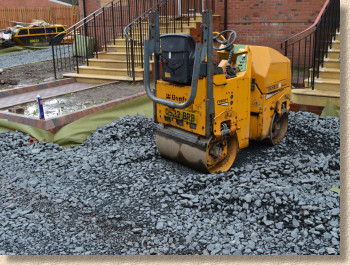
Once the CGA is spread, it needs to be compacted. Due to the aggregates' size, compaction using a 'typical' vibrating plate compactor is often impractical. There are beefy plate compactors that *are* capable of compacting 350mm of chunky, angular stone, but they are few and far between. On larger installations, such as these projects, most professional contractors will use a double drum vibrating roller, making numerous passes to consolidate the sub-base without crushing it.
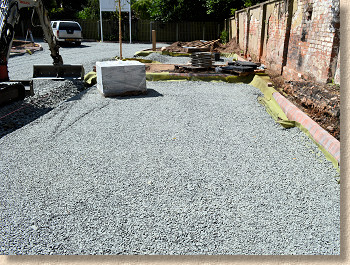
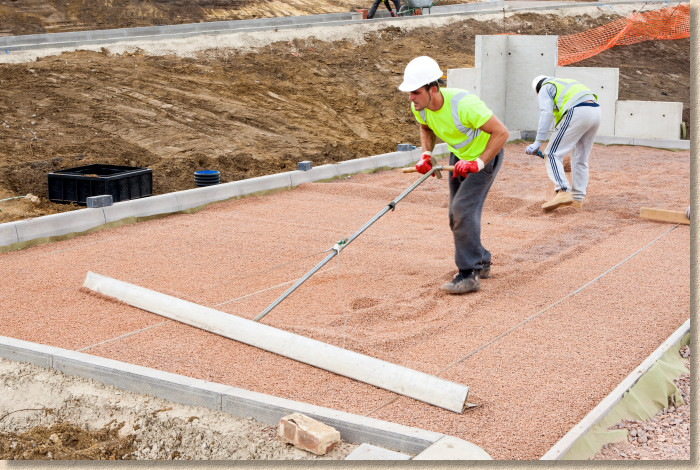
The upper layer of sub-base material can then be placed and, because it is smaller, it is generally easier to level out. While the roughing-out of this 5-20mm material may be done using a mini-digger, the fine-tuning, to get the sub-base to a reasonably even and accurate level, is often done by hand using a rake and/or lute.
Laying Course:
Bear in mind that the design specification may require a second geo-textile layer to be installed on top of the upper sub-base, before the laying course or bedding is placed. The photograph below shows the build up used at the supermarket project with both upper and lower sub-base geo-textiles visible.
When the sub-base and any additional geo-textile layer is in place, the laying course can be added. Again, this is a specially-selected angular aggregate, and again there are no fines which might clog the system and impede the free flow of water. Like the CGA, this bedding is not generally available ex-stock from Builders' Merchants or DIY Sheds but has to be ordered in.
Looking at the laying course or 'bedding' material closely, it is an angular, hard, inert crushed rock with particles in the size range 2-6mm. This size renders it tricky to accurately screed to level, but many contractors report that it is simply a matter of developing a feel for the material and within a few minutes, most operatives will have adapted their screeding techniques to suit the coarser, chunkier aggregate and will be creating perfectly acceptable screeded beds ready to take the blocks.
As with conventional paving, the screeding of the laying course is undertaken using screeded boards and all the other usual tools. There's no special kit required, even though the aggregate is considerably coarser. It's simply a matter of adapting existing techniques.
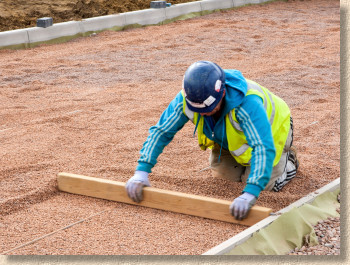
So: screeding of the laying course can be done using screed rails and timber boards, as is often the case for conventional block pavements. These techniques are explained more fully on a separate page .
However, for larger areas, many contractors find that professional screed tools are not only easier to use, they give superior results.
Laying the Blocks:
Keeping the prepared sub-base and laying course clean and free from detritus is massively important. Litter, dirt, leaves and other waste can create problems with these carefully constructed permeable layers, and so the best protection is to get them covered as soon as possible - preferably with the permeable blocks!
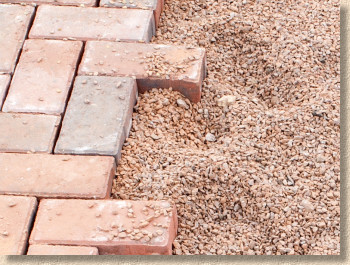
It's important to note that blocks for CBPP are subtly different from conventional blocks. While many of the normal blocks have spacer lugs on the side, these are typically sized to create joint widths of 2-3mm, just enough to allow the fine jointing sand to enter. Look now at the plan for a Formpave AquaPave block. Notice that, rather than having small spacer lugs protruding from the edge faces of the blocks, there are, instead, wide notches which will align and so create a much wider gap through which surface water can pass and so enter the permeable sub-layers.
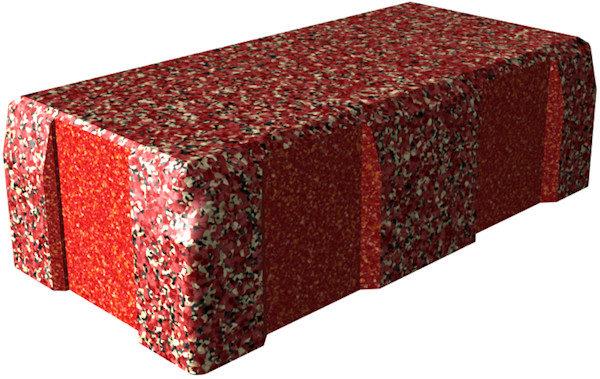
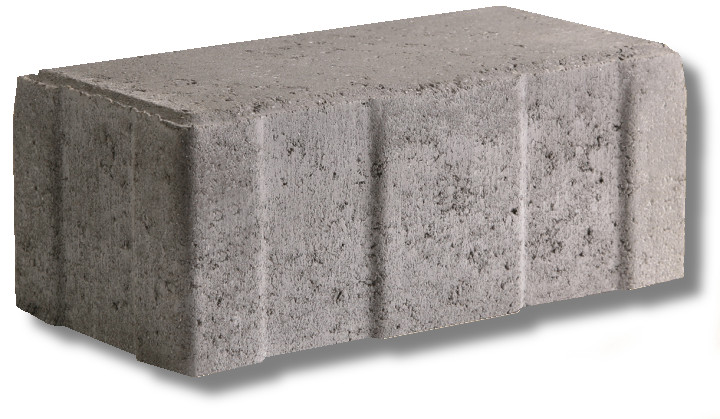
The precise format of these notches varies from product to product, but, in each case, the Formpave blocks have been engineered to ensure there is more than adequate void space between adjacent blocks to allow storm conditions water to escape, as well as allow adequate jointing to generate that all-important interlock which give the pavement its strength.
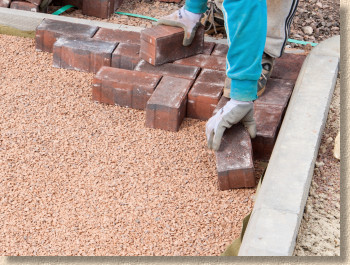
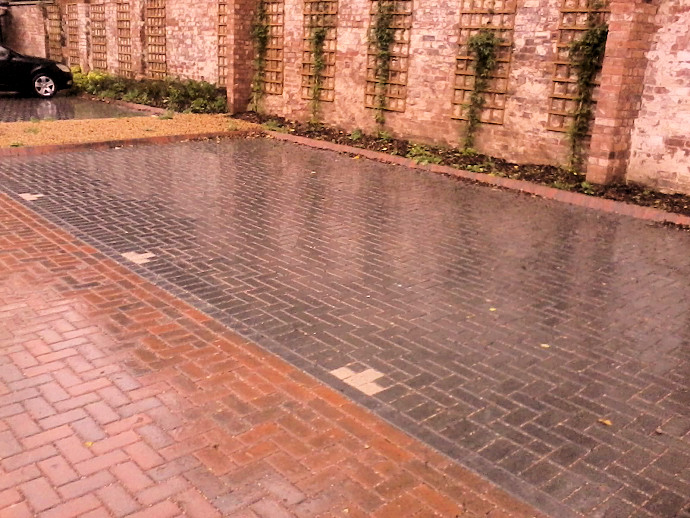
CBPP blocks are laid in exactly the same manner as conventional block paving. Laying generally starts against a straight baseline or a corner and the blocks are placed in courses, either straight lines for transverse layouts or, more popularly, in diagonals for herringbone patterns.
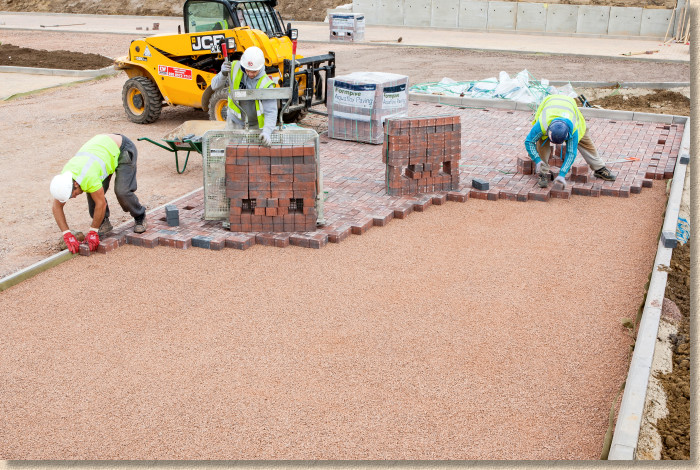
Although all CBPP pavements could be hand-laid, on larger jobs there is a growing trend to rely on machine aided laying, which is much faster and far easier on the hands, knees and backs of the laying operatives. Formpave helpfully produce AquaFlow blocks in machine-ready packs, with the blocks in each layer pre-arranged into a cluster format which will easily interlock with previously laid clusters.
Cutting-in:
Cutting-in is carried out exactly as it would be for conventional pavements, although Formpave do recommend using a dust-suppressed cut-off or bench saw to slice blocks rather than relying on the more traditional guillotine splitter.
Although CBPP does rely on having open joints to enable the ingress of surface water, this should not be regarded as an excuse to tolerate or accept loose or inaccurate cutting and filling any resulting gap with jointing material. To maintain the structural interlock of the pavement, accurate cutting is just as important as it would be for a conventional pavement. Ensure cut pieces create joints not greater than 5mm in width, as stipulated in the British Standard . Further, with permeable blocks, it's important to maintain the intentional voids between blocks, so ensure cut pieces are properly aligned with neighbouring blocks and do not impede or restrict the open joints.
Jointing:
After cutting is completed and the compliance checks are satisfactorily fulfilled, the pavement is ready to be jointed. As with all the other aggregates used for CBPP, the jointing grit is a specially selected material. In some applications, it will be identical to the laying course material, but there are some installations where a slightly different specification for the jointing will be required. It's important to check the design specification to ensure the correct material is used. Regardless of what you might read elsewhere, sand is NOT acceptable. It is too fine and will simply wash into the underlying sub-layers.
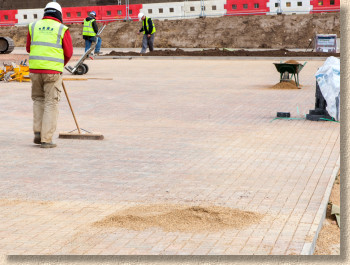
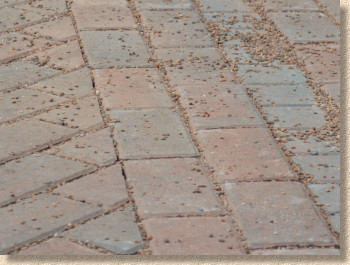
The jointing aggregate is scattered over the surface of the pavements and simply brushed around to fill the empty joints. Each joint should be filled right to the top, and then the surface of the pavement swept clean of any excess before bringing in the vibrating plate compactor to settle the blocks and the jointing.
Although there appears to be little settlement when compared to a conventional block pavement, both the blocks and the jointing will settle somewhat after a few passes of the plate. The blocks should level out to give an even-looking surface with no discernible humps or hollows. The jointing will most likely settle into the joints and may require topping-up before opening the pavement to traffic.
Ready to go:
And once the jointing is in place, the pavement is fully ready for use. Bear in mind that, to operate as a successful permeable pavement, the joints need to be kept clean as far as possible.
Advise clients and users that storage of loose materials on the surface, such as topsoil for planter beds, or sand for garden paving, will seriously detract from the pavement's ability to perform. It's best to keep such material off the pavement surface, but, of there is no alternative, then at the very least ensure that impermeable sheets or tarpaulins are used to cover the surface before any loose material is delivered. Don't allow loose material to spread or slump onto the pavement. Keep it tidy and use baulks if necessary to limit the inevitable spread.
All CBBP surfaces will benefit from reasonably regular maintenance, which essentially involves ensuring the joints are not clogged. Formpave can advise on a suitable maintenance regime for a permeable block pavement ? this usually involves jetting and/or mechanical brushing to remove any moss, vegetation, or detritus from the joints, and then topping up with new jointing material.
Showreel:
ForterraFormpave
Further Info:
Formpave are happy to provide further information on their extensive range of permeable paving solutions, including product details, samples, installation guidance and design specification to suit all types of projects.

Forterra Formpave
Tufthorn Avenue,
Coleford,
Gloucestershire
GL16 8PR

Tel: 01594 836999


