Introduction:
Construction of the step is one element of a larger project to re-pave the entire driveway of this sub-urban home, and so the materials used were chosen to suit the new drive and to provide an attractive but functional replacement for the flag-on-brick step that was here previously. That step served its purpose for many years but it would look ridiculously out of place with the new driveway paving.
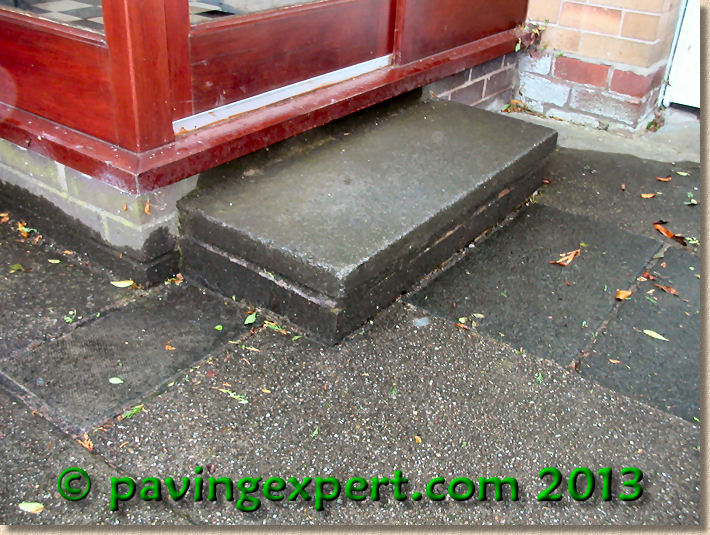
So, obviously, the first stage is to demolish the old step and clear the area ready for the new build.
Plan and Design
Once the old step and paving are cleared, the ground needs to be dug out or 'reduced' to a level that will allow for the kerb-riser units and their bed of roughly 75mm of concrete, as shown on the cross-section plan below.
Step gone; old flagstones gone, just need to dig out that nasty red building sand and get a sub-base in place.

Laying Risers
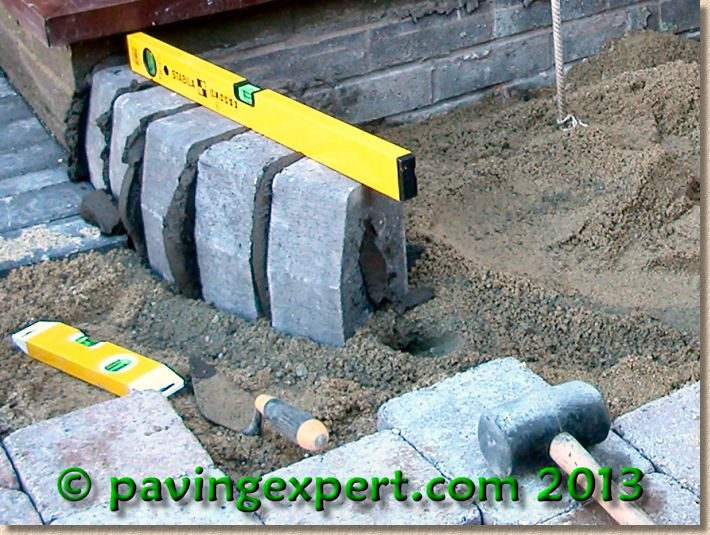
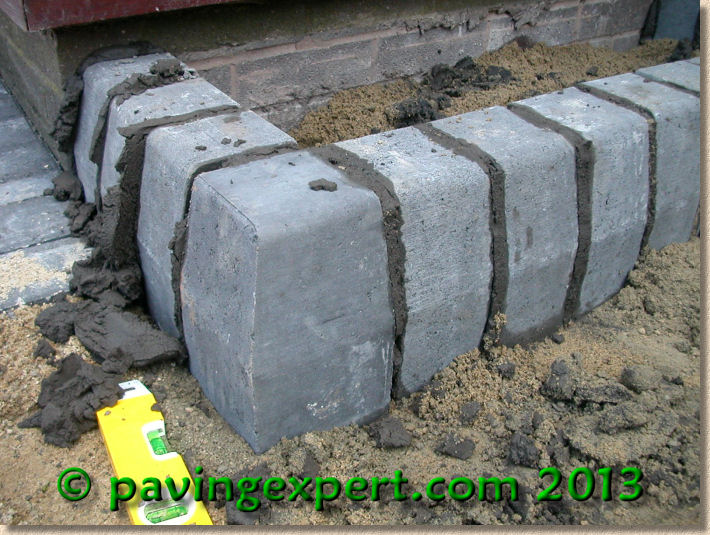
It's not easy to spot, but on the image below, the charcoal grey kerb risers are being bedded onto a 75mm deep 4:1 mix of exceptionally coarse sand with cement as a concrete base.
Note how the kerb risers are 'buttered' with the black mortar before being offered into position, and then 'squeezed-up' to extrude the mortar which will be given time to harden slightly and then be trimmed and polished.
The eagle-eyed amongst you will also notice that the kerb risers are being laid to an arc as Plan A was to build a semi-circular step , but Mrs Client changed her mind halfway through the build!
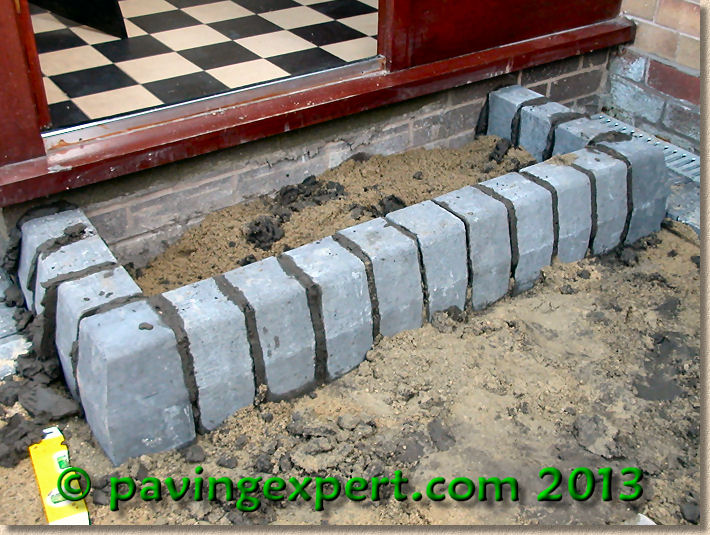
So, rip out the arc and start again laying as a rectangle!
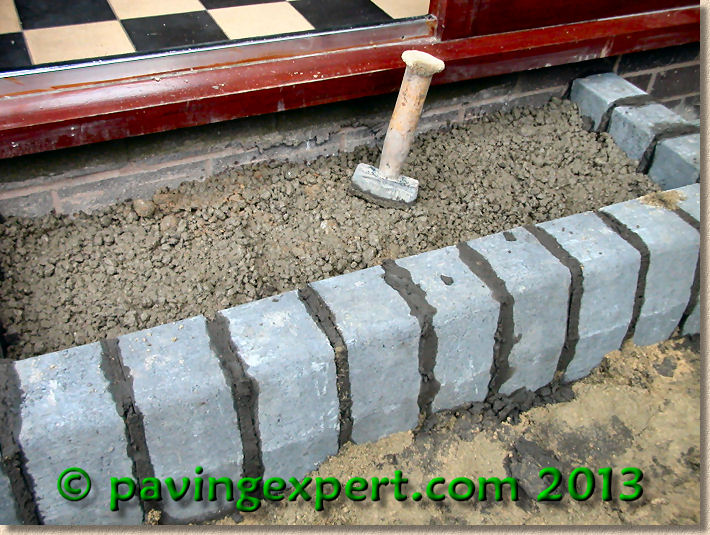
On the original step, the left-hand edge was set back from the corner of the porch by 100mm or so. This time, the kerb riser on the left-hand side is aligned to the brickwork - it just looks better.
Notice also how we've used full units throughout. It's much easier to cut the tread paving to suit rather than try to slice through one of these kerb risers.
When laying the kerb risers, they should be tipped forward ever so slightly, to ensure surface water will not hang on that upper face.
Use a long spirit level or straightedge timber to check the alignment of the kerbs. They should be in a perfectly straight line along the front face. Any variation in the width of the individual units, which is known to happen during manufacturing, can be moved to the back edge where it can be 'accommodated' by the tread paving later on in the build.
The other important point to note when building rectangular steps is the use of special corner units. These are usually a bit pricey (often twice the price of a standard unit), but they really do make all the difference to the finished step.
Laying the tread
With all the kerb risers in place, and still waiting for the joint mortar to harden sufficiently to warrant striking , the inside of the step can be backfilled using a lean-mix concrete , roughly 10:1 or 1:3:6 mix, which is then *carefully* compacted to avoid nudging the kerb risers out of alignment. On this job, the contractor used the head of a lump hammer to compact the lean-mix concrete backfill.
The tread paving could be left until the joint mortar has cured and the concrete backfill hardened, but time is of the essesnce, so the contractor pushes on and, rather than use a separate laying course based on a 6:1 mix of grit sand and cement, elects to bed the tread blocks onto more of the lean-mix concrete. This is fine, as long as the bed gives full support to the blocks and doesn't allow them to rock or rotate.
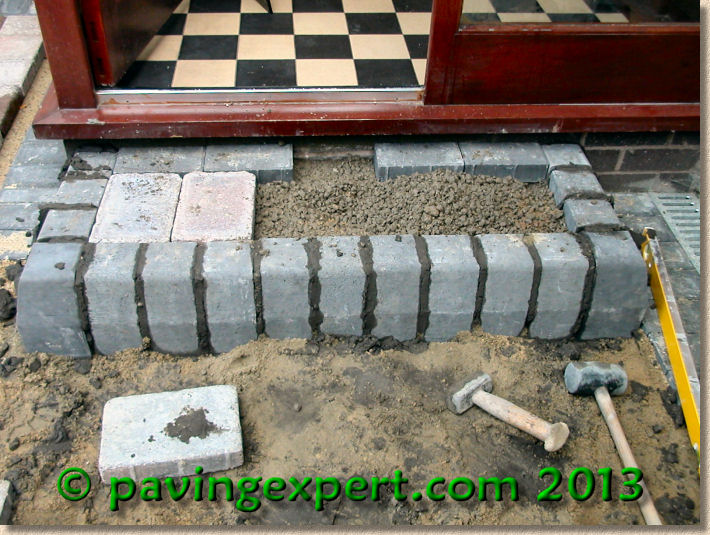
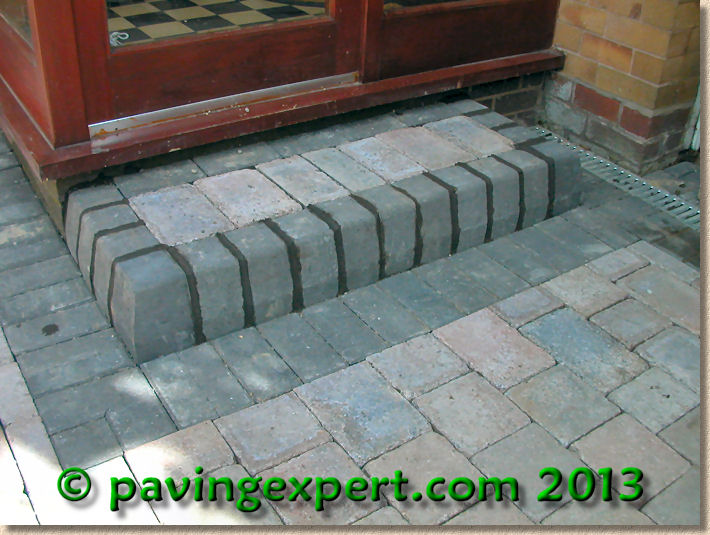
The tread paving starts at either end and works towards the centre. Notice the charcoal contrast course at the rear of the step. Two full blocks are used to each side and the centre block will be cut to fit ensuring the completed step looks balanced and symmetrical.
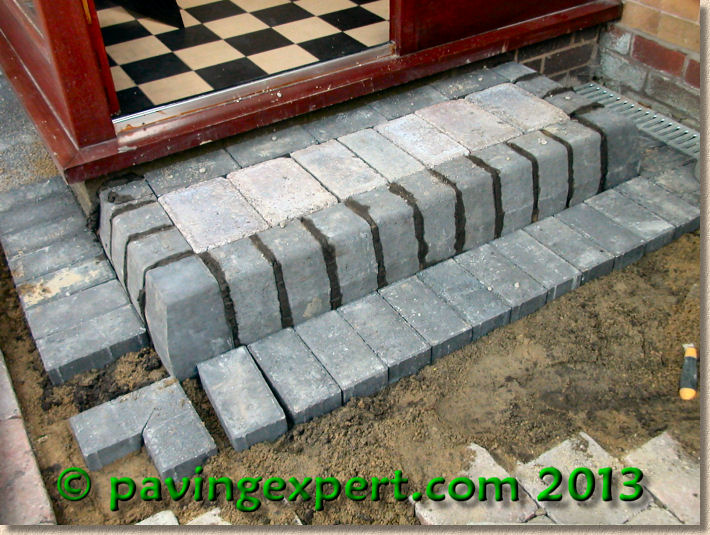
The tread paving is completed, working from both sides of the step and then cutting two pieces to fill the reamining gap in the centre, again going for symmetry.
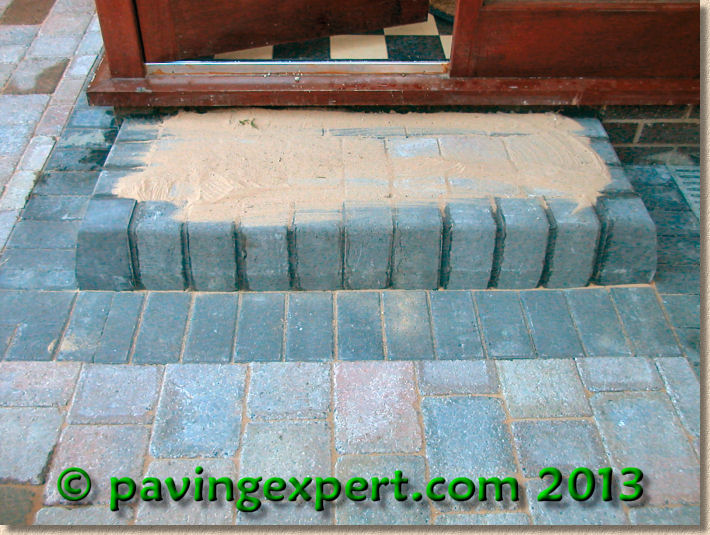
The soldier courses to the lower part of the step are also put into place at this point, bedding them on more of the lean-mix concrete so that they will help hold the kerb risers securely in place.
The contractor is using a mitred 90° corner within this edge course because it looks much better and shows off his work as being that of a true professional.
Striking Joints
Now the step is substantially complete, the mortar jointing needs to be finished off. This is referred to as 'striking'.
Any excess mortar squeezed out of the joint is scraped away using a small pointing trowel, taking care to avoid it staining the new paving.
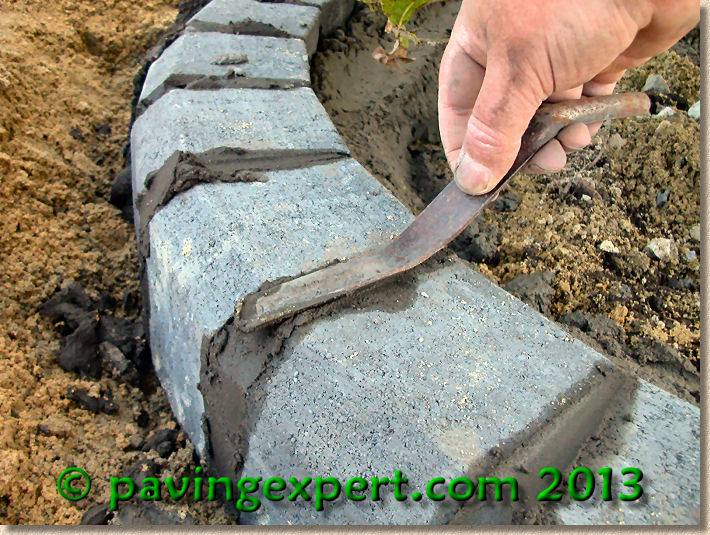
Once the excess has been removed, the remaining mortar is smoothed and polished using a jointing iron.
There are various shapes of iron available, but on these kerbs being laid to form a planter circlke on the same job, a half-round iron is used to create a neat and tidy finish to the joint.

On the left, a joint that has been trimmed but not struck, while on the right, a freshly struck joint can be seen, with the pointing iron resting on top of the kerb units.
Notice the iron is double ended. The two ends are of slightly different sizes (10mm and 15mm radius) to accommodate joints of differing widths.
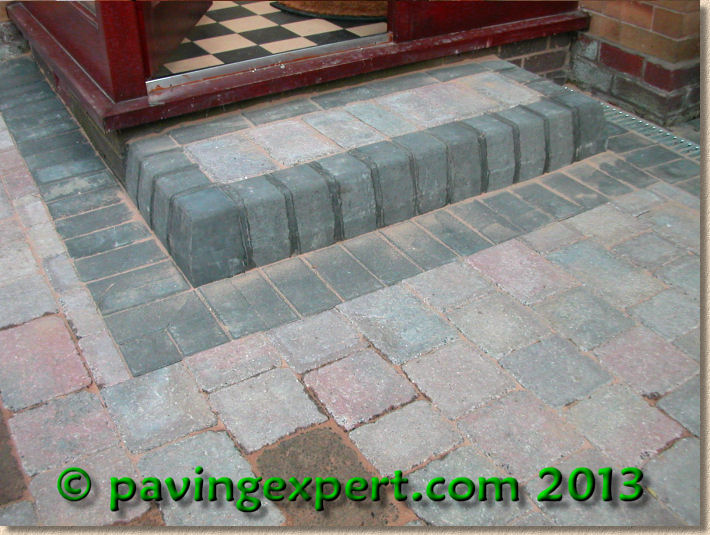
Finishing off
All the mortar joints have been struck, the soldier edge course to the lower edge of the step, which helps provide essential visual contrast asd well as 'locking-in' the kerb risers, is complete, with a lovely mitre detail on the left hand corner, and the paving has been pieced-in around the whole step.
It just needs a day or two now for the mortar and concrete to harden suffiuciently to allow the sand jointing to be done....
...so the next day, when the whole construction is more or less 'set', the kiln dried sand can be applied to the tread paving and brushed into the empty block joints.
Obviously, a plate compactor would not be a sensible tool to use here, so we'll rely on gravity to draw the sand down into the joints and then heck them again in a couple of weeks, topping-up with additional sand if necessary.
And there you have it - a simple but effective and attractive entrance step.
Total build time for a professional is around 2 hours, so a DIYer could easily achieve this in a single morning or afternoon.