Introduction:
Here's another hoary old chestnut that comes up with monotonous frequency from DIYers and homeowners looking to improve their existing mortar-jointed paving, whether it's flags or setts, natural stone or concrete...
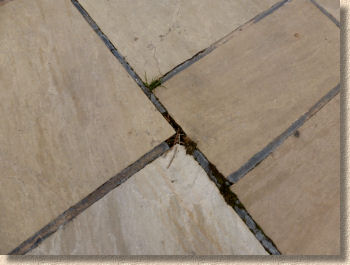
"The mortar pointing on my patio/driveway has cracked and weeds are growing in it. What's the easiest way to replace the failed mortar?"
The problem can be broken down into two parts:
- How to get rid of the old mortar
- How to replace it once we've got rid of it
Actually, part two might need to be further divided into two subsidiary parts:
- How to replace
- What to replace it with
And it makes more sense to reverse the order of those two subsidiary questions, because knowing what material will be used as a replacement will largely determine how it is installed.
The most popular form of this FAQ asks for the easiest method. It doesn't ask for the cheapest, or lowest tech or fastest, and the question tends not to hail from professional paving contractors, but from people with occasional or no familiarity with paving methods and materials.
Consequently, the answer provided here looks only at what is widely considered to be the simplest method, the replacement technique that involves minimal effort and has minimal chance of going wrong. Other techniques will be cheaper, but the corollary of saving on material cost usually means an increase in labour or a decrease in finished quality. At the time of writing, no replacement method is faster, but that may change.
So, on with the challenge, and Part 1
Removing old mortar
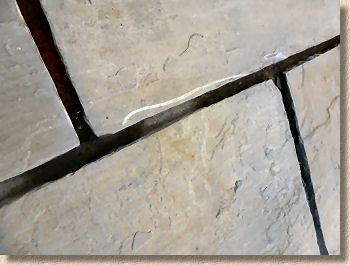
Most paving laid in the last 100 years or so was pointed using a cement-based mortar of some description. Occasionally we come across lime mortars , or even more exotic pozzolanic mortars, but they probably account for less than 1% of problem pavements. The overwhelming majority of failed pavement jointing is a cement based mortar. This might be a pathetically weak 20-to-1 mix that would struggle to survive a single winter, or it could be a hard-as-iron 2:1 mix that has cracked because the paving has shifted ever so slightly.
And that point raises a highly important consideration: if the paving units are loose or moving or rocking, then re-jointing is probably not going to rectify the problem . If a paving unit is loose, it should be re-bedded and not re-jointed until it is certain that the unit is no longer loose or moving.
Occasionally, re-jointing can stabilise loose small paving elements, such as setts, but it's a hit-and-miss affair. With larger element paving units, such as flagstones, re-jointing almost never rectifies the problem.
Don't waste time and money by re-jointing paving that is known to be loose or moving. The likelihood is that the movement will continue and any new jointing will crack and fail, requiring the whole procedure to be re-done. Fix the movement first and then you'll only need to re-joint once.
Cutting Out:
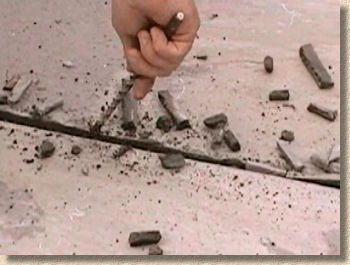
The old failed mortar needs to be cut out. In some cases, the mortar may be so degraded that it can be raked out using a hooked tool of some description. This might be something as crude as a big nail through a stick, or a purpose made weeding knife sold at garden centres and DIY sheds. The principle involves nothing more complex than raking along the joint, drawing out the crumbling mortar and opening the joint to accept the new mortar.
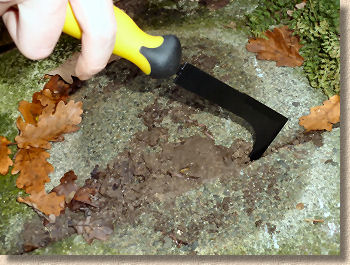

Where mortar is more resistant, it may be necessary for it to be chiselled out. The best tool for this job is a broad bolster chisel . Combined with a lump hammer, the bolster will cause most mortars to break up and make it easier for the detritus to be raked out.
However, there are some instances where, by fluke or by design, the mortar is actually quite tough. It may be occasional patches or larger areas that need upgrading, but the prospect of cutting out using a hammer and bolster is just too daunting, and so we need a mechanical answer.
That answer is a diamond-tipped blade, or, even better, a special mortar-raking blade. This is similar to a standard diamond blade that might be fitted to a cut-off saw or angle grinder, but will be noticeably wider, so that fewer passes are required to clear out the joint, and the abrasive grade is selected to suit cement mortars which, maybe surprisingly, can be more wearing on a blade than granite or sandstone.
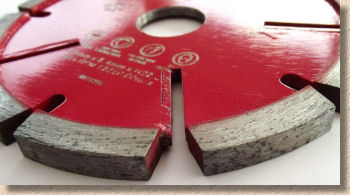
Although a diamond blade, either standard or mortar-raking, can be fitted to a cut-off saw, these tend to be unwieldy for the rather delicate task of cutting out between what may be expensive paving units, and so the usual tool of choice is an angle grinder.

Great care is needed when using an angle grinder or saw for this task. Obviously, all the usual dust protection measures should be followed, so a proper filter mask is essential, and it's wise to wear safety eyewear. The process tends to generate lots of dust so a boiler suit or similar, and a hat will help keep as much as possible off the skin and out of the hair (and lugholes!)
However, care is also needed in accurately guiding the blade as it chomps its way through the old mortar. A momentary lapse of concentration, running into an unexpected 'hard bit' within the mortar, a sudden gust of wind can all send the blade off-course and into the paving units, leaving score marks or even deeper cuts.
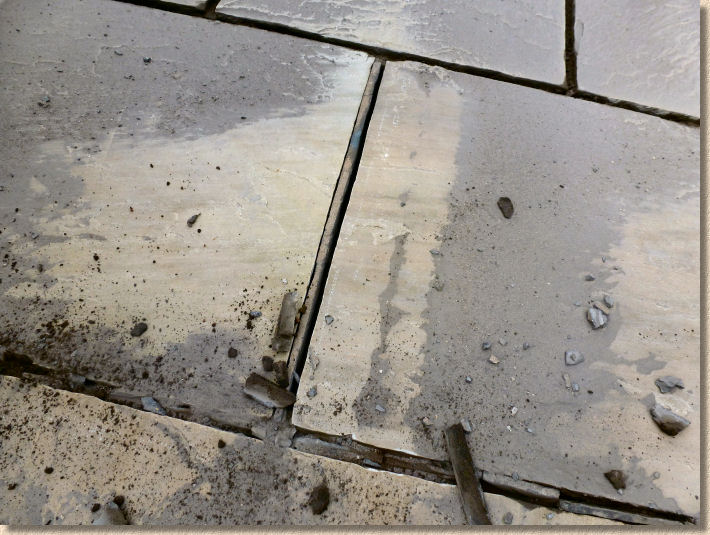
On parts of the project featured here, the joints were wider than average and so it was found best to cut a channel along the edge of each flagstone and then flick out the mortar fillet. This worked better when a narrow 'standard' blade was used rather than the wider mortar-raking blade.
The key to success is to take time and care. Being hunched over and crouched down holding a vibrating lump of machinery for any length of time becomes very tiring and it's easier than you'd imagine to stray. Take regular breaks; cut around one flag at a time, shifting your position as necessary and so avoid the build-up of cramp; or cut out, say, a couple of metres of sett joints and then return to cut-out the verticals.
Once the mortar has been loosened by the angle grinder (or bolster or whatrever was used) it needs to be raked out, removing it from the joint which is then open to accept the new mortar.
Again, a patio knife, or similar hooked implement could be used for this task, The important point is that the joint needs to be free of the old rubbish and sufficiently deep to provide a suitable new home for the replacement mortar. Most resin mortar manufacturers stipulate 30mm minimum depth, which is a good guide, but for patios, as long as there is NOT LESS than 20mm depth, that should be adequate.
Even the most patient of operatives with the steadiest of hands will go off-line occasionally and so it's almost inevitable that a few of the paving units will incur some damage, but care and attention will keep this to a minimum and any scores will be minor and easily overlooked.
Cleaning:
Regardless of how the old mortar has been removed, there is likely to be some undesirable residue or detritus remaining within the joint. This may be 'dirt' stuck to the edges of the paving units or dust from the cutting-out process. Whatever it is and whatever the source, it needs to be removed, as far as practical, if the replacement mortar is to have any chance of lasting.
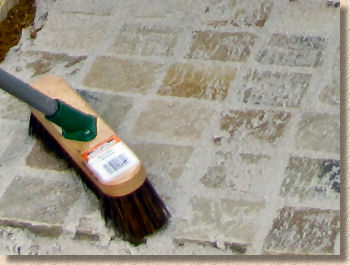
In the case of dust, a thorough sweeping can often remove most of the problem, but for areas where the mortar was more degraded or little more than 'dirt' or soil, it's a good idea to wash down the de-jointed paving using a pressure water to remove any undesirable material that may be clinging to the edges of the paving units.
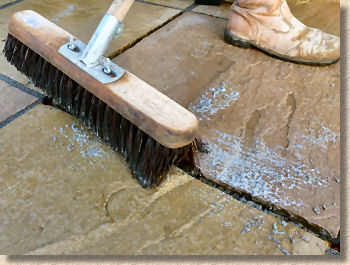
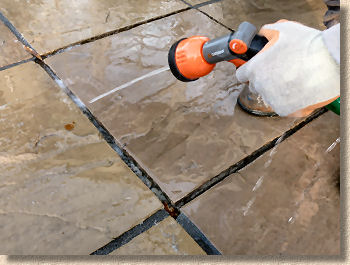
However, care is required where the paving has been laid on a flexible or 'un-bound' bed. Sand, whin dust, grit, or even weak mortar/concrete can be seriously disturbed by the ingress of water under high pressure. In fact, the risk to the integrity of the pavement is such that it's better to forsake the pressure water where unbound bedding is used, and instead rely on a light rinsing with a hose set to spray and a stiff brush to loosen any residual muck on the exposed edges.
The aim is to have *reasonably* clean edges to which the replacement mortar will be able to bond. There is no need for the edges to be meticulously clean – it's practically impossible, anyway – just for them to be free of obvious contamination that could potentially compromise the bond that needs to be formed between the replacement mortar and the paving units.
Re-Jointing:
As made clear (hopefully) earlier, the task is to re-joint in the easiest manner, and of all the hundreds of jointing materials on the market, there's nowt much easier than a resin or polymeric mortar. These products are covered in much greater details elsewhere on the website, but for the purposes of this page, the key factor is they are fast to use, they are clean and cannot stain the paving (assuming they are correctly used) and they rely on nothing more complicated than sweeping.
The choice of mortar, whether it's a two-part resin or a ready-to-use polymeric, whether it's a dry brush-in or a wet slurry is immaterial. No one product is suitable for every application and so the choice of material is left to the user. However, as a rough guide to good-better-best, a resin mortar is nearly always better than a polymeric , and a wet slurry nearly always gives better results than a dry brush-in.

What is critically important, however, is that the manufacturer's installation instructions are followed to the letter. If the manufacturer says to pre-wet the paving before applying the mortar, then bloody well pre-wet the paving. In almost every case where a good quality resin or polymeric mortar has failed it can be traced back to some eejit thinking they know better than the people who make the damned stuff!
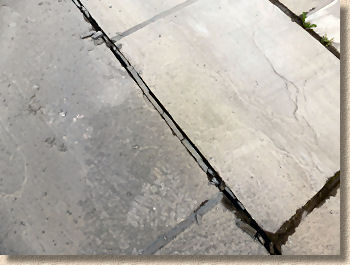
In the project shown on this page, a two-part wet slurry resin mortar has been used. Using alternative products will probably yield different results at different costs, but the principle remains: resin/polymeric mortars are fast, clean and simple, and if the installation instructions are followed, it's almost impossible to bugger them up.
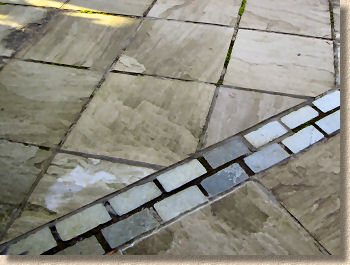
- Jointing using an epoxy resin mortar - sett paving case study
- Jointing using an epoxy resin mortar - patio flag paving case study
- Jointing using a wash-in polymeric mortar - case study
Video:
Finished Project:
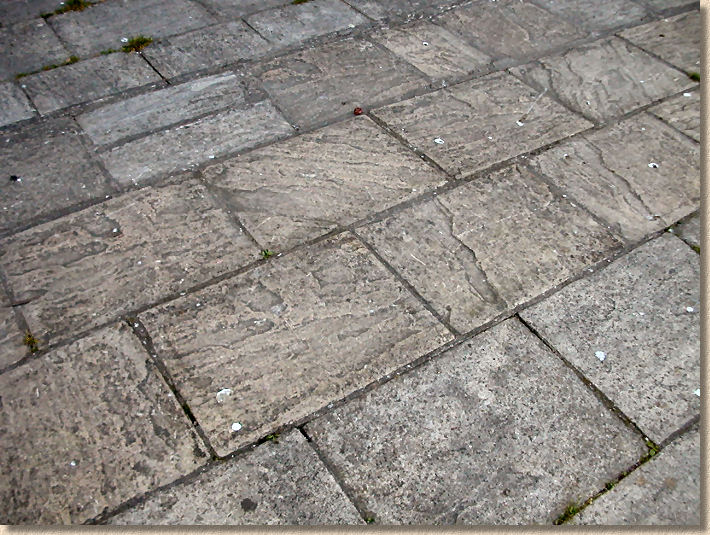
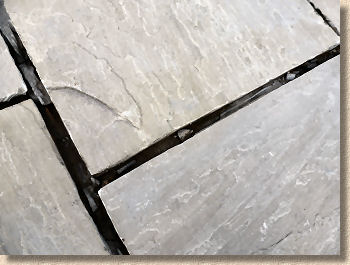
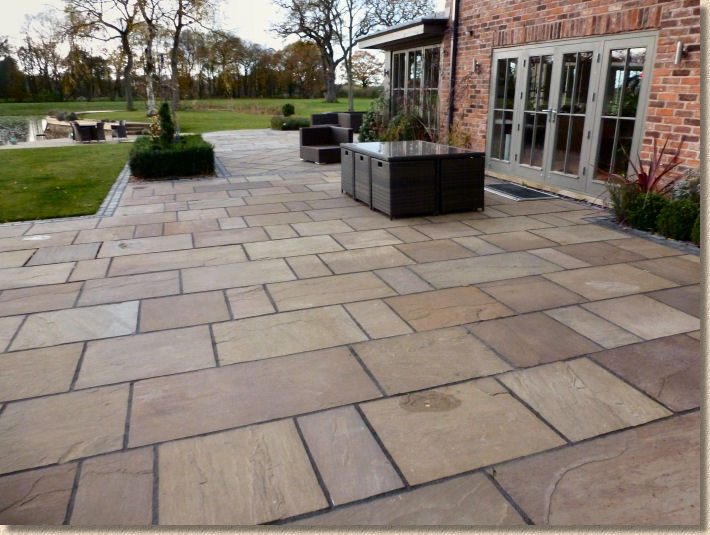
The proof of the pudding is, as they say, in the eating, and so here's a phoograph of the patio area once the re-jointing was completed....
Associated Pages
- Basic Pointing and Jointing
- Terms & definitions
- Polymeric Sands and Modified Mortars
- Other Jointing Materials
- Introduction To Jointing Stone Paving
- Resin Mortars
- - Polymerics
- - GftK Polymerics: A Product Study - VDW 840+
- - VDW 815+ mortar - Patio Jointing
- - Romex Polymeric Mortars: A Product Study
- - Jointex Easy Polymeric: A Product Study
- - Slurries
- - GftK Slurry Mortars: A Product Study - VDW 850
- Cement Mortars
- - Hand Pointing
- - Pointing Riven Flagstones Using Coloured Mortar: A Case Study
- - Wet Grouting
- - Dry Grouting
- - Slurry Grouting
- - Gun Grouting
- - Poured Grouting