
This installation was observed and documented independently by pavingexpert.com on November 25th 2009.
Many of our towns and cities now have their pedestrian and low-speed vehicular areas surfaced with modular paving of some form.
Small element flagstones were popular for a spell but now seem to be reserved for those 'just-out-of-town-centre' projects where reliable performance at a reasonable cost is the main criterion; block paving, in both clay and concrete formats , is losing favour due to problems that have arisen primarily due to poor installation standards and/or improper maintenance. After decades of being overlooked, natural stone is now the material of choice for many urban centres. This is largely attributed to significantly reduced material costs due to the influx of cheap imports from Asia and South America and the dramatically improved laying standards that have been promoted through the widespread adoption of BS 7533 , notably those parts covering setts and flagstone design and installation.
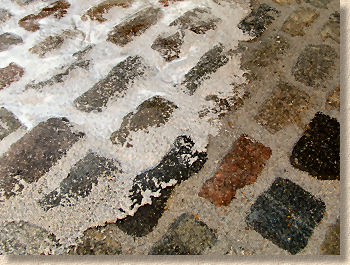
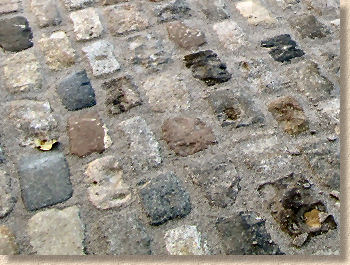
However, there are a multitude of villages, towns and cities that have what we might think of as 'legacy paving', areas of pavement that were laid decades or even centuries ago and are now regarded as part of the town's heritage and defining character. While still offering an attractive surface, the impact of modern traffic on pavements that may have been designed for nothing heavier than a horse-drawn cart is resulting in widespread failure, and when a pavement fails, it's often the jointing that fails first. The paving elements themselves are generally fine: it takes a lot to completely trash a granite cube or a basalt sett, but the jointing, which is likely to comprise long-degraded bitumen pitch patched up with a variety of what might be considered 'interesting' cement mortar mixes applied cack-handedly on a seemingly annual basis, has often failed completely and is now rendering the pavement on the cusp of being unusable.
The task ahead
So local highways departments are faced with a dilemma: do they create months of chaos to shoppers and traders alike by ripping up the lot and have it re-laid to modern standards at a not-insignificant cost, or do they spend a couple of days waving the wishful magic wand of cement mortar repairs over the problem and hope that it gets them through another financial year without anyone getting their windscreen smashed by a loose cube flicked up by an accelerating car? What if there was a system that allowed the jointing to be replaced by a reliable product and the pavement re-opened to traffic in a matter of days?

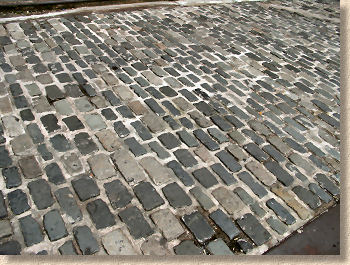
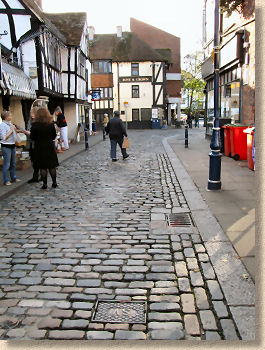
This was the dilemma facing the highway managers in the hystoricke towne of Hitchin in Hertfordshire , England. The Old Market Square is paved with time-worn granite and basalt setts, but the jointing is long past its best-before date, and the surrounding access roads, paved with gorgeous deep-sett bogens, is failing on a grand scale. In time-honoured tradition, ordeal by traffic was deemed to be the best method to determine the most appropriate solution.
Church Road, a side road linking the Market Square to the Parish Church was selected as the venue for the trials and various products were given a few square metres or so of neglected sett paving to re-joint, which would then be monitored by the highways managers before deciding on a suitable method to tackle the 750-ish m² of paving in the Market Square itself.
The eventual winner was deemed to be the GftK VDW 850 mortar supplied by NCC Streetscape , and so the contract to re-joint the entire Market Square was awarded with a start date of mid-November and all was to be completed in time to allow the Square to fulfil its annual duty as centre of all Christmas activities in the town. So: no pressure then!
Preparation
The technique involved dividing the Square into sections, which would then be refurbished in turn to minimise inconvenience to the townsfolk. A section was to be fenced-off, the old decrepit jointing removed by high-pressure water jet, and then replaced with the epoxy resin VDW 850 mortar in a Sand colour, before re-opening to the public (predominantly foot-traffic with the occasional idiot delivery driver to whom the usual rules of the road do not apply) after 3-4 days.
The bulk of the work was undertaken during the week that Cockermouth was inundated, the week which saw the heaviest recorded daily rainfall in England. The site was permanently wet, with near non-stop rain for days without end, but the beauty of the VDW 850 epoxy mortar is that wet weather does not hinder its application: no matter how wet and miserable it may be, work can continue when most traditional jointing methods would be rained off.
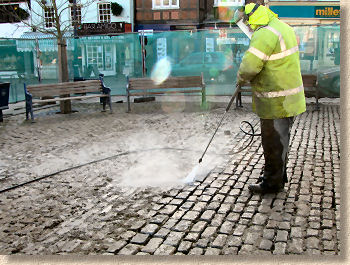
An industrial-grade high-pressure jetting unit fed from a tank of water mounted on the back of a flat-back van was used to sequentially blast out the degraded jointing, by playing the lance along each longitudinal joint before returning to clean the perpend joints.
VDW 850 epoxy mortar requires a minimum joint depth of around 30mm, so the contractor had to ensure that sufficient degraded jointing was removed to ensure the necessary minimum depth. In several places, so degraded was the old jointing that significantly more than 30mm was removed. Where larger areas of over-depth cleaning occurred, due to the very poor condition of the old jointing, the joints were partially re-filled using a rapid-set cement mortar.
The re-jointing is very quick, and it is the actual joint cleaning that takes most time, so the operatives were spending around three days preparing an area that would then be jointed in less than a day.
Preparing the VDW 850
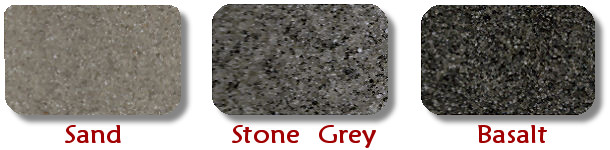
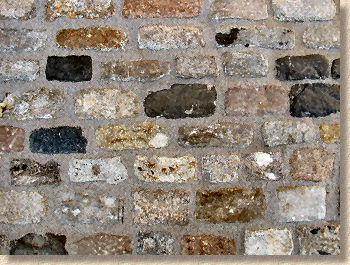
The epoxy mortar comes in sealed plastic pails containing 25Kg of pre-coated selected fine aggregate along with a 1-litre bottle of liquid hardener. Three colours are available: Sand, Stone Grey and basalt. For this project, the client had selected the Sand option which works well with a multi-coloured mix of setts as present on this project.
The mixing operative opens several pails at once, knowing that 5-8 pails will be used in the next 30 minutes or so, and then up-ends the bottles of hardener, partially pushing them into the pre-coated fine aggregate to ensure the liquid will drain more readily from the bottles and into the aggregate once they are opened.
All of the hardener is added to the pail to ensure the ideal ratio of components, and then mixed for a minimum of 3 minutes using a compulsory action paddle-blade agitator (aka "Spiral Mixing Paddle" and available ex-stock from NCC Streetscape).
The fine aggregate used in these mortars is graded to eliminate very fine particles to help maintain permeability. The sand grains are individually pre-coated with epoxy resin, which enables and ensures a faster dispersion in the mix with less shear forces required to achieve a homogeneous consistency, as the technical blurb almost says.

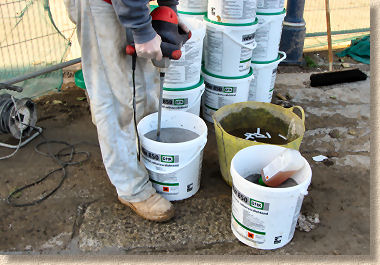
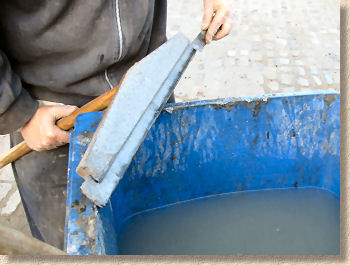
It's noticeable that the mortar develops a creamy texture as the mixing progresses, and the operative ensures that the agitator is worked into every part of the pail, especially the bottom corners. Repeatedly driving the rotating agitator blade to the bottom of the pail and then gradually drawing it upwards brings aggregate from the base and helps ensure a thorough mix. Operatives often report that, after mixing a dozen or so pails of the mortar, they can sense when the mix is complete and thorough by the way it moves within the bucket and by the presence of a light whitish froth on the surface.
Note the bucket of water next to the pail of mortar being mixed. This is used to rinse off the agitator paddle after mixing each batch, so that the mortar is not allowed to build-up on the paddle.
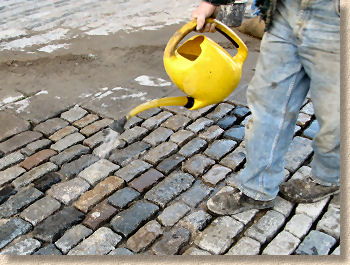
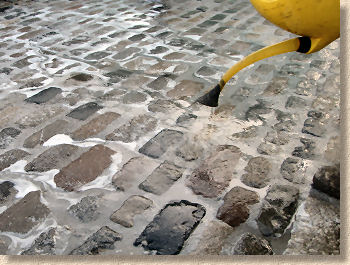
Pre-wetting
While one operative is mixing the mortar, another operative readies the area to be jointed by checking all joints are clear and of adequate depth before pre-wetting by spraying the surface with clean water from a hose or via a fine rose on a watering can. Pre-wetting (not always necessary if the surface is already wet such as during rain) ensures the VDW mortar will move freely over the surface and not stick to the heads of the setts . In theory, it's not possible to overdo the pre-wetting but most contractors like to avoid standing water within the joints, as this will be displaced to the surface once the self-compacting epoxy mortar is applied and may slow down the initial curing.
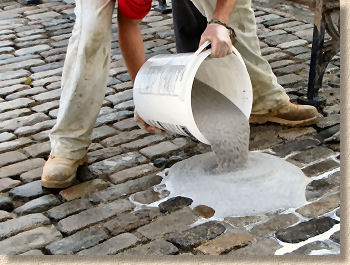
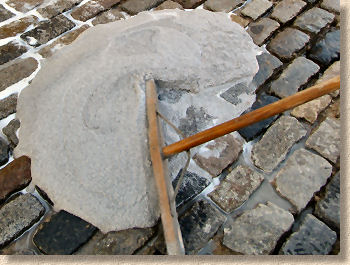
Spread the mortar
The bucket of mixed mortar is carried over to the working area and emptied in one movement at a point indicated by the application operative. A rubber-edged squeegee is then used to disperse the mixed epoxy mortar over the surface, persuading it into the joints in the process.
Coverage is obviously dependent on joint width, joint depth and the size of the setts, but on this particular project, with setts approximately 100-150mm wide, 150-250mm in length, 5-40mm wide joints @ 30-50mm depth, the contractor found that each 25kg pail of mixed mortar covered an area of roughly 2.6m².
The mortar moves surprisingly freely and finds its own level within the joints. More importantly, as a self-compacting mortar, there is no need for the operative to crouch down to press the mortar into the joints. All work is done from an erect position using a long-handled squeegee for maximum ergonomic benefit and minimal tiring of the operative.
The mortar starts to cure as soon as the hardener is added at the mixing stage, but in typical weather conditions, say 12-18°C, each mixed pail should have a working life of around 20-40 minutes. This may be reduced in warmer weather and extended on colder days.
This particular project, taking place at the end of November with ambient daytime temperatures of around 6-12°C, found that the initial hardening started to become noticeable after around 30 minutes. Before this initial hardening takes off, it is vitally important to check that there are no holes or missed joints, and to remove any surplus material remaining on the heads of the setts following rough cleaning with the squeegee.
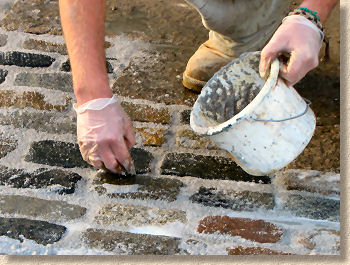
This task is often assigned to a third operative, who works with a small trowelful of freshly-mixed mortar to top-up empty joints prior to washing-off. The same operative will often also be responsible for pre-wetting the setts prior to jointing thereby allowing the application operative to focus on that task rather than have to repeatedly switch between wetting and jointing.
Rough Clean
Once a batch has been spread as far as it will go, the squeegee is used to remove as much as possible of the surplus material from the surface, working it towards unfilled joints. Complete cleaning is not necessary at this stage, but it is good practice, and economic sense, to get as much of the mortar into the joints where it is needed, and not left on the heads, where it is not.

The application operative will notice that the rubber strip on the squeegee becomes 'bunged-up' as mortar clings to the blade and starts to harden. If allowed to build-up, this would impair the effectiveness of the squeegee and adversely affect its performance, so it is recommended that the operative cleans the blade after every couple of pails, by rinsing it under clean water and using a palette knife of similar to scrape off any material adhering to the rubber strip. It comes of quite easily if caught so enough, but if left for more than hour or so, it may prove difficult, if not impossible, to clean off completely.
Circumstances will obviously vary from job to job and it is not unusual on this type of project to find that the squeegee operative can spread a full pail of mortar in half the time it takes to mix, and so some projects have two or even three operatives mixing the mortar to keep one squeegee operative fully occupied, and a further operative looking after pre-wetting and joint topping-up.

Final Cleaning
Washing-off takes place just before the mortar becomes too hard to shift. A hose or watering can with a fine rose is used to re-wet the surface and then a soft brush is used to gently and carefully sweep across the surface, removing any remaining mortar from the heads of the setts in the process. It's best to sweep at an angle of 30-45° to avoid brushing out too much material from the long and perpend joints. The water helps move the excess and prevents it from re-settling onto the surface too rapidly.
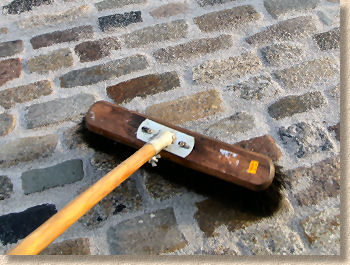
This is a task best suited to an operative with a keen eye as the amount of material removed at this stage will have a significant impact on the finished appearance of the sett pavement. Remove too much and the heads stand proud creating a surface that is bumpy and uneven for both foot and vehicular traffic; remove too little and the setts become lost in a sea of mortar. What is needed is the happy medium – well-filled joints that provided a reasonably smooth and even surface without detracting from the natural beauty of the stone setts.
If required by the client, the mortar can be tooled using standard pointing irons, but experience in continental Europe suggests that there is no real structural benefit obtained by the additional task, although some pernickety clients do seem to prefer the smoothed surface, even if no-one else will ever notice it!
Overnight, even in cold weather, the mortar will harden sufficiently to allow careful foot traffic the following day, and so any final tidying and titivating can be done. When ambient temperature is 20° or higher, careful foot traffic can be allowed onto the pavement in as little as 6-12 hours and vehicles in only 3 days.
The mortar darkens slightly as it cures, but there is a consistency of colour as the proportion of key ingredients is tightly controlled during manufacture, and the only variable is the amount of water that is used by the installation operatives during application and cleaning. As water is transparent, this has little or no effect on the actual colour of the mortar once cured.
For areas that cannot be completely jointed in a single shift, there is no problem in creating the equivalent of a 'Day Joint' in the mortar. Once a shift is complete, it's simply a matter of ensuring the surface is thoroughly cleaned and that any 'tailing' joints are raked relatively clean. then, on the next shift, simply start pouring and spreading the mortar as previously, allowing it to overlap the previous shift's jointing by a small degree. When brushed off and cured, the joint will be practically invisible.
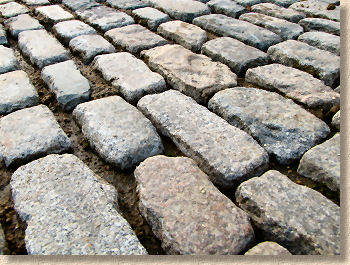
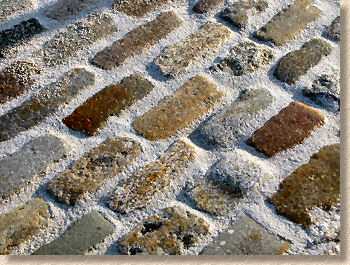
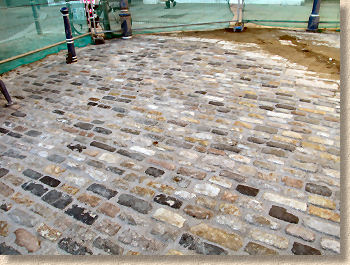
The re-jointed pavement can be opened to general foot traffic after 3 days or so, and lo-speed vehicles after 5 days. The Hitchin Market square project was fully re-opened to all traffic in plenty of time for the festive shenanigans, and the whole project, roughly 750m², had taken a little under four weeks, and all during one of the worst periods of wet weather the country has ever known!
Completed Project
And so, it came to pass, that the good burghers of Hitchin did receive their re-vamped Market Square in ample time for Christmastide, and it was good.
The work was finished within the allotted contract time and the feedback to date has been excellent. The contractor was impressed with the speed of working and particularly the ability to joint paving during wet weather without any loss of time. The client has a public space with no loose setts, and the people of Hitchin have a Market Square that shows off their town to its best. Everyone's a winner!
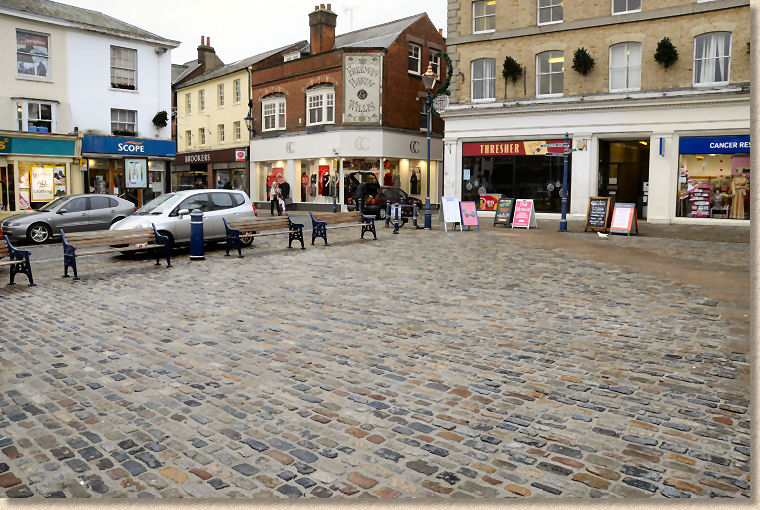
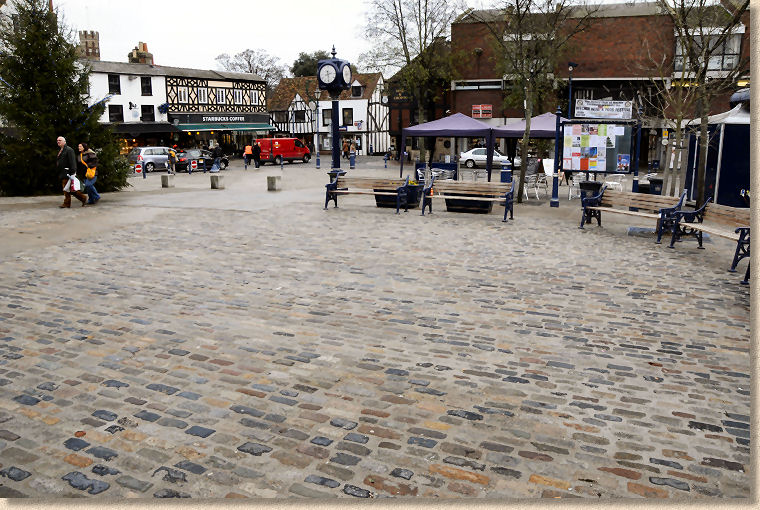
The re-jointed Market Square at Hitchin
Market Square looking East towards Church Street

Market Square with Christmas Tree

Market Square at Night
Follow up:
This market square project was re-visited eight years after the above installation to see how it had fared.
Further Information:
Contact NCC Streetscape:

Tel: +44 (0) 1257 266 696


![]()


Client Group:
Hertfordshire Highways
North Herts. District Council
Hitchin Town Council
Consulting Engineers:
Adams Consulting Engineers
Letchworth
Paving Contractor:
RPB Ltd
Letchworth
Videos:
Commercial Application - Hitchin Market
Residential Application - Merseyside Patio

Other Product Studies featuring VDW mortars: