Introduction:
They are used for a variety of reasons: some people feel they are more discreet than a formal, continuous path, and some believe they are cheaper to construct. There are even flags, both concrete and natural stone , manufactured specifically for use as stepping stones.
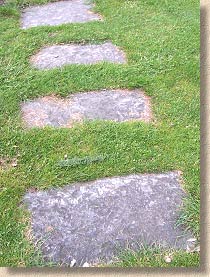
Traditionally, stepping stones would be medium-sized slabs of stone placed at roughly single-stride intervals within an area of uncertain trafickability. The design (if that's not too generous a term) would be to provide a reasonable surface that could enable pedestrians to cross an area of grass, earth or other unsuitable surfacing, keeping their shoes clean-ish and their footing more reliable, and all without going to the trouble of constructing a full path or pavement.
Stepping stones must represent one of the earliest forms of paving used by mankind. The evolution of this type of elementary surfacing is fairly obvious: Early human is en route back to the cave with tonight's steak dinner thrown over shoulder and is confronted by a muddy surface. Not wanting to slip in the mud and risk ruining the dinner, human employs massive brain to find solution, which is basically to drop medium-sized rocks into the mud at various intervals, and hop from one rock to next, keeping feet (and the dinner) clean and safe.
Types:
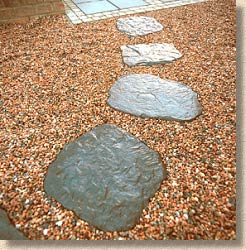
So-called "Tobishi" stones are modelled on the stepping stones used in traditional Japanese gardens. Those hewn from natural stone (invariably from that region of Japan more commonly known as "India") replicate the random shapes and textures found in genuine Tobishi stones, and tend to be 300-600mm in width and 400-750mm in length. For the concrete copies (often touted as "reconstructed" or "reconstituted" stone) there are those that are little more than mis-shapen riven-effect castings while some of the better examples have been cast using moulds prepared from genuine Japanese Tobishi stones.
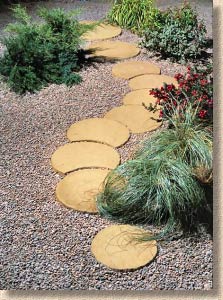
One particular type of crescent-shaped stepping stone, sometimes known a "Winders" are intended to be laid adjacent to similar units to create an irregular, winding effect with the paving. These, too, are available in natural stone or as concrete castings, and in varying degrees or realism, depending on how much you're willing to pay.
Full (ie: circular) complementary units are usually available as starter or end stones
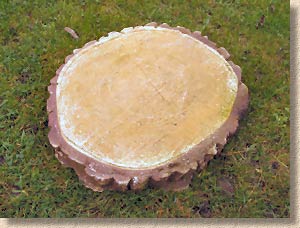
There are, unfortunately, a seemingly endless supply of twee and unconvincing units that are sold as stepping stones. These range from the "Log Slice" effect type of stone shown opposite, to truly awful items with saccharine messages or cheesy images embossed into them.
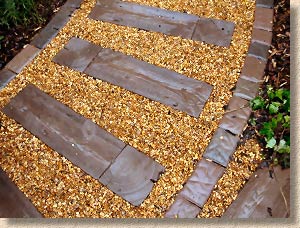
Other decorative paving units are often laid within a garden layout as part of the overall design, and while they may not, at first glance, register as stepping stones, when the structure is considered more fully, it becomes apparent that they are, indeed, simply more decorative versions of the stepping stone principle. This can be seen with the wet-cast imitation concrete sleepers shown opposite.
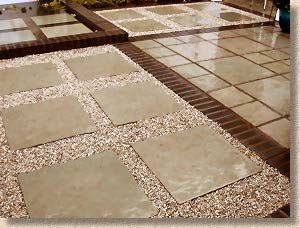
Even formal or geometric layouts can be viewed as "advanced" stepping stones. In the image opposite, square flagstones have been set at regular intervals in a geometric grid layout with a relatively narrow strip of gravel separating the units, but the essential structure is a simple stepping stone.
Wherever two or more paving units are laid with a gap greater than about 50mm between them, so that each unit is, effectively, isolated from its neighbours, then the structure can be thought of as a variation on the theme of stepping stones.
Construction:
It's generally accepted that stepping stones are used only be pedestrians - cars and other vehicles have difficulty in performing a convincing stepping motion - and so it might be considered that construction would follow the same principles outlined in the section dealing with the laying of patio flags . While that is largely true, there are two important factors that must be borne in mind when contemplating a stepping stone style layout:
- Fixing the units in place to prevent movement
- Determining the separation distance between units
Fixing in place:
The big problem for all types of stepping stones is how to stop them moving, how to prevent what is known as "lateral slippage", keeping them from sliding to one side or the other. Most other forms of modular paving have several units placed adjacently and supported at free edges by restraining structures such as edge courses , kerbs , walls , or by having the outermost units bonded to a mortar or concrete laying course . However, most stepping stone sare single units, so they cannot rely on support from any neighbours and must, in effect be self-restraining.
The simplest way to achieve this is to bed the paving unit(s) that will form the stepping stone(s) directly onto a decent mortar. A wet mortar (or concrete) will naturally form a bond with most paving units, and, once hardened, that bond is often adequate to retain the paving in place.
Where there is reason for concern regarding the "bondability", there are bonding agents (such as SBR ) that can be mixed into the mortar concrete and/or applied to the underside of the paving units as a bond bridge .
The method shown above works in two ways. Firstly, by having the laying course material firmly bonded to the flagstone, the total mass is increased significantly and the structure behaves as a homogenous whole, with increased inertia and stability. Secondly, and of much more variable impact, there is an element of the cementitious laying course material bonding via horizontal interlock to the substrate, whether that's bare earth ( sub-grade ) or a prepared sub-base .
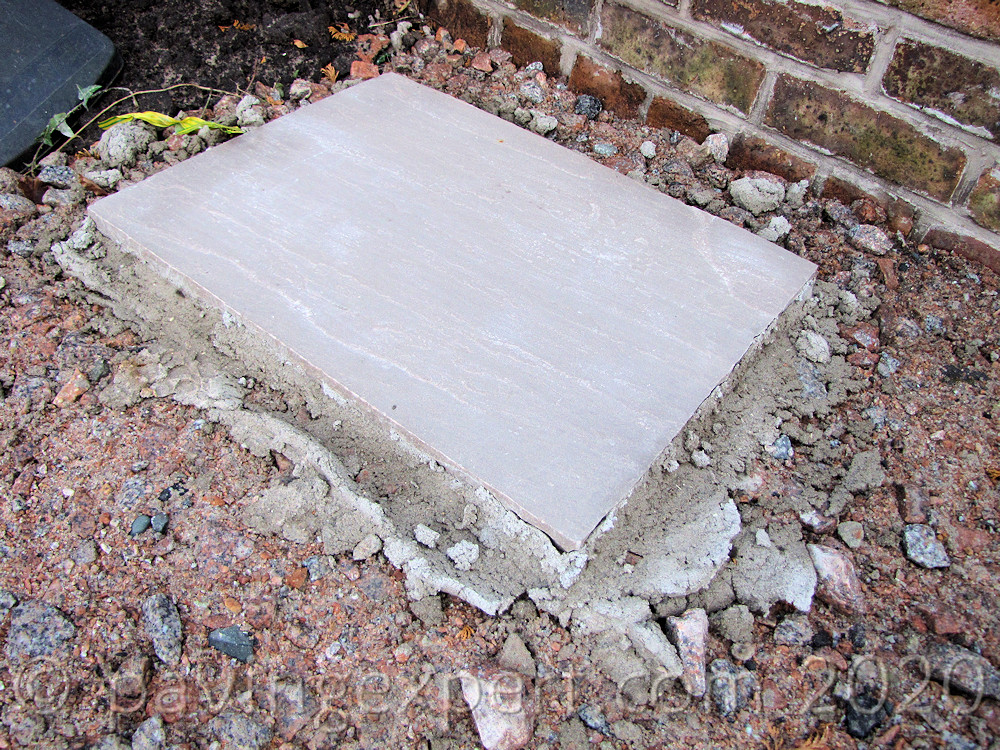
For added security, and usually cheaper than using chemical bond enhancing agents, there's a neat methodology that uses the laying course itself to hold the paving firmly in place.
By extending the laying course beyond the edges of the paving unit (known as "spread") and then bringing it up the sides, this has the effect of "locking" the unit in place, reinforcing the bonding element described above, and, because it uses more of the bedding, increasing the overall mass of each stepping stone. Note also that the depth of the laying course has been increased to 50-100mm. Mortar (as in fine aggregate and cement) is relatively weak and shouldn't be used in thicknesses greater than 50mm, so a wet concrete (coarse aggregate, fine aggregate and cement) is used in its place.
Where stepping stones are to be separated by gravel or some other decorative aggregate , the laying course material can be continuous beneath the paving, as shown below...
However, where grass is used as the separator, or when there is a need to permit drainage through the structure (as may be the case when using stepping stones to cover va larger area), the laying course will need to be discrete or pierced in some way. While it would be possible to insert drainage composites (waffle boards), a (cheaper) alternative strategy would be to place 30-50mm diameter plastic pipes at regular intervals through the bedding and into the sub-grade, fill them with gravel and cut them off 20mm or so below surface level so they can be buried by the decorative aggregate.

While all of the above cross-section drawings have shown flags being used as the actual stepping stone, the same principles hold if other modular paving materials are used. Hopefully, this is illustrated in the cross-section drawing below...
...smaller paving units will most likely require what is, in effect, a small area of that paving type to be laid to form the footfall. Block pavers , setts, cubes or cobbles should be laid onto a bed of concrete not less than 75mm thick, and jointed as they would be in a standard pavement. For those paving units that are normally laid as flexible paving (eg: block pavers), such a small area is hardly worth the effort of constructing a sub-base, edge course and a screeded laying course; laying directly onto a concrete bed will be fine in this sort of application.
Finally, in this consideration of construction techniques, there is the option to "cast in situ", which essentially involves pouring wet concrete into a pre-formed hole or mould in the ground and allowing it to cure.
For informal areas in relatively firm ground, simply digging a hole of the required size and shape may be adequate. The ground will act as "formwork" for the unset concrete, keeping it in place until it has hardened. For more decorative areas, a mould might be used to ensure a consistent size and shape of the poured stepping stone. A simple mould can be formed using 25-50mm deep timber, plastic edging, angled steel, or any other suitable items.
The hole/mould should be lined with a damp proof membrane. For small stepping stones, supermarket carrier bags could be used in place of the more usual Visqueen or PIFA membrane. The concrete will need to be fairly strong; a ST4 (20 Newton) mix would be the minimum strength worth considering; 30 Newton concrete (1:2:2 ~ cement/sand/10mm gravel) would be a better option, and it is worth considering adding polypropylene reinforcement fibres to the mix.
The concrete can be coloured or decorated if desired. It's also possible to "imprint" the fresh concrete with a pattern or text, or to use a secondary treatment such as acid staining or exposing the aggregate .
Spacing:
It's an unwritten rule that, no matter how the individual "stones" are placed, the separation will not suit everyone's gait. If 450mm diameter stones are placed at 600mm centres, this creates a 150m gap between consecutive "stones", which might suit a child or a shorter lady's pace, but will be stuttering and stumbling for a taller man. However, if the stones were placed at, say, 900mm centres (450mm gaps) then the man might be perfectly happy while others struggle to reach the next step.
When working with the more usual flagstone-based stepping stone, it's a good idea to "dry lay" the flags onto the surface and have the client test them out, allowing them to be moved closer or further apart as necessary until a comfortable spacing is determined, usually a compromise to all can cope with. For projects where multi-unit stepping stones (such as the block pavers) or cast-in-situ is being used, it's possible to replicate the 'dry run spacing' by cutting templates of the planned 'stones' from cardboard.
Gallery:
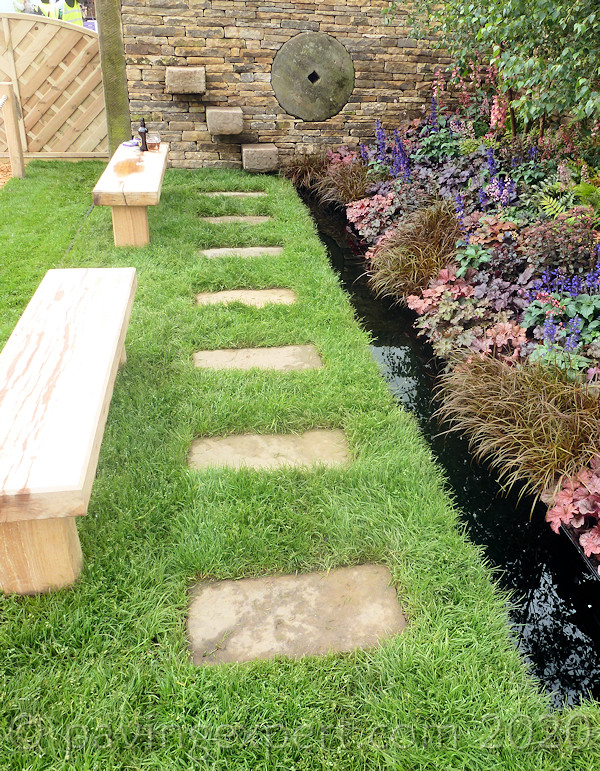
In this setting, the stepping stones have been positioned more for aesthetic effect - the spacing and separation - rather than for any functional use. The individual stones are, in fact, too widely separated to be much use as an actual walking surface but, as a feature of the garden itself, they seem natural and well-balanced.
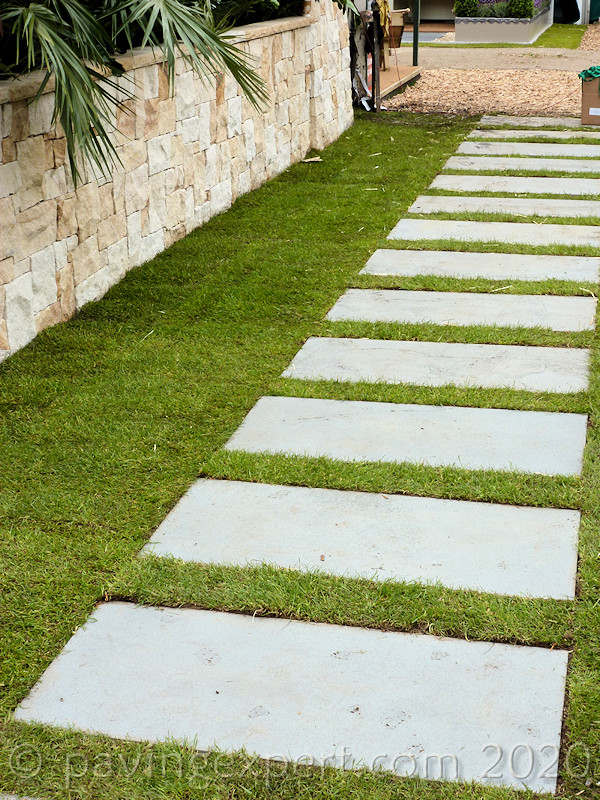
This setting uses much larger flags, real statement pieces (1200x600mm) and the spacing is just about ideal as a walking surface, but the stones still work aesthetically, providing a naturalistic pathway - not easy to do with identical repeated rectangles - that is both attractive and functional.