Introduction:
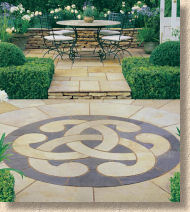
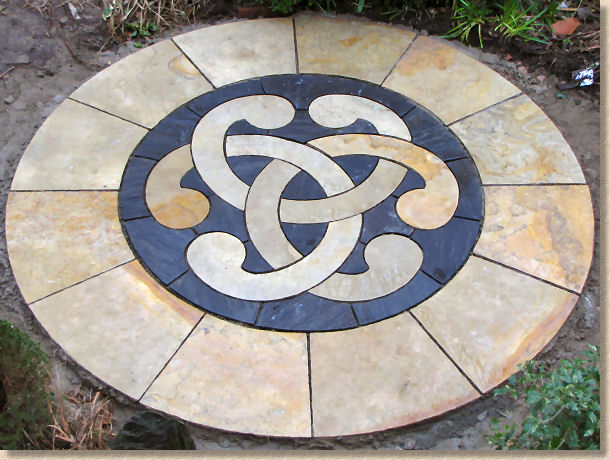
This is no ordinary circle: it is a decorative circular feature first introduced to Britain in 2009 by Stonemarket . This was chosen for the case study because its installation gives insight into the methods and materials required for a decorative feature as well as outlining the basic principles used when installing a simple 'centre stone and rings' circle. Further, the fact that all stone elements used to form the feature and surrounding circle are all calibrated, so the alternative methods used to lay regular thickness paving could be examined. Finally, and most importantly, the Celtic Knot Circle is being installed because it's the best looking circle feature in years and it's being laid in my own garden!
Sadly, the Celtic Knot Circle Feature is no longer available, but the methodoloogy shown here works well with any circle feature, regardless of actual styling or type of material.
The Paving:
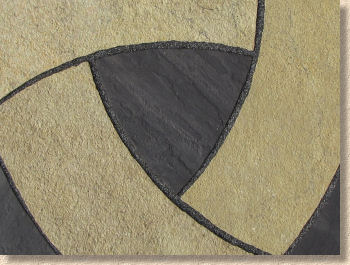
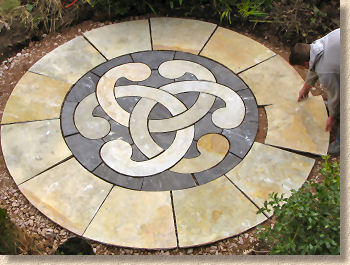
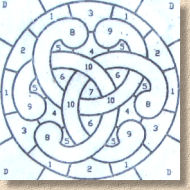
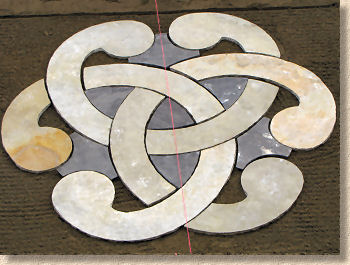
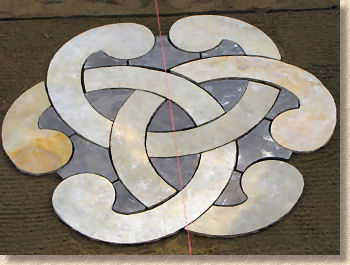
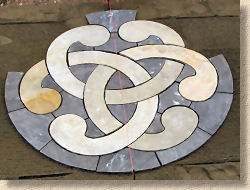
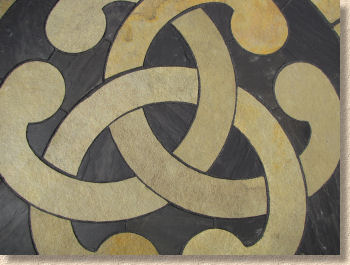
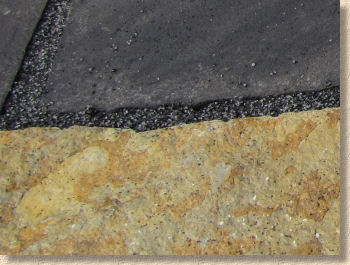
The Stonemarket Trustone Cotsdale Celtic Knot Circle , to give its full name, was unveiled at Glee in September 2008 and won the pavingexpert.com Best New Product award. It is cut from two different types of natural stone sourced in India. The dark 'background' stone is the Raveena quartzitic sandstone sold by Stonemarket as “Sable”, while the knot elements and the surrounding ring are hewn from dolomitic Kotah Yellow limestone, which sells under the name “Cotsdale”. There is an optional 'squaring-off' or corner infill kit, in either Sable or Cotsdale, which expands the 2840mm diameter of the basic 46-piece circle to a 70-piece square measuring 3120 x 3120mm. Due to limitations of space, the squaring-off kit was not used on this project.
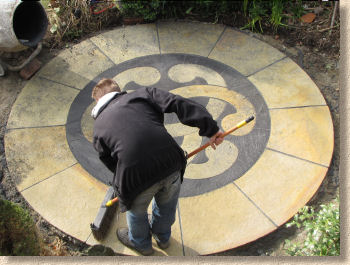
The installation work was undertaken by Ken and Craig of KGC Paving over a period of two days: A half day to clear the site and excavate to formation level; a day to lay the sub-base and the paving; and a final hour the following day to joint the paving using Rompox Drain supplied by McMonagle Stone .
Preparation:
The location for the circle was formerly laid to lawn and had been so for almost twenty years. Beneath the turf is good quality clayey topsoil that is very well-compacted, but capable of draining without any mud or puddles forming. The sub-soil is encountered at a depth of around 300mm and this is a heavy boulder clay which is all but impermeable; however, a 6 metre deep disused railway cutting at the rear of the plot allows the topsoil to drain freely and avoid what might otherwise be a wet and claggy plot of land.
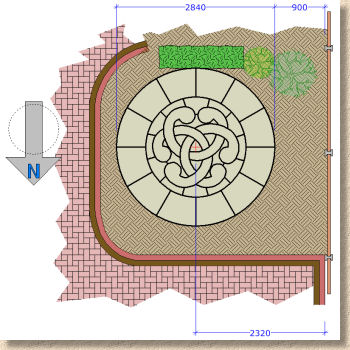
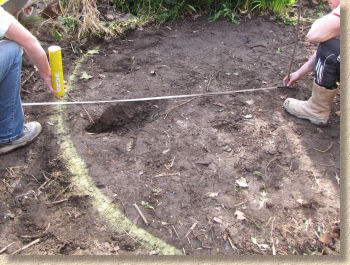
The area was cleared of surface vegetation and the approximate centre for the circle determined by measuring from the garden boundaries. Against the western fence, a bed depth of not less than 900mm was required, while at the southern end, a box hedge and garden bench limited the positioning. To the east and south, a garden path set the limit for positioning.
Knowing the circle feature has a declared diameter of 2840mm, the centre point would need to be at least (2840/2 + 900 = 2320mm) from the western fence and, allowing 100mm of working room (2840/2 + 100 = 1520mm) from the box hedge.
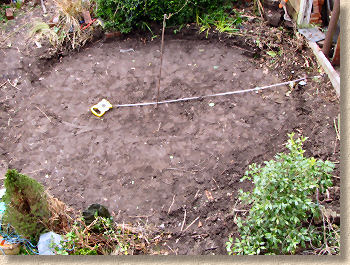
A line parallel to the western fence was established along with a second line parallel to the box hedge. Where the two lines intersect indicates the centre of the circle. A line pin was driven into the ground at this point, and then used as the origin to mark out the circumference of the proposed circle to act as a guide for the excavation.
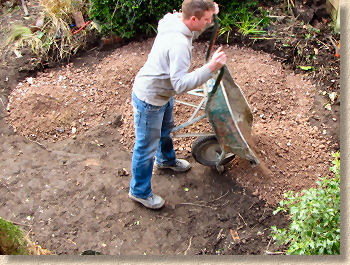
The marked-out circle was excavated to remove the topsoil prior to placing, levelling and compacting the sub-base, a 100-150mm thick layer of Type 1 granular material.
Most patios will never carry vehicles or anything heavier than a lawnmower or laden wheelbarrow and therefore, where the sub-grade is firm, reliable and well-compacted, it may not be necessary to construct a sub-base . Instead the cementitious laying course can be placed directly onto the excavated sub-grade. However, where topsoil is present, it is better to remove this layer as the organic content within the soil will decompose over time and this may lead to slight settlement, which could cause the paving to move and the jointing to crack.
When levels require building up, as in this case, the build-up is always constructed using the sub-base or base materials, rather than relying on an overly thick laying course. With a granular sub-base, the minimum recommended thickness is 75mm; for hydraulically-bound materials (cement bound mortar or concrete) a similar 75mm minimum thickness is required.
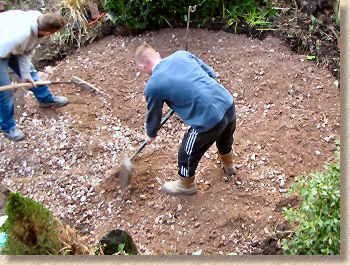
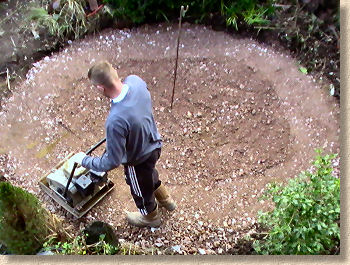
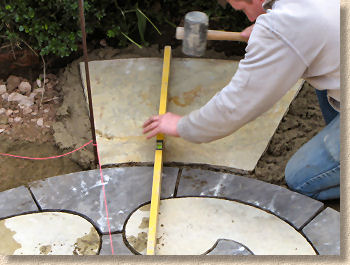
The sub-base was levelled using shovels and rakes before being compacted by multiple passes of a vibrating plate compactor to a level that would match the gradient of the completed patio circle. In this case study, there is a natural fall in the garden from south to north and this will be replicated by the patio. For riven natural stone, the minimum recommended falls is 1:80 and for a patio to be comfortable and serviceable, the fall should not exceed 1:50. Falls greater than this run the risk of a patio table being excessively uneven. A fall of approximately 1:60 would provide adequate surface drainage without being excessive and would tally with those of the existing garden.
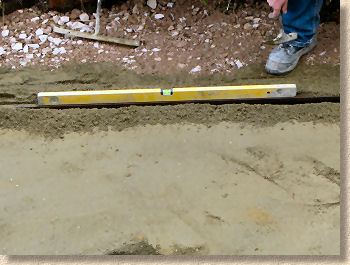
With a diameter of 2840mm and a designed gradient of 1:60, there would need to be a crossfall of ...
2840 x 1/60 = 47.3mm
... a straightedge timber was placed on the compacted sub-base and checked with a spirit level to ensure there was approximately 50mm of crossfall.
Unpacking the paving:
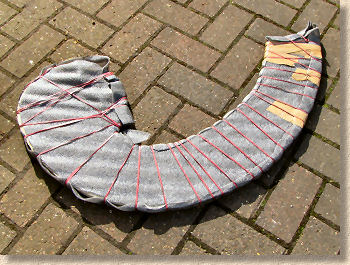
The Celtic Knot comes packed on a single pallet, protected by polythene shrink-wrapping. This outer wrapping should be cut using a craft knife or scissors taking care not to scratch or mark the paving elements within.

The knot elements are individually wrapped in sheets of protective expanded polyethylene foam held in place by a tough polypropylene string. This string is usually a single length wrapped around and around the expanded polyethylene foam.
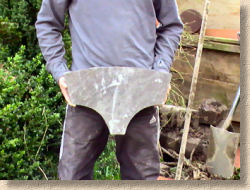
One at a time, the wrapped elements are placed onto a flat surface and scissors used to cut through the multiple rotations of tough polypropylene string. Once cut, the string is removed and then the paving element is carefully unwrapped.
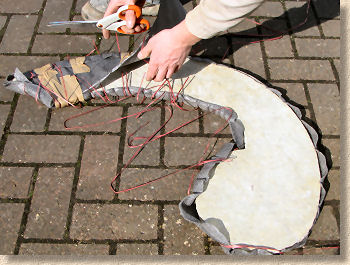
Check the elements are sound and intact and report any damage or breakage to the supplier immediately. It may be extremely difficult to obtain a replacement for any pieces damaged or broken during the laying process as the supplier might insist that careless handling was responsible, rather than any damage incurred during manufacture and transport to site.
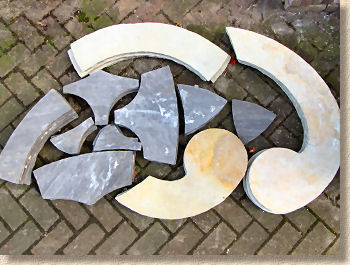
The ring elements are not tied, but are separated from neighbouring pieces within the package by sheets of expanded polyethylene foam. Again these are removed individually, checked for damage, and then set aside to a safe place prior to laying, using the polyethylene sheets to protect them from accidental scratches.
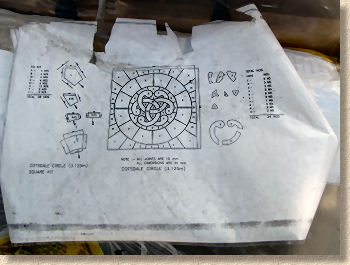
An A4-sized laying plan (laminated on one side only, so vulnerable to moisture) is provided with each kit and this indicates the shape and quantity of each element. This should be used to check that all elements are present prior to laying.
Preparing to lay:
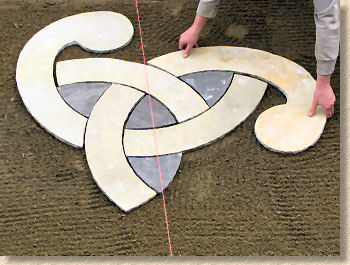
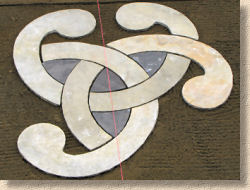
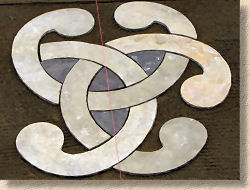
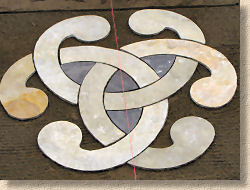
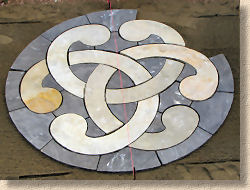
Whenever a patio circle or decorative feature is to be laid, it is good practice to lay a 'dry run' of the paving to determine just how it fits within the space allocated and to ascertain the typical joint width necessary to create a neatly aligned feature. With more complex features such as this Celtic Knot, dry-laying gives the operative the opportunity to determine the most suitable laying sequence, that is, in what order each of the pieces should be laid.
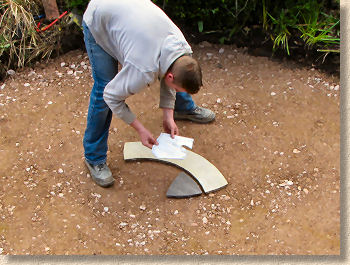
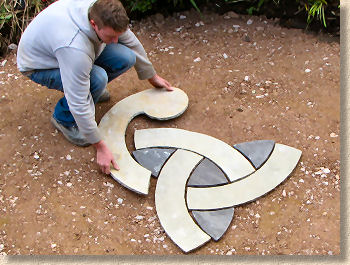
Further, much of the charm of natural stone arises from its variability, in colour, texture, and surface characteristics. Consequently, when working with natural stone, dry laying allows the installer to assess the colour and aesthetics of each piece of stone and so determine which pieces should be kept apart, and to swop pieces as necessary to create the most visually pleasing arrangement.
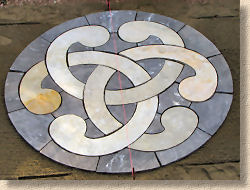
Circles and circular features should always be laid from the centre outwards. If necessary, the centre stone can be omitted to allow a line pin to remain in position to facilitate checking the alignment and positioning of the pieces as they are laid. This can be especially useful when laying a multi-ring circle, as tape measure can be attached to a line pin at the circle origin and used to accurately position the ring segments to maintain a true circle.

Watch Ken and Craig dry-lay the knot and surround ring in less than 45 seconds!
Once the layout was understood and the installation team felt confident with the arrangement and its alignment, the pieces were lifted and set aside ready for re-use once the laying course as in place.
The laying course:
Over the last few years there has been a move to calibrate high-end natural stone for gardens and patios as the variable thickness that occurs with riven stone requires individual beds be prepared, thereby complicating the laying process and slowing the rate of laying. When paving has a standard or 'calibrated' thickness, it can be laid onto a screeded bed, the same method that is used for pressed concrete flags and block paving.
However, screed preparation usually involves a dry or semi-dry laying course material, whereas patio flagstones are normally laid onto a moist or wet mix . While it is possible to screed prepare a wetter laying course material (after all, this is how concrete slabs and bases are laid), for the purpose of experimentation, it was decided to use a semi-dry mix for the Knot elements and reserve the opportunity to use a wet mix for the outer ring.
There was some concern that the small size of some of the Knot elements would require a wet mix to ensure the adhesion that is necessary to prevent rocking or movement, and so a strategy was agreed that might address this issue.
- 1 - a semi-dry laying course mix would be lightly compacted and screeded to level
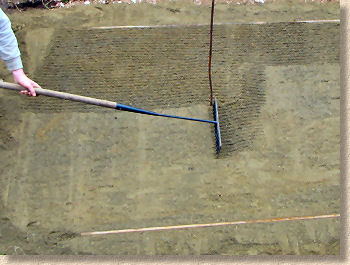
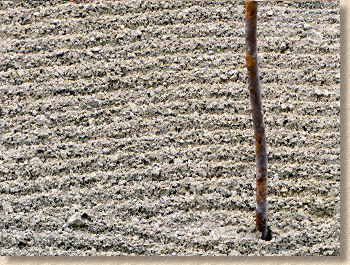
- 2 - the uppermost 10-15mm of the screeded laying course would be loosened using a rake
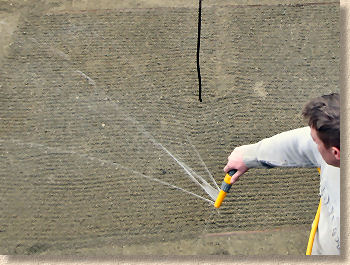
- 3 - the loosened laying course would be wetted in-situ using a hosepipe
- 4 - the paving elements would then be laid onto the wetted, loosened laying course
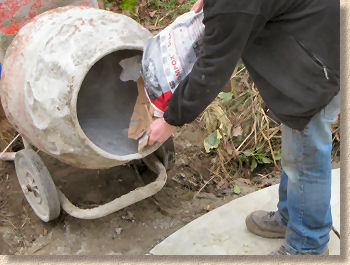
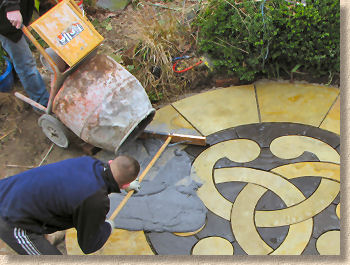
The laying course material was prepared in a drum mixer, combining 4 parts grit sand to one part cement with minimal added water. The mixed material was to be damp, granular, but free flowing rather than sticky.


The mixed material was spread over the prepared sub-base, levelled and then lightly compacted with a single pass of the vibrating plate compactor.
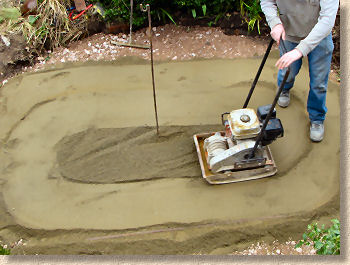
Screed rails were established to the north and south of the Knot circle, with 50mm of fall from south to north, matching that of the natural ground. The laying course material was then prepared exactly as described above .

The wetting was achieved by using a hose with fine spray fitting to repeatedly play across the surface until it was thoroughly soaked and water was beginning to collect on the surface.
Alignment guide:
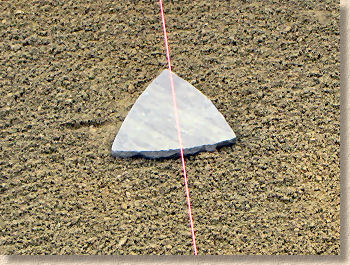
The dry-lay procedure outlined above had revealed that the Knot circle needed to be aligned in a particular direction to look correct when viewed from the house. To ensure the Knot would be correctly aligned, a taut string line was established perpendicular to the house. Throughout the laying of the Knot feature and the surrounding ring, this line would act as a guide to accuracy.
The line pin marking the centre of the circle had been removed to allow the laying course material to be screeded, and if replaced, it would prevent the placement of the centre stone. As the centre stone is integral to the positioning of the subsequent elements (as learned during the dry-lay procedure) the line pin could not be re-established in the centre. However, as the string line passed over the centre point, it would be possible to tie a string tassle to it and so mark the position of the centre stone without interfering with its placement.

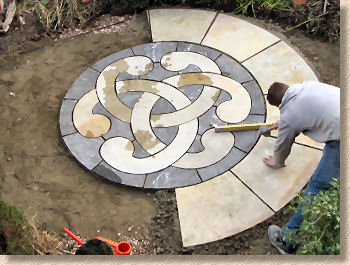
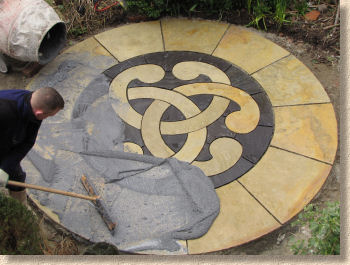
Laying the Knot elements:
The dry-lay exercise had revealed the importance of laying the Knot elements in a particular sequence and the need for repeated fine adjustment of position as more and more elements are added. The three-sided centre stone must be laid first, and aligned so its longest axis matches that of the string guide line.
Each apex of the centre stone acts as a position guide for the placement of the next elements, the curved elements marked as "10" on the supplied laying guide. One end of each curved element aligns with an apex of the centre stone. Note that these curved pieces lead off from the centre stone in an anti-clockwise direction. The knot elements can only be laid in one direction.

Once each element was in position it was tapped down to level using a rubber mallet.
The curved elements were followed by the first of the sable background pieces, the three-sided elements labelled "6" on the supplied plan. These were placed in the niche formed where two of the curved pieces (10) overlap.
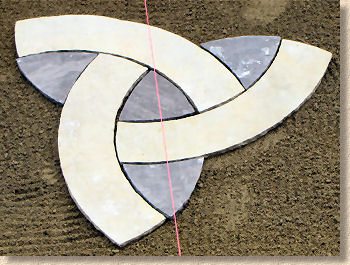
Next, the first of the knot end pieces, the larger elements labelled "8" which were placed to enclose the infill pieces (6) laid previously. Some minor adjustment was required at this stage to even out the joints between the various elements laid so far.
The smaller knot end pieces (9) were laid next. These are the final Cotsdale Limestone elements forming the knot. The remaining pieces are all Sable sandstone infill pieces.
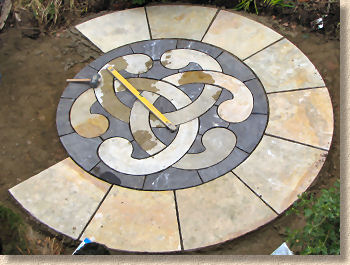
The first of the infill pieces to be laid is the central five-sided element labelled "4". These pieces separate the paired knot ends and once in place, further fine adjustment of position was necessary to ensure the knot ends were correctly placed.
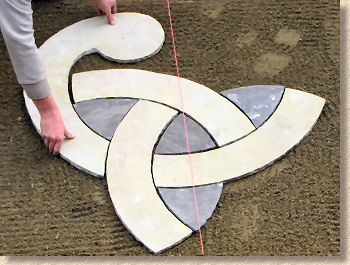
The final infill pieces are the smallest elements, all of which are labelled "5" on the plan, but which are laid in mirrored pairs. It is relatively easy to identify the different right- and left-handed elements.
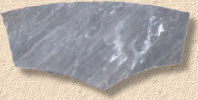
The encircling parts of the knot circle were laid next. The first element to be laid was the 'underpants-shaped' pieces which sit between the paired knot ends. These are followed by the "knicker-shaped" pieces (2) that are positioned against the overlap between two knot-end pieces. Finally, the infill pieces labelled "1" are laid between the underpants-shapes to complete the circle.


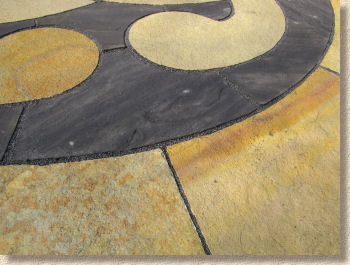
The riven nature of the flagstones made it impossible to have the edges (arisses) of each element match exactly those of the adjacent elements with no minor lips or differences, so the final position and level of each element became an exercise in compromise, eliminating lips as far as practical yet accepting that some minor level differences would be inevitable. Careful selection of elements helped in minimising potential lips. By avoiding the use of elements with pronounced 'high relief' directly next to elements with 'low relief', lips that could present a trip hazard or an excessively uneven surface were avoided.
In hindsight, and if ever required to install this feature on another occasion, a wet mix laying course should be used from the outset, and we'd probably use a bond bridge slurry primer. Semi-dry bedding, even when wetted in-situ, does not provide adequate adhesion and stability for the individual elements.
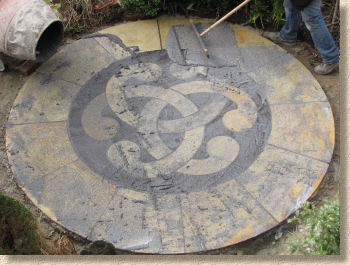
Laying the surround ring:
In the light of the experience gained from laying the central Knot feature, it was decided that the ring elements would be laid directly onto a wet-mix laying course .
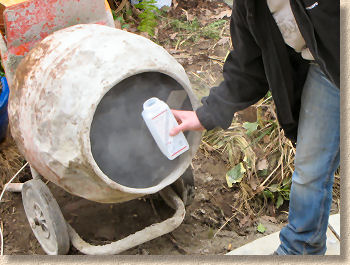
The laying course mortar was mixed using 4 parts grit sand to 1 part cement with a plasticiser added to the gauging water to improve the workability of the coarse-grained mortar, to improve the adhesion of the flags to the mortar, and to reduce the volume of water required.
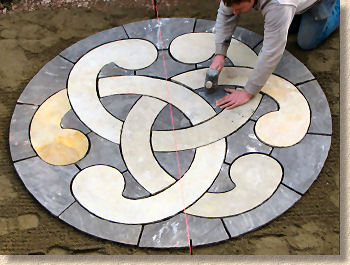
The mixed mortar was transferred from the mixer to where required, placing just sufficient mortar for one ring element at a time. The mortar was levelled using a trowel and the surface rippled or 'slashed' to create voids that could accommodate movement and compaction of the flagstone as it was tapped down to the correct level using a rubber mallet.
The first ring element flagstone was positioned and aligned using the string line as a guide, and then its fall checked using a spirit level to ensure it matched that of the completed Knot elements. Once satisfied that the flagstone was correct in both alignment and level, further mortar was brought in to prepare the bed for the adjacent flagstone, working clockwise around the Knot circle.

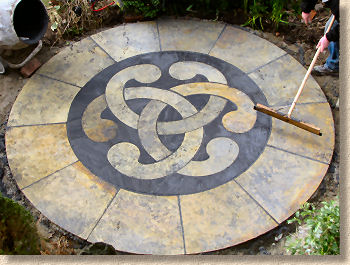
The process continued, making each bed individually, despite the flagstones being calibrated, and compacting each before moving on to prepare the next bed. As the ring surround contains 12 elements in total, the sixth flag would complete a semi-circle and, if the alignment and joint width had been correctly established, the leading edge of the sixth flagstone should coincide with the string line. Some very minor adjustment was required, and once that sixth flag was correctly positioned and aligned, the string line could be removed as it would not be needed again.

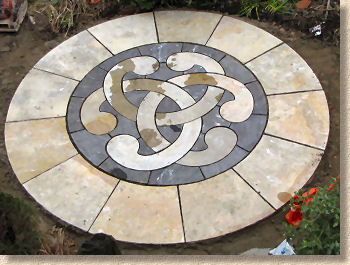
The laying process continued for the second semi-circle, and again, some minor adjustment of position, alignment and joint width was required to fit the final piece into place.
This completed the laying process. Checking with a long straight-edge timber showed that the gradient from south to north was consistent across the whole patio circle, and final minor adjustments were made to ensure joint widths were as consistent as feasible. Each piece was checked for stability, and, with no elements showing movement or looseness, the project was left overnight for the bedding to harden.
All tools were cleaned of mortar and the drum mixer was thoroughly rinsed, the wash-out being emptied onto a patch of ground close to the project and not into the drains, where the cementitious slurry might settle, harden and cause problems at a later date. This completed the work for the day.
The whole laying process, step-by-step
Jointing:
The paving was to be jointed using a resin-based product, Rompox Drain , and the darkest 'Basalt' colour was chosen to maximise the contrast and emphasise the individual elements, particularly within the limestone ring surround. A cement mortar could have been used but was rejected because it was considered to be too time-consuming. Hand pointing would take an estimated 2-3 hours for a skilled man and ran the risk of staining the surface. Using a sand-cement slurry could reduce the time required to around 60-90 minutes, but there was concern that the riven texture of the stone would render it difficult to clean and there was a very real possibility of a cement haze being left behind, regardless of how meticulous was the clean-off. A resin-based product would take 10 minutes, with no risk of staining. Sometimes, the resin leaves a thin film on the surface of the jointed paving, but this is known to weather and disappear in a few days or weeks.
There is a patio grade resin-based polymeric product from Romex (Rompox Easy) that could be used, but this patio is located beneath a large oak tree, which drops tannin-rich leaves in autumn and provides moisture retaining shade for algae and lichens in summer, and so it is most likely that regular cleaning will be required. Consequently, for added strength and security, a permeable, tougher resin slurry mortar, Rompox Drain, was selected.

The cost of resin-based jointing is much greater than that of sand-cement mortar, but the time that could be saved, combined with no risk of staining were considered to render it a justifiable expense. One 25kg pack of Rompox Drain, valued at 30 pounds (including VAT), was used on this project.
The Rompox aggregate, a selected granitic sand, was placed into the drum of a rotating mixer, and the contents of both containers, the resin and the hardener, were added. This is allowed to mix for three minutes and then each container is filled with clean, cold water which is added to the mixer, and mixing continued for a further three minutes.

While the jointing mortar was mixing, the patio surface was prepared by cleaning off any minor detritus that had founds its way onto the paving since its completion, and then the whole surface was thoroughly wetted using a hose pipe.
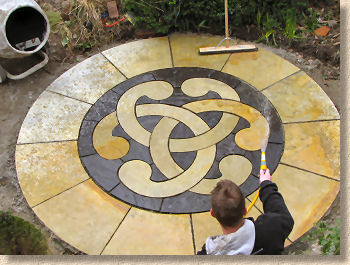
Once mixing was complete, the resin mortar was emptied directly onto the wetted paved surface and then spread using a rubber-bladed squeegee, ensuring every part of the paving was covered and that each of the joints were completely filled. The mortar is self-compacting and therefore does not need trowelling or pressing into the joints. This whole process took less than five minutes.
The excess mortar was then removed from the surface using the squeegee, and allowed to 'dry' for 5 minutes before switching to a medium-stiff brush to sweep off the material that was clinging to the flag surface. The sweeping brush had to be moved in a direction that removed excess mortar from the paving without removing it from the joints. On a typical orthogonal pavement, where all the joints (transverse and perpends) are at right angles, sweeping at an angle of 45 degrees ensures mortar is not brushed out of the joints, but as joints within this feature are not aligned and run in almost every direction, a degree of care is required to avoid creating empty joints.
Once the medium-stiff brush had removed most of the surface excess, a soft brush was used to sweep off the final residue, again taking care not to empty the joints. While it is possible to 'strike' the mortar in the joints (smoothing using a trowel blade or pointing bar), the simple brushed finish was considered suitable therefore no joint striking was undertaken.

Once all the excess had been swept from the patio feature surface, the mixer, the squeegee and the brushed were rinsed clean with cold water. The entire jointing task had taken around 15 minutes.
The jointing needs to be protected form rain for the first 12 hours, but as no rain was forecast for at least three days, there was no need to cover the surface. Overnight, the mortar hardened and the patio was, in theory, usable the very next day.
Watch a photo-montage of the whole jointing process
Comments:
- While there can be no denying the aesthetic appeal of the Celtic Knot Circle, the component pieces are tricky shapes and care is essential to avoid damage or breakages. It is not clear whether replacement pieces are available should individual elements break during installation.
- Should any part of the feature be broken or damaged, it may be necessary to fashion a replacement piece from a full flagstone of the correct stone type. It is highly unlikely that a typical patio/driveway contractor would have the requisite skills and tools to create a replacement piece that would match those supplied as part of the feature.
- The packaging is excellent and affords realistic protection to each of the elements. However, it does generate a significant quantity of non-recyclable waste which requires off-site disposal. This should be borne in mind when a contractor is preparing a price to install this feature.
- No matter how experienced the laying contractor, the benefit of dry-laying the feature prior to actual installation cannot be recommended too highly. There is a great deal of minor positioning adjustment required to ensure the joints are of a consistent width and that the pieces work well with each other.
- The only successful installation method involves using a wet mix laying course. The high number of small elements that make up the Knot feature cannot be successfully stabilised on any other form of bed.
- Further, the small elements within the Knot circle make it exceptionally difficult to rely on individual bedding for that part of the feature. The bed for the Knot circle is best screeded to level to take advantage of the calibrated thickness of the various elements.
- The flagstones which comprise the surround ring can be screed bedded or individually laid, as the installation contractor prefers, but a wet mix bed is strongly recommended.
- Given that this patio feature is not intended to carry heavy loads or vehicles, there is no discernible advantage to be had by coating the underside of each element with a slurry primer (bond bridge), as a suitably plasticised wet mix laying course mortar will provide adequate adhesion.
- Serious consideration should be given to the jointing. While it would be possible to hand point using a traditional sand-cement mortar, the speed, cleanliness and ease of use provided by a quality polymeric or resin-bound mortar should not be lightly dismissed. A single pack of resin-bound mortar was adequate to joint the Knot and the surround ring, with material left over. It is likely that there was sufficient surplus resin mortar to joint the elements of the squaring-off kit, had they been used.
- A gun-injected cement mortar could be a viable alternative to resin-based mortars.