Introduction:
This page is part of a series of pages that consider cutting techniques used with flags (or slabs, if that's what you call 'em). The first page examined the basic principles of cutting-in: this page looks at how corners and radii are cuts; subsequent pages consider other cut features such as notches and flagged radii. See the menu above right or the related pages listing at the foot of this page for a more comprehensive guide to what's available.
Cutting flags for a footpath radius
Flagged pathways, particularly public footpaths, often include a regular curve, more correctly known as a radius. The radius may be a long, slow radius following the gentle curve of a roadway, or it might be a relatively sharp, short and fast radius at the junction of two paths.
Although the techniques shown here are most commonly used on public footpaths, many of the principles can be used on non-commercial projects. For example, the methods used to cut a ring radius can be applied to cutting coping stones around the edge of a pool.
There are several different laying patterns that can be used when flagging a radius and this section looks at a few of the more common techniques. In practice, the most suitable layout is determined by a number of factors:-
- The laying pattern used on the straight(er) sections of the footpath
- The size of the radius, whether it is fast, medium or slow
- The size of the flags being laid
- The skill level of the laying operatives
- The budget
On paths where flags are laid transversely, a fan radius or a town corner is usually most appropriate, while paths flagged longitudinally can have the radius sections laid using a ring radius or a fan radius. Fast curves are often (but not always) more suited to fan radius pattern while slow, sweeping curves where the flags are laid longitudinally are nearly always laid to a ring radius layout.
For certain projects, usually those operating on a tight budget or with limited skilled operatives available, a 'run out' radius may be used as it is the simplest option of all: one path of flags is continued through to the kerb line while the other abuts its 'back edge'. The only cutting involved is that against the kerbline (usually a curve cut as described previously), and the boundary between the two paths.
Click on a corner type to access the related page
A further type of flagged radius which is more commonly used nowadays, because genuine skills and proper training are in short supply, is the skewed radius. In essence, the flags are laid as fairly standard stretcher or transverse broken bond, with courses laid parallel, until a point is reach where the angle between the leading edge and the kerb line (or containing curve) becomes so acute that an 'adjustment' is required.
It's similar to a fan radius, but instead of having each flagstone trimmed to a taper, a panel of flags in courses are laid and trimmed only at the adjustment lines.
And as with fan radii, they may be single taper or double taper, depending on how concerned is the designer/engineer regarding aesthetics. From eye level, few pedestrians would notice the difference, but from a designer's view point, and as a streetmason with integrity, there's something more innately pleasing about the double taper option.
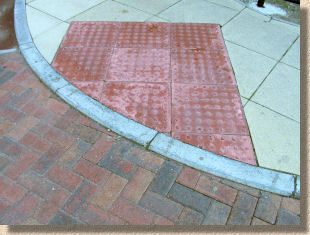
The other pages of this section looks at how each of these options would be cut. It should be noted that, as this section is focussed on cutting techniques, the actual layout of each radius has been simplified. Most notable is the exclusion of any tactile pavers that are now more or less standard at the dropped or pram crossings that are typically placed on a footpath radius.
The next page looks at how a Ring Radius is cut. Subsequent pages will consider a Fan Radius , and Run-outs & Town Corners .
For projects where the origin point is not visible or accessible, take a look at the page dealing with the geometry of Obstructed Arcs