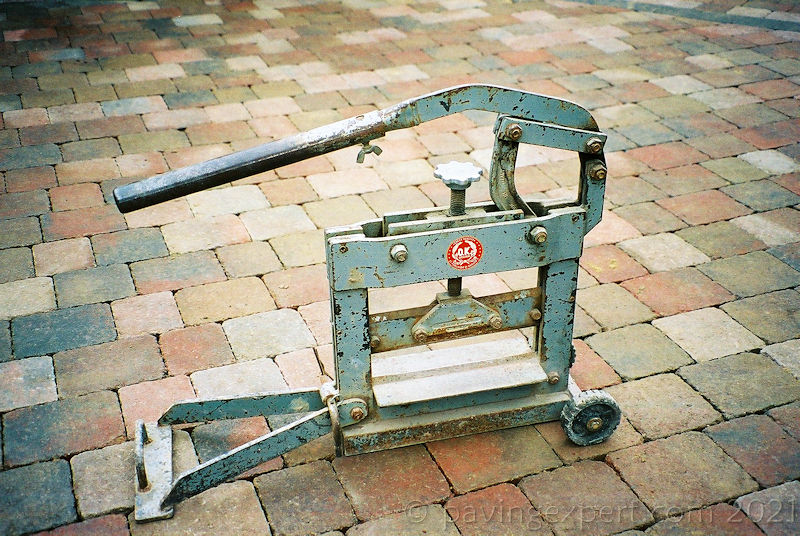
Block Splitters
These handy little machines are essential for professional paving contractors but are also available at hire centres for approx £25 per day or £60 per week. They come in a range of sizes to accomodate different types of materials, from 50mm thick paving blocks to 300mm thick stone slabs. The ones used on most blockwork projects has a maximum jaw opening of around 100mm and a jaw length of 300-450mm. The cutting action relies on brute strength, applied via telescopic lever, to snap the block along the required line. Larger machines may incorporate a hydraulic jack to maximise the cutting power on thicker, tougher materials, and there's even electric versions for those with smaller biceps.

There is a separate page which examines the use of block splitters in much greater detail, and follows their use on a range of cutting-in jobs using various paving materials.
The hire centre will provide full instruction on the safe use and operation of the type of splitter appropriate to your requirements. Most work by adjusting the jaw opening via the screw to grip the block, and then use the eccentric cam of the lever to snap the block.
Splitters, also known as Guillotines, are very useful for cutting brick or block paving, and the larger models will cut flags and slabs. However, they do not work well on decorative 'riven-look' flags, which are best cut with a power saw.
Lift the lever arm to open the jaws as wide as possible and place the paving unit between the jaws in such a position that the top blade of the splitter is directly over the required line of cut.
Angling the block in the splitter will create an undercut, making it that much easier to fit the cut piece into the pavement because there is less chance of there being 'snags' sticking out from the cut edge.
Use the screw adjuster at the top of the splitter to close the jaws until they just begin to 'bite' the block to be cut. Pull the operating lever down, and the force of the blades should split the unit along the right line. This can require some serious effort with very hard materials, such as clay pavers.
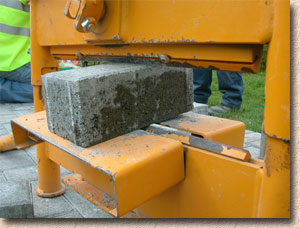
Beware of damaging the cut block when the splitter snaps it and the two pieces drop to the ground. Some splitters have a small 'table' on either side to 'catch' the cut parts just 20mm or so below the lower jaw. If offcuts from the splitter drop heavily to the ground they can break or spall. An old rug or piece of foam rubber laid beneath the block splitter can lessen the impact and reduce breakages. Cut edges that are slightly oversize can be trimmed with a bolster or a cold chisel.
See also Cutting Pavers for more information on block splitters and power saws.
For those using a power saw to carry out the cutting of block pavers (why??), there is a separate page which looks at what needs to be considered when choosing a diamond blade

Ever wondered what to do with all those off-cuts? Obviously, the larger pieces can sometimes be used to give a second cut piece, but at the end of every job, there are always loads of pieces that are neither use nor ornament ... unless, of course, you're Tom Quinn, Kilmallock's top block layer and all-round genius. See what Tom did with the off-cuts from a paving job in Co. Limerick by clicking here .
Marking the Blocks
The principles involved are quite simple.....
Place the block to be cut into position against the body of the paving, so that its bottom edges are tight against the top edges of the full blocks in the body, and so that it overhangs the line being cut to. With your eye directly over the line of cut, sight through to the edging and mark the line of cut on the block with the edge of a small piece of slate, a steel nail or similar, allowing 3-6mm for a joint against the edge.

The knack of holding the block steady, aligning it accurately, and positioning your eye directly over the cut line takes a bit of practice, but, after a year or two, it starts to come naturally!
Try to mark a single line, rather than 3 or 4 approximations. This will make alignment in the jaws of the splitter, or beneath the blade of the saw, that much easier.
On site, the operative will normally mark 6 or 8 blocks at a time, and then cut them before returning to the working area to fit them into place. This helps reduce the amount of bending and wear and tear on the knees and back.
How to Cut-in
As mentioned above, unless you are working with perfect rectangles and ideal paving widths, blocks at the edges of the body of the paving will need to be cut to fit. This cutting-in work is best done once the main body of the paving has been laid and checked for alignment, so that the paving can be adjusted to the correct line without being restrained by the solid edges.
At first, it may seem easiest and most obvious to cut the blocks in such a manner that the pattern of the paving in the body is maintained. This is shown in the diagram opposite.
However, following this method will result in a number of small, fiddly pieces needing to be fitted. On site, we refer to such pieces as 'darts' as their small size makes them prone to being driven into the bedding sand, spoiling the finished appearance of the paving. The incredibly thin slices are sometimes known as 'slips'. In the diagram opposite, these 'darts' and 'slips' are highlighted in yellow.
In practice, we use a couple of simple rules to avoid these 'darts', and, hopefully, keep the paving in tip-top condition.
Rule 1 - Ideally, all cut blocks should have at least 3 uncut edges. This is not always possible, notably when the orientation of the cuts is shifted through 90°
Rule 2 - Each cut should be not less than one-third of a block, unless there is no other way of piecing-in.

BS7533 Part 3 states that cut blocks should be at least one-quarter full-size, but we find this to be too small, especially with the popular 200x100mm sized blocks, as the cuts made to this standard look 'bitty'. Hence, we prefer the one-third, or even a one-half minimum size.
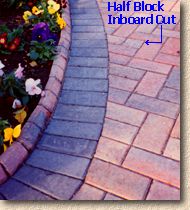
Inboard Cutting
As is shown on the diagram above, the pattern of the paving is broken by inserting half-blocks or even full blocks in a different orientation to eliminate all small pieces at the edges. This practice is known as "Inboard Cutting". In practice, although this method may seem unsightly because of the pattern disruption, it's usually only a paving professional that would be able to spot the pattern break, and the paving is less liable to spread because of 'lost darts'.
This practice of breaking the pattern is not used solely for curves, but is also utilised where the body of the paving is neither parallel nor perpendicular to the edgings.
The diagram on the left shows the above rules being applied to a straight cut-edge.
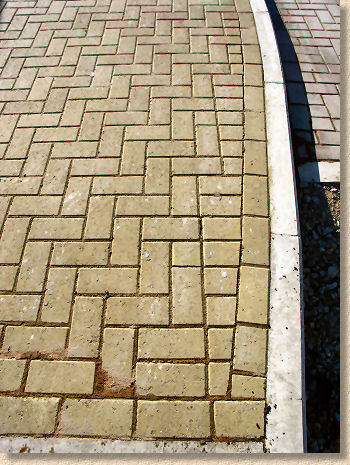
In an attempt to make this tricky subject seem a little clearer, the photograph opposite exemplifies the rules for cutting-in at edges applied to a real-life job. If you look closely towards the top of the picture, you will notice a half-block inserted into the pattern to make sure that cut bricks at the edge comply with the above rules.
Also notice that the cut blocks are neatly trimmed, with the cut edge parallel to the soldier course, with no excessively wide or overly tight joints.
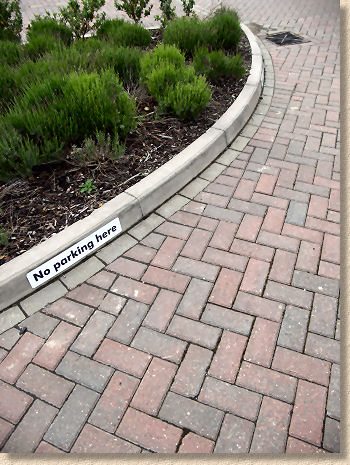
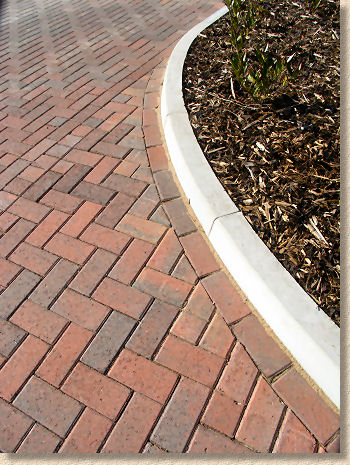
Inboard Cutting Gallery
Some examples of good practice with inboard cutting

Joint Width and Cutting Accuracy
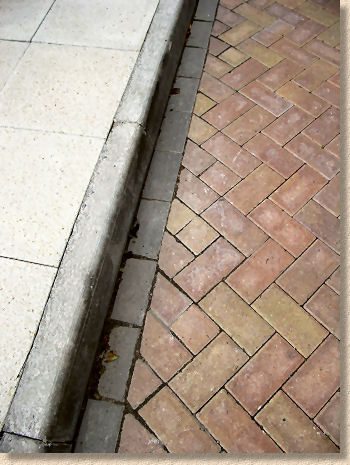
Returning once again to the official Rule Book, BS 7533 Part 3 states that cuts should be accurate and should not result in a joint width between the cut block and the adjacent unit of more than 5mm, although it acknowledges this may not always be possible when cutting to a curved edge - see diagram.
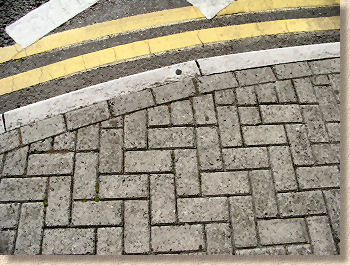
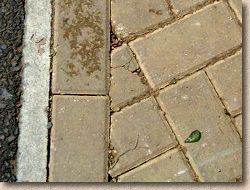
And while overly wide joints are to be avoided, it's just as important to avoid excessively tight joints. As can be seen in this photo (NOT our work, I hasten to add!) the cut blocks are slightly oversize and have been forced to fit. Subsequent trafficking of the pavement has resulted in the blocks being spalled, ie, having the surface 'chipped' as the blocks move under loading, forcing them even tighter together.
A properly cut block will drop into the gap without needing to be forced, and without being too loose. A 2-5mm joint width, properly filled with jointing sand, acts to generate sufficient interlock to give the pavement its essential strength, yet provides sufficient cushioning to prevent spalling.
Cutting-in other patterns and blocks
Although the examples shown above have used a typical herringbone pattern to illustrate the salient points, the rules apply equally to other patterns, and to other block formats.
When cutting-in a basketweave pattern, the most commonly encountrered 'issues' are block orientation and avoiding slips.
Although it is possible to cut blocks lengthways, we tend to turn such a cut through 90° and cut across the shorter axis. This is done because...
- Lengthways cuts are trickier to cut - on a splitter, they take a lot of effort to snap, and when they do, they tend to snap in the wrong place. With a saw, they need to be cut to at least half-block depth to ensure a clean break.
- They are more fragile and more likely to break than short axis cuts.
The issue with slips further strengthens the case for short axis cuts. Some slips will be ridiculously thin and impossible to cut without using a saw. And if they are cut successfully, they are frighteningly fragile and need to be carefully bedded to avoid breakage.
Is it worth it? After the best part of 30 years experience, we reckon not. Turn the block through 90° and make it easier for yourself!
With larger format blocks, such as the tumbled pavers (Drivesett/Tegula, Woburn, Chelsea Setts, Alpha), cutting-in is kept tidy by rotating one of the larger blocks through 90°, cutting across its shorter axis, and using it to lap two courses, as shown in the diagram opposite.
Once the gap to be filled becomes wider than can be filled with a single block, then two courses are re-introduced - a full block and a small-unit cut.