Introduction:
This page is part of a series of pages that consider cutting techniques used with flags (or slabs, if that's what you call 'em). The first page examined the basic principles of cutting-in: this page looks at how the cuts for a Ring Radius are prepared; related pages consider other cut features such as notches, curves and flagged radii. See the menu above right or the related pages listing at the foot of this page for a more comprehensive guide to what's available.
What is a ring radius
A ring radius has the flags laid in courses flowing longitudinally around the curve, with each course forming a concentric circle or "ring", hence the name. Accordingly, ring radii layouts are most commonly used where the adjacent flagging is also laid in longitudinal courses, although there is no good reason why they could not be used in conjunction with transverse coursework.
What makes a good ring?
The key to success is....
A geometrically true ring radius, and possibly more importantly, one that looks attractive, is one that adheres to two principles:
- 1 - the rings follow a true arc, with adjacent rings following concentrically
- 2 - the units making up the ring are all cut to roughly the same shape and/or size
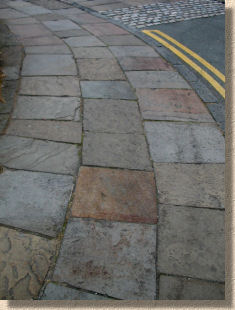
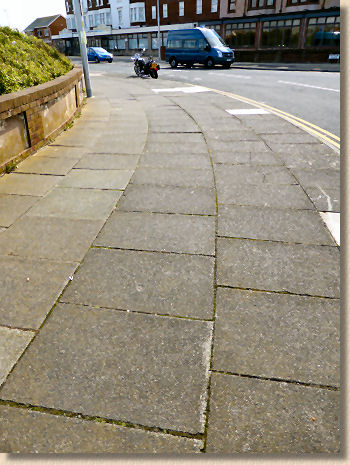
At first glance, it may require careful examination to determine whether a ring radius is the work of an artisan or an apprentice, but there are key indicators which can be sought to reveal the nature of the hand behind the work.
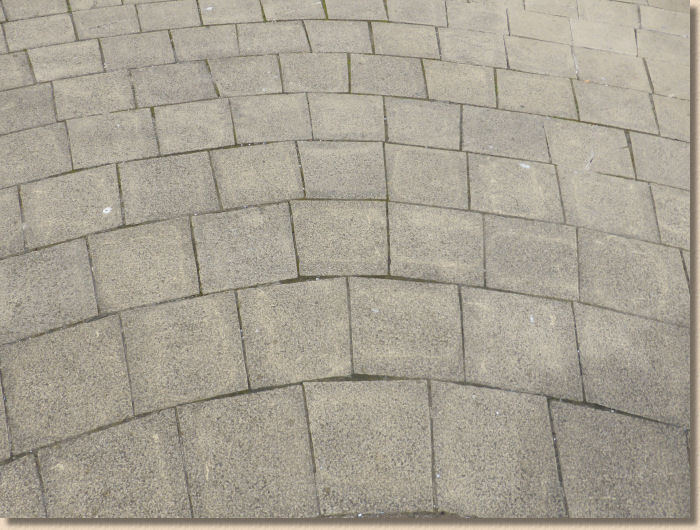
From some angles, and preferably from a distance, a ring radius may seem perfectly acceptable, but when the quality of setting-out and the consistency of cutting is examined, the skill level of the installation team soon becomes apparent.
Viewed more closely, and especially when viewed aling the radial joints, that is, towards or away from the origin, the quality reveals itself.
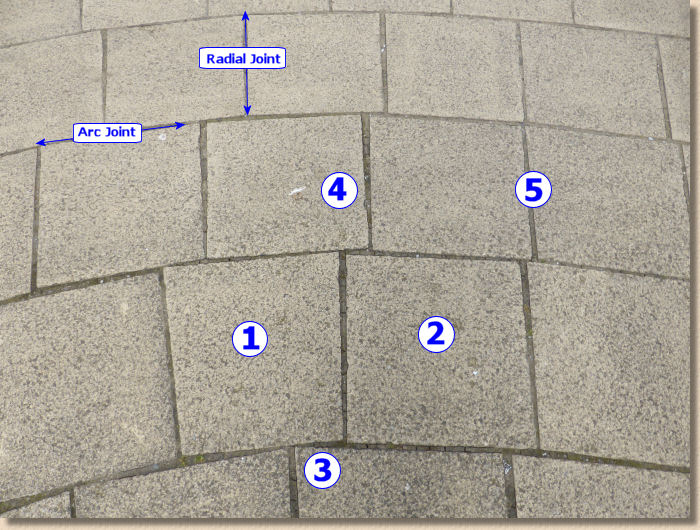
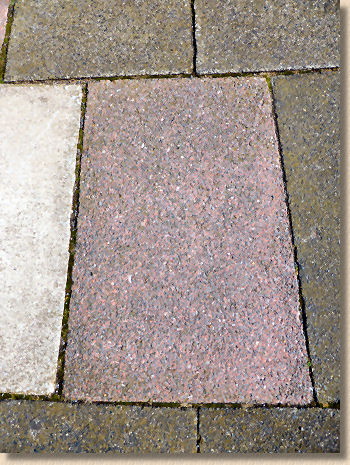
- 1 - This flag has been double taper cut (cut to two edges)....
- 2 - ....while this flag immediately adjacent has been left uncut
- 3 - On the 'faster' internal rings, the joint between two flags forms a point which forces a wider-than-acceptable arc joint. This point should have been trimmed to ensure a regular 10-12mm arc joint
- 4 - Failure to taper cut this flag has resulted in a gaping radial joint
- 5 - These three joints are too close to being a straight line. The flags should have been reduced in size to ensure the radial joints were staggered
What size of flagstones?
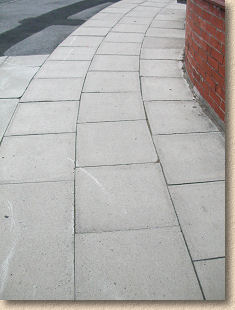
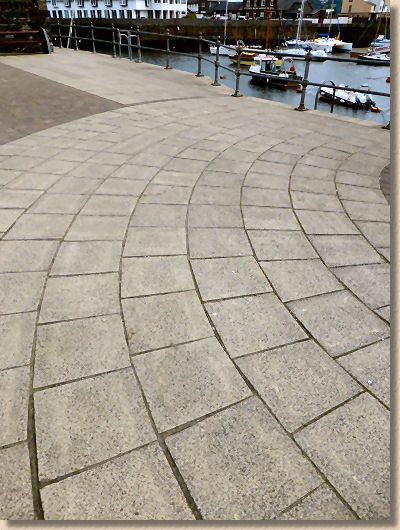
When laying concrete flags , ring radii are typically paved using a single size of flag, usually a square format, ie: a 600x600mm (B format), 450x450mm (E format), 400x400mm (F format) or even the G format 300x300mm units. The scale of the radius will usually determine the most appropriate flag format to use. On slow radii, it is possible to use rectangular formats (A, C, or D) with the longer axis laid longitudinally, as shown above, but the use of such units often results in a relatively long 'back edge' that makes neat alignment of the inner courses/rings that much more difficult.
So: the scale of the radius, combined with consideration for the flags used to pave the main paths, will determine the most appropriate flag format to be used. The next consideration regards the cutting of the flag edges - should the flag be cut just along one edge, or should it be cut along both?
Layout and Cutting
Again, the format of flags being used and the size of the radius being cut will largely determine the most appropriate strategy. Wherever possible, ring radii are cut on just the one edge. This is done not just to save on time and materials, but also because fan radii need to be cut on both edges and it is considered that some additional distinction is warranted.
It doesn't really matter whether it is the leading edge that is cut, or the rear edge, as long as the cutting is consistent. If the first flag has its rear edge cut, then ALL of the flags in that ring, and preferably in that radius, should be cut on the rear edge, so that there are no instances of cut edges being laid against cut edges.
Traditionally, it is regarded as better practice to cut the leading edge of each flag. This is because the leading edge can be fully and generously buttered with mortar prior to laying the next flag in the sequence, whereas if the rear edge is cut, the receiving edge of the preceding flag is a full (ie: uncut) edge that is not as easy to load with sufficient mortar to ensure a full joint once the flag is laid. Even though many modern flagged paths often rely on close-jointing rather than mortared joints, and that most cuts are now made with a saw, the tradition continues.
Cutting a leading edge
A simple piece of additional kit is recommended when cutting this type of radius path against a fixed restraint, such as a wall or, especially, a kerbline. It's a very, very simple tri-square of timber, with the two shorter edges cut to match those of the flags being laid, and the hypotenuse (or bracing piece) being cut to suit. The tri-square is typically fashioned from roofing laths or other cheap, light timber. In the example shown in the illustration, the flags are 450x450mm units, therefore two arms of the tri-square will be cut to that length. If the flags were, say, 600x600mm units, the arms of the tri-square would be cut to that dimension.
Radius paths are ALWAYS laid from the kerbline back. It does not matter whether the radius path is an external or an internal curve, the first flags are always laid against the defining kerbline (or wall, soldier course, edging, string line or whatever else is being used to define the arc.) Starting at, or as near as dammit to the tangent point, the first flag is laid into position, with its rear edge aligned to suit that of the receiving edge on the preceding flag. The flag is not consolidated yet - it is left "loose".
The tri-square is offered into position so that one arm lies against the outer ring or kerbline, while the second arm is allowed to overlap the surface of the flag to be cut. A line is marked onto the surface of the flag using the overlapping arm as a guide. The flag can then be moved to a cutting position and sliced along the line just marked. The bed is re-made or titivated as required, the receiving edges buttered with mortar (if mortar is being used) and the freshly-cut flag offered into position. Assuming the marking and cutting were fairly accurate and a neat joint is formed between preceding flag and kerbline/inner ring, the flag can be consolidated to level and the next flag offered into position.

Using a cap stone
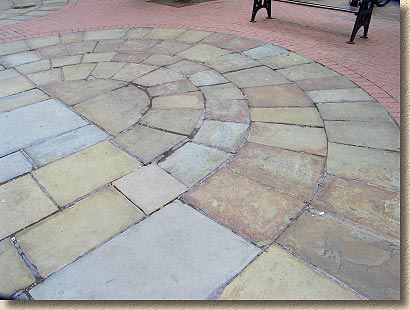
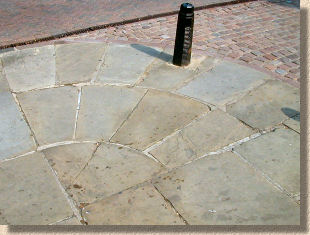
Where the origin of the radius is to be paved, a single piece known as a "Cap Stone" is used as the first unit out from the origin. The rings may then be paved out from this cap stone, or in from the kerb boundary, with a cap stone cut to fit as required.
The drawing below illustrates a quadrant radius. When the radius is greater than 90° two or more cap stones may be used as can be seen in the photo above


Working with no fixed edge
Ring radii are occasionally used to create features rather than simply follow an existing kerb line or wall, and often, in such cases, the precise setting-out is left to the installer, who no longer has the fixed object (wall, kerb, etc.) to act as a guide. Sadly, due to the scandalous lack of proper training for the paving trade in the 21st century, this is when things usually start to go wrong.
There needs to be some accurate method of ensuring the rings are true arcs. Obviously, the simplest guide would be to use a tape measure pinned to the origin point, which could be swung around as required to define the circumference, but origin points are not always available. It may be that a technique borrowed from surveying is used: obstructed arcs are a relatively common occurrence, so basic geometry plus a tape measure will usually offer a solution to plotting an accurate and aesthetically pleasing ring radius.