
Refurbishing a block paved driveway
This page is one in a series which documents the refurbishment of an existing block paved driveway.
Although the page can be read as a standalone article, it will probably make more sense if read in conjunction with the associated pages listed below.
Part 1: Surface detritus and litter

Sweeping and Scraping
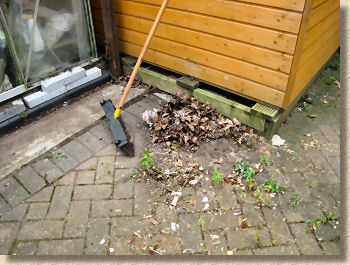
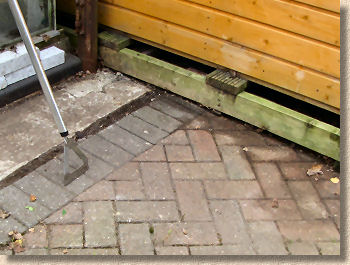
It's already been revealed that the driveway has some areas of significant weed growth and there is also the inevitable assemblage of litter, partly organic such as dead leaves and grass clippings, and partly inorganic including a few empty crisp packets and the inevitable chip wrapper.
Removing the loose litter is simply a matter of sweeping with a brush, rounding up all of the debris and shovelling it into a bin. The weeds are another matter, though.
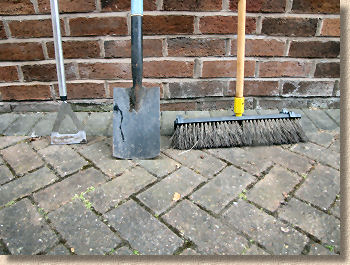
Running a shovel or hoe across the surface would remove the top growth but would also leave the roots intact and some weeds are adept at growing back from a severed root. To eliminate the weeds once and for all, the driveway will need to be treated with a proven weedkiller several weeks in advance of the other works. The weedkiller may need more than one application, and, despite what the advertisements may say, no weedkiller works overnight: they all need a week or longer to be most effective.
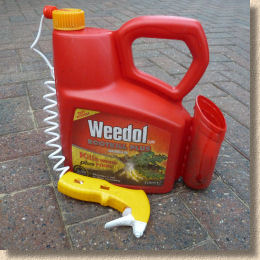
Back in the old days, Sodium Chlorate was the weedkiller of choice for almost all groundworks or paving applications. It was cheap and it was effective. It was also pretty nasty to the environment and anyone coming into contact with it on a regular basis and so it is more or less unobtainable nowadays. Further, the whole point of this case study is to show how a typical residential driveway can be refurbished by a typical residential driveway owner without relying on trade-only products or tools, and so the weedkiller of choice will be one that is readily available, ex-stock, from one of the local DIY sheds.
The weedkiller is a pre-mixed liquid supplied in a plastic dispenser with a spray attachment which is actually more of a hindrance than a help. The resulting spray is quite fine and, if there is the slightest breath of wind, it is whisked away to land anywhere but where you want it, namely on the paving. I suspect the spray is better suited to spot applications where a single offending dandelion needs to be dispatched, or to meet the highly optimistic coverage rates advertised by the manufacturer. For larger areas (this driveway covers roughly 100m²) application via the rose of a watering can may reduce the coverage but ensures the surface being treated receives a thorough wetting.
While the weedkiller deals a decisive blow to the majority of the leafy weeds, it has little, if any, impact on the more troublesome algae and lichens, and so for these bruisers, we rely on the time honoured 'dousing with bleach' strategy.
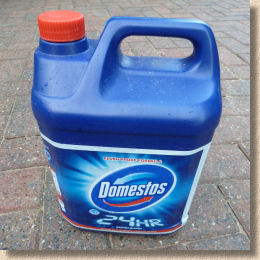
Again, it might have been more effective to obtain a drum of professional-grade sodium hypochlorite as used to chlorinate swimming pools, but to keep with the DIY ethic, a few containers of a well-known household bleach were sourced via the local supermarket. This product claims to contain around 5% sodium hypochlorite, which is the sort of dilution normally used for algae-killing purposes, and so it was applied 'neat' and then scrubbed into the surface using a stiff brush to help spread what is a rather gloopy product designed to cling to the sides of the family bog rather than be easily dispersed over a pavement.
Both the weedkiller and the bleach required repeat treatments, which validates the decision to carry out these treatments a few weeks before the other maintenance tasks. The weedkiller saw off the more weedy weeds, such as Yorkshire Fog grass and the mosses that colonise the joints, on the first attempt, but there were a few toughies, including a type of spurge which blows in from the neighbouring woodland and the hard-as-nails dandelions than frequent these parts, which necessitated a repeat treatment. 5 days after the second application, there was no sign of green in any of the weeds. It was expected that the anti-algae bleach treatment would require more than one session, and in the end, a total of three thorough soakings were used to make the algae curl up and die, or at least turn to a crispy shade of brown, and this also encouraged all but the most stubborn of the lichens to surrender.
In between each treatment, the surface was swept using a stiff brush. This helped loosen any detritus or weed matter that was attempting to cling on. Predictably, leaves swept up and removed one week were fully replaced by fresh dead leaves by the time of the follow-on treatment, which is not what you really expect in July!
Dealing with Algae, lichens and 'Black Spot':
It probably comes as no surprise whatsoever to hear that Britain and Ireland have a damp climate, and in such a climate, all sorts of teeny tiny life forms manage to make a home for themselves on many types of paving, and block paving is a particular favourite, no matter whether it is concrete clay or natural stone. Many surfaces will see areas which have a green-ish tinge, often due to an algae, and then there are the spots or blobs of something that can look like anything from rust spots to flattened chewing gum to the scourge of ..the dreaded Black Spot.

These spots and blobs, including the Black Spot, are actually a lichen, which is a cooperative effort between an algae and a fungus, and these can be a real nuisance, but, thankfully, they are not too difficult to shift.
The cleaning and treatment for algae, lichens, and Black Spot is covered in greater detail on a separate page. Regardless of the surface on which they grow, the treatment is pretty much the same. The good news is that its relatively cheap and simple.
