Introduction:
The two more popular types of resin-based mortars are the brush-in (aka "polymeric") mortars (1-part), and the slurry grout (2-part). The polymerics tend to be lower strength products more suitable for use on patios and low-use pedestrian areas which aren't regularly power washed , while the mixed on-site slurry-applied grouts tend to be much stronger and ideally suited to driveways, public plazas and anywhere open to vehicular traffic. The 2-part grouts are also superior at withstanding the erosive effects of pressure washers.
The polymerics are considered on this page, while the slurry-applied resin mortars are considered on a separate page .
Most polymeric resin mortars comprises a sand or other suitable filler which is coated with a resin (usually polybutadiene or similar) that will cure when exposed to the atmosphere. This resin is usually 'protected' by a light oil, which evaporates when the mortar is exposed to air, which in turn leaves the resin unprotected and so able to harden.
Most brands are provided as pre-mixed "ready-to-use" in a sealed pail or package. With some products, they are swept into the empty joints 'dry'; that is, with no added water and without needing to pre-wet the pavement surface. However, the latest generation of polymeric jointing mortars tend to be "wet-brushed" into the paving joints using water to move and compact the mortar more readily than is sometimes the case with dry polymerics.
It's important to realise there is significant variation in performance between the various brands. Some are, not to mince words, bloody useless and cause more problems than they solve, while the genuinely good products are VERY good. Look for products with a reasonable adhesive strength (> 0.7N/mm²). Avoid those that bond only to themselves and do not actually bond to the paving: these products are easily removed by power washers and are NOT suitable for use on any pavement carrying vehicles, regardless of what the manufacturers claim.
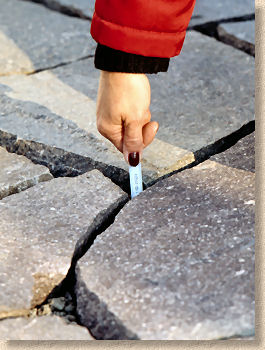
It's particularly important to appreciate that most polymerics have a minimum joint width and/or depth requirement. Mortar used to fill any joints that are narrower and/or shallower than the recommended minimum is likely to be weak, fragile and more prone to being lost from the joint over time.
The pre-mixed one component polymeric products are convenient and they reduce preparation time, but some brands feature packaging that is prone to being accidentally punctured, exposing the contents to air or moisture and consequently hardening or perishing. All packs should be checked for integrity before opening: most suppliers are loath to accept returned opened packs that are alleged to have been compromised/punctured. The better quality products tend to come in sealed buckets or pails.
Before placing the mortar onto the surface, the installation instructions MUST be consulted, as there may be guidance or advice specific to that particular product.
Tools:
- Stiff brush
- Soft brush
- Squeegee (optional)
- Trowel (for scraping out buckets/pails)

Coverage Guide:

Use this Pavingexpert Calculator to determine approximate coverage for polymeric jointing
Technique:
Dry Brush-In
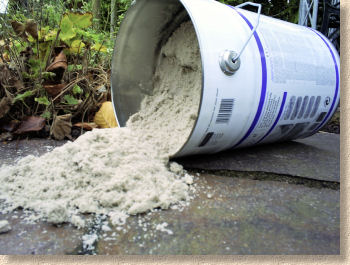
The container is opened, the mortar is tipped out on a dry pavement surface, and the trowel used to scrape out any 'sticky' mortar that remains in the upended pail. When jointing smaller areas (25m² or less) one container at a time is normally opened, with all of its contents spread and chased into the joints before opening any additional containers. On larger areas, two or more containers at a time may be opened and spread. Bear in mind the coverage rates and the working life of the material when determining how many containers to open.
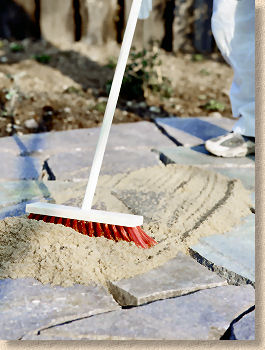
The polymeric is spread over the pavement surface and chased into the joints using a stiff brush or a squeegee. Most resin-based mortars tend to be self-compacting, so the material readily settles into the joint and does not need to be tamped down or 'tooled' to consolidate it within the joint.
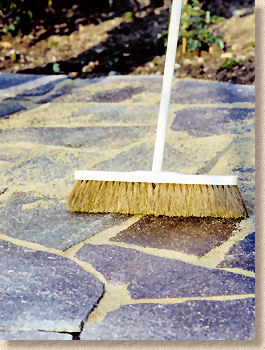
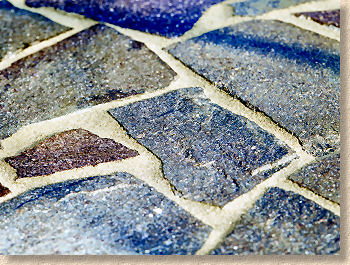
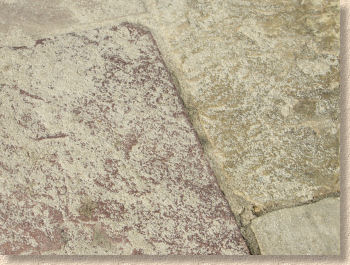
Excess material must be swept off the surface before it has a chance to 'set' otherwise it will bond permanently to the paving surface. While as much of the sand/filler should be removed from the surface as is possible, there is usually a thin film of resin remaining that cannot be removed. This will cure and give the paving a semi-damp appearance, enhancing the colours of the stone, but it will weather away over the course of the following weeks, returning the pavement to its natural state.
The time required for polymerics to cure varies from product to product, and, not surprisingly, is heavily affected by environmental conditions, particularly ambient temperature and humidity. However, most have a 10-20 minute working life, take around 20-40 minutes to start to harden, and need 8-12 hours to become hard enough to accept pedestrian traffic. When polymerics are used on vehicular areas (and they should only ever be used for light-use private driveways), it's often a good idea to allow 24 hours before allowing vehicles to use the pavement.
Tools should be cleaned of any residual mortar by brushing them clean. Any surplus polymeric left over will need to be binned. It can't be put back in the container and saved for later: once exposed to air, it immediately starts to cure.
And that really is all there is to it! Polymerics are amazingly simple and, when used for the first time, there's a natural tendency to believe there must be more to it than simply sweeping the stuff into the gaps.
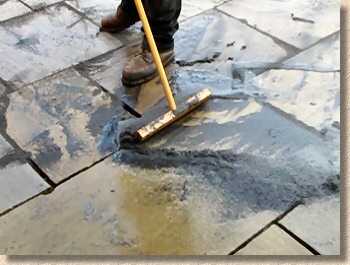
Technique: Wash-In
The tools and techniques used to joint a pavement using a Wash In polymeric are quite similar to those outlined above, except for the use of water.
In most cases the surface is pre-wetted and then additional water is used to spread the polmeric across the surface and coax it into the open joints. This can have significant advantages over dry application...
- Work can continue in damp weather, light drizzle or the usual climate fun we get in these islands
- The polymerics become self-compacting and thoroughly fill the joints without needing to be tooled
- There is a reduced incidence of residual resin clinging to the pavement surface
- Can also be used dry, if required
Not all wash-in polymerics offer all of these benefits. As with much else in the paving trade, there are good products and there are products that are less good.
It's never a good idea to try to predict what will happen next in this industry but the way the wind seems to be blowing just at the moment, the wash-in polymerics are increasing their market share and there is some evidence to suggest they actually perform even better than their dry siblings. So, maybe as this market develops, the wet-applied, wash-in polymerics will become the preferred patio jointing material for those unwilling to use a proper resin slurry grout.

There are a couple of Product Studies looking at the use of wash-in polymeric mortars on this site:
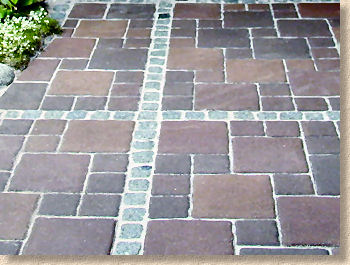
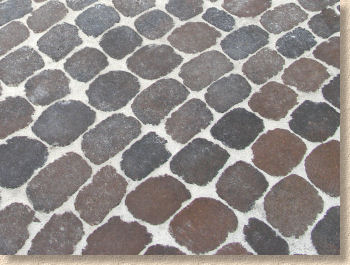
Examples:
Comments:
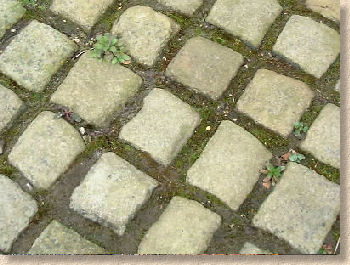
If you can sweep, you can joint paving using a polymeric resin mortar. They eliminate much of the hard work normally associated with pavement jointing by allowing ALL work to be done from a more ergonomically comfortable standing position, and no need to get down on hands and knees to ensure the joints are properly filled.
The good products (the difference between the good and the crap really can't be over-emphasised) are resistant to colonisation by weeds and algae, they can just about withstand very careful power-washing, and they provide a supremely quick, easy and effective method for jointing patios and pathways.
And that's their main limitation: they just aren't tough enough for any pavement subject to regular vehicular use, nor for commercial or heavy duty projects, and not for any paving that is regularly subjected to a thorough power washing treatment. Thankfully, their beefier cousins, the resin slurry grouts , are supremely well-suited to these applications, so there really is no need for them to be used inappropriately.
The other limitation is cost. They are not cheap, particularly when compared to plain sand and cement mortars, although the proprietary cement mortars are closer to them in terms of price per kilo. However, the material cost has to be offset against the considerable saving in both time and effort, not forgetting that there is no risk of staining. Many contractors are beginning to realise that, for most residential patio projects, polymeric resin mortars are a real boon. Feedback to this website indicates that somewhere between 75-80% of contractors using a quality polymeric never go back to traditional sand/cement jointing.
Finally, one last mention of the huge yawning chasm of difference between the genuinely good polymerics and the dross. Don't be tempted by lower prices or easy availability from the DIY sheds: the poorer products will not only let you down and reduce the service life of your paving, they'll also hit your pocket. If you're going to pay good money for a polymeric jointing material, you might as well be certain it's not going to be an expensive failure.
Other pointing and jointing pages...
- Introduction
- Terms & definitions
- Pointing Styles
- Spacers for Paving
- Cement Mortars
- - Hand Pointing
- - Pointing Riven Flagstones Using Coloured Mortar: A Case Study
- - Wet Grouting
- - Dry Grouting
- - Slurry Grouting
- - Gun Grouting
- - Poured Grouting
- Resin Mortars
- - Polymerics
- - GftK Polymerics: A Product Study - VDW 840+
- - Romex Polymeric Mortars: A Product Study
- - Jointex Polymeric Mortar: A Product Study
- - Slurries
- - GftK Slurry Mortars: A Product Study - VDW 800 Permeable
- - GftK Slurry Mortars: A Product Study - VDW 850
- Re-jointing paving
- Pitch Jointing
- Loose Fill Jointing
- - Stabilisation
- Alternative Jointing Materials