Gallery

Principle
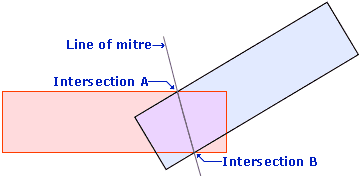
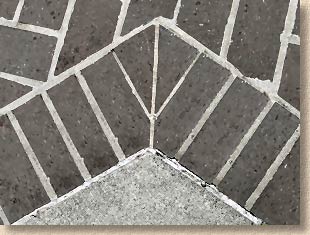
Whatever type of paving is being used, the principle involved in creating a mitred joint remains the same. The line of mitre ALWAYS runs through the two points of intersection. In mathematical terms, it "bisects" the angle, splitting it in half, so that each side looks balanced and even. This basic principle is illustrated below.
Worked Example
What follows is a schematic illustration of how a mitred joint might be formed when laying an edge course around a typical bay window. The principles involved can be applied to a whole host of other scenarios, but this example shows each of the stages involved, and (hopefully!) makes it a lot clearer.
The first step is to lay the edge course blocks as normal, until the final block is within one block's width from the mitre point. Do this to both the left-hand and right-hand side of the intended mitre.
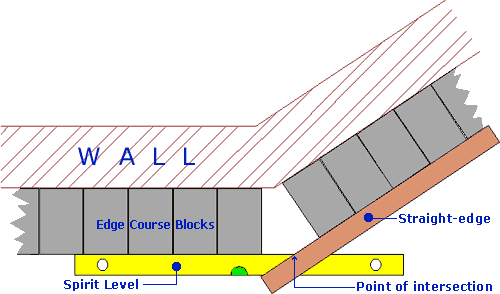
Once the blocks are in place, a spirit level and/or a length of straight-edged timber can be used to project the imaginary outside lines to the point of intersection.
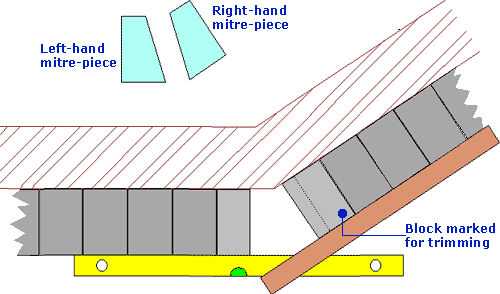
Position a full block so that the corner is aligned to the point of intersection on the external edge. Mark the block (the edge of a piece of slate is ideal for this job) where it abuts the internal point of intersection, and then join the two points, marking the cut line onto the surface of the block.
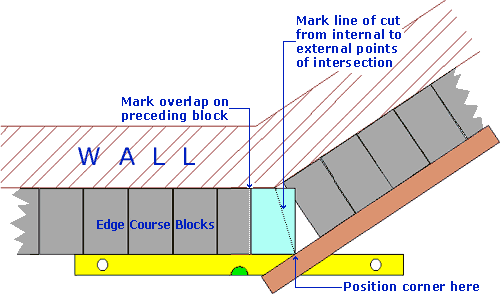
Before moving the block away to be cut, mark the overlap (if any) on the preceding block, which will need to be cut down to accommodate the mitre-cut pieces. In the diagram above, the block immediately to the left of the mitre-cut block (the light blue block) is marked for cutting.
Once the marking-up has been done, the block that will be the mitre piece can be removed and cut as required. The preceding block can be cut at the same time and then re-laid.
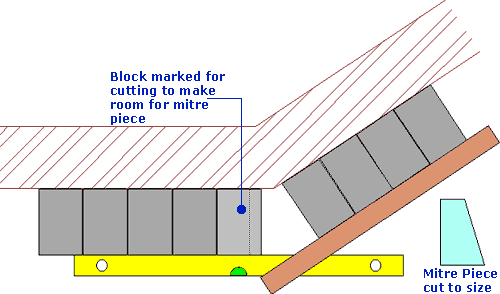
The reduced block has been put back into place on the left hand side and now the right-hand component of the mitre can be positioned for marking. Again, a full block is positioned so that the bottom left-hand corner (when looking at the diagram) is aligned to the external point of intersection, and a cut line is marked from this point to the internal point.
As in the previous stage, any overlap of the preceding block (on the right hand side) should be marked while the mitre-block is in position so that it, too, can be cut to size.
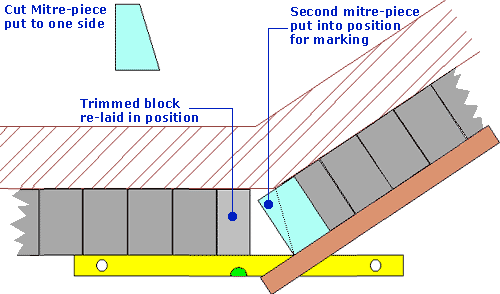
The right-hand mitre is cut and put to one side, along with the left-hand mitre piece, while the block marked in the previous stage is trimmed down to accommodate the mitre-pieces.
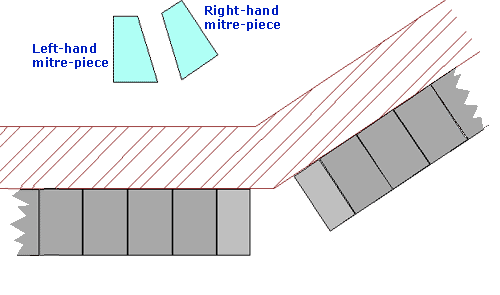
The spirit level and the straight edge that have been used as a guide to positioning can be removed and the trimmed block for the right-hand side re-placed, ready to fit the last two pieces, the mitre-cuts.
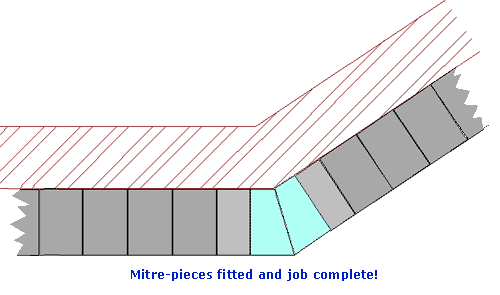
And finally, the two mitre pieces can be put into place, completing the mitred angle in a thoroughly professional way.
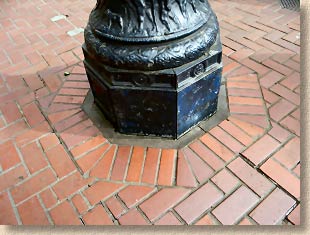
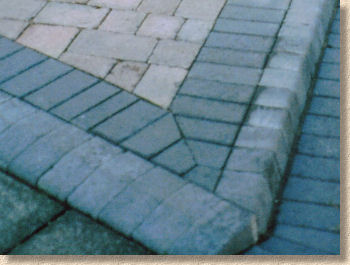
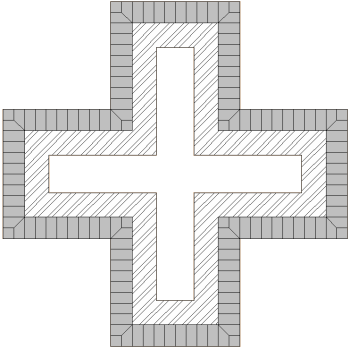
The principles outlined in this section can be adopted and adapted as required to suit cutting-in tasks around objects such as this octagonal lamp column. Simple 45°' mitres, cut using the same principles shown above, have been used to form a neat soldier course around the base of the column. The rest of the cutting in and the jointing leave something to be desired, but the mitre details are just as they should be.
90° Mitres
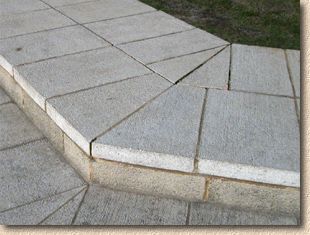
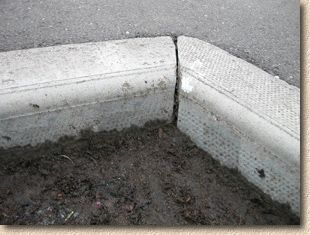
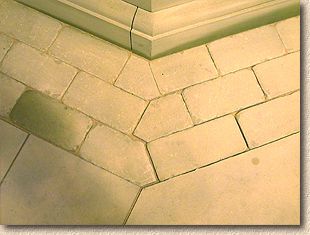
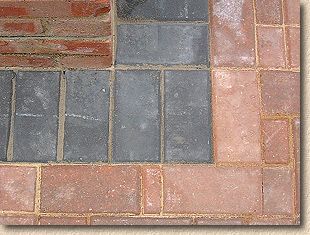
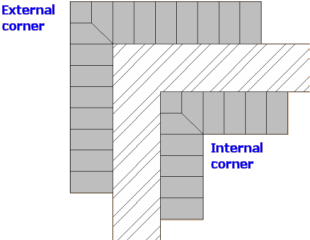
90° mitres are used on both internal and external corners of buildings and wherever else a right-angle corner is required. Although it is possible to use non-mitred paving units, as shown on the left-hand side below, a properly mitred joint (right-hand side) looks much tidier and more professional.
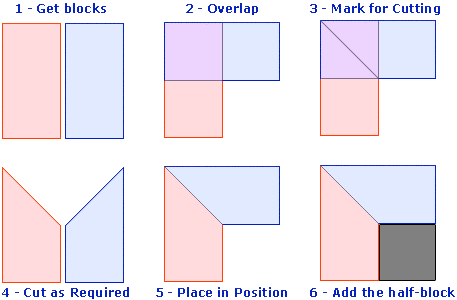
This type of mitred joint is relatively simple to construct, particularly with the popular 200x100mm plan size block pavers and the basic principle is shown below....
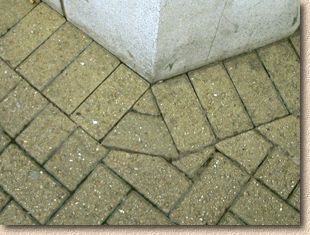
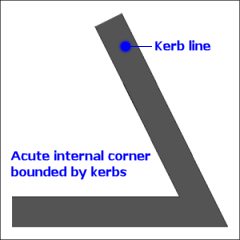
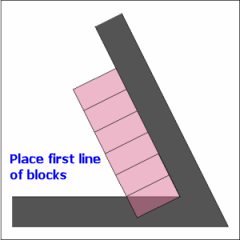
Acute mitres
How would you go about creating a mitre for an acute angle (ie: one that is less than 90°)?
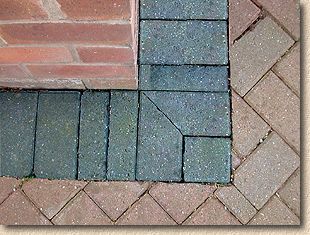
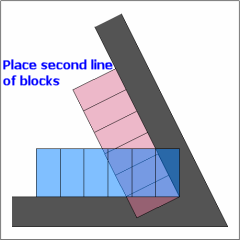
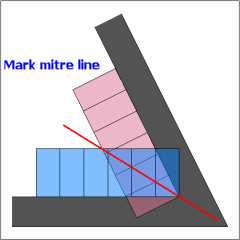
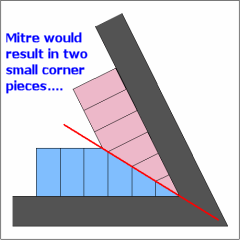
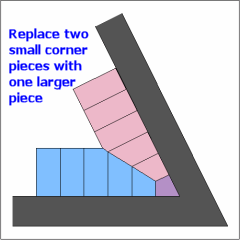
The same principles apply, in that the two branches are positioned, the mitre line defined, and then the paving uniots cut to suit. However, with acute angle, the two innermost pieces would be quite small, and so a better finish involved cutting a single piece for that internal corner, resulting in a much more professional looking finish, and no nasty small pieces to worry about!
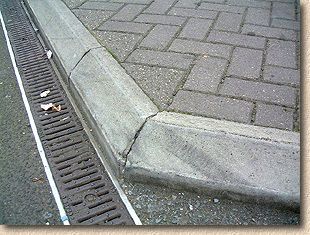
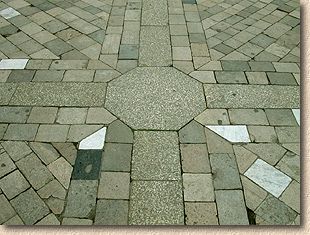
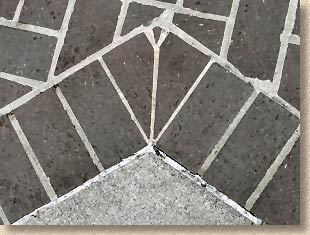
...and how does it look in reality?