
Refurbishing a block paved driveway
This page is one in a series which documents the refurbishment of an existing block paved driveway. Although the page can be read as a standalone article, it will probably make more sense if read in conjunction with the associated pages listed below.
Part 3: Cleaning
The Problem
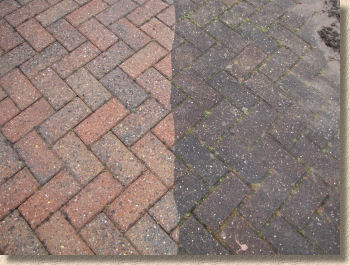
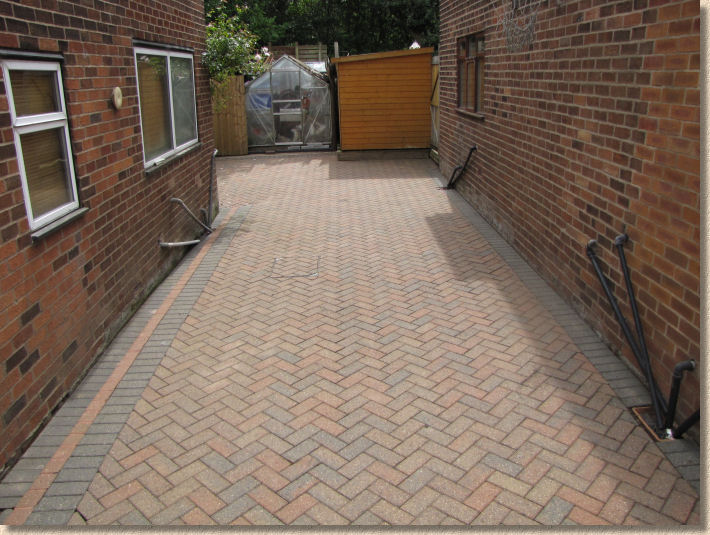
As has been noted previously, the biggest problem with the driveway was the general dirtiness resulting from at least a couple of years of neglect. The surface had become encrusted with dirt which masked the colour and texture of the paving blocks, and this had been exacerbated by the presence of algae, mosses and lichen , which had, by and large, been killed off by the previous weedkiller-bleach onslaught .
It would have been possible to clean the surface using a typical 'home use' pressure washer of the type sold by the DIY sheds, but because this was to be a showpiece project with the aim of getting it thoroughly clean and then using a top quality sealant to keep it clean, it was decided to bring in a professional surface cleaning specialist with the appropriate equipment to carry out the job quickly, efficiently and, most importantly, thoroughly.
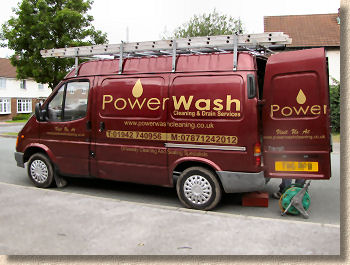

The Crew and The Kit
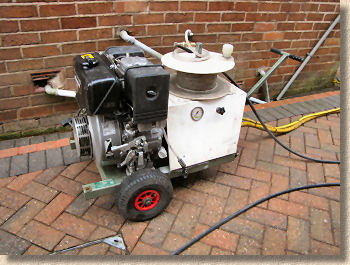
Powerwash, an experienced local contractor was selected. They advise that a rate of £1 - £2 per square metre would be typical for cleaning of residential driveways and patios. The main equipment to be used was a diesel-engined pump which powered a rotary cleaning head fitting with the option to use a lance on more inaccessible areas. This equipment is capable of delivering a jet of water that is much more powerful than that from a typical 'home use' pressure washer, which makes cleaning more effective and faster, but also requires greater care from the operative, and full appreciation of just how much damage such a tool can cause to a pavement if used inappropriately.
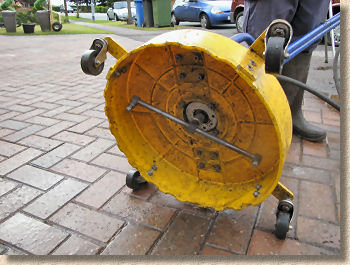
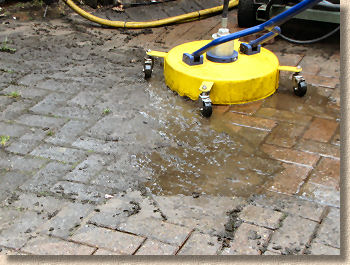
The rotary cleaning head is preferred for cleaning horizontal surfaces as a larger area is cleaned with each pass than would be the case with a lance, and the water jet is carefully angled to ensure maximum cleaning impact with minimum threat to any jointing of the paving itself. Further, the protective hood of the tool prevents any dislodged detritus being scattered onto adjacent surfaces.
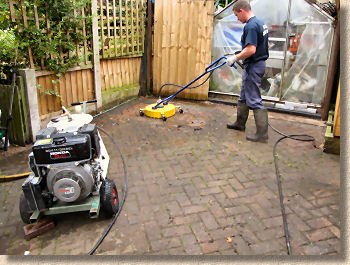
The Cleaning
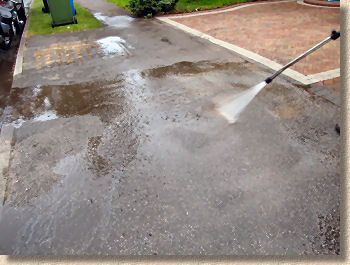
The rotary head cleaner makes rapid progress across the dirt-encrusted surface, loosening the layer of crud and blasting free the last few specks of algae clinging to the paving blocks.
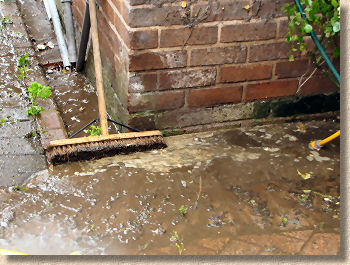
Some care is required with all that loosened detritus, as the water will wash it towards any drainage points, such as gullies or linear channels. These should be protected to prevent them becoming blocked. On this project, a large part of the driveway drains towards a single gully within a dry channel construction and so this could be protected by using a soft brush to straddle the entrance to the gully channel. The bristles of the brush allow water to pass through relatively unimpeded but trap any solid matter.
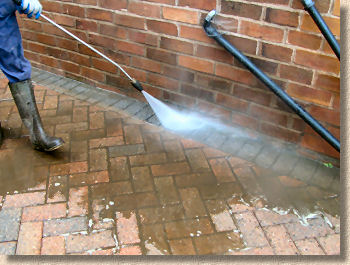
The rotary head cleaner performed well for some parts of the driveway, but the cleaning gang soon noticed that, in certain areas, the dirt was so heavy that it was taking several passes with the head to remove all of it, and so it was decided to switch to the lance for these sections. The lance provides a much more forceful jet of water over a much smaller area, compared to the rotary head cleaner, and so extra care is required to ensure the water jet is maintained at a safe, shallow angle.
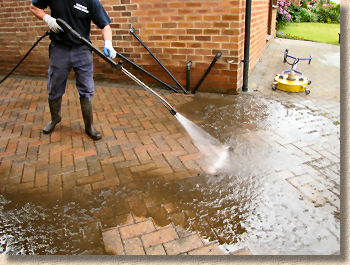
The professional lance used by this operative allows the pattern of the jet to be adjusted and it was found that a splayed jet which presented a fan of water roughly 300mmin width was delivering best results, being powerful enough both to remove the dirt and to wash forward the loose detritus.
And to prove just how effective the cleaning can be, this photograph shows the radical improvement following a single pass with the high-pressure lance, which has removed 95% of the dirt and algae. A further pass following initial cleaning will remove any remaining matter.
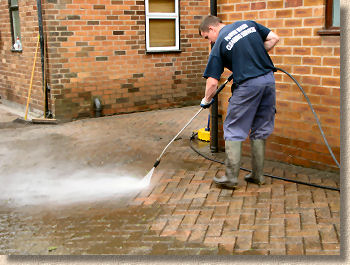
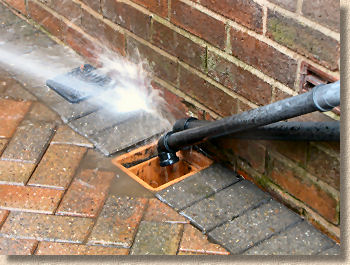
The lance is also useful, if not essential, for cleaning edges and against walls where the rotary head cleaner cannot get. This task could be done before cleaning the bigger area, or, as in this case, left until the bulk of the paving has been cleaned and done as part of the follow-up clean which looks to remove any spots or awkward bits missed by the initial clean.
Wash Down
Once the whole area has been cleaned and checked over, any adjacent walls, windows, doors or other surfaces which may have become spattered with the removed detritus should be washed down and left in a clean and tidy condition. For this task, the high-pressure function is normally switched off and the lance, or just the hose, relies on normal mains pressure to swill down.

The other essential 'finishing-off' task is to check any drainage points, gullies or linear channels to ensure they have not become blocked or silted with wash-off.
It's worth pointing out that intensive cleaning such as this project can generate a significant quantity of crud that will need to be disposed. On this project, 90m² resulted in almost a barrowful of slops! Allowing this to enter the drainage system, a soakaway or a watercourse is not a good idea. Much better to allow it to collect at some low spot, give it a half-hour for the excess water to drain and then shovel-up the remains, which will be rich in organic matter and ideal for adding to a compost heap or scattering across a flower or vegetable bed. As a last resort, it could be put into the garden refuse bin or bagged-up and dumped.


All done and dusted
If this was simply a straightforward cleaning job we'd now set about re-sanding the joints, to replace any of the essential jointing material that will have been washed out during the above work. This is shown in Part 6 of this project, but there are some minor repair to be done before that, which are shown on the next pages in this series, Parts 4 and 5.
Once cleaned, the driveway needs at least three days to dry out before even thinking about applying a sealant . The biggest single cause of problems with sealants reported to the website result from premature application, when there is residual moisture within the pavement. The surface may well look dry after an hour or so on a summer's day, but it will take considerably longer for all the water used in cleaning to evaporate from within the paving blocks and the sand-filled joints. As a general rule, and assuming there is no precipitation in the meantime, we recommend a minimum of three days in summer (May-October) and two weeks in winter (November to April). That's why we don't like to see established pavements sealed during the off-season.
Luckily for us, we have some repairs to carry out which will be done over the next week or so, which will provide (hopefully) plenty of time for the pavement to completely dry out.