Introduction:
The following diagrammatic instruction for laying block paving is intended to be used in conjunction with the detailed methodology given on the Flexible Construction page.
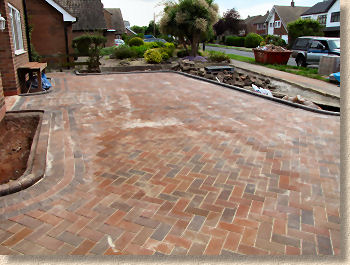
This case study follows the construction of a private driveway using clay pavers , which follows exactly the same procedure as construction using concrete block pavers, although clays can be a little more awkward to get into straight lines. Similarly, each of the steps illustrated is the same as those used for construction of commercial block pavements , although sub-base and block thickness will be different, and commercial pavements may include a base layer as well as a sub-base.
Each and every job is unique and will present unique challenges, so this highly simplified step-by-step guide can only hope to illustrate the key stages of construction in the most generic terms.
Photographs of actual block paving jobs being undertaken by users of this website can be seen on the Doing it Yourself page.
Preparation
It's a good idea to have a plan before any ground is broken.
On this project, a construction drawing was prepared in advance (as part of the pavingexpert.com design service ), so that the client could be sure they were happy with the proposed dimensions and layout, and that the contractor knew exactly what was expected.
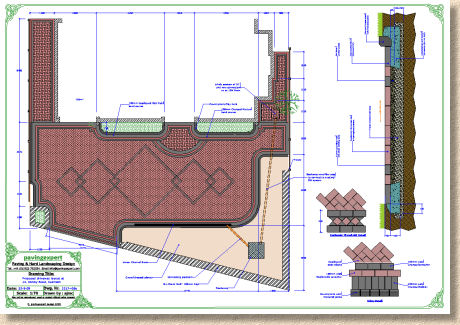
The cost of preparing such a drawing is often recouped in the time saved by not having to argue over just where the edge course was to go, and which bits were to have kerbs, etc. A good site layout plan is an extremely useful addition to a written specification and/or Bill of Quantities, as each party knows exactly what is to be constructed.
The area of the planned paving should be marked out in advance, allowing approximately 300mm over at each free edge to make the handling of materials and haunching of edgings or kerbs that much easier. Sand, a spray marker or string lines and stakes can be used to mark out the area - see Setting Out page.
Make sure the approximate location of any services such as electricity, gas, cable tv, etc., are known before and excavation takes place - see Working Safely page.
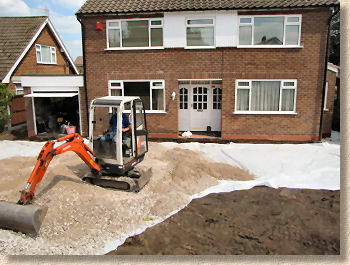
Excavation
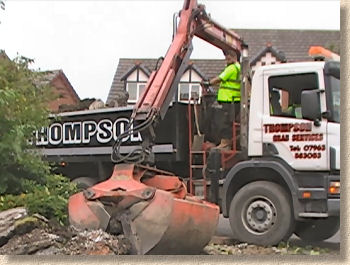
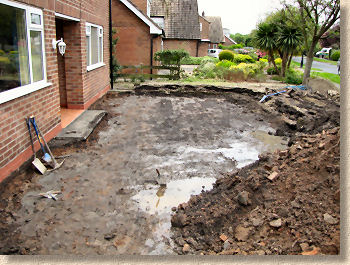
Dig off as required, and dispose of spoil. On this project, a 3.5 tonne mini-digger was hired-in to undertake the excavation which with a total area of 115m² plus extra for drainage, flower beds, etc., would generate around 30m³ of spoil to be carted off-site to a licensed landfill site. The excavator would also help to spread the sub-base material.
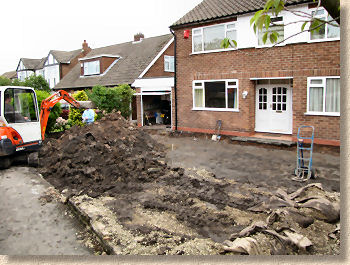
The excavation depth for a typical domestic driveway is 200-250mm below finished paving level, based on 100-150mm sub-base, 40mm sand bed and 50mm block. Typical builders' skips hold approximately 4.5 m³ of excavated material, which, assuming a 200mm dig depth, works out that each 20-25 m² of paving will require 1 skip to dispose of spoil. Remember that excavated material bulks up by 20-30%, so each 1m³ dug out will become 1.3m³ for disposal.
Rather than rely on a fleet of around 7 or more skips, the spoil was collected by a Grab Wagon, which can collect roughly 9m³ at a time and works out cheaper than using skips.
Make sure any soft spots are excavated: they should be backfilled with compacted sub-base material. Remember, it's better to dig too deeply than too shallow.
See also sub-grades page.
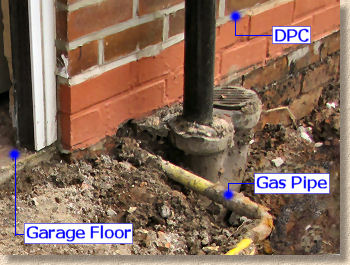
Any drainage that is required should be installed at this stage in the construction sequence and haunched with concrete for protection.
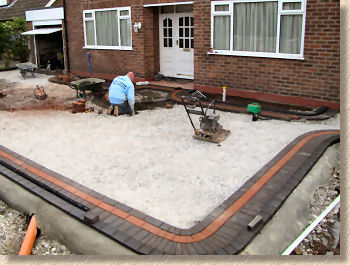
Sub-base
Spread, level and compact a minimum 100mm thick layer of sub-base material.
The sub-base should be profiled or graded to match the planned profile of the finished paving and should be accurate to ±10mm. There should be no voids within the sub-base - any such voids should be filled with stone dust or grit sand and compacted before placing the laying course.
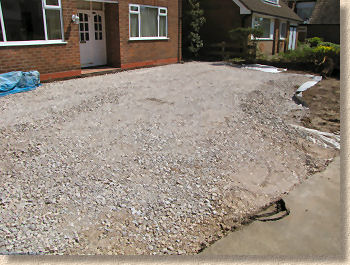
On this project, a non-woven geo-membrane has been used between sub-grade and sub-base to prevent the stone being pushed down into the underlying clayey material (and the clayey material being pumped up into the sub-base). As explained in the FAQ , geo-membranes are optional but if there is any query regarding the competence of the sub-grade, they are a good investment.
Edge Courses and Kerbs
Set up taut string lines to guide line and level of edge courses and kerbs.
Edge course bricks and kerbs should be laid onto a concrete bed. Check that straight lines are indeed straight, and that the curves are 'sweet'. Once satisfied with the lines and curves, edge courses and kerbs should be solidly haunched with concrete at least 75mm thick.
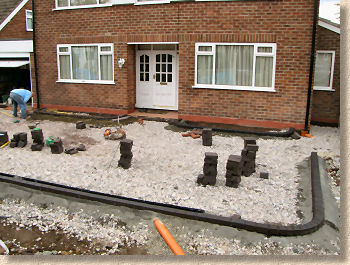
The client requires a small clay bull-nosed kerb to the flower bed edges of the new driveway, so these are installed first, laying onto a concrete bed and buttering the joints between each of the kerb units to give a neat and tidy finish. They are then robustly haunched with fresh concrete.
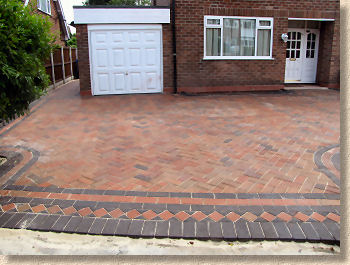
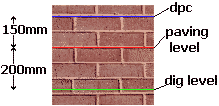
Wherever there is a kerb, that will act as the restraining edge so the edge courses does not need to be laid on concrete, but this contractor prefers to have very firm and reliable edges, so the decorative edge course, comprising a 200mm wide ebony brown brick with a 100mm wide red-multi contrast and then a final 100mm wide ebony brick is laid on a lean-mix concrete.
Laying Course
Spread, level and compact laying course sand, and screed to correct level.
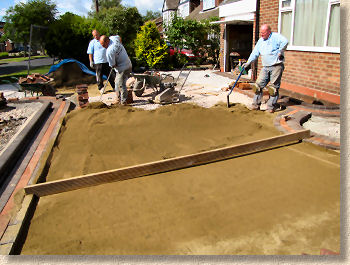
When compacted, the laying course sand should be 25-40mm deep. The key to successful screeding is creating a smooth, even and flowing surface on which to lay the bricks. The surface profile of the screeded laying course more or less matches that of the finished pavement, so attention to detail is essential.
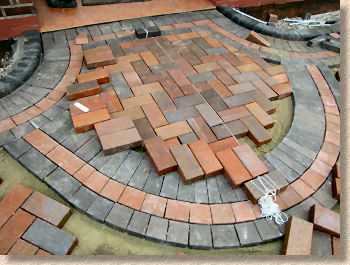
Block laying
The plan calls for a 45° pattern, so a starter course of blocks square to the building is established. 90° patterns are best started at a corner or main edge of the building.
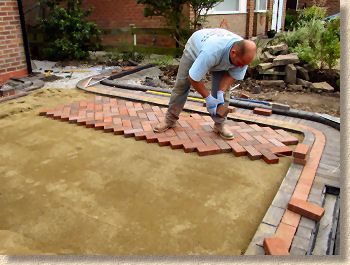
Laying of all full blocks continues, with the operatives working from the already laid paving, not from the screeded laying course. The bricks (blocks) are randomised prior to laying by selecting them from at least three open packs. this helps prevent blotching or banding of colours and allows the paving to show off the full range of hues to best effect.
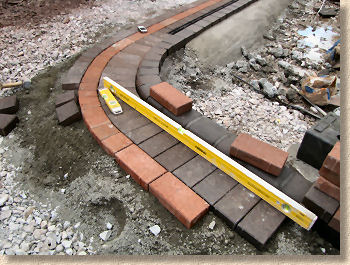
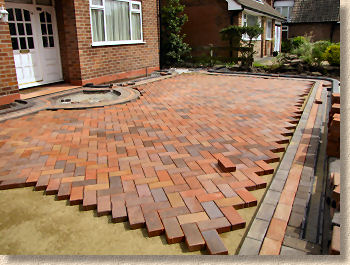
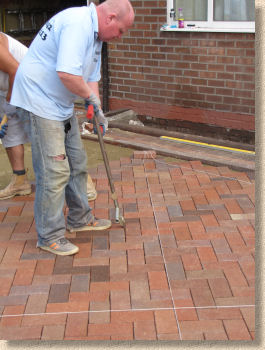
Alignment and compliance
Once all the full blocks are laid, they need to be checked for alignment by using a string line stretched along the diagonal courses and adjusting as necessary, using the alignment bar tool as shown in the photograph. Clay pavers often require significant re-alignment as the imperfect rectangles are prone to drifting off-line during the laying process. Concrete blocks, being moulded as perfect rectangles, usually suffer less drift and so require less re-alignment, but they should always be checked prior to cutting-in.

Cutting-in
Once the alignment has been checked and verified, the edges can be cut in .
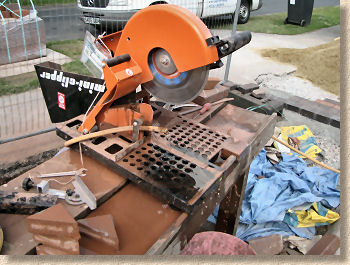
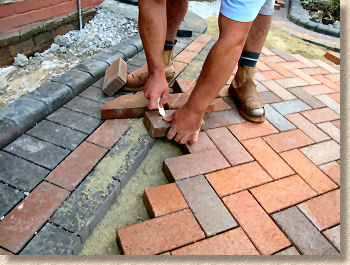
Clay pavers are noticeably harder to cut than their concrete counterparts and so the contractor on this project decided to use a bench-mounted saw rather than rely on a block splitter . This is a matter of personal choice as it is perfectly acceptable to use a splitter for clay pavers and it would be the first choice tool for most concrete pavers.
Notice the hose pipe providing essential dust suppression on the saw cutter.

Finishing Touches
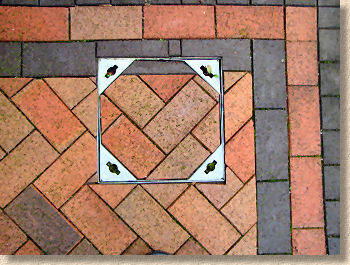
Fix Recess Trays and gully covers, if necessary.
Check paving for compliance .
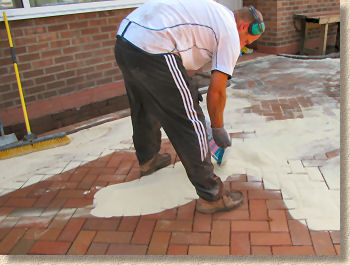
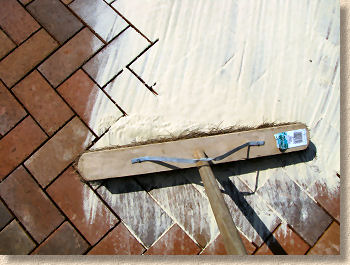
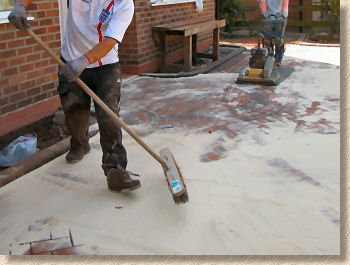
Jointing and compaction
The final task is jointing . This is done once all the cutting-in has been completed, and the compliance checks carried out.
Kiln-dried jointing sand is spread over the block surface and swept into the joints using a soft brush.
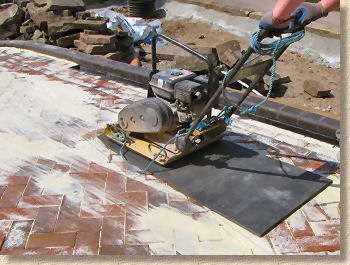
The paving is now compacted using a vibrating plate compactor (wacker plate). 4 to 6 passes are made over each section of paving, alternating passes at 90° to the previous pass. With clay pavers and some of the more decorative concrete blocks, a neoprene cushioning mat is attached to the base of the plate compactor to prevent spalling damage to the edges of the bricks.
Completion
Excess jointing sand can be swept off the surface and it is now ready to be used.
The jointing sand may settle over the first few weeks and should be topped up as soon as this becomes apparent. Many block pavements, of both clay and concrete pavers, may exhibit efflorescence in their early life but this should disappear within 12 months.
Regular maintenance will keep the pavement in tip-top condition and some clients will want to consider the use of a sealant to protect their investment from accidental staining.