
The installation was observed and documented independently by pavingexpert.com during July 2011.
A short video looking at the use of this same mortar on a patio of sandstone flags is available on a separate page.
Jointing for residential driveways is a regular debating topic amongst paving contractors. Block paving in all its forms is pretty straightforward: the efficacy of kiln-dried jointing sand is well proven and, despite numerous attempts to persuade us to use fancy chemically enhanced "Technical Sands" which claim to resist scour, weed growth and/or nuclear Armageddon, the trade is quite happy with the results we get from plain old KDS. However, when it comes to flags and setts, there is much less agreement amongst experienced contractors. Some maintain that traditional sand + cement mortar is more than adequate, but a growing number are coming to the view that the epoxy resin mortars, whilst being more costly materials, are actually a better option when the bigger picture is viewed, and especially so for driveways that are subjected to heavier-than-normal vehicles, such as vans, 4x4s and the like.
The pros and cons for cement mortars and resin mortars are made elsewhere on the site , but it's important to note that, for any vehicular areas, the use of an air-cured polymeric product is NOT recommended. They are fine for patios and pathways, but they don't really achieve the compressive, the adhesive, and most importantly the cohesive strength required to withstand the rigours of even the smallest of family cars, and so when a pre-batched resin mortar is to be used, the choice has to be epoxy.
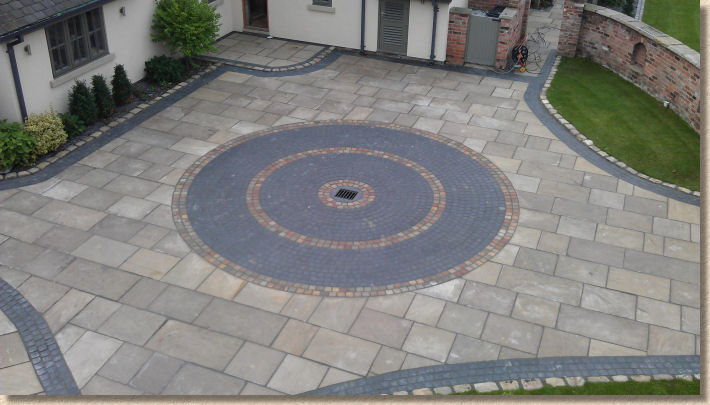
What follows is an examination of the jointing used on a very decorative residential driveway which uses a mixture of large flagstones and small setts. The main area under consideration was designed as a car washing area, which explains the dish-shaped layout and the use of setts to facilitate the numerous changes in levels that are necessary to create such a profile. The area is regularly trafficked by large 4x4s and there are various maintenance vehicles up to 20 Tonnes that will occasionally access the area, so a jointing system that was clean, simple and, above everything else, reliable was required.
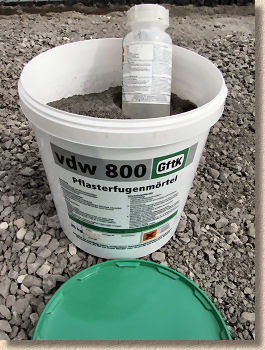
After examining what was available on the market, and the costs involved, the client elected to use VDW 800 Epoxy Mortar from German manufacturer, GftK , as supplied by NCC Streetscape Limited in Chorley, Lancashire.
Elsewhere, this website has looked at a commercial grade heavy-duty, slurry-applied epoxy resin bound sand mortar from this manufacturer and been impressed with the results when used on a town centre sett paving re-jointing project . At the other end of the scale, we've also looked at using an air-cured polymeric sand product for patio jointing , and at using a slurry resin mortar when jointing a flagged patio . However, this study focuses primarily on the use of an epoxy resin bound sand mortar for a driveway.
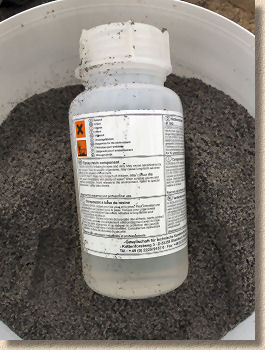
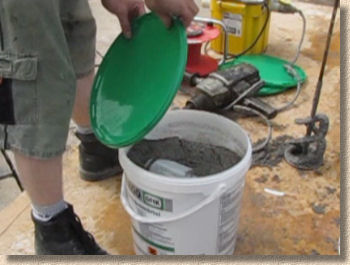
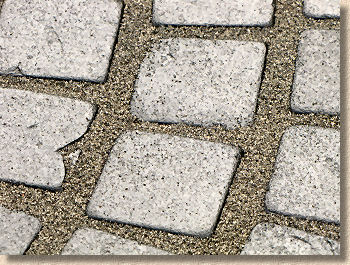
The mortar comes in an airtight sturdy plastic pail, complete with carrying handle. Each pail contains 25kg of the pre-coated fine aggregate (sand) in one of three colour options: Natural Sand, Stone Grey and Basalt, and a bottle of the "Hardener" which is added to the aggregate to initiate curing. It's worth noting that the aggregate used for VDW 800 is coarser and has a much wider grading envelope than that used for the polymeric resin sand mortar from GftK, and the Basalt colour, in particular, is noticeably different in both shade and texture to that of, say, the VDW 840+ Basalt.


How to use
VDW 800 epoxy resin mortar is intended to be applied as a wet slurry. The mortar is prepared as described below and then spread over an area of paving and chased into the joints using a squeegee. Any excess is scraped off using the same tool, and then, as the mortar begins to dry and harden, any residue is swept off the surface using a soft brush.
Vertical joints, such as those between kerbs, step risers or edgings, can be filled by feeding in mortar from a trowel. This is best done once the mortar has begun to harden and is slightly 'thicker' and stickier than when first mixed.
Where to use
VDW 800 is an epoxy resin bound sand mortar suitable for use on pavements trafficked by light-to-medium sized vehicles. It has been used in Germany for around 20 years where it has an excellent track record of performance. It has been available in the UK for around 5 years and is gaining respect with each new job. It is typically used with flags, setts and concrete blocks, where joints are 30mm or more in depth and at least 5mm in width.
It is water permeable and fully resistant to frost and the use of de-icing salts (Road Grit or Rock Salt, as it is often known). It achieves a good level of compressive strength (c. 15 N/mm²) and its results for flexural and bond strength, along with the important correlation of E Modulus are equally impressive.
It is ideally suited for pavements that receive occasional vehicular traffic, so the residential driveway featured in this Product Study is an ideal candidate.
There is a good selection of alternative resin jointing mortars available from NCC Streetscape that are ideally suited to patios, to public areas or even for highways and heavy vehicle hard-standing.
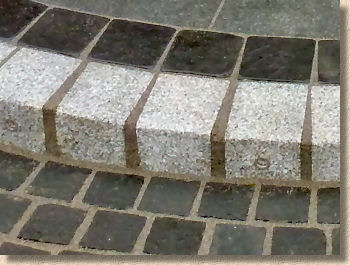
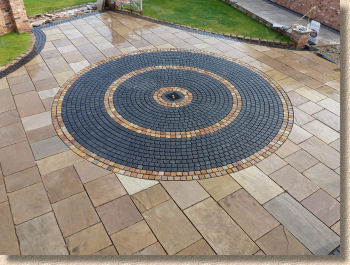
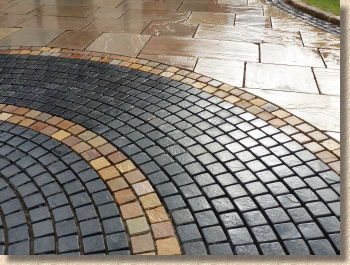
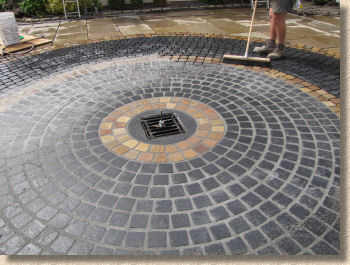
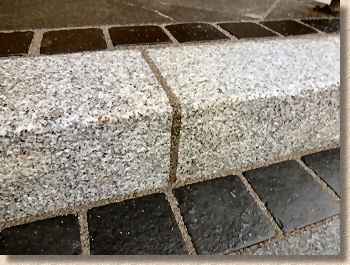
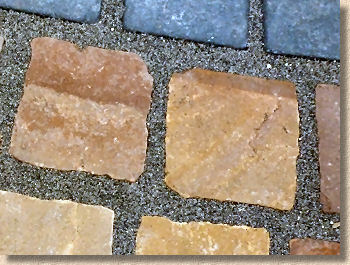
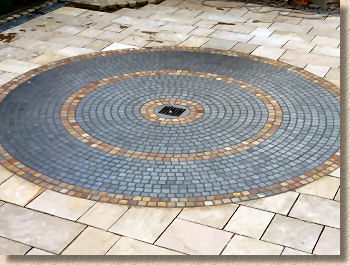
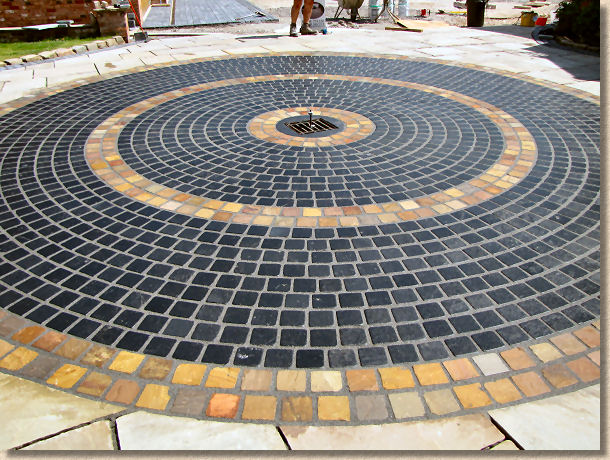
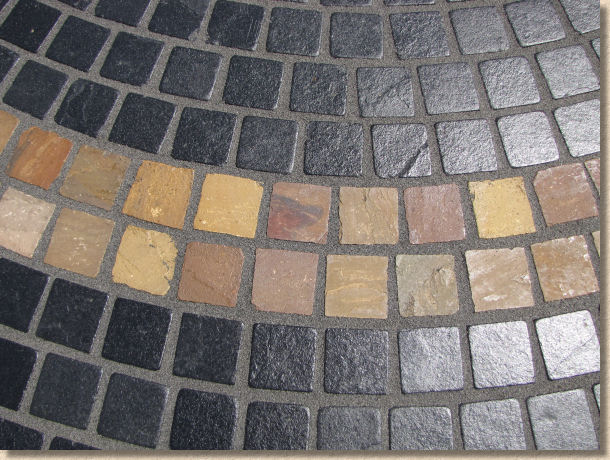
In this Product Study, we shall be jointing a residential driveway car wash area which has been constructed as concentric circles of 50mm thick Black Limestone and Raj Sandstone 100x100mm setts surrounded by 60mm thick Indian Sandstone (Raj Green, if you must know) with a triple-band edge course of the same 50mm thick Black Limestone setts.
Preparation
The circle has a diameter of 6m and so measures approximately 28m² in area. It should be possible to joint the whole circle in a single session.
The paving joints need to be empty (obviously!) and at least 30mm deep. As part of the construction process, the joints have been partially filled with cementitious bedding material (4:1 grit sand with cement) to hold the setts and flags in position until the jointing has been completed. This partial jointing has been kept low deliberately so as to ensure the required 30mm depth for the resin mortar. A visual check of the joints is made to ensure there is no detritus or litter trapped within the open joints
Once it has been confirmed that the joints are clean and of adequate depth, the surface needs to be cleaned to ensure it is free from any detritus, so it is washed down with a power washer prior to carrying out the jointing.
Pre-wetting
VDW 800 must only ever be applied to a wet surface. Should the resin mortar be applied to a dry surface, the resin could, in some iinstances, penetrate the paving material and may prove very difficult to remove. Wetting the surface prior to jointing helps ensure that the paving units remain free of resin and the mortar is much easier to move across the surface and into the joints.
If the surface is not already wet as a result of washing down as part of the preparation, it should be thoroughly soaked at this stage, before applying the mortar.
When applied as a wet slurry, the mortar becomes self-compacting and self-levelling so there is no real need to tool the joints, although they can be tooled if so desired.
Simply hosing down the surface is the best way to pre-wet the surface. It's practically impossible to over-wet the surface, and on warmer days, it will often be necessary to re-wet the surface as it dries off before the paving has been jointed. The key point to remember is that the VDW 800 must NEVER be applied to a dry surface.
Each 25kg pack of the mortar should cover around 2.2m² of this type of sett paving, and 10-12m² of flagstone paving.
Mixing the VDW 800
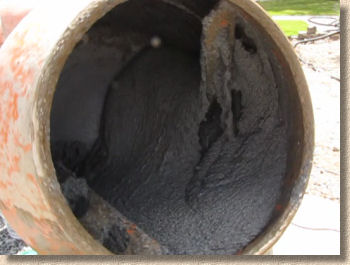
The VDW 800 is supplied in 25kg pails which are opened by removing the distinctive green lid to reveal a pre-coated fine aggregate and a bottle of the Hardener. The product is relatively stable until the Hardener is added. Relatively stable means it won't go hard if left open for a couple of hours or so, but if left open for much longer than that, some drying out could occur and the end strength and performance can become compromised. The moral of the story is that it's best not to open the pails until they are needed.
VDW 800 is what is known as a Two-Part Water Dispersed Epoxy Resin Mortar. It will not set until the two parts, the base and the hardener, are brought together and thoroughly mixed. The fine aggregate is pre-coated in the factory with the base component of the resin. When the pre-coated aggregate is mixed with the hardener, the curing and hardening process begins.
One other advantage of having a pre-coated aggregate is that when mixing is taking place, there is no risk of dust being generated from the material.
There are two commonly-used methods for mixing the VDW 800 and Contractors will choose which method is more appropriate for each particular job. The two methods are:
- 1 - Motorised Mixing Paddles
- 2 - Forced Action Mixer
Mixing Paddle
This method is popular for smaller projects and relies on the VDW 800 being mixed within the pail. It is also perfectly suitable for larger projects where several pails of the VDW 800 will be required but experience suggests that the mixing operative soon tires and struggles to keep up with the demand for mixed product coming from the jointing operative.
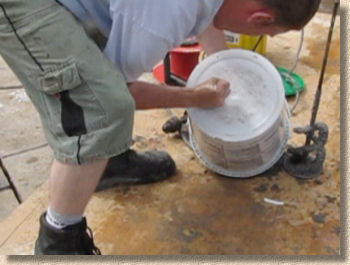

- 1 - The unopened pail of VDW 800 is inverted and tapped on the base to loosen the material that may have settled during transit and storage and to help free it from the bottom corners of the pail.
- 2 - The lid of the pail is removed, the bottle of hardener taken out and set aside
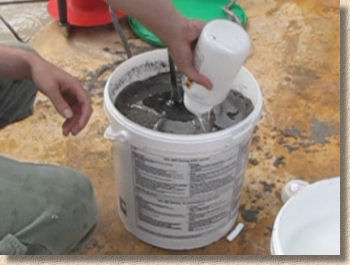
- 3 - The mixer paddles are driven into the pre-coated aggregate to loosen the material
- 4 - The bottle of hardener is added to the pre-coated aggregate
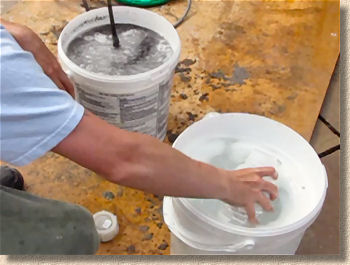
- 5 - The hardener bottle is rinsed out TWICE with clean cold water which is added to the pail along with the hardener
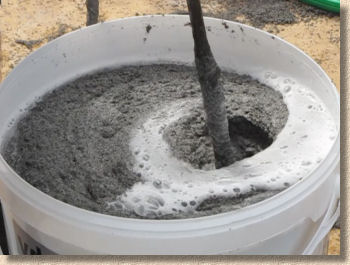
- 6 - The aggregate, hardener and water are thoroughly mixed for several minutes - usually a minimum of 3 minutes and up to 6 minutes is required to ensure complete and thorough mixing.
- 7 - The mortar is ready to be used
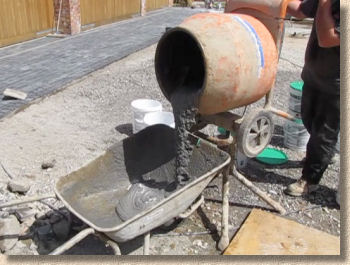
Tumble Action (Gravity) Mixer
This method is popular for larger projects because two pails at a time can be prepared within the mixer. Again, it can be used for smaller projects if preferred. Regardless of which mixing method is used, the key requirement is that the product be thoroughly mixed. Beyond that, the choice of method is down to the personal preference of the contractor.
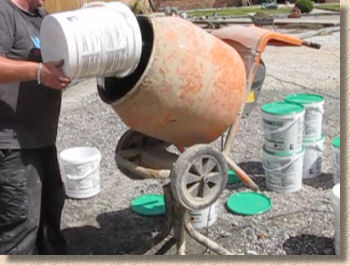
- 1 - Add the VDW 800 pre-coated aggregate to the mixer
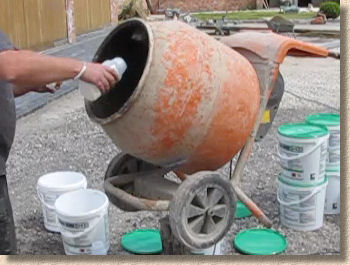
- 2 - Add the hardener
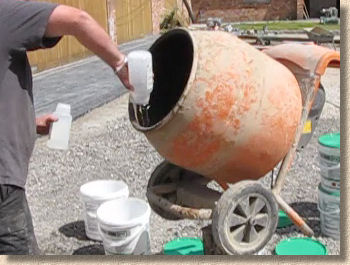
- 3 - The hardener bottle is rinsed out TWICE with clean cold water which is added to the mixer
- - 4 The aggregate, hardener and water are thoroughly mixed for several minutes - usually 3-6 minutes is required to ensure complete and thorough mixing
- 5 - The mortar is ready to be used
It's important to note that once mixed the VDW 800 starts to cure. This curing is a relatively slow process and even on a warm day the mortar will have a working life (pot-life) of at least a couple of hours, which is more than enough time to joint an area of paving. However, the downside of this is that any surplus mortar can't be saved for use on another day.
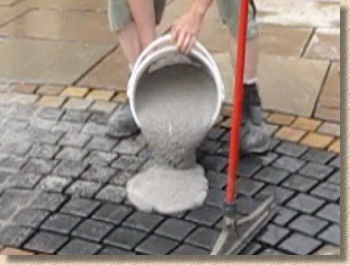
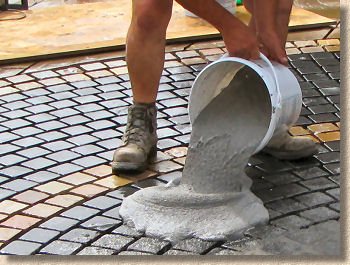
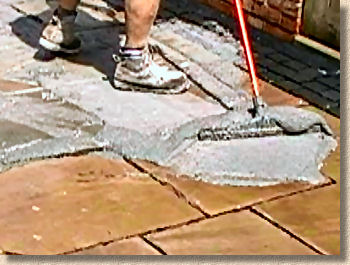
Spread the mortar
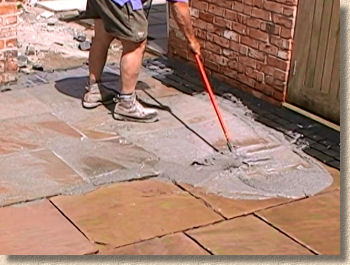
The mortar must be spread over a pre-wetted surface, as mentioned . The mixed VDW 800 is emptied onto the wetted surface and then spread over the whole of the surface using a rubber-bladed squeegee to chase the mortar into the joints. The squeegee is also a superb tool for scraping off any excess from the surface, ensuring that you can get 25 kg of jointing from 25kg of mortar and not have to waste any of the product as dust or residue.
The mortar moves quite freely as long as it is wet and it finds its own level within the joints. More importantly, as a self-compacting mortar, there is no need for the operative to crouch down to press the mortar into the joints. All work is done from an erect position using a long-handled squeegee for maximum ergonomic benefit and minimal tiring of the operative.
The mortar is quite 'frothy' at first and will move over the surface with ease, but as the water content seeps away under gravity and as the resins start to cure, the material becomes stiffer and drier and noticeably less frothy. Even on a warm day, you should get 4 or 5 minutes working time, and if the mortar starts to stiffen before you've had the chance to get all of it into the own joints, simply spray with additional water to re-wet it.
Use up all of one batch before pouring the next, so that the mortar being worked is always fresh and free-flowing. Don't be tempted to put out too much at once.
Cleaning Off
When the mortar loses its froth and the joints are filled, use the squeegee to scrape off any excess and move it towards any unfilled joints. The less mortar remaining on the surface at this stage means less cleaning effort required in the final cleaning stage.
After a period of time, the mortar becomes dry enough to allow the residue to be swept off the surface. Just how long this is will depend on how warm is the day, the porosity (or thirstiness) of the paving and all sorts of other factors, but it's usually 10-15 minutes or thereabouts. Do NOT leave any surplus mortar on the pavement surface for more than around 30 minutes or there is a real risk it will bond and be practically impossible to shift.
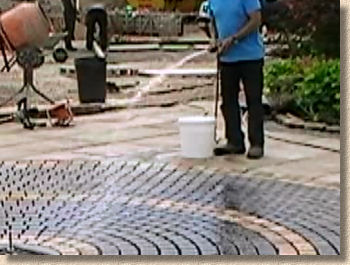
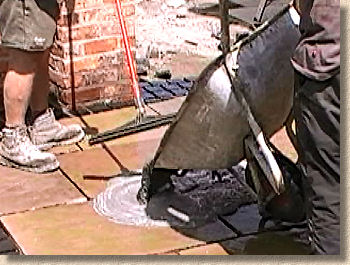
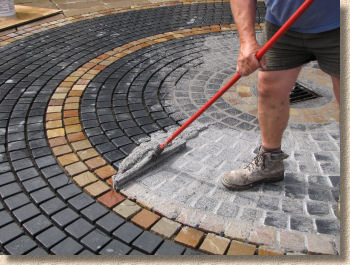
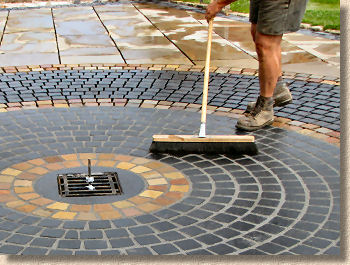
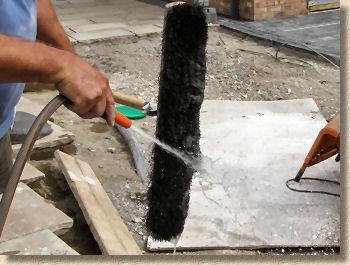
In the photograph opposite, jointing started at the 'top' of the circle (furthest point from the camera) and proceeded in a clockwise direction.
Notice how the first batch of mortar, to the right where the operative is holding the sweeping brush in anticipation, is noticeably flatter in colour, while the 'just done' material to the left is obviously frothier and lighter in colour, which indicates it's not yet ready for sweeping.
The sweeping process involves using a soft broom to brush diagonally across the joints with the aim of removing any surplus mortar but without disturbing the freshly-filled joints is at all possible.
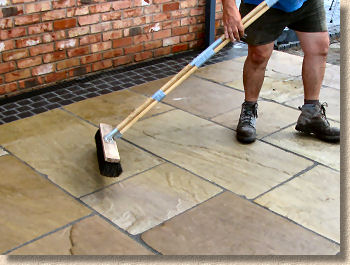
Thoroughly sweep clean the surface and any adjacent walls where mortar may have been splashed.
Pay particular attention to the nooks and crannies that are commonly found on riven stone surfaces. Use the point of a trowel to scrape free any trapped or retained mortar and then continue brushing.
Remember that, on larger jobs, this sweeping to clean process will be on-going while other areas are still being jointed. Do NOT joint a whole area and then return to clean off - you may find that the mortar applied first has hardened and bonded to the paving. Work systematically and have one operative jointing while another cleans, if necessary,
As the mortar cures, return to it repeatedly with a soft brush to dust off any last few grains of aggregate that have managed to cling to the surface. Remember, any mortar remaining on the surface WILL set hard and be almost impossible to shift, so attention to detail at this stage will save hours of unnecessary labour later on.
Every contractor will find their own preferred way of working. On smaller jobs, it's possible for a single operative to carry out all the tasks: mixing, spreading and cleaning. In such a scenario, experience suggests that it is best to mix and spread one batch, then mix and spread another batch while the first settles and partly dries. Once the second batch has been spread, the first will be ready for its initial clean, which involves removing any surplus and giving it a light sweeping. A third batch can then be mixed and spread before returning to do the initial clean to the second batch and a follow-up clean to the first. Confused? It's simpler than it sounds and they key point to remember is to clean as you go.
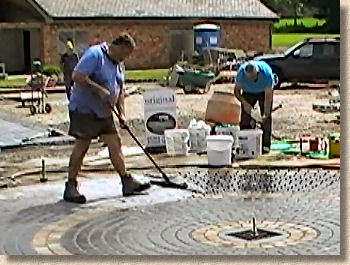
On larger jobs, a typical set-up would be one operative mixing and delivering to the a second operative who focuses on spreading while a third operative looks after the cleaning, aided by the spreading operative as and when time permits.
Hand finishing
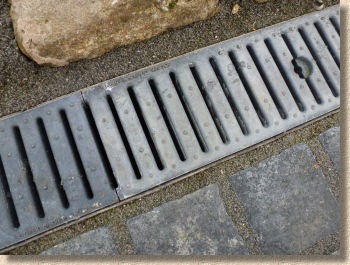
There are occasions where finishing by hand makes perfect sense. It's not always possible to spread a wet slurry into or over all the places that need jointing. For example, where paving abuts a linear channel or gully, it might be judged best to keep back from that open edge to prevent the slurry spilling over and falling into the drainage system. Another example is step risers and other vertical joints where slurrying just wouldn't be practical (or possible!)
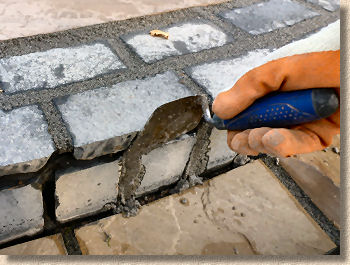
For locations such as this, it's usually best to allow the VDW 800 to dry off slightly (10 or 15 minutes after mixing) and then feed the stiffer mortar into the joints using a trowel.
For horizontal joints, trowelling-in the mortar is no great problem. The material isn't 'sticky' or 'plastic' as a traditional cement mortar might be, but it is damp, so it can be pushed into joints and smoothed off if required. Vertical joints can be trickier precisely because the mortar isn't 'sticky', but there is sufficient adhesion for it to stay in place and to accept tooling. It may take several 'top-ups' and judging the right time to fill a vertical joint is something that can only be learned by experience, but it is possible.
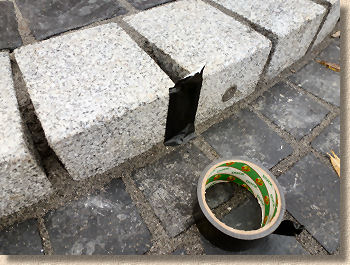
Some contractors use Duck® Tape (other sticky tapes are available) or similar to seal the vertical face of step riser joints and keep the mortar in place until it has begun to cure. The tape is peeled off an hour or so after the joint has been filled and the face can be carefully smoother or tooled to create a fantastic looking joint.
As with slurry-applied mortar, the surface of trowelled joints will need to be brushed clean and this is best done using a soft hand brush with movements that are diagonal to the joint itself.
Finishing Off
If required by the client, the mortar can be tooled using standard pointing irons or the blade of a trowel, but experience shows that there is no real structural benefit obtained by this additional task. The mortar is self-compacting and the careful brushing to clean the surface tends to create a smooth finish which lies just below the surface of the flagstone and really doesn't need any extra work. However, some clients do seem to prefer the smoothed surface, even if no-one else will ever notice it!
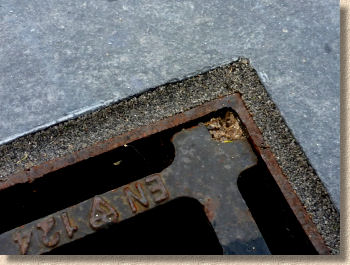
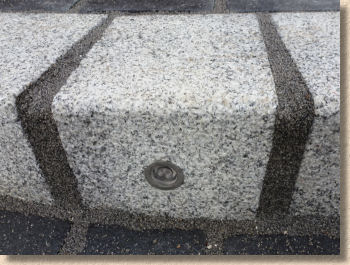
Where the mortar has been used around access covers to inspection chambers, manholes or even gully gratings, it's good practice to lift out the cover or grating within a couple of hours of jointing to ensure that it isn't 'glued' into the frame by any mortar that has found its way into the joint between cover/grating and frame.
Use a soft hand brush to remove any mortar attached to the side of the cover or the inside of the frame, and then simply re-fit the cover to maintain safety.
Coverage and curing
Coverage is obviously dependent on joint width, joint depth and the plan size of the paving units used. On this particular project, with flags of 450/600/750/900/1200mm by 560mm and 60mm thick, the contractor reports a coverage rate of approximately 11m² per pail or 2.3kg/m². For the sett paving, using 100x100x50mm setts, the 28m² circle area consumed 16 packs so that's 14kg/m²
Overnight, even in cold weather, the mortar will harden sufficiently to allow careful foot traffic the following day. When ambient temperature is 20° or higher, foot traffic can be allowed onto the pavement in as little as 6-12 hours.
Cleaning Tools
As we've established (hopefully) once the VDW 800 mortar has cured, it's practically immovable (there is actually a solvent but it's not pleasant and not cheap), so the clever contractor ensures that the tools are cleaned long before the mortar has a chance to harden.
The good news is that, as long as the mortar remains loose, it's simply a matter of washing them off with clean, cold water. This is a task that is best done frequently during the whole working sequence.
The squeegees used to spread the mortar should be rinsed off every 15-20 minutes or so, just to keep the head clean and so make it easier to move around the fresh mortar. Besides, what's the point in shoving around a load of mortar that has hardened onto the blade? The brushes used for cleaning off really do need to be mortar-free for best results, so these should be rinsed out every few minutes which involves nothing more complicated than running them under the hose.
The same goes for any other hand tools such as trowels, pointing irons, hand brushes, buckets, barrows and so on. A few seconds of simple rinsing ensures their longevity and saves having to throw them away because they've quadrupled in weight overnight.
Completed Project
Overall, it took around 75 minutes to completely joint and clean this 28m² circle, and that includes the hand-finishing to the central gully.
We reckon about one-third of the time is spent actually jointing and two-thirds doing the cleaning, which is nothing more than repeated sweeping. The work can easily be carried out by labourers or DIYers as there is no great skill involved as long as they have an eye for detail and can be trusted to thoroughly clean the paving.
Remember: any mortar left on the surface, no matter how small an amount, is probably there for good (unless you buy the aforementioned special solvent used for 'accidents').
Further Information:
Contact NCC Streetscape:

Tel: +44 (0) 1257 266 696


![]()


Client:
Mr & Mrs Lee, Cheshire
Paving Contractor:
Original Stone Paving Co. - York
Video:
Residential Application - Feature Driveway Car Washing Area

Other Product Studies featuring VDW mortars: