Project 3 - Replacing an existing tarmac driveway
Mike Grant in Cheshire sent in the following....
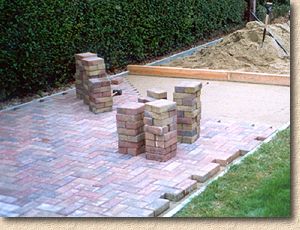
I have recently finished a block paving project at my new house. I had never done a DIY project this big before, and I asked a lot of people about it. One of my sources of information was your excellent web site. I noticed there were a couple of pictures shown on it from other people in a similar position to me (DIYers) - so I thought I would share my pictures with you.
As I said, this is a new house, so the pavements are not finished yet - the kerbs are yet to be reinstated - maybe my final picture may be available in a year or so!!!
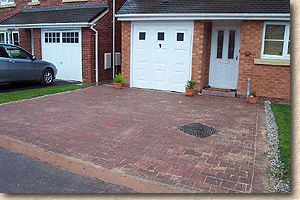
The blocks I used were Marshalls Driveline Excel, in brindle. My builders merchants would only supply me with full packs so I have about 2m² left over. Originally I was going to have Tegula Setts but the cost of these put me off a bit. In the end, I think the Driveline Excel is a good block, as the spacing between blocks seems to be much smaller than what you get with Tegula. - There is less room for the moss!
The soldier edgings are the same as the drive, only I used just the large blocks laid at 90° to the rest of the pattern. These were put on a mortar/concrete bed and mortar/ oncrete was set against the outside edge of them.
The story of the project is quite long - but here are some facts
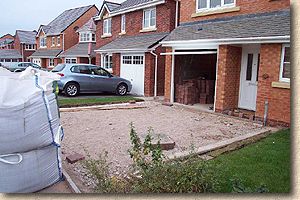
- - the purpose of the project was to convert a tarmac single driveway into a double
- - I had asked three contractors for prices, only two replied - only one of these wanted to do the work.
- - the prices quoted for materials through the contractors was greater than I could obtain them myself through a builders merchants - plus the labour would be about £500 - £600.
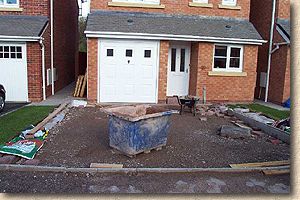
- - I took a week off work to do the work - my Dad helped me but most of the week we were rained off.
- - the hardest part was cutting the blocks - I used a 9" grinder - it took all day and 8 discs.
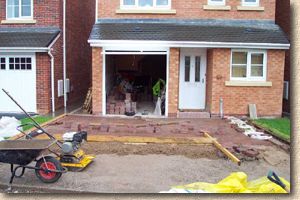
What went well - the quantities of materials - 2.5t of sand and 30m² of blocks was just right
What I would do differently: - Use a diamond blade disc - the blocks are riven finish - otherwise a block cutter could work. - Use a cement mixer - the concrete block underneath the soldier course was initially set too low - I tried mortaring on the blocks on a bed of about 60mm mortar and it was really tricky to get them to stay in one place!
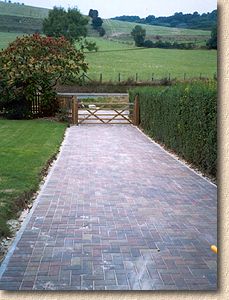
Overall, I'm not saying its the best job but I did save quite a bit of money and got it completed in the week - despite October weather!
Project 4 - Upgrading the basic 'two-strips' driveway
Darren, living somewhere in the southern wastes, undertook his own block paving....
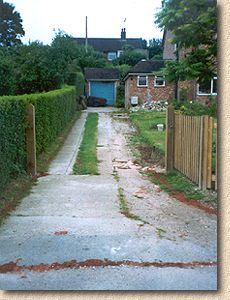
The outline of the proposed driveway is marked out with sand. Given the natural fall of the land away from the house, drainage will not be a problem on this project.
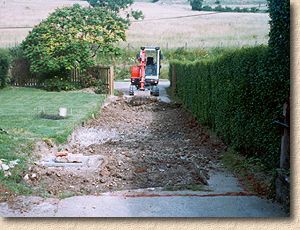
A 1.5 tonne mini-digger is brought in to undertake the excavation. Extra care is needed when breaking out around the Inspection Chamber cover that can be seen on the left-hand side of the drive.
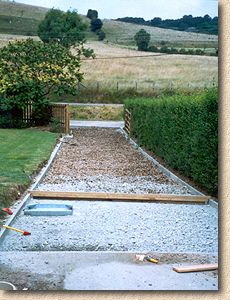
A simple 150x50mm flat-top edging kerb is laid on and haunched with concrete to form the restraining edges. A recess tray cover is fitted to the Inspection Chamber and set to level, and the sub-base material is spread and checked for level using a screeder board that's been specially made for this job.
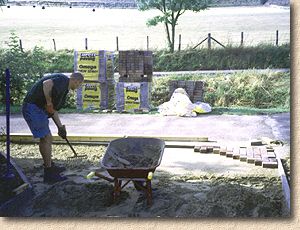
Once the sub-base has been compacted, the actual block laying can begin. Darren chose Brett Paving 's Omega blocks, a standard 200x100x50mm concrete paver, in the Autumn Gold colour option.
When working on any gradient, the laying should always proceed uphill , so Darren starts at the driveway threshold with the public road. The previously installed edging kerbs provide a base line for reference, and a 90° herringbone pattern is used, laid square to the edgings.
The laying course is screeded as the work progresses, using a screeder board that has been cut with notches at each end so that it can ride over the edging kerbs and establish the bed at the perfect level.
Finally, the edges are cut-in, the recess tray is paved, and the sanding and compaction are done. All that remains is an hour or so to tidy the garden edges at the back of the edging kerbs and Darren has a driveway that would make any professional paving contractor proud.
"I'd just like to say thanks for all your help during the construction of the drive.The superb website and your forum advice gave me the knowledge to finish it to a standard that I (and she) are very happy with and the confidence to complete more projects when the weather turns in Spring. Have a good Xmas and New Year, Darren."
Other DIY block paving projects featured on this site....
- Project 1 - New concrete block driveway
- Project 2 - Clay cobble patio
- Project 5 - Circular Garden Feature
- Project 6 - An Irish Patio
- Project 7 - Curving driveway to garage
Want to add your pictures to these pages? Send your jpegs and a description of the fun you had to Tony at the usual address... info @ pavingexpert.com