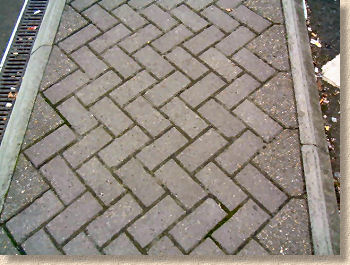
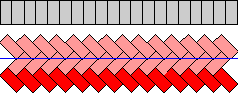
90° Herringbone Pattern
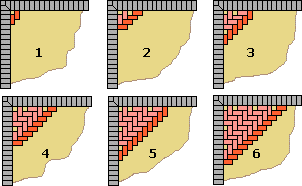
This is the simpler of the herringbone patterns to set up. Decide on a "base-line" that will be the start of the pattern. This is usually taken to be a line along the main direction of travel or one that is parallel or at right angles to the house or other building. If there is a right-angle corner, the setting out can be based on the two lines, as shown in the diagram below.
Setting out a perpendicular, ie a line at exactly 90° to the base line, is described on the setting-out page.
On a square or rectangular area, a 90° herringbone pattern can be used to keep cutting to a minimum. Only one block width in 4 need be cut to fit, and judicious positioning of edge courses can ensure that the pavement is a given number of full bricks wide. It is best to start laying tight against a fixed edge, such as against an edging course, but if this is not possible, then a taut string line can be established as the base-line.

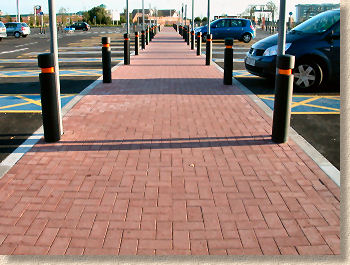

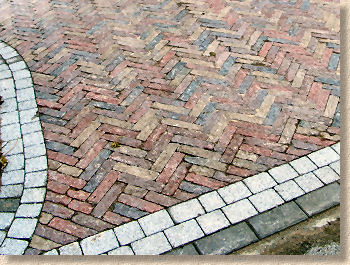
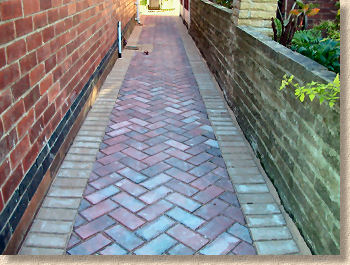
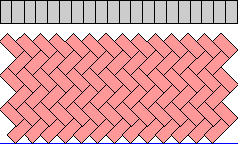
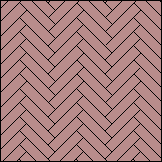
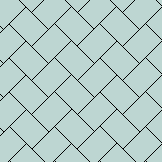
45° Herringbone Pattern
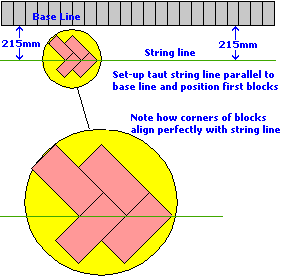
This pattern is identical to the pattern above, except that it has been rotated through 45°. It can be set out exactly as shown above, by establishing the base-line at 45° and laying the blocks square to this line. Alternatively, a base-line can be set up square to the work, and the blocks laid at 45° to this line. This second method may at first seem complicated, but is particularly valuable for ensuring that the alignment is not drifting out of true with subsequent courses of blocks.
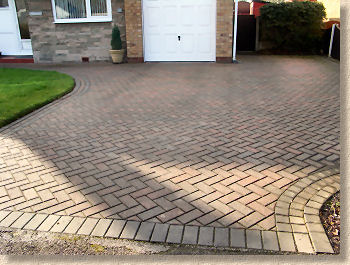
When establishing this pattern, the best visual effect is achieved by laying the blocks in such a manner that the "chevrons" run along the principal direction of traffic or along the length of the driveway (longitudinal), rather than across (transverse).
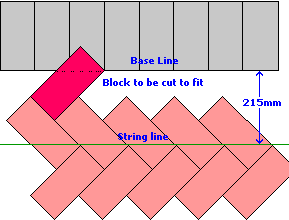
With this pattern, most of the blocks at the edge of the work will need to be cut at an angle to fit in. It is usual to lay all the full bricks first, then once these have been checked for alignment, the edge pieces can be cut in. Leaving out the edge pieces allows the body of the paving to be accurately aligned BEFORE fastening in the work. In the following diagrams, the bricks are the standard 200x100mm plan size blocks most commonly used for domestic paving.
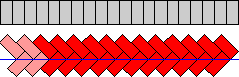
Continue to lay as many full blocks as possible and then check the alignment, using a pinch-bar or pavior's mall to 'nudge' blocks into line. Once the alignment is complete, the edge blocks can be cut to shape and fitted in prior to final sealing.

Other Herringbone Patterns
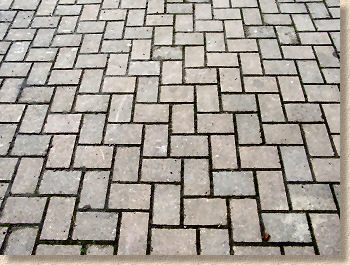
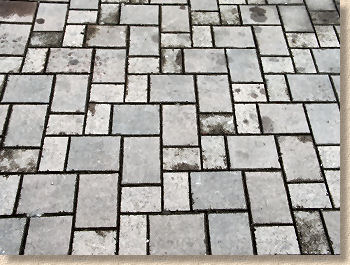
Herringbone patterns can be created using any rectangular pavior or any combining any 2 paving units. With flagstones, this is sometimes referred to as a Dutch Pattern .
This combination allows distinctive patterning to be achieved by mixing paviors of your choice. You can mix concrete blocks with small concrete flags/slabs, or clay paviors with the smaller clay cobbles. Even the traditional "3 by 2's" can be laid in a herringbone pattern. The possibilities are endless, the diagrams below show a few patterns to set you thinking.
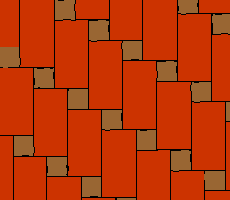
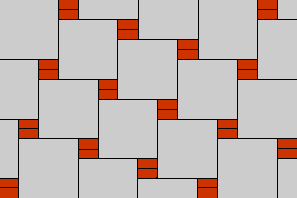

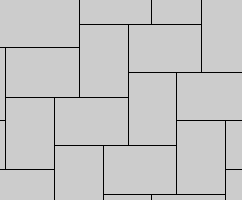
The following are all drawn to the same scale and rely on using just one block size.
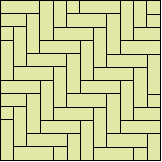
laid to 90° Herringbone
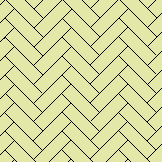
laid to 45° Herringbone

laid to 90° Herringbone
laid to 45° Herringbone
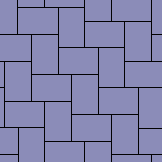
laid to 90° Herringbone
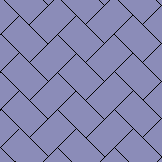
laid to 45° Herringbone
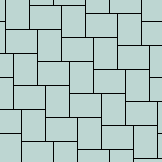
laid to 90° Herringbone
laid to 45° Herringbone