Fencing Posts
Three types of posts are commonly available; timber, concrete or steel. Timber should be at least 100x100mm in section, and must be treated, quality lumber.
We can not recommend any of the 'spike' fixing systems promoted for timber posts, preferring all posts to be properly anchored into the ground with concrete. The 'spikes' and bolt-on fittings are often more trouble than they're worth, they are treacherous in any but the heaviest ground, and you never see reputable fencing contractors using them, unless there are exceptional circumstances.
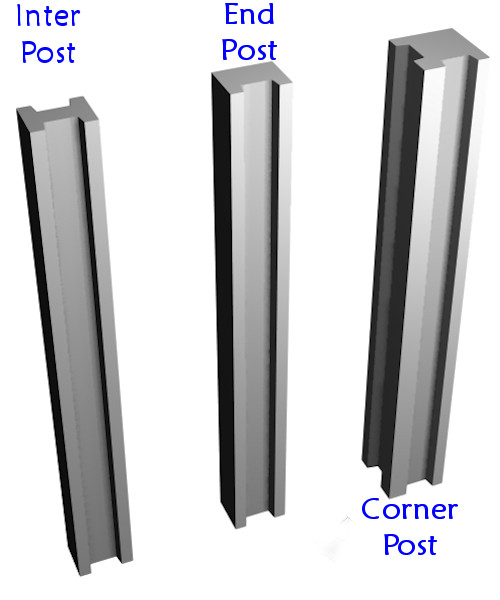
Concrete posts are typically slotted for standard panelling, pre-drilled for wires, or fitted with brackets to carry non-standard or heavy panels. The steel posts are typically used with security or anti-vandal fencing.
Fencing Panels
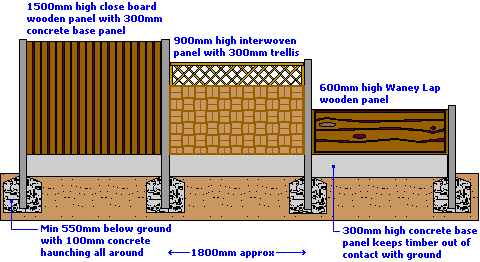
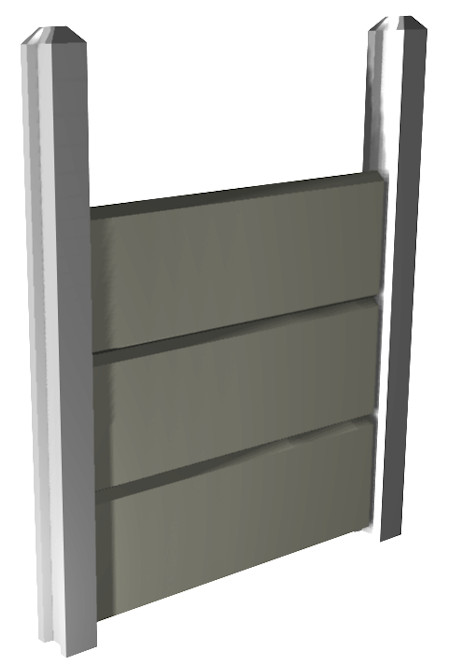
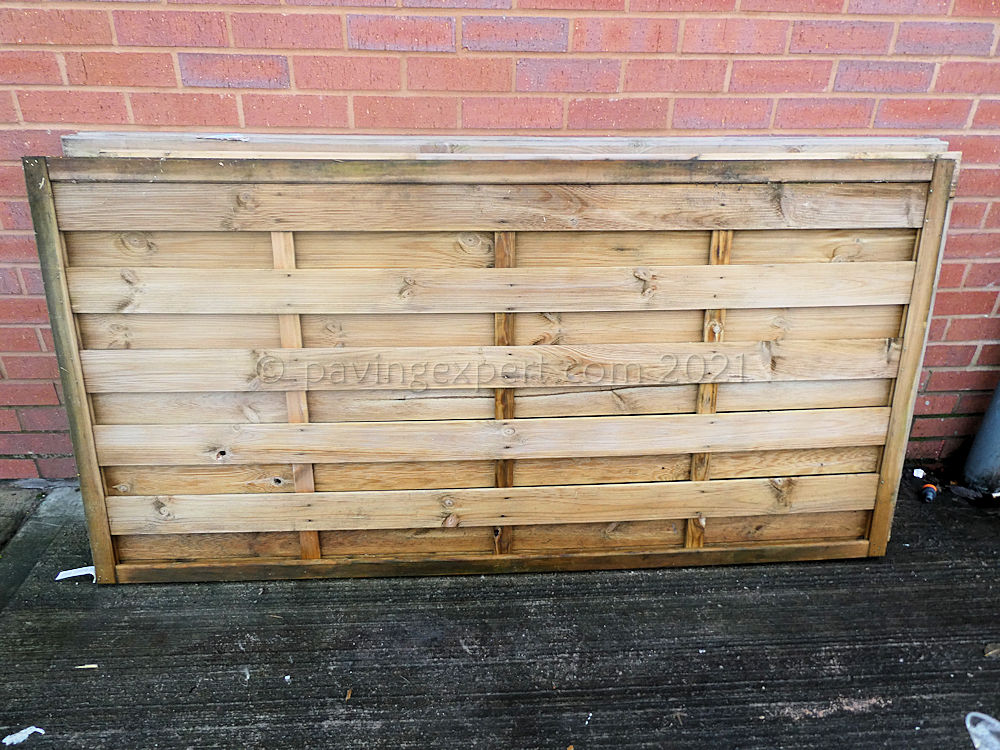
Panels come in a wide variety of shapes, sizes and materials. The most common are wooden panels, a few of which are illustrated below. There are also steel palisade panels, mesh panels and panels of more decorative materials, such as willow or bamboo. The concrete slotted post systems also enable the concrete base panels to be used in place of wooden panels, up to a maximum height of 1.8m.
Installation
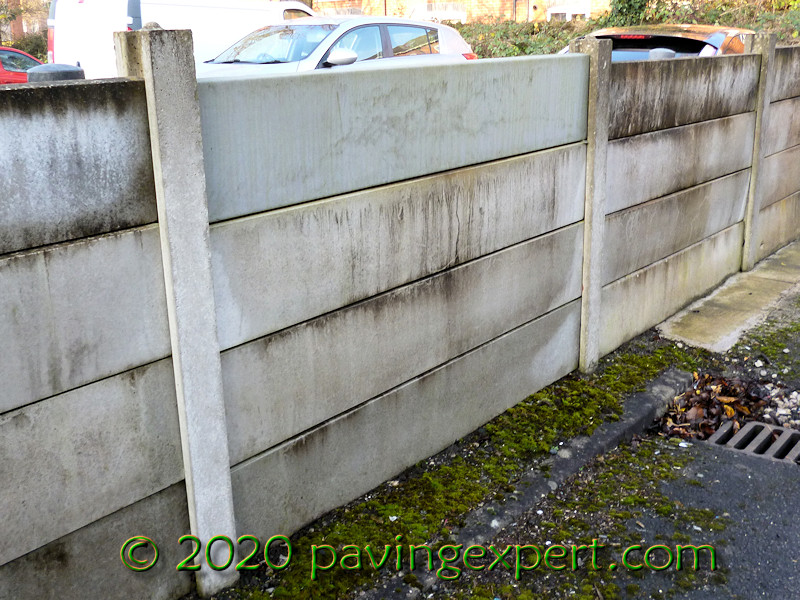
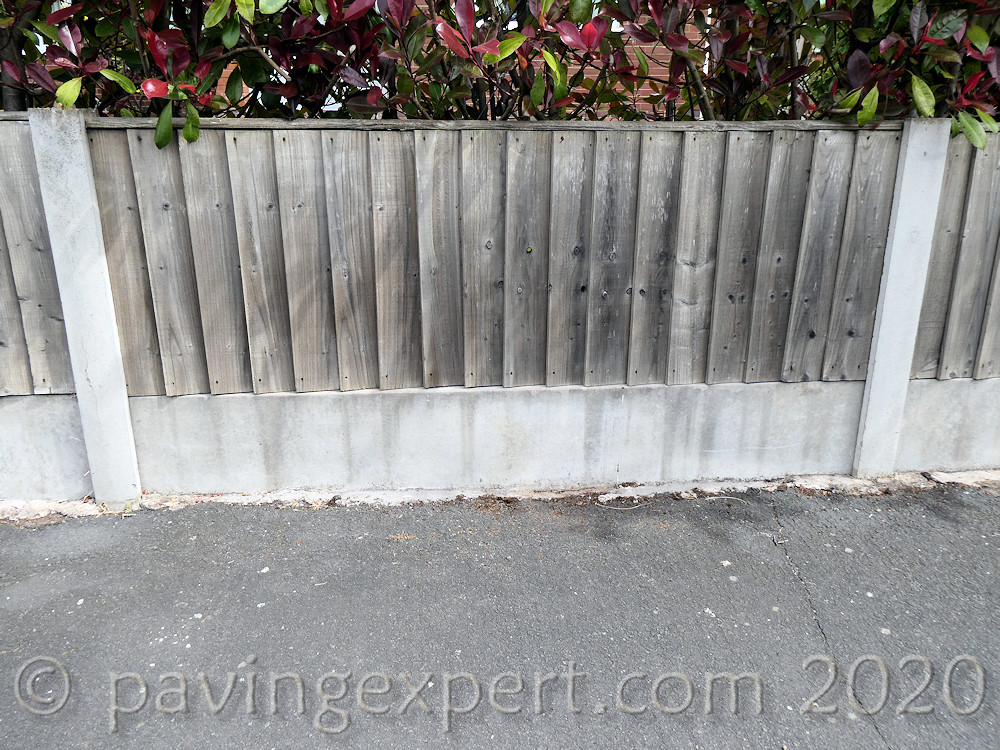
Slotted concrete sectional fencing
Most of the readily available fencing of this type is described and sold in imperial units, which will be used here for clarity.
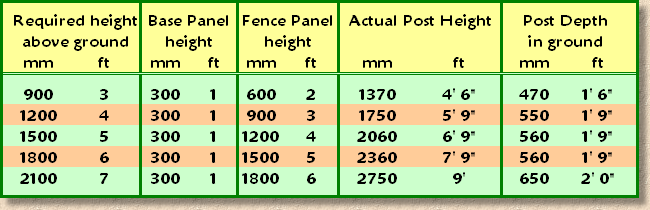
The posts required should be 450-600mm (1'6" - 2'0") longer than the height required. So, for a 1.8m (6') high fence, a 2.36m (7'9") post is required.

Set up a taut string line to guide the run of the fence and final alignment. Excavate the first post hole approximately 300x300mm (12"x12") in plan and at least as deep as shown in the table above for the size of post being installed. It's common practice to dig the post hole around 50mm (2") deeper than the required minimum, to allow for a modest bed of concrete to be used to adjust the height of the post and so aid final profiling.
Use a pencil or similar to mark where Ground Level (GL) would be on the post when it is at the correct height. Place half a spade of concrete into hole (if required) and lower the post into the hole. Check that the pencil mark tallies with required ground level, adjusting the post by twisting it into bedding concrete or adding extra concrete bed, as required. Once the height is correct, align the post vertically by checking on two perpendicular faces for plumb, and jam the post in place with a few half-bricks, broken concrete flags or other hardcore, prior to concreting.
Use a dry mix concrete, (see Mortars & Concretes ) and sprinkle this in amongst the hardcore. Water it in with a can or a hose, and use a long bar or stick to poke the wetted concrete down amongst the hardcore, filling all of the voids. Add more dry mix and water in as required. The top of the concrete/hardcore should be kept a couple of inches below ground level.
Once the post is in position, place a base panel into the slot and along the required run line to ascertain distance and position of the next hole. Put the base panel to one side whilst the next hole is dug, then re-position and level it prior to positioning the next post. Make sure the new post is positioned fairly tight against the base panel, and check it for height and plumb before concreting-in as before and moving on to the next section.
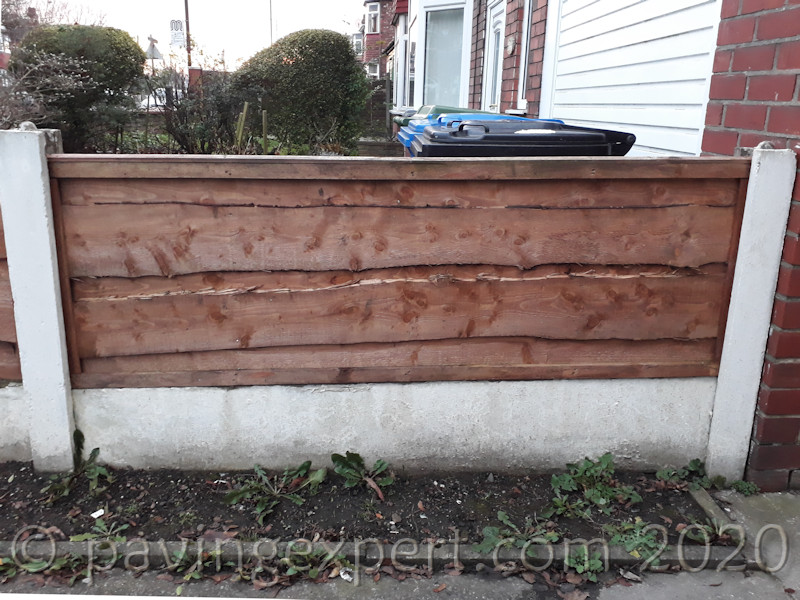
Leave off fitting the timber panels until all the posts are in and secure. It may be worth 'spragging' the posts with temporary supporting timbers while the concrete hardens.In windy conditions, it's best to allow concrete to set overnight before fitting panels, which dramatically increases the fence's wind-resistance.
Alternative Fittings:
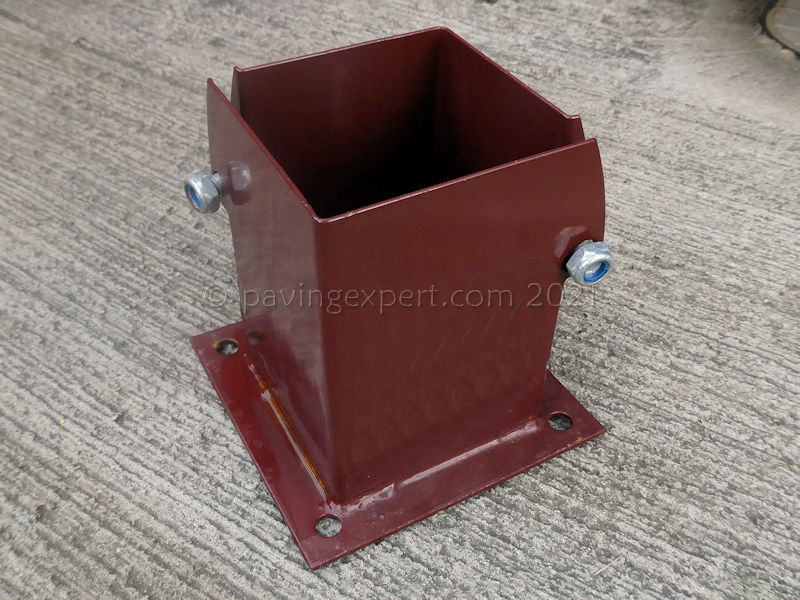
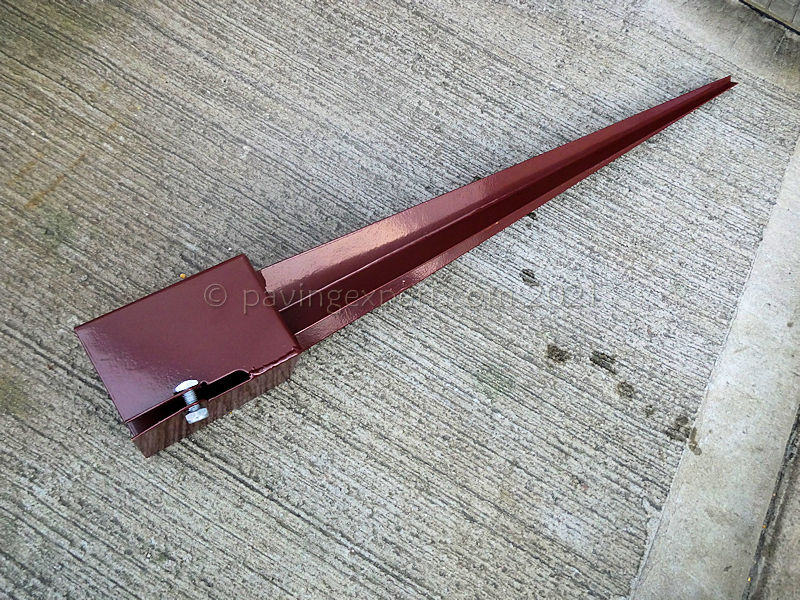
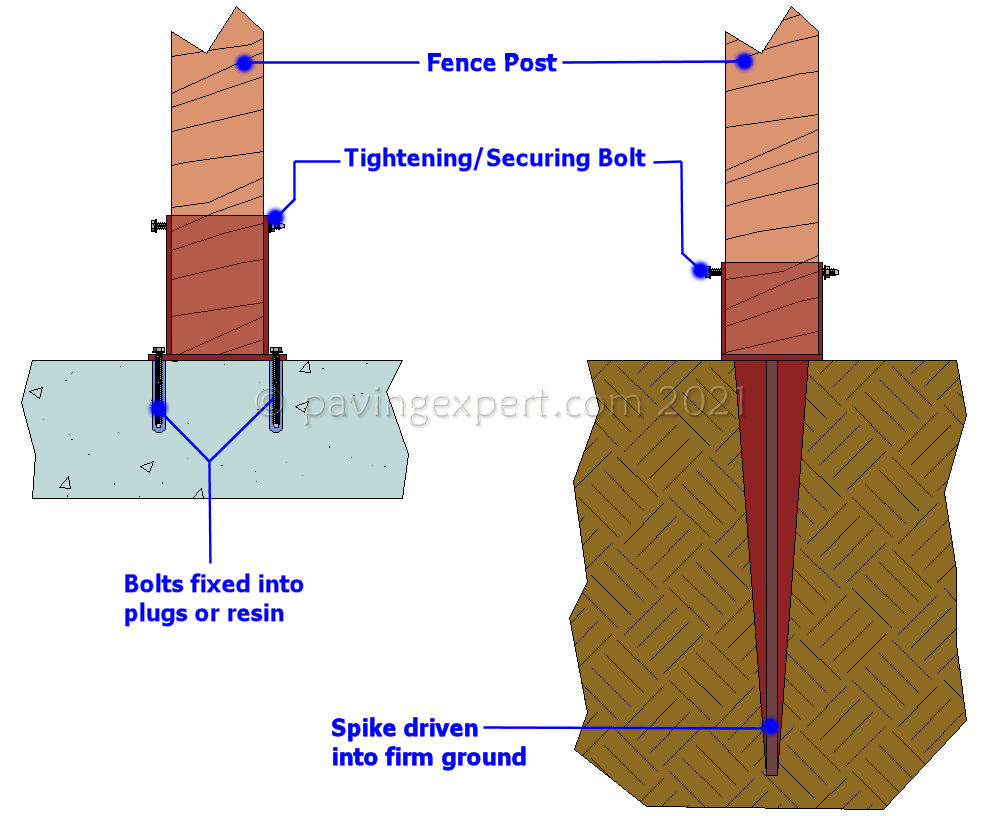
As mentioned above, the bolt-down post-holders and their cousins, the drive-in spiked post holders are notorously unreliable, but there are occasions where there simply isn't any other option but to use such fittings. In general, the higher the planned fence, the more certain it is that these yokes will fail. While they might be OK-ish for 600mm high panel fences, they almost never last long with the full 1800mm or 2100mm panels.
High winds can exert enormous pressure on the anchor bolts, so longer bolts, at least 100mm, and preferably set into a resin anchor mortar (rather than a plastic plug) will give a greater chance of survival. Similarly, the spike versions are only as secure as the ground they are driven into, so soft, friable ground will almost inevitably cede to pressure from wind-forced panels and posts.
However, for those "no option" jobs, this is the sort of construction detail to be expected...
Party fences:
Double-sided fence - simple and cost-effective to building a fence that looks good from both sides.
Stock fences:
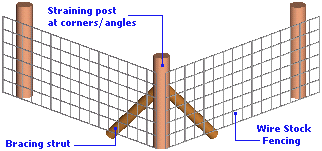
Stock fencing is normally used to keep grazing animals penned in, or out, as the case may be, There are a variety of mesh sizes and heights used to control different stock, from a 13mm mesh to control small animals such as rabbits, to a 2 metre high deer fence.
Timber posts are typically used, driven into the gound, if it is a firm and stable soil, or concreted in poorer soils. Posts are typically 100mm diameter, with 150mm diameter used at corners and angles, which are braced with 75-100mm struts, usually angled at 45° to the upright.
Paling fences:
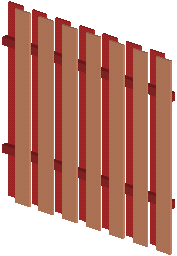
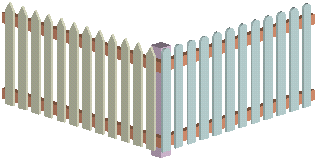
Palisade, Paling or Picket fences are usually seen around gardens, indeed, they seem to be a quintessential component of the much fancied English Cottage Garden. Normally around 900mm high, but any height from 600 -1800mm can be used to suit the site.
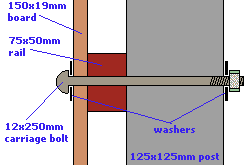
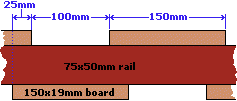
The posts are fixed into position, the 75x50mm rails added so that they are approximately 100-150mm above/below the top/bottom of the palings, and then the palings are nailed to the rails. Palings are usually made from 75mmx19mm timber, with a pointed, rounded or ornate top. They are spaced at regular intervals, usually 50mm, although this can be adjusted to suit paling type and size. There palings can also be cut to form an arched top to each section of fencing.
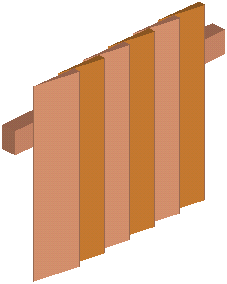
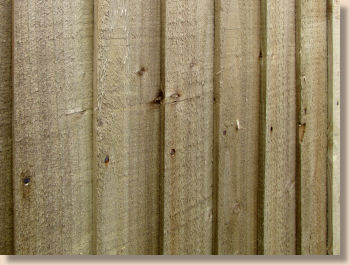
Featheredge fences:
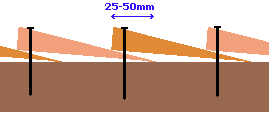
Featheredge boards are more or less triangular or wedge-shaped in section, usually 150mm wide and 20mm thick, tapering to 3mm. They can be used to create a closed section of panel, by overlapping the boards, leaving no gaps between the boards.
They are generally overlapped by 25-50mm with nails driven through two boards at a time, to fasten the boards to the rails behind.
British Standards for Fences and Fencing
There is a full series of British Standards covering various types of fences and their construction.
You can access the list and buy the standards, if you wish, via this page