Introduction:
As our understanding of pavement engineering grows, and our experience with various types of mortars and concretes expands, the trade has come to appreciate that knocking-up a barrowful of mortar on-site, using whatever is available locally and at a low cost, mixed at a ratio that is based more on tradition than any actual facts, is not quite cutting it any longer. For a professional standard of paving, we have to turn to consistent, proven mortars where each component, that’s the bedding, the primer, and the jointing, are all compatible and work together to provide a quality pavement that will give years of reliable service.
With the advent of a re-vamped BS7533, there is now even more of a push to move on from hit-and-miss site-mixed mortars of yesteryear, to “engineer out” the guesswork that goes with them, and to rely on proven, pre-batched, proprietary mortars and primers, not solely for “big jobs”, but for every type of paving project.
Steintec has led the push towards more reliable mortars for many years, but, up to now, their main market has been the commercial sector – the town and city centres, the multi-store retail developments, the fancy plazas and piazzas. However, there has never been any valid reason why the mortars and primers used for such developments should not be used on simpler, less expansive schemes such as courtyards, driveways and even patios.
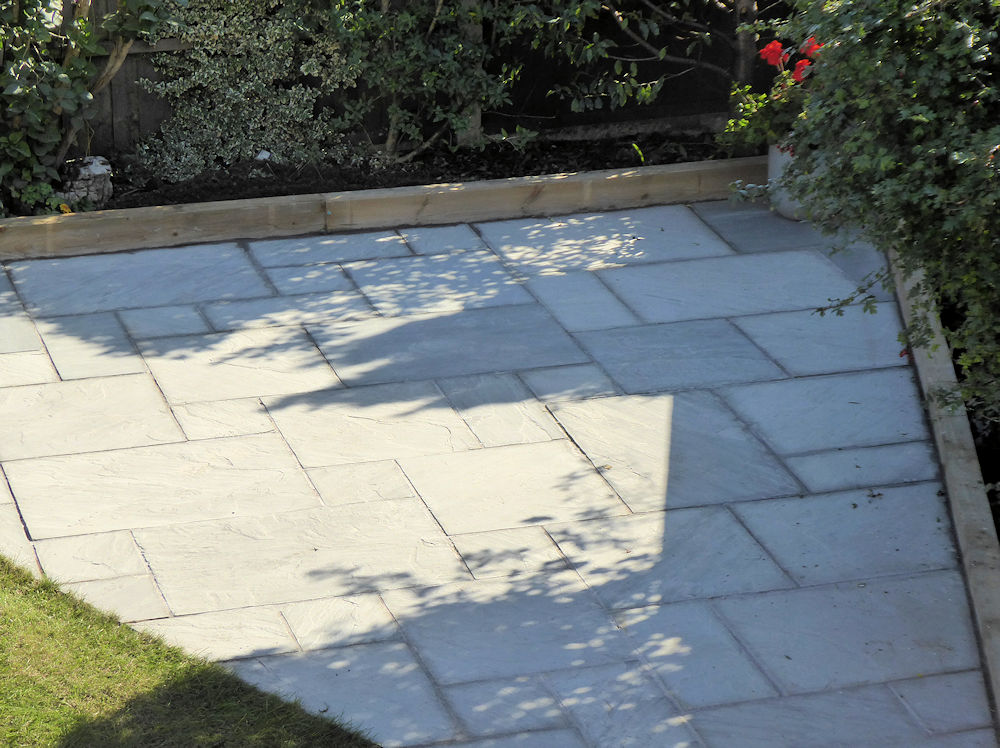
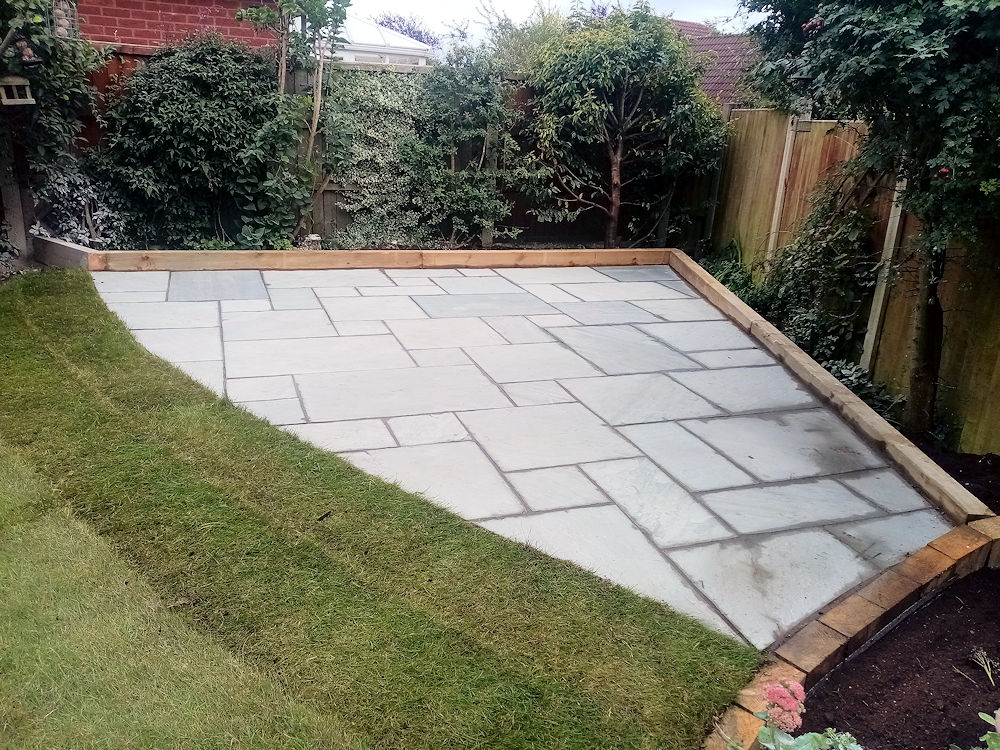
This page looks at the use of Steintec’s key products to construct a small residential patio, hopefully illustrating that the use of professional-grade materials is neither complicated nor time-consuming. It’s the same set-up and installation techniques we’ve known for years. The only difference is the mortars and primers are of a far better quality and are proven to work.
Bedding:
With our better understanding of just how a pavement functions, the role of water and its movement within the pavement structure has become far clearer. In short, it’s a damned nuisance!
Many of the problems encountered with paving, from de-bonding in winter, to reflective staining, all too often arise because moisture is retained within the build-up. In particular, the mortars traditionally used for bedding have acted as reservoirs, taking in moisture from the surface and from the ground beneath, and enabling it to wreak havoc. Much of the damage ultimately occurs because of the mortar’s ability to lift water via capillary action and keep it in contact with the paving units.
If we can keep moisture away from the interface between the bedding and the paving units, the risk of debonding by frost heave, or staining by moisture-driven reflective staining can be eliminated.
Traditional mortars tend to be more like sponges, soaking-up and retaining that damaging water. What is required is a permeable but tough mortar, one that will not retain moisture, but will compel it to fall through the pavement structure under gravity, taking it away from where it can cause problems and directing it to sub-layers that are unaffected by its presence.
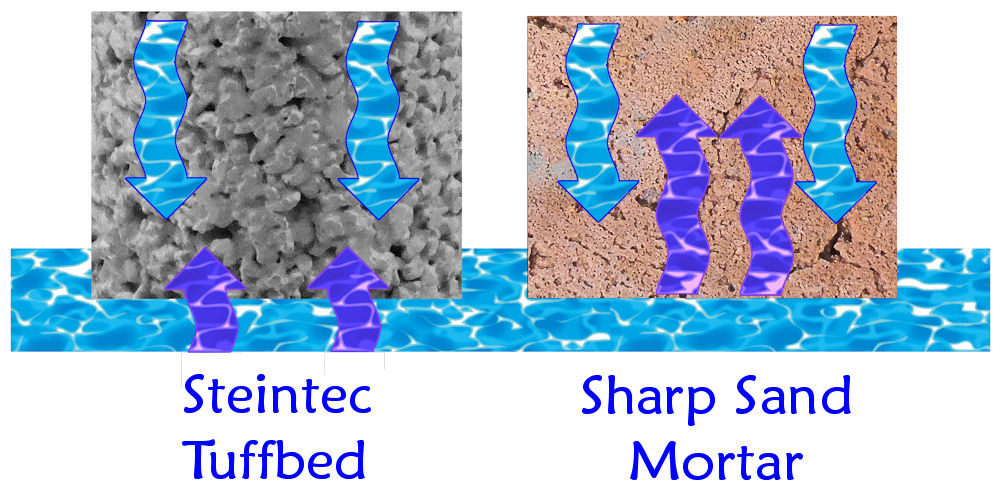
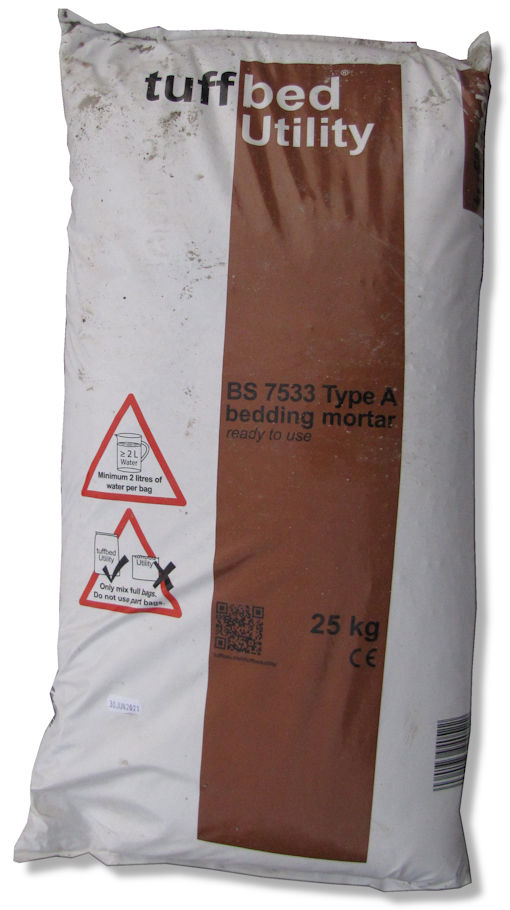
That’s exactly what TuffBed, the Steintec bedding mortar, does. The specially selected blend of fine aggregates and high-quality cements produce a mortar that is strong but very free-draining with almost no capillary capability to lift and/or retain moisture.
Note: Tuffbed is the version produced specifically for smaller projects, such as patios and driveways. It’s a little more forgiving and easier to work with than it's sister-product, Tuffbed Utility (and often slightly cheaper). Tuffbed (red pack) uses a slightly finer aggregate blend and is less fussy about the exact water content to be added (within reason!) but has the same exceptionally high standard of performance.
Tuffbed Utility could have been used, but it's a little more demanding, especially for first time users, mainly because the aggregate is slightly coarser, and the water to be added requires fairly strict control. It's a product more suited to experienced users and/or larger projects, but still gives class-leading results.
And for the big jobs, the commercial and public relam projects, for example, there is Tuffbed 2-Pack, which can be seen on its own page. Tuffbed 2-Pack provides separate binder and aggregate - two packs, see! - which are mixed on demand in a forced action mixer. fantatsic for the bigger projects, but sometimes a bit too awkward for smaller jobs.
Mixing Tuffbed:
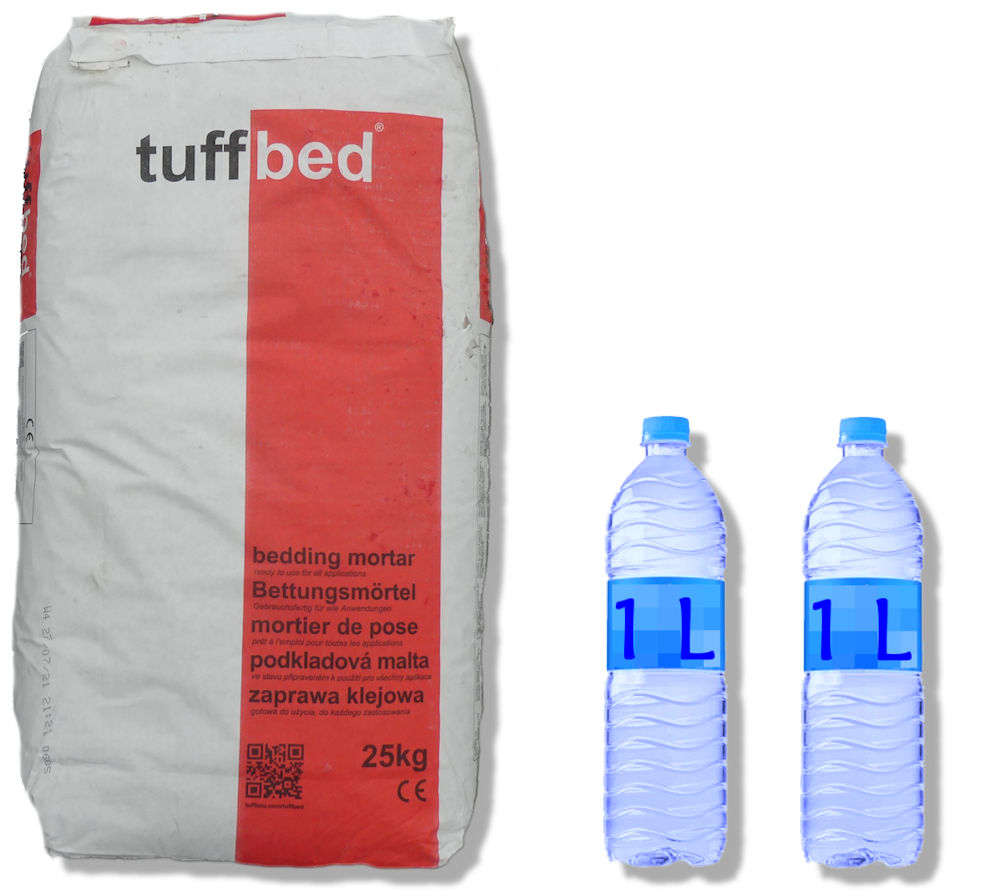
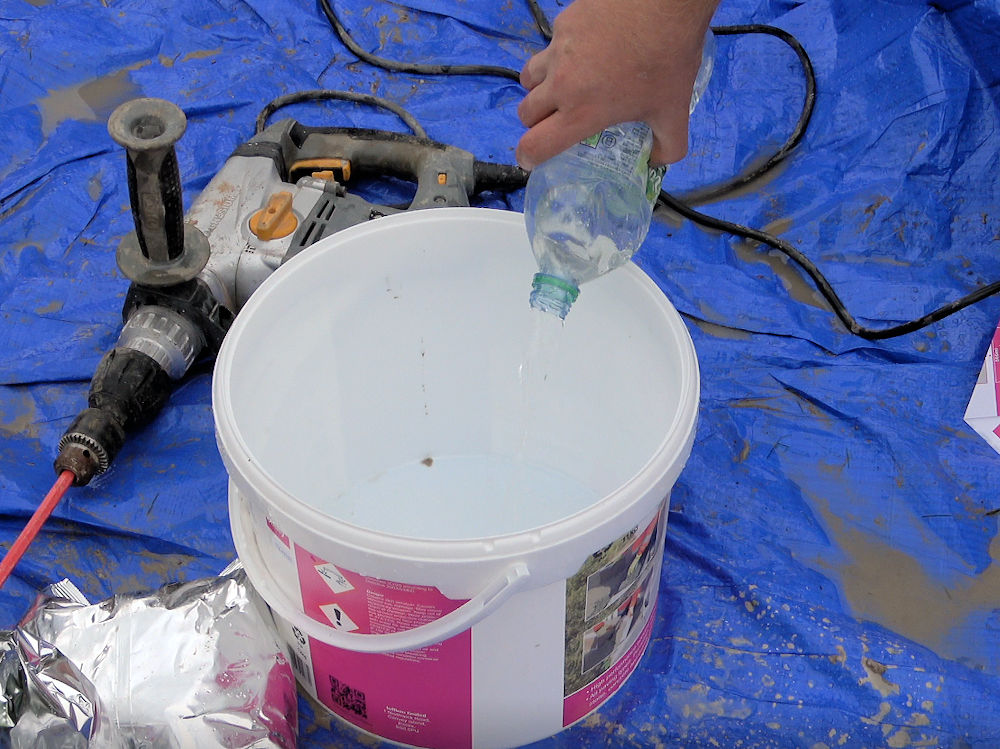
The Steintec Tuffbed mortar comes pre-mixed in 25kg moisture-resistant packs. Each pack will require the addition of just two litres of clean, cold water to produce a working mortar. Some installers prefer to work with wetter mortars (higher slump) and may find the addition of a further 300-500ml of water will give the consistency they like, but it’s always a good idea to start with the ‘recommended’ slump, see how it works for you, and then adjust subsequent mixes if necessary.
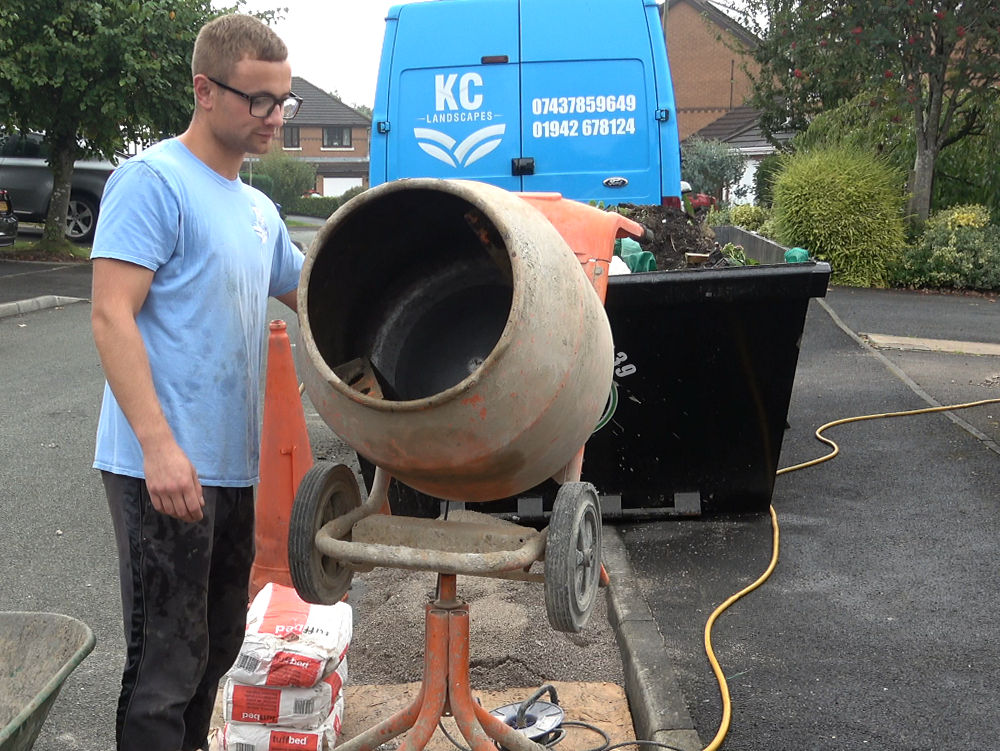
Tuffbed is specially formulated to be suitable for mixing in a standard tumble-action mixer. There’s no need to use a forced action (pan) mixer, although they can be used if preferred. Most contractors have a tumble action mixer and so Steintec have tweaked the recipe to ensure Tuffbed doesn’t require them to acquire specialist kit.
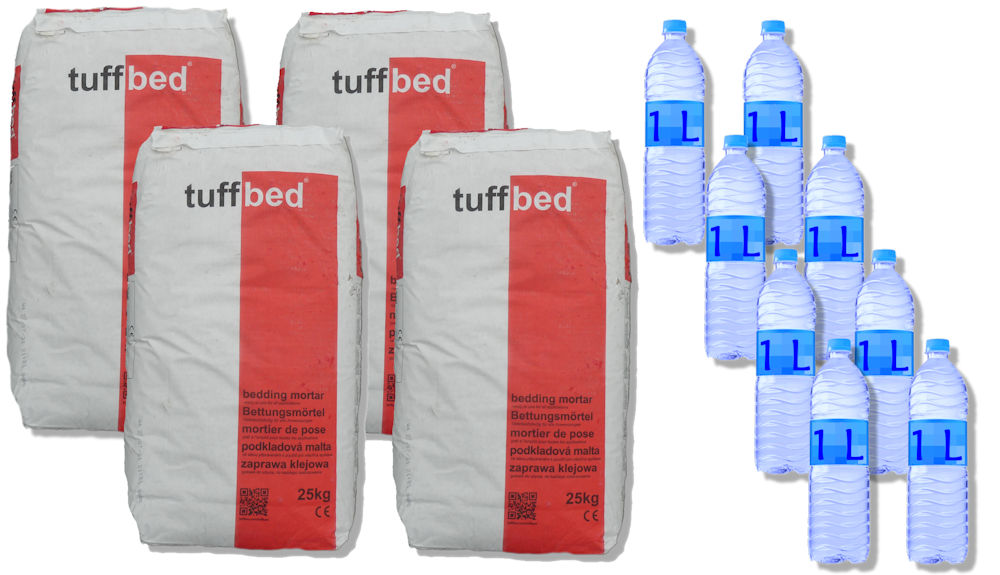
Although it is possible to mix one 25kg bag at a time, most contractors find that a four bag mix (100kg) fills a typical mixer, loads a barrow, and generates sufficient mortar for a couple of square metres of paving, or thereabouts.
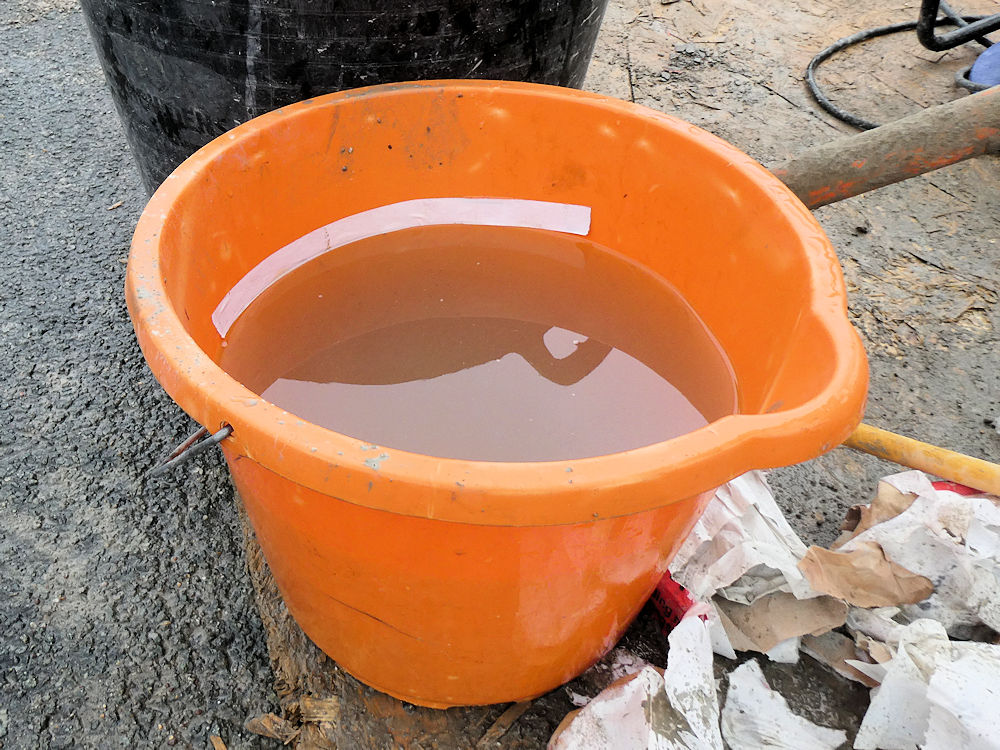
When preparing a four bag mix, a total of around 8 litres (4 x 2 litres) of clean cold water will be required.
A handy tip is to measure 8 litres on water into a bucket and mark the level. This enables rapid filling and reasonably accurate measuring of the water requirement, which can then be added to the mix as and when needed.
Mortars are usually started by adding a small quantity of water to the mixer and then adding the dry ingredients. For a well-mixed, consistent mortar using Tuffbed, pour a litre or so of water to the empty mixer, then add a full bag of the Tuffbed. Give it 30 seconds or so the mix, then add around a couple of litres of water. Allow this to mix in, creating a wettish mix, then add the next full bag of Tuffbed. Again, allow time for that to be mixed in, then add another couple of litres of water. This will wet-up the mortar, so let it work its way through the drum creating an even slump, then add the third bag of Tuffbed.
A minute or so later, that will have been dispersed through the mixer, and another couple of litres of water can be added and given time to blend in before adding the fourth and final bag of Tuffbed. There should only be a litre or so of water remaining in the bucket, and this can now be added. Allow it all the churn for a minute or so, and it’s ready to use.
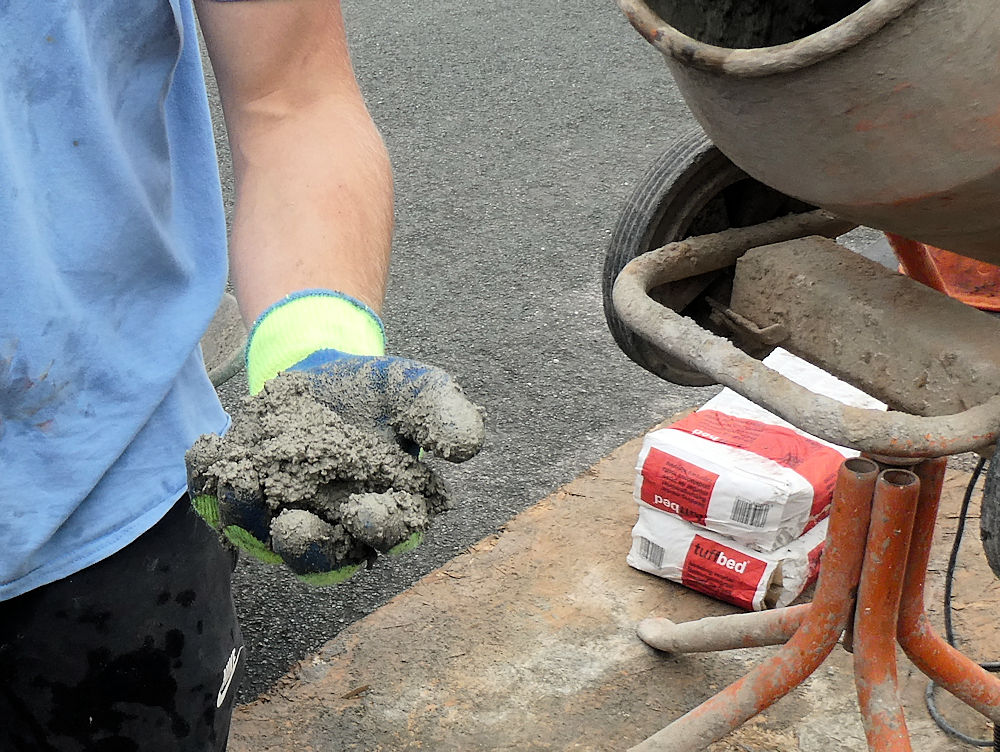
A good test of suitability is to squeeze a handful of the mixed mortar in a gloved hand. (Tuffbed, like all cement-based products, will burn bare skin, so gloves are essential – no-one wants Cement Burns). The mortar should clump together as a ball, with no excess water dripping from it.
Laying with Tuffbed:
Most installers find they quickly adapt to working with Tuffbed. For some, it may be a little stiffer than their usual sand/cement mortar, and it may not compress quite as much, but most skilled workers will “get a feel for it” after laying a square metre or two of paving.
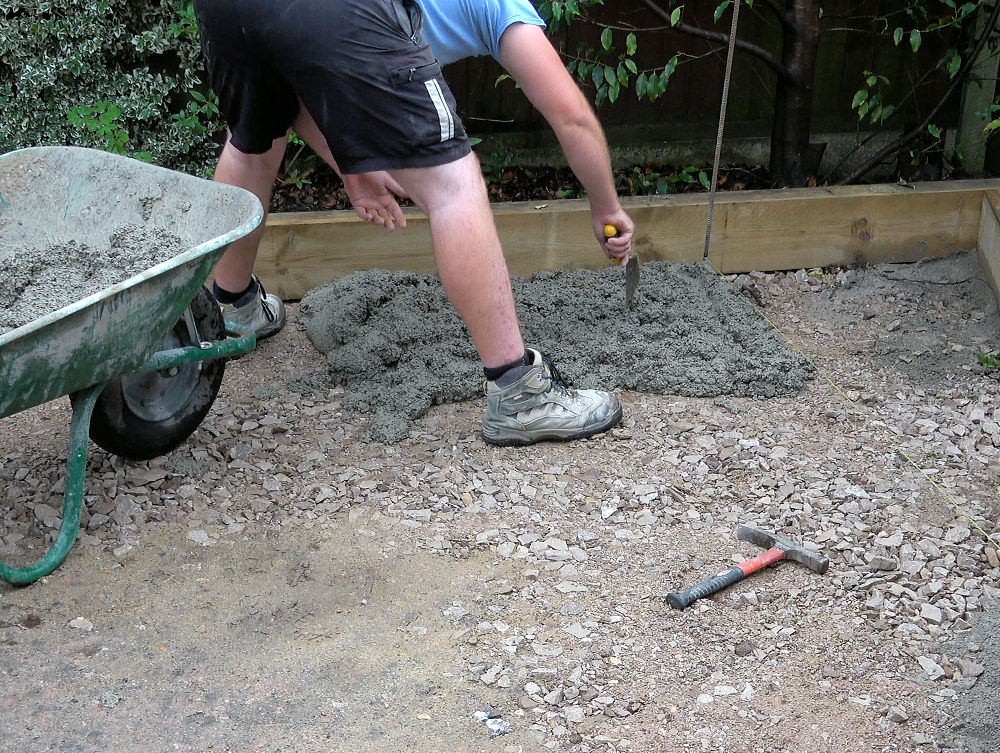
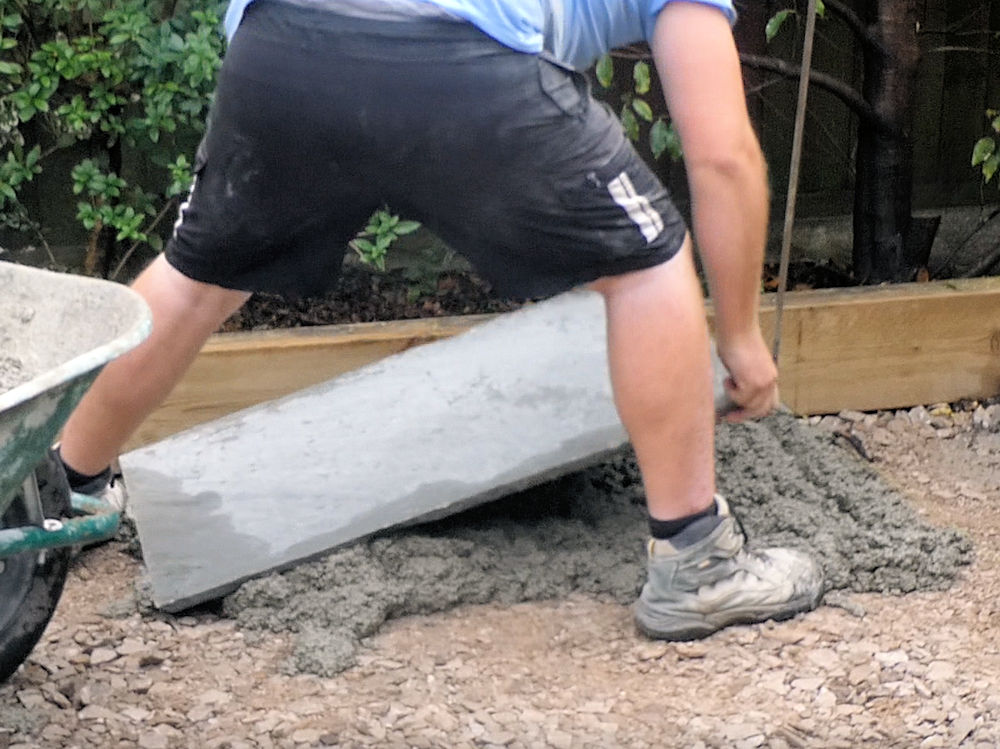
The Tuffbed is spread, levelled out and that’s all that is required. Some installers will use a spade to level out; some will use a trowel. The prepared bed must support the whole of the underside (bed face) of the paving being laid. The use of individual spots, dabs, or dollops of mortar is NOT acceptable. This is the “Full Bed” method required by the British Standard and by every paving supplier of significance.
The paving can now be laid, but to ensure the best possible results the underside (bed face) will need to be primed. The application of a specially formulated slurry will ensure full adhesion of the paving to its supporting bed.
That’s where Tuffbond comes in….
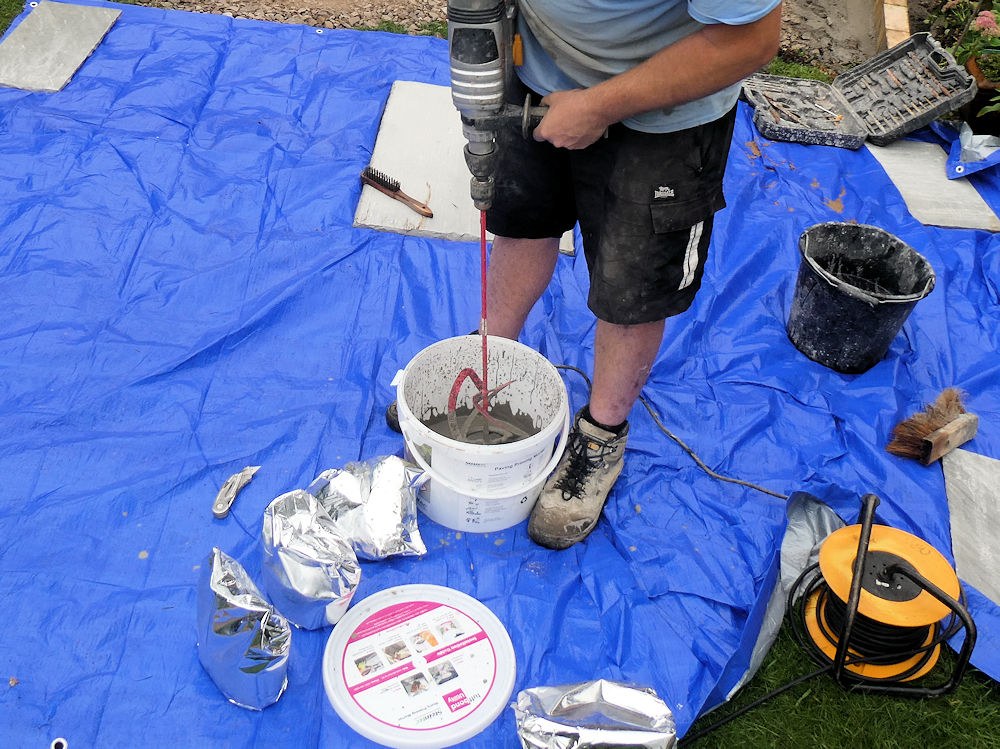
Mixing Tuffbond:
Tuffbond is the perfect complement to Tuffbed. They’ve been specifically developed to work together, to fulfil or exceed the requirements of the British Standard. Together, they make an industry leading paving installation system.
Tuffbond is an engineered slurry which combines high-quality cements with selected fine aggregate fillers and super plasticisers. When mixed with water, it creates a smooth, creamy paste that is easy to apply and creates a tough, permanent bond between paving and bedding.
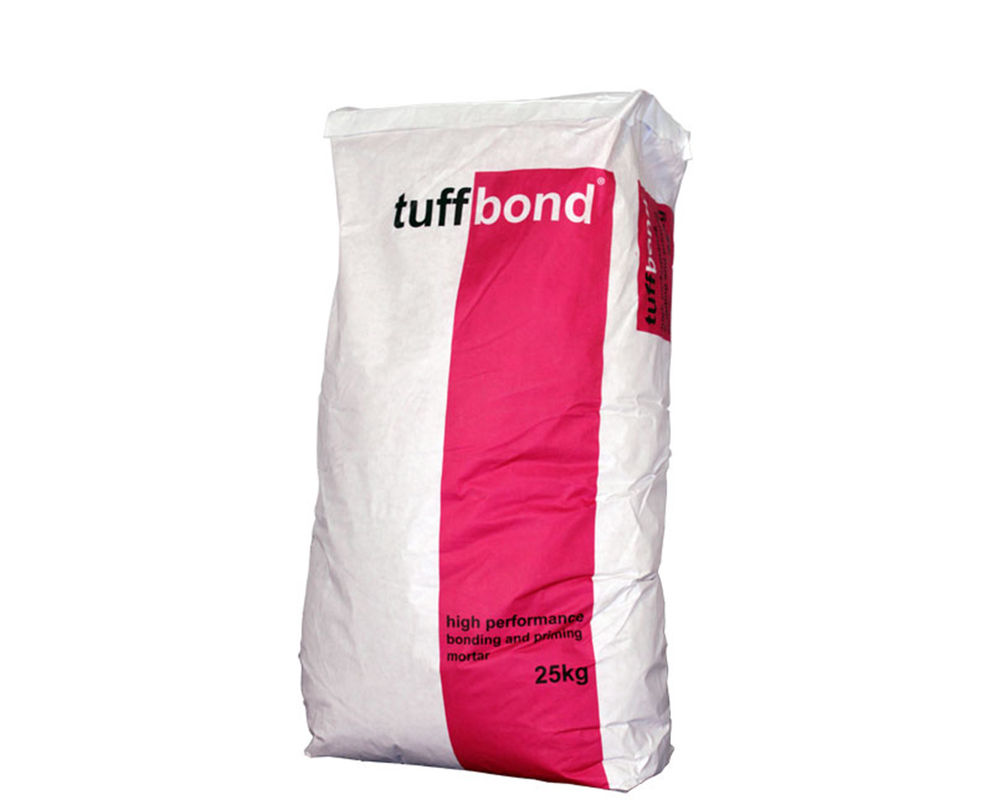
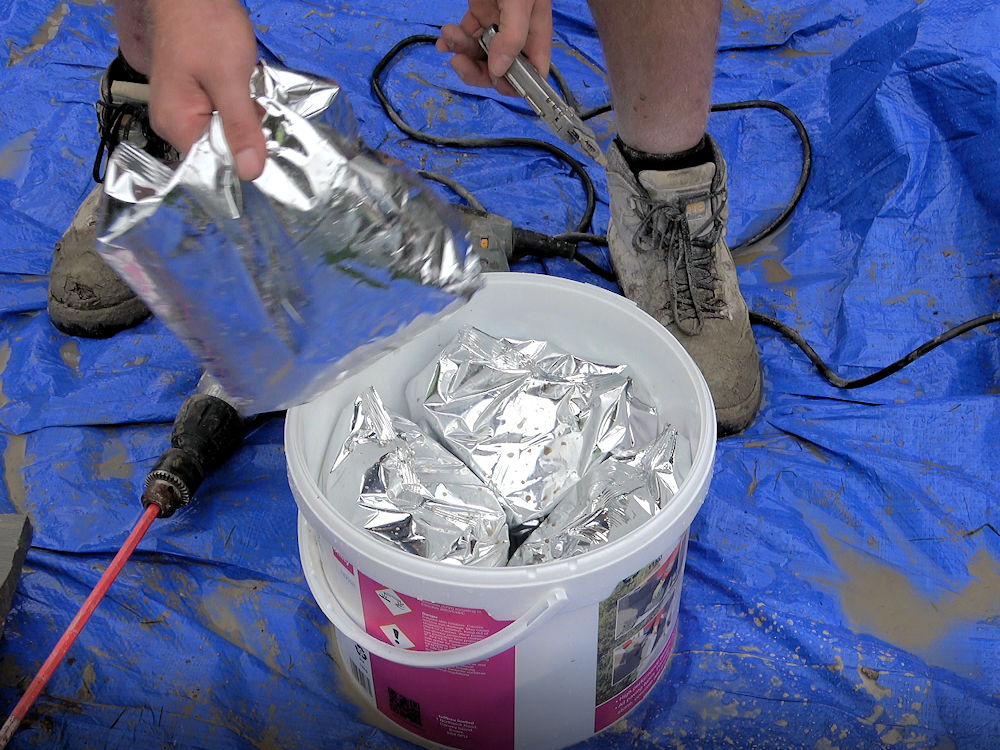
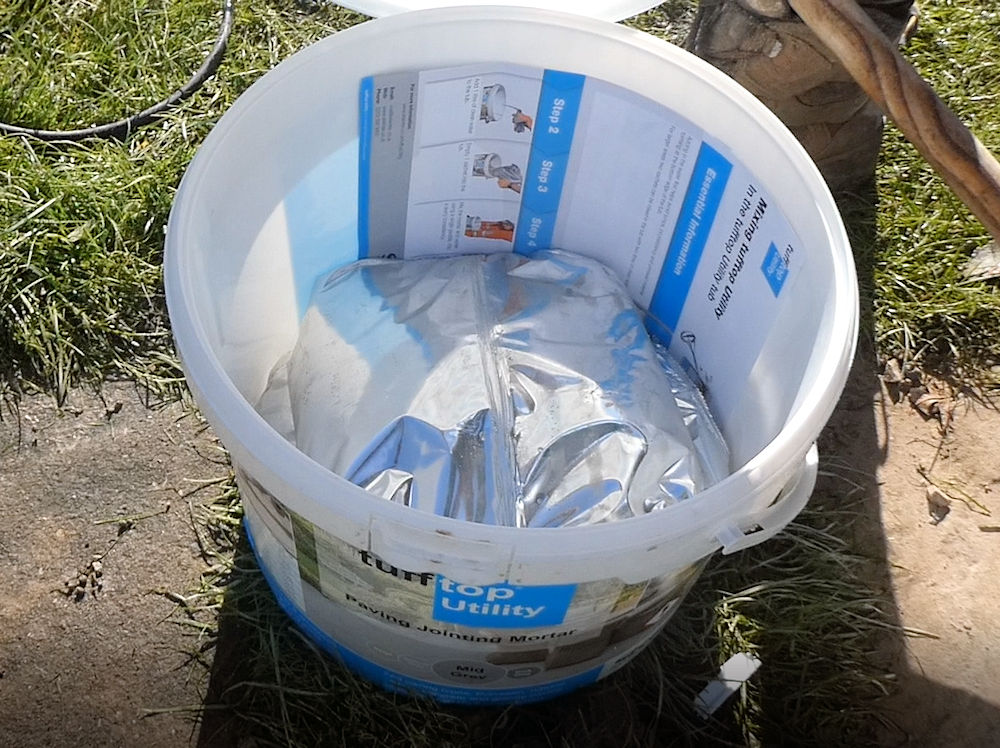
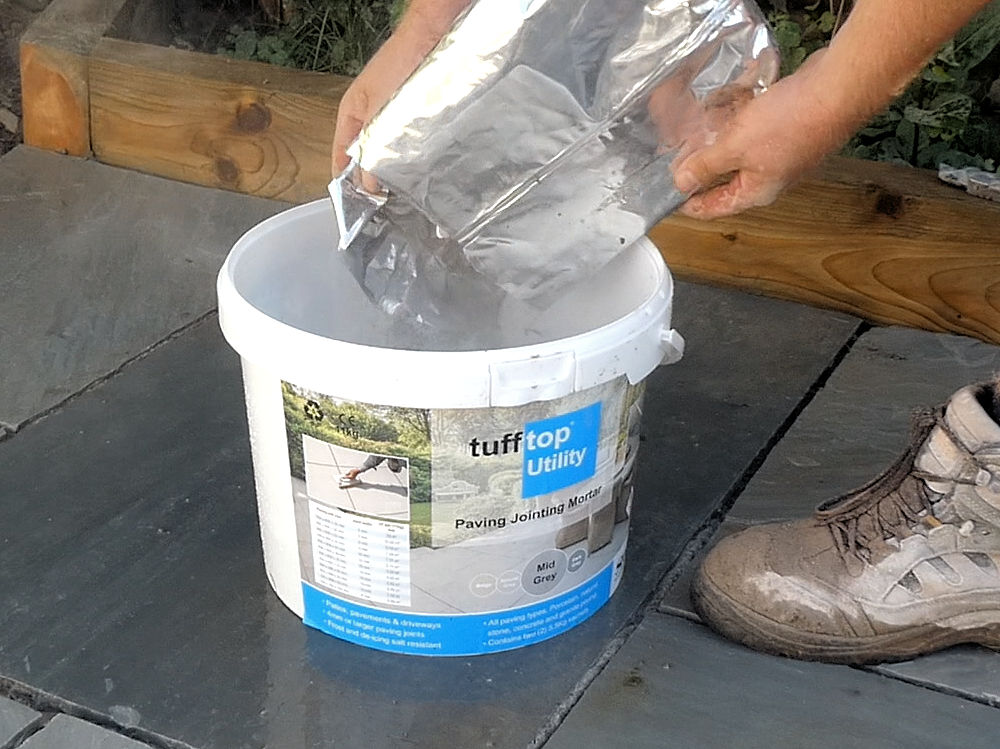
Tuffbond is supplied in two forms: the super-convenient Utility Bucket Pack, with four sealed sachets each containing 3kg of Tuffbond, enabling smaller batches to be prepared; and the 25kg Contractor Pack which allows larger quantities to be mixed on demand.
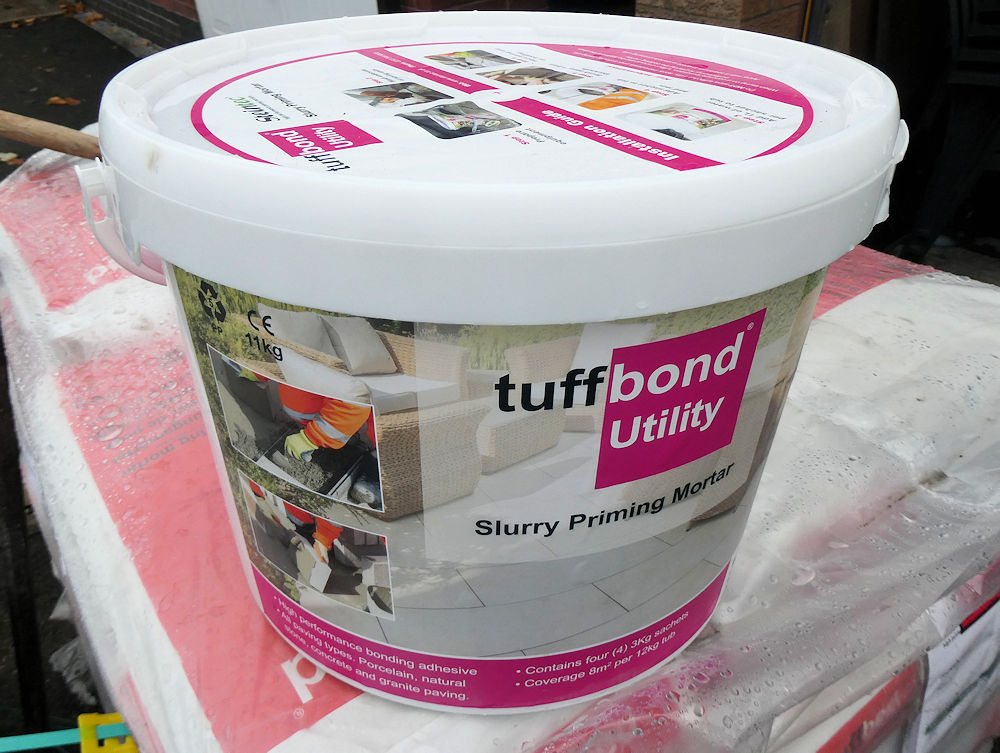
On this small project, the Utility Bucket was the most suitable choice, allowing sufficient primer to be prepared to install 10-15m² of the paving. Tuffbond has a “pot life” of 30-60 minutes depending on ambient temperature, so it makes sense to mix only what can be used in that time. On larger projects, where two or more laying gangs many be working, and/or installation if faster, the larger quantities of primer offered by the 25kg Contractor Pack would obviously be a better option.
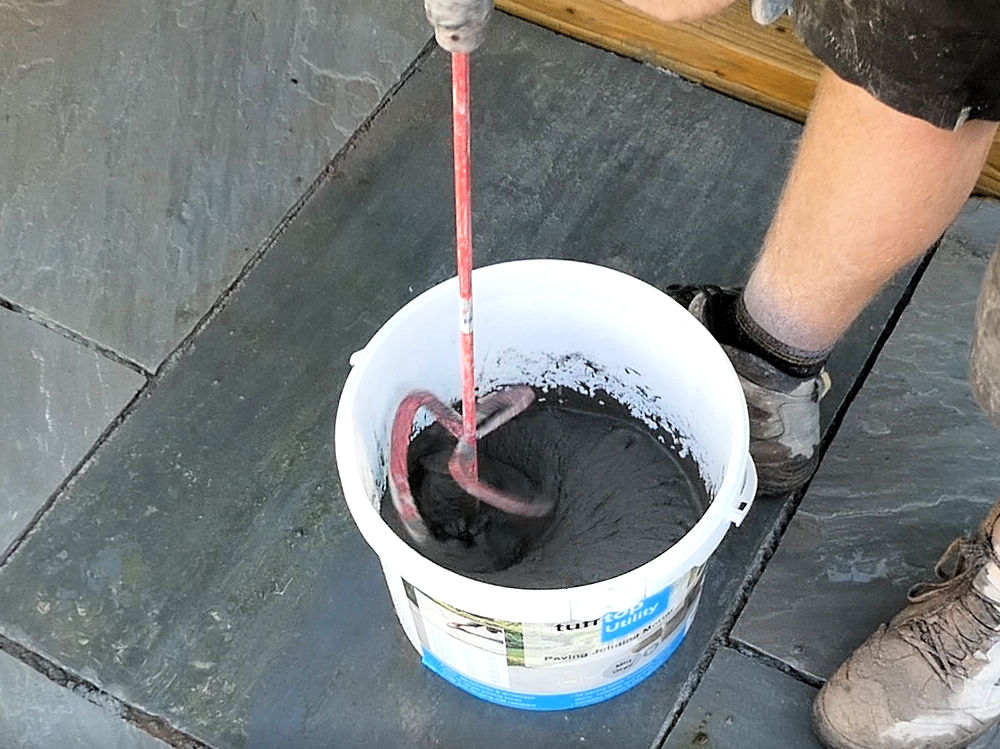
To mix the Tuffbond Utility, remove all the sachets from the container bucket, setting aside those not to be used at this time in a safe, dry, out-of-the-way spot.
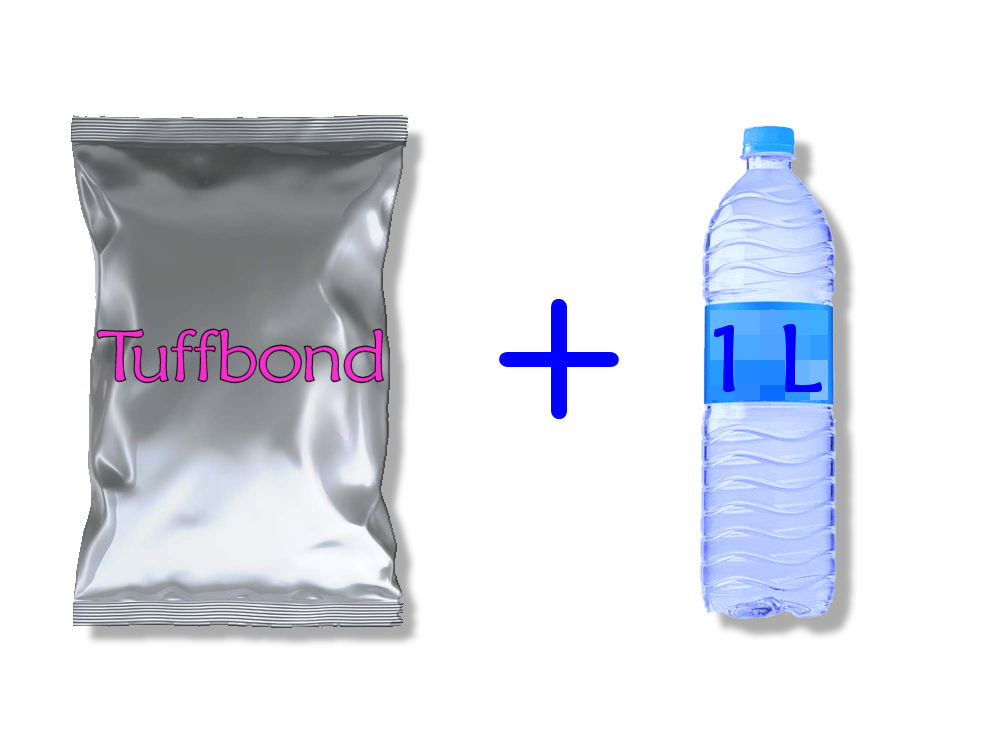
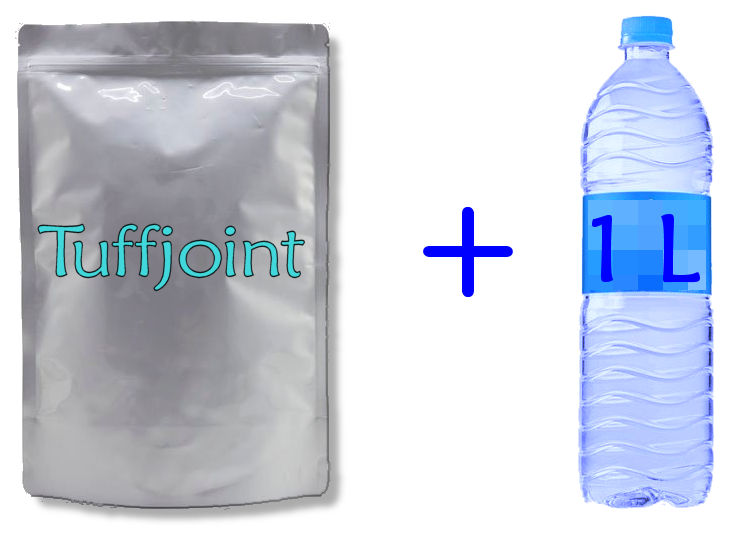
To make a single sachet mix, pour exactly 1 litre of clean, cold water into the empty bucket and then open a sachet and pour that into the water.
IMPORTANT: Add powder to water and NOT water to powder!
Use a powered paddle mixer to stir the Tuffbond powder into the water, starting slowly and gradually building up speed to create a smooth, creamy, lump-free slurry. Make sure the paddle mixer reaches into the corners of the bucket or use a small trowel to draw out any powder into the centre of the bucket and re-mix to ensure all of the Tuffbond is mixed with all of the water. Mixing takes 60-90 seconds or so.
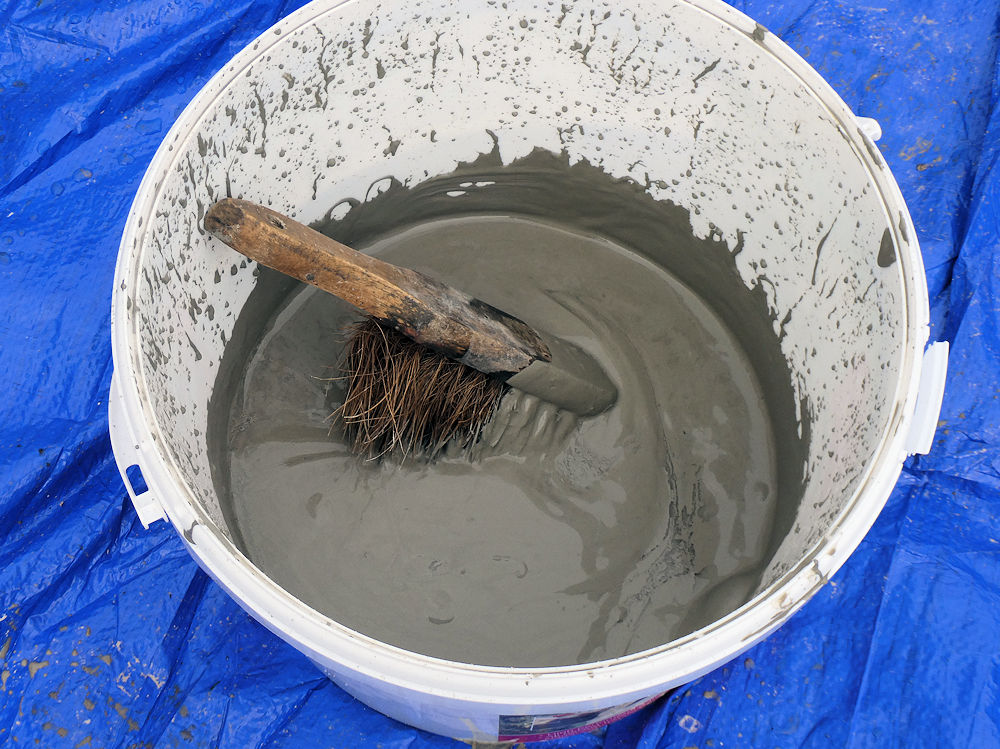
Tuffbond is now ready for use and should remain workable for at least 30 minutes. Regular stirring with a trowel or similar will extend its pot life.
Applying Tuffbond:
The mixed Tuffbond is applied to the underside of the paving immediately before it is to be laid, but before it can be applied, a little preparatory work on the paving units is required.
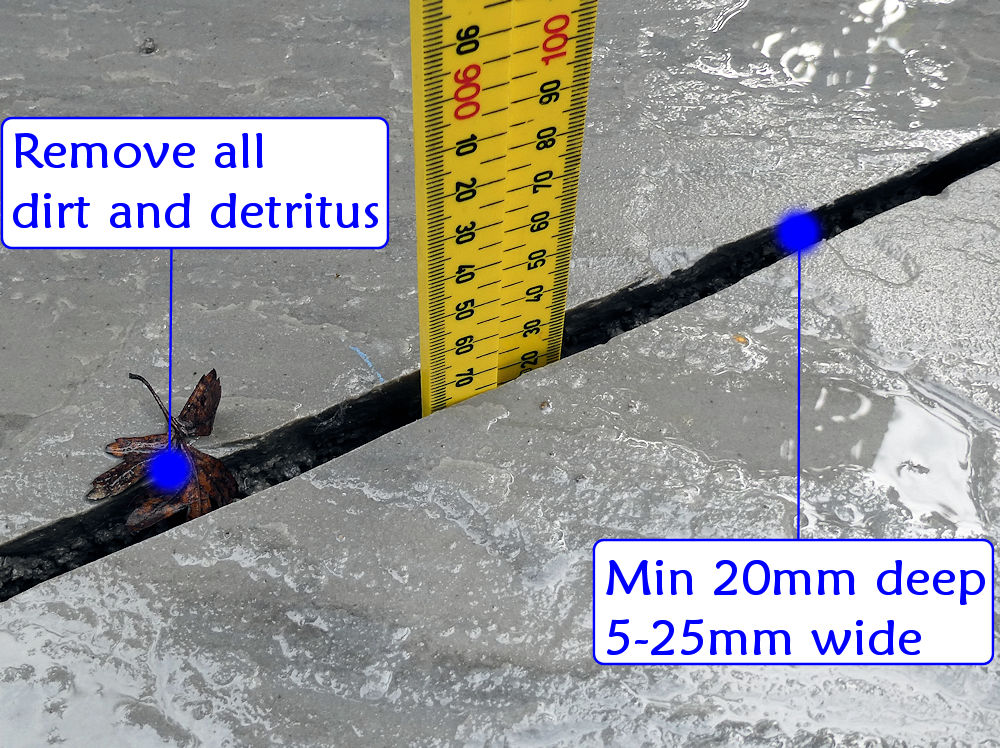
Nearly all paving units, whether they are concrete, natural stone, or porcelain, will have some dust or fine detritus clinging to its surfaces, top, bottom and edges. To ensure best performance from the Tuffbond primer, this dust needs to be removed and this is best done using a wire brush.
The paving unit is placed on a support with its bed face uppermost (so: it’s upside down) and scrubbed with the wire brush to dislodge any dust or detritus. It’s practically impossible to remove every last speck of dust, but as long as the bed face is free of all the obvious loose material, it will be fine.
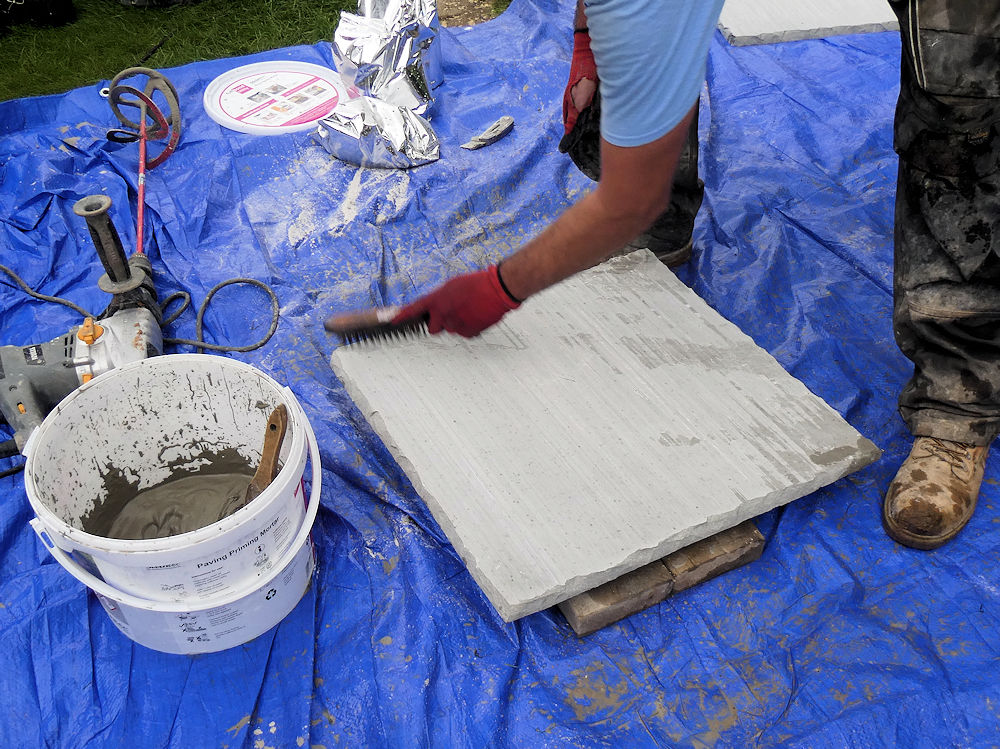
Next, wash down the bed face with a damp cloth or brush. This will rinse off any remaining dust and wet the paver ready to accept the primer. However, it doesn’t want to be dripping wet – too wet and the primer will become runny and messy when applied. If necessary, use a dry cloth or sponge to remove any surplus water, leaving the bed face just damp.
Spread the primer over the whole of the bed face using a brush or a trowel. The aim is to get a covering that is 1-2mm thick, so do not skimp. Thin, watery smears of Tuffbond are both a waste of the product and a waste of your time, as they are more likely to fail.
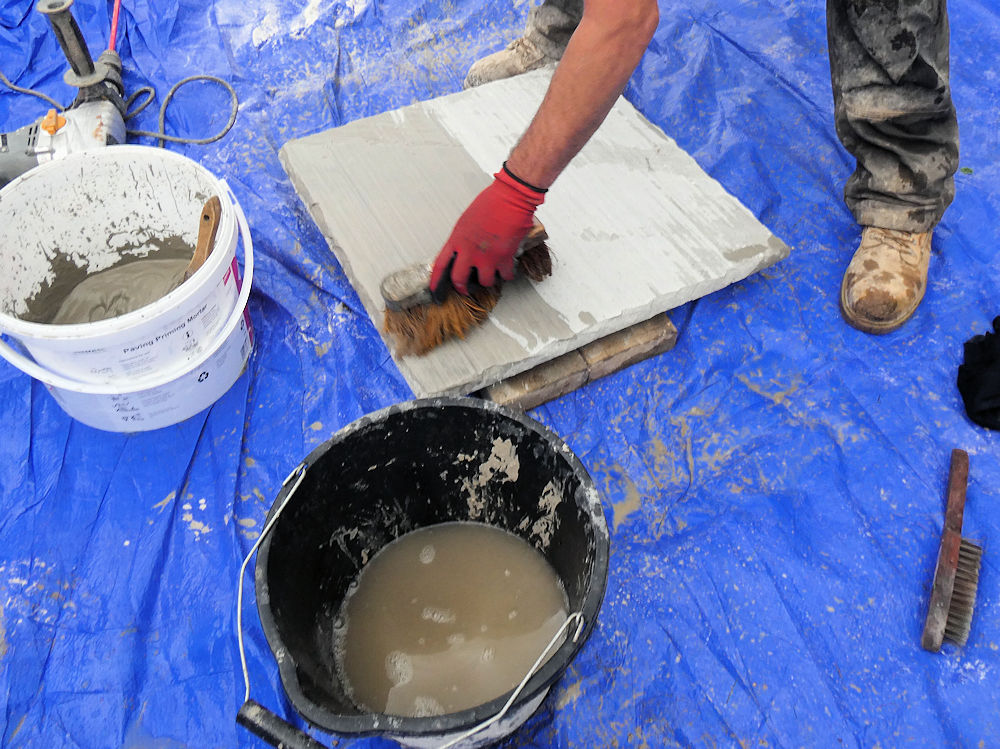
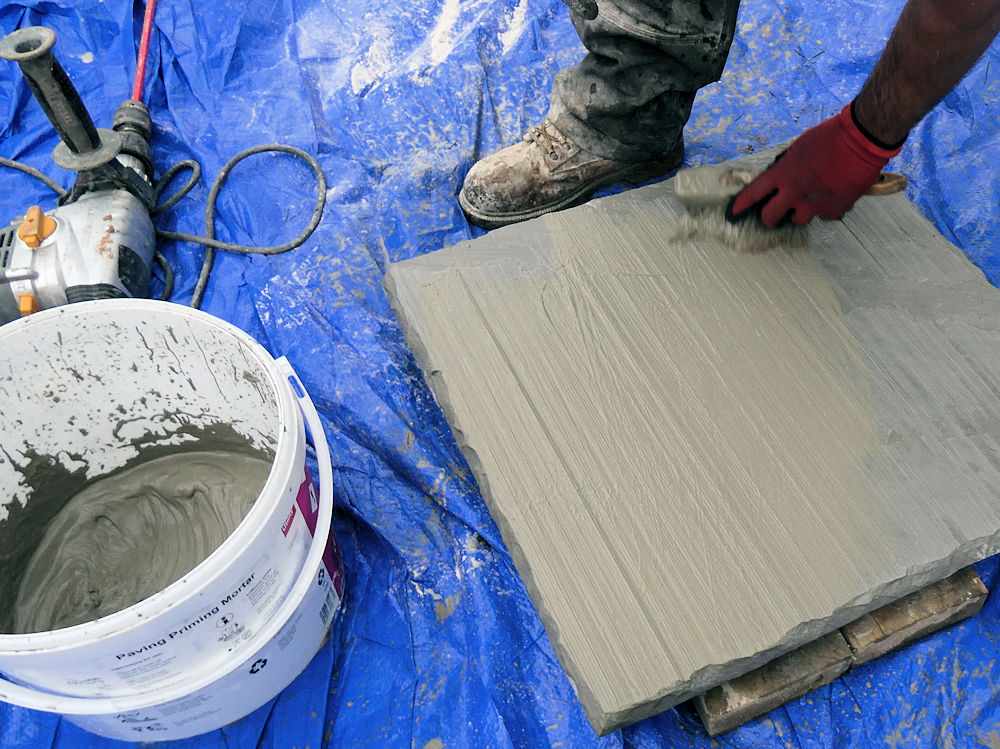
Note that the primer is applied immediately prior to laying. This ensures “wet-on-wet” contact: the wet primer is in direct contact with the wet bed, and so there is no joint, no interface, no barrier or break between the two. They become a single, homogenous mass.
Also, do not allow the Tuffbond primer to dry. The practice employed by some clueless installers in a misguided attempt to save time of priming a whole batch of paving prior to starting the laying process is not only bad practice: it is potentially faulty. The working life of the primer once applied is limited to 20-30 minutes. Beyond that, the curing process has progressed too far and the performance will not be anywhere near as good as intended with freshly applied primer.
The paving unit should be laid immediately.
Video I:
Tuffbed and Tuffbond
This is the first part of a video showing the use of Tuffbed and Tuffbond to construct this patio. The second part, showing the jointing using Tufftop, is avaialable later on this page.
Bear in mind this was filmed under actual site conditions, and is not a staged and scripted perfomance piece. The operatives don't always follow strict Health and Safety procedure to the letter, and there may be some "earthy" comments overheard. The video is intended to show how these products are used in real life on a real construction site, employing practices which are not always quite as the manufacturers' would like them to be.....but they still provide excellent results. Enjoy!
Laying The Paving:
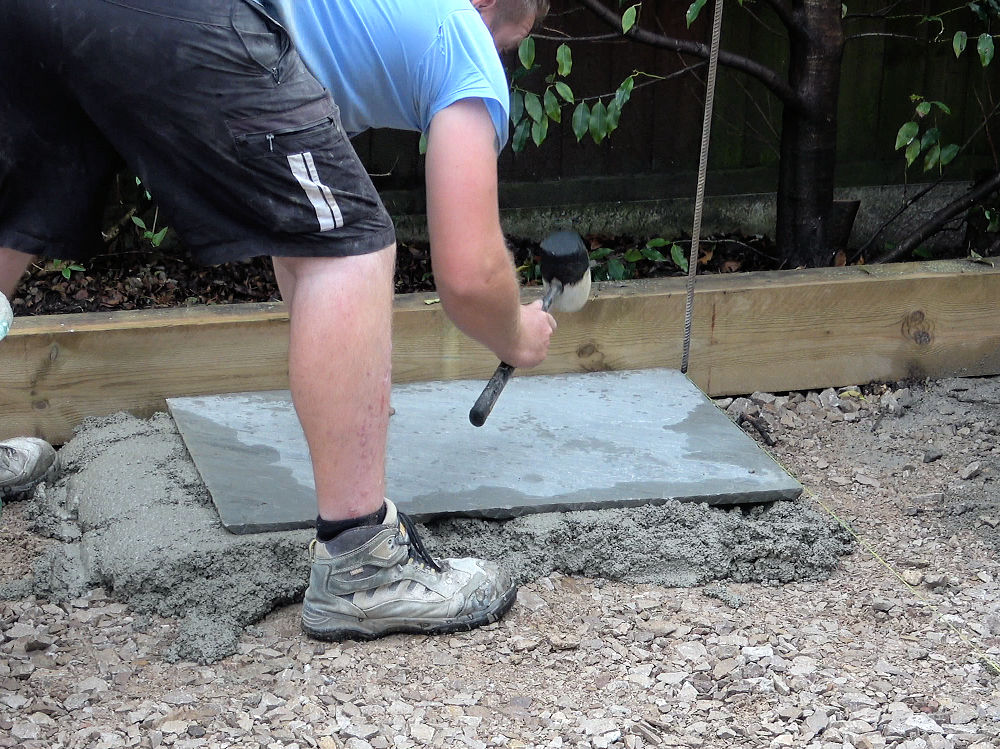
The primed paving unit is placed onto the prepared bed and tapped down to level.
It’s as simple as that. There is nothing different to how paving has been laid for decades. No fancy techniques, no special requirements, no expensive tools. Simply prepare bed, prime paver, place on bed, tap down to compact, check the levels.
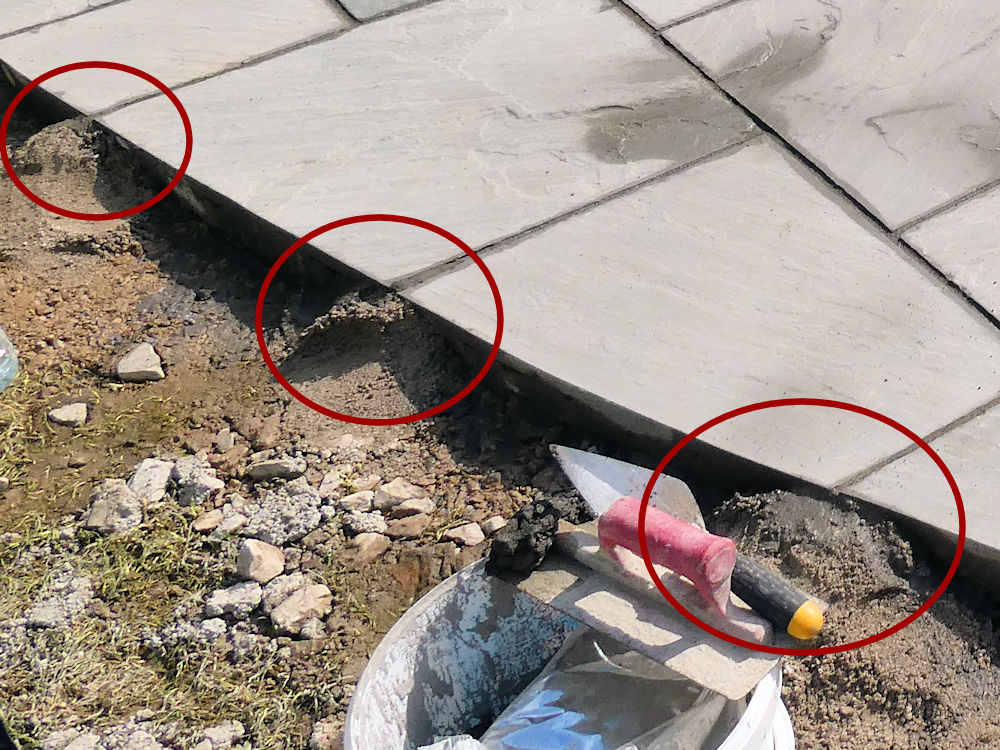
Wash off any spills or splashes immediately. Don’t allow them to dry and harden, as they may well be impossible to shift. Keep the work clean by regularly wiping down with a damp cloth or sponge, and also rake out any mortar that is extruded into the joint space – a joint depth of at least 20mm is needed when it comes to filling those joints in a few days’ time.
Trim off any excess Tuffbed mortar extending beyond the edges. Once set, this is an incredibly hard mortar and it will probably require cutting with a saw to remove it, rather than attempting to chisel it away. It is far, far easier to trim the Tuffbed while it is still in its plastic (unset) state, and that removed mortar can be re-used to bed more paving, if necessary.
As mentioned earlier, some installers may find the Tuffbed mortar doesn’t compress quite as much as what they are used to, but skilled people rapidly adapt and a few square metres later, installation speed will be back to normal. Contractors using Tuffbed and Tuffbond regularly report that there is no loss of productivity, and they comfortably achieve the sort of laying rates per shift they were managing when using sand/cement mortars.
Creating A Curved Edge:
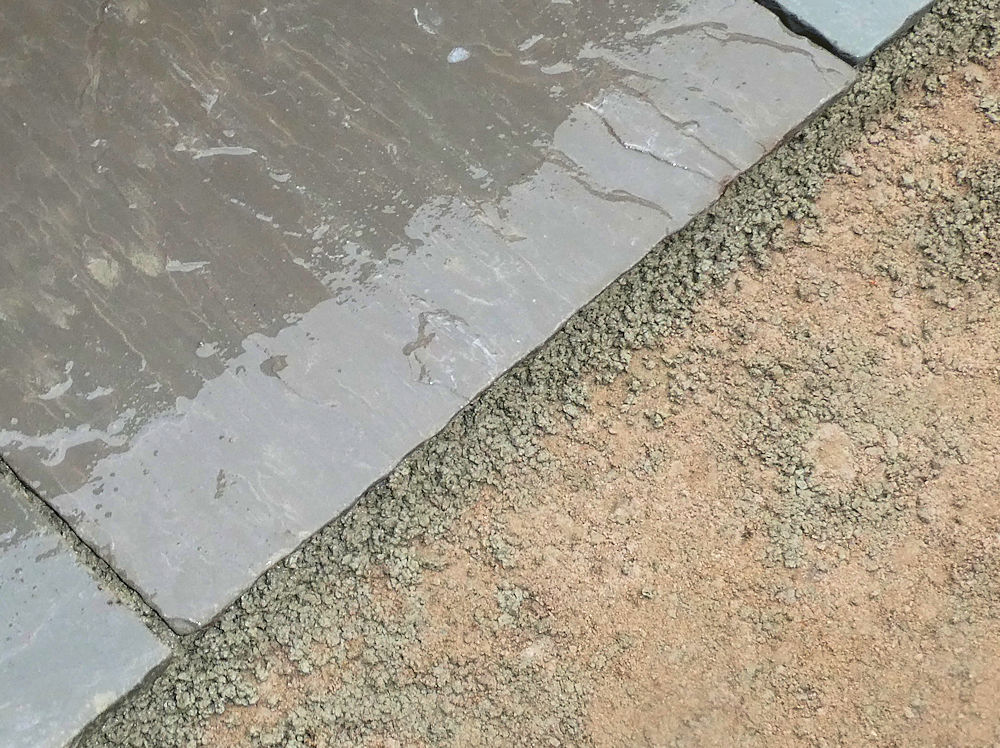
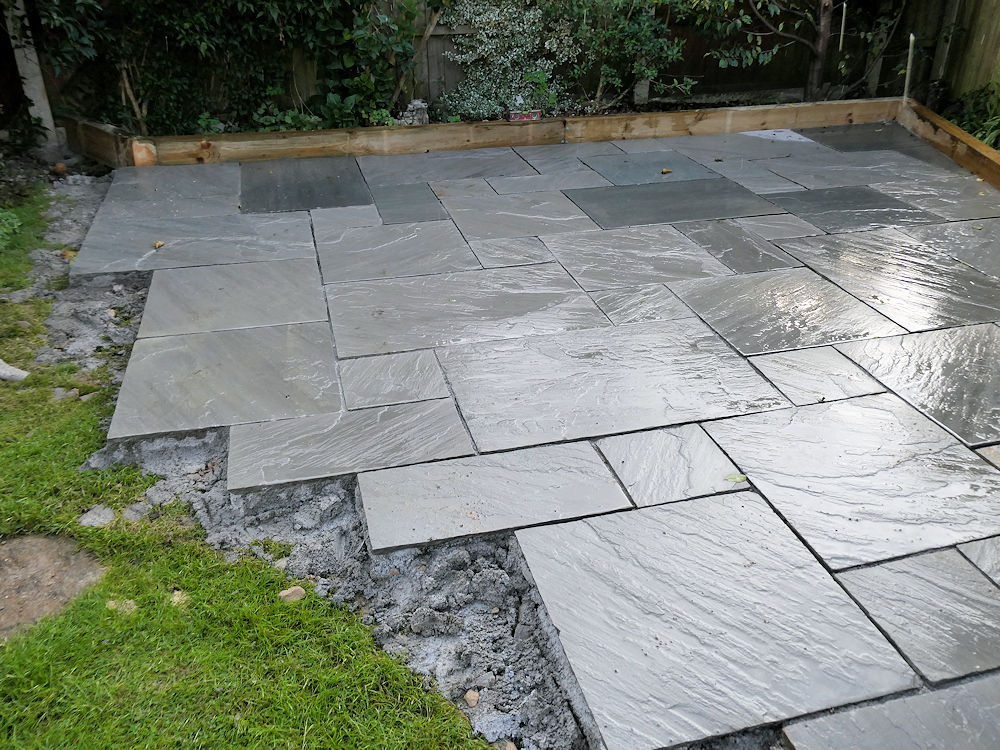
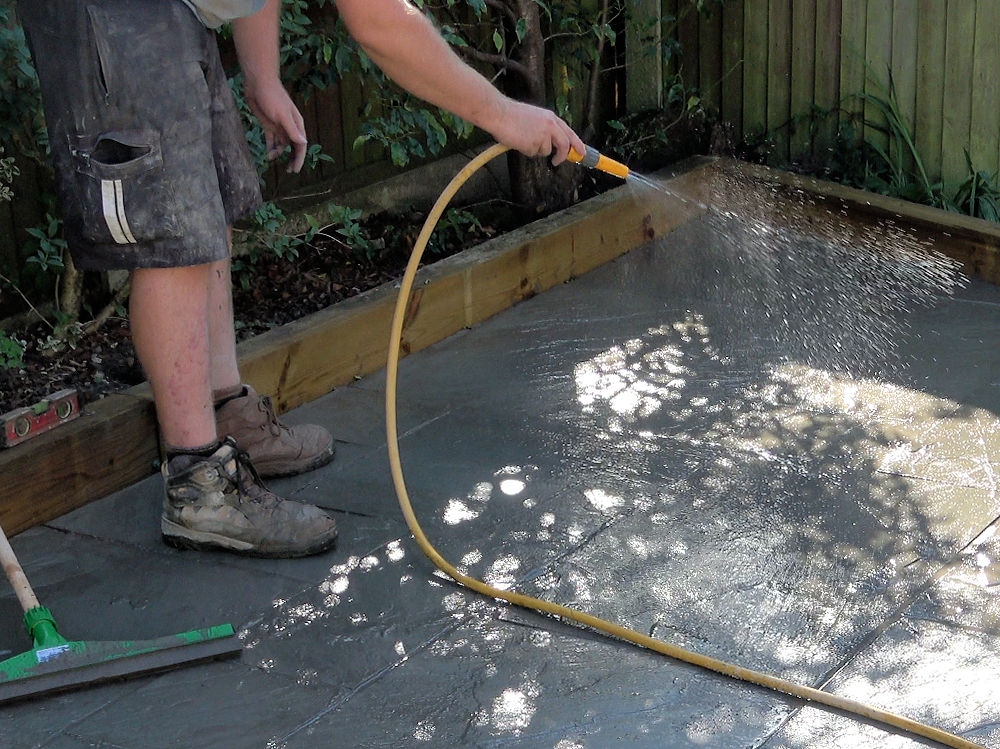
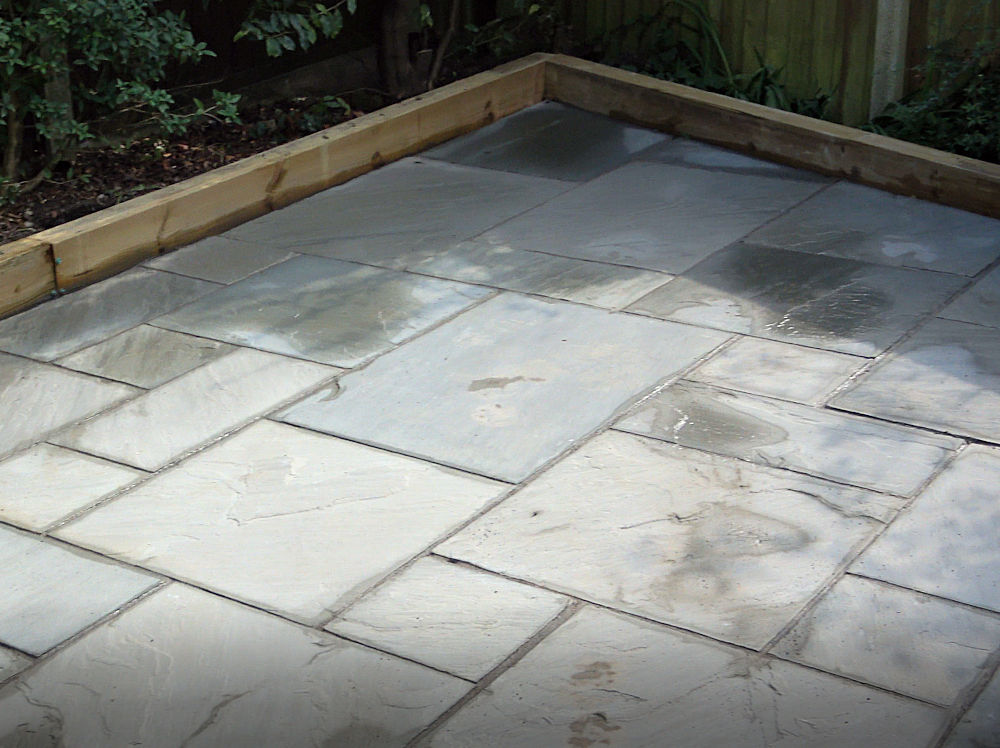
On this particular project, the client specified a curved edge to the patio where it meets the lawn. So, the paving was initially laid to extend beyond the planned curve, and then, once it was all in place and the Tuffbed mortar set, a sweet curve could be marked and cut in one operation.
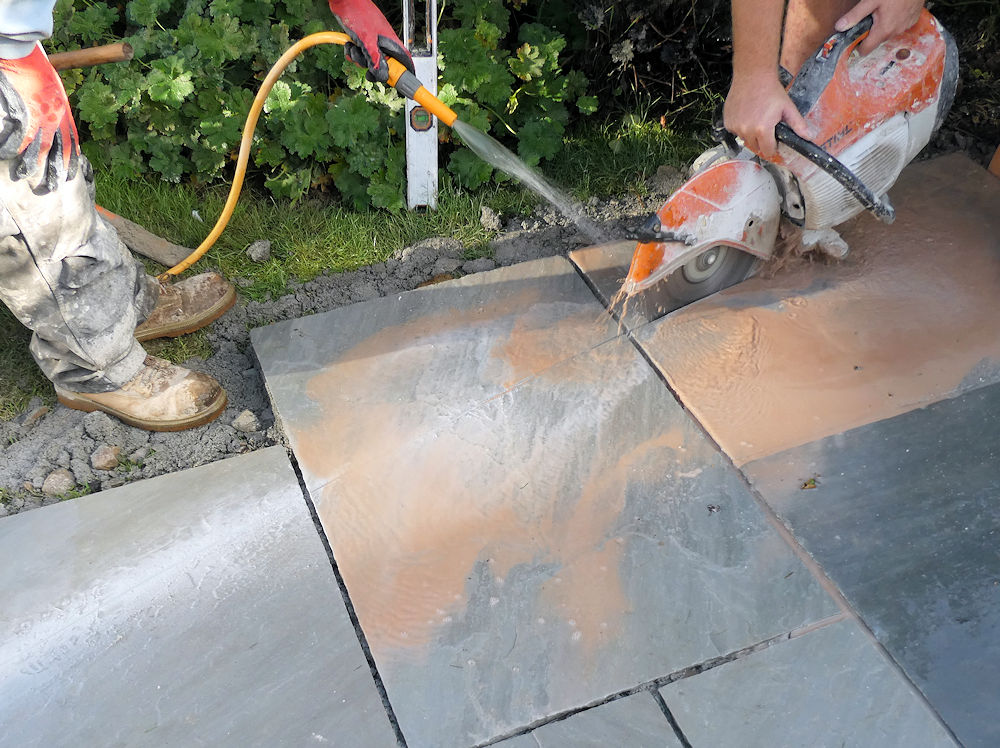
Dust from the cutting operation is suppressed using a water feed from a hose, and the reddish colour to the resulting waste stems from the hard aggregate within the Tuffbed mortar. This will need to be washed off before jointing work starts.
It’s worth noting that the strength of the Tuffbed and the powerful adhesive grip of the Tuffbond ensured not a single piece of the patio came loose despite all the rattling and vibration of the cutting procedure.
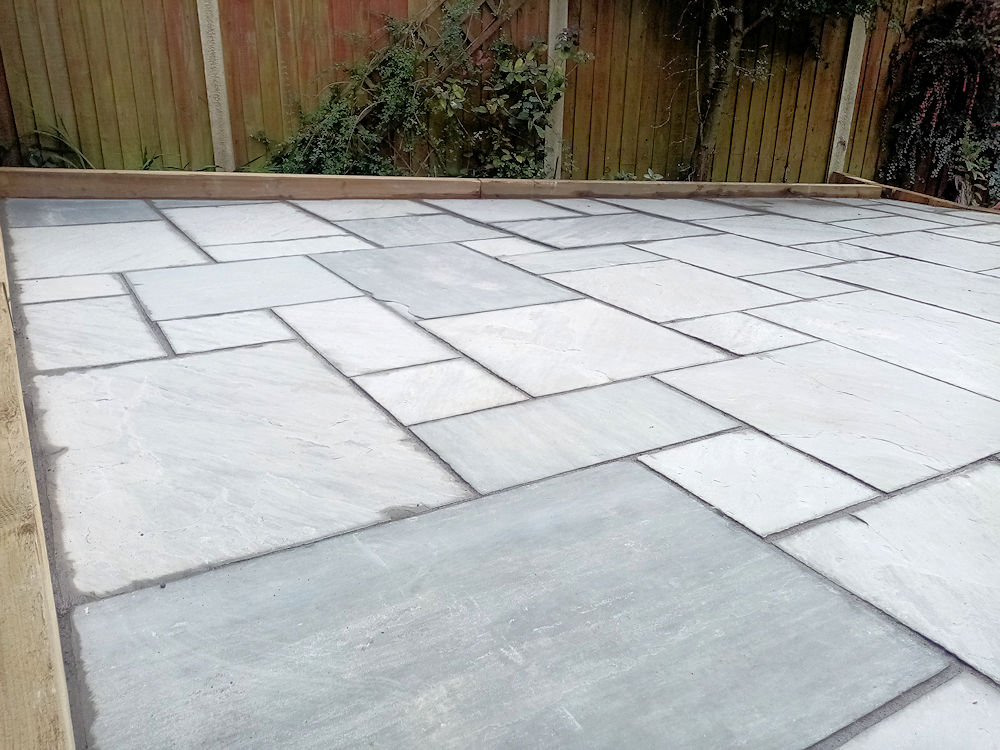
Jointing:
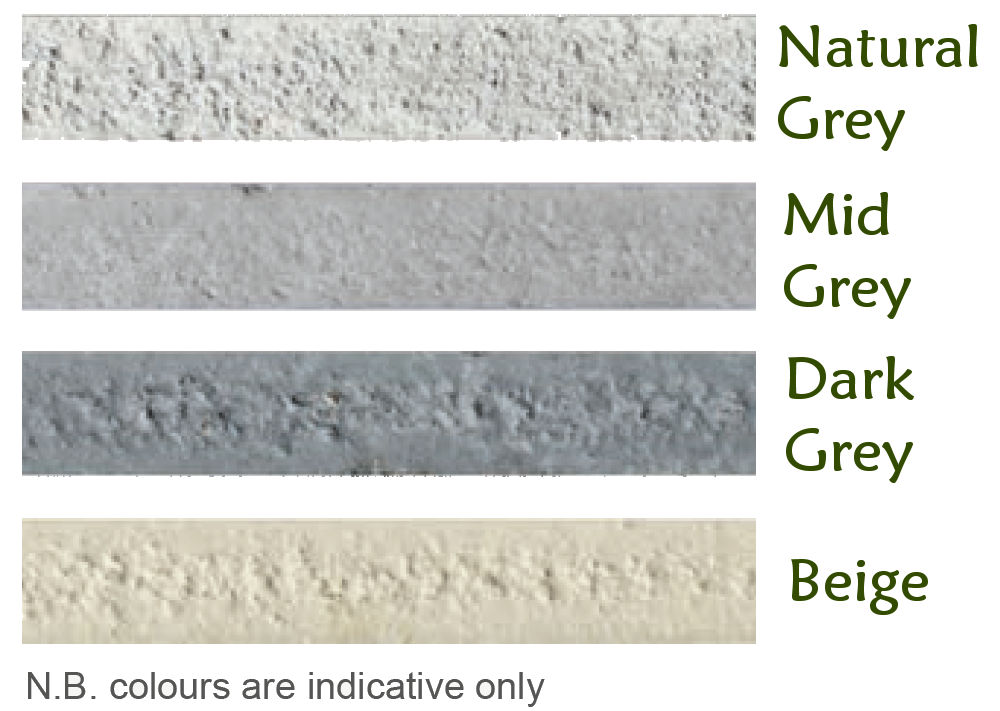
To finish the project, the laid paving needs a short while to harden off and then the jointing can be undertaken. To complement the Tuffbed and Tuffbond products, the ideal jointing material is Tufftop, the self-compacting, BS7533-compliant quality mortar available in four popular colours.
Jointing should only take place when the ambient temperature is 3° and rising or warmer, but not above 30°.
The use of Tufftop to joint a larger area of porcelain paving is followed in exacting detail on a separate page. This is a smaller project, using a riven sandstone, and will rely on hand-cleaning rather than the mechanical belt cleaner due to site restrictions. Those wanting fuller guidance on the use of Tufftop may find the dedicated page more useful.
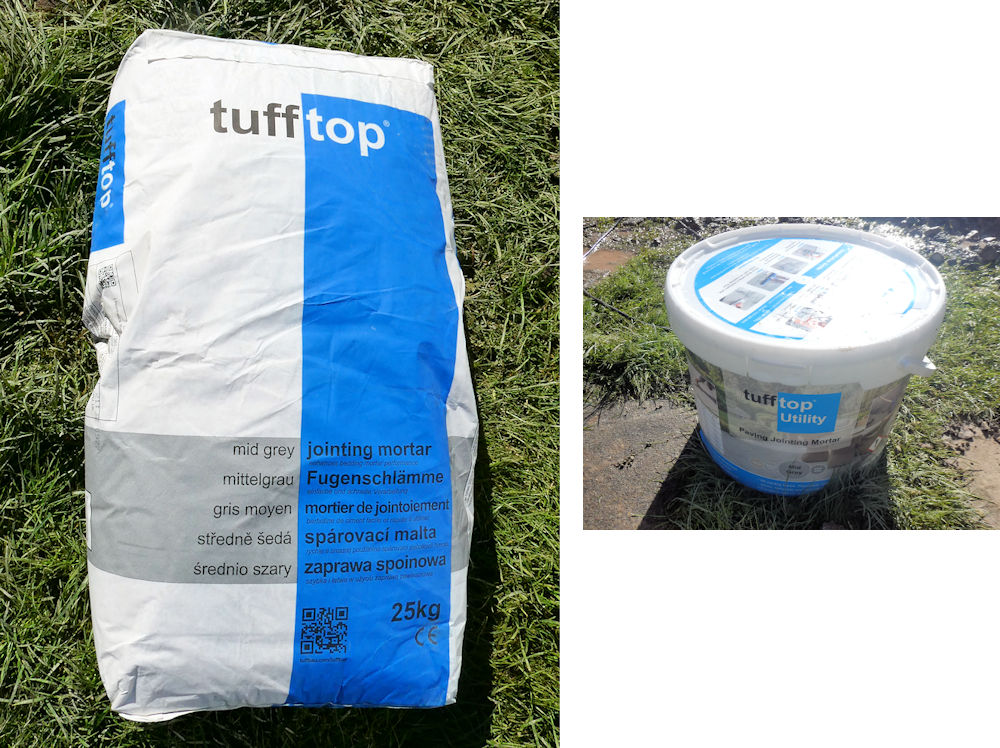
As with other products in the range, Tufftop comes in two pack options: the smaller, backet-packed, 12kg (2 sachets @ 6kg) Tufftop Utility; and the larger 25kg moisture-resistant Contractor Pack. Both packs contain the same high-quality jointing mortar, and there is no issue in mixing packs (of the same colour) on any particular job, as was done on this project. Once mixed and applied, its impossible to tell which joints were filled with mortar from the smaller pack and which used the larger.
Preparing the Paving:
There is some essential preparatory work to be undertaken before starting to spread the Tufftop jointing mortar.
First of all, the pavement should be swept clean of any surface litter or detritus. Next, the joints should be checked for obstructions. They need to be at least 20mm in depth and not less than 5mm in width. Joints that are partially obstructed with bedding mortar may need cutting or chiselling out to ensure adequate depth and width.
Any open-end joints (joints that terminate against fresh air, or against loose material such as soil) can be stopped-up, damming the end of the joint in order to prevent wasteful loss of the Tufftop mortar.Generally speaking, Tufftop is sufficiently stiff to remain in the joint with minimal loss, but, on some jobs, there may be slight seepage.,
Ideally, a small quantity of Tufftop can be mixed into a stiff paste and used to close-off open joints and there will be no visual difference between slurry-applied jointing and the 'dam' used at the end of joints.
Alternatively, this can be also done with clay, sand, adhesive tape or almost anything that will hold back the Tufftop until it has started to harden.
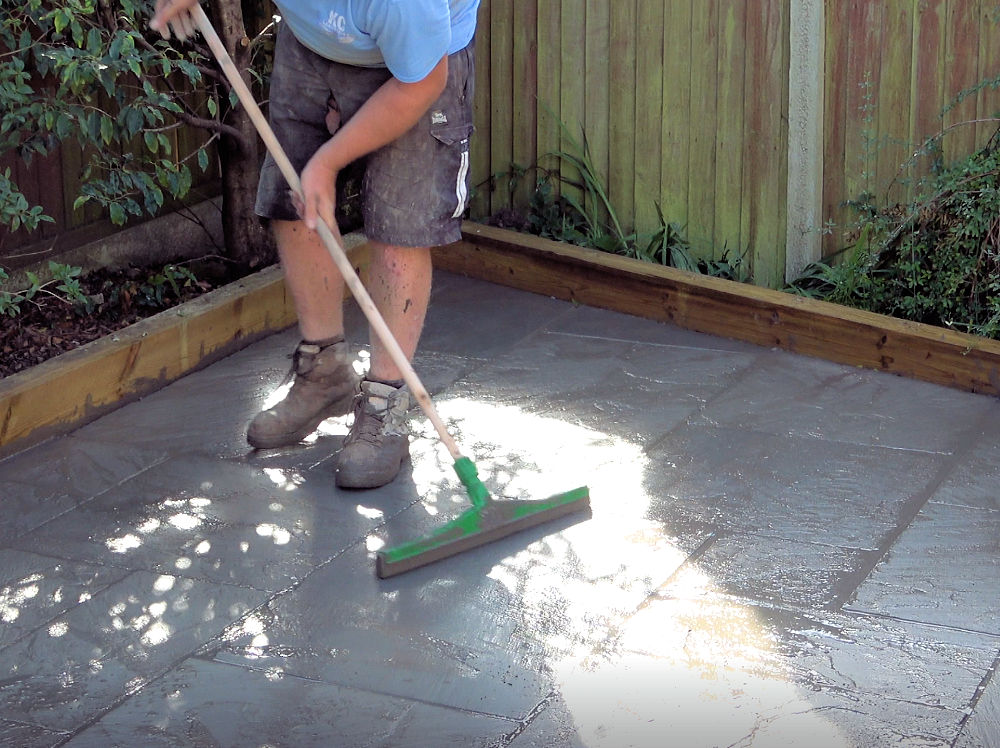
The surface needs to be damped down, but not to the point where there is standing water on the surface or within the joints. It’s important that the pavement does not dry out until the jointing work is completed, but at the same time, it does not want to be dripping wet.
The Tufftop mortar can now be prepared.

Mixing Tufftop:
As mentioned, both pack types were used on this project, and both require slightly different preparation methods. We’ll start with the convenient Tufftop Utility.
Tufftop Utility:
Open the bucket and remove both sachets of Tufftop mortar, setting aside one sachet in a safe, dry place to be used later.
The Tufftop mortar can now be prepared.
Pour 1 litre of clean cold water into the bucket, then open the sachet and carefully add the contents to the bucket.
IMPORTANT: Add powder to water and NOT water to powder!
Use a powered paddle mixer to stir the Tufftop into the water, starting slowly and gradually building up speed to create a smooth and lump-free slurry. Make sure the paddle mixer reaches into the corners of the bucket or use a small trowel to draw out any powder into the centre of the bucket and re-mix to ensure all of the Tufftop is mixed with all of the water. Mixing takes 60-90 seconds or so.
Tufftop Pack:
The preparation using a Contractor Pack is covered exhaustively on a separate page. The abridged version is that each 25kg pack requires 4 litres (±0.5 litres) of clean cold water and is best mixed in a large bucket or tub.
Applying Tufftop:
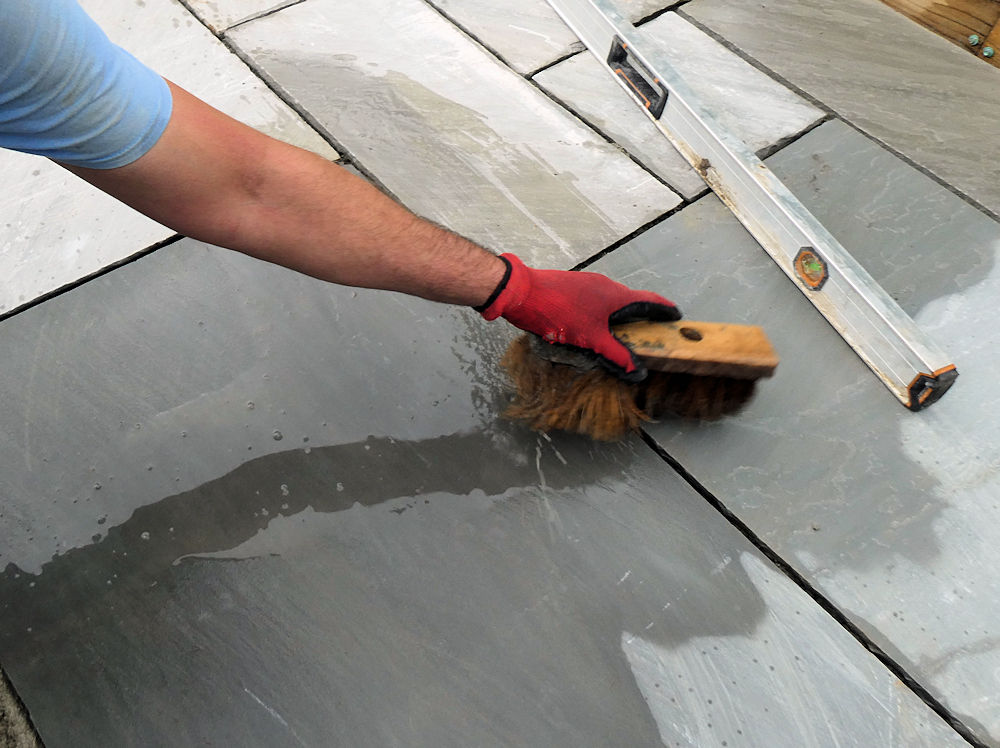
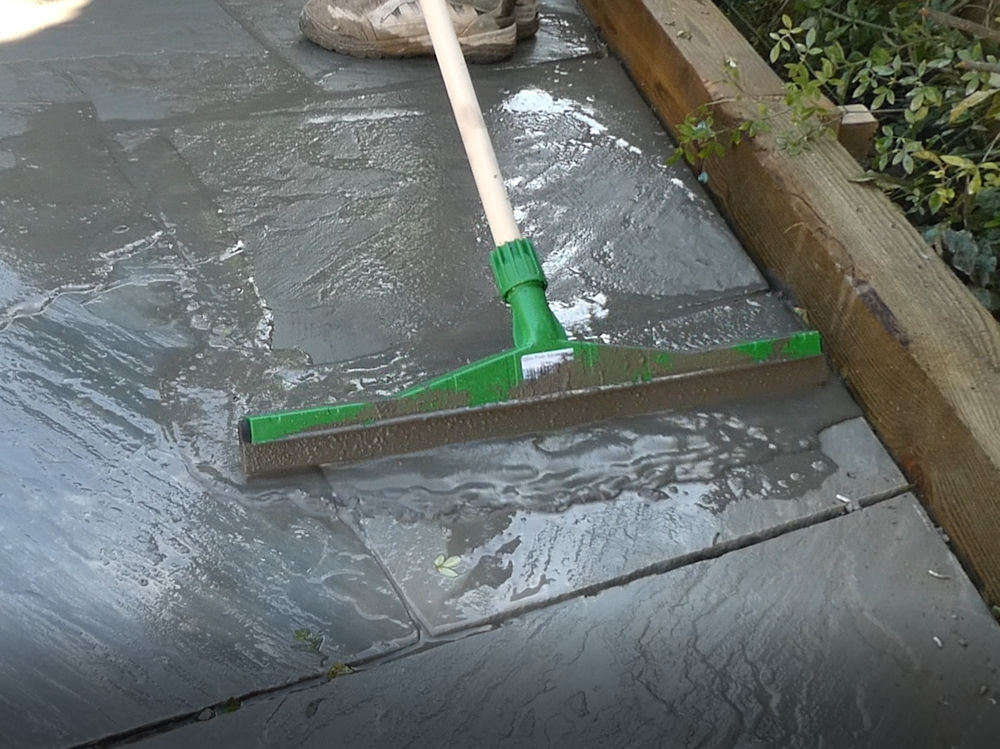
This is a slurry mortar, so the freshly-mixed Tufftop is spread out over the pre-wetted paving and moved across the whole surface using a squeegee, chasing the fluid mortar into the empty joints.
Tufftop is self-compacting so the level of mortar within the joints may settle slightly over the first few minutes. Repeated passes with the squeegee should ensure the joints eventually become completely filled.
The unique formulation of Tufftop means it starts to firm-up as soon as it falls into the empty joints. It does not need any time to harden or cure: that starts straightaway, so cleaning can start as soon as joints are filled.
Move the squeegee diagonally, as this minimises the risk of the flexible blade removing mortar, rather than topping-up. Push and pull the Tufftop back and forth. Mist the surface with additional water, if necessary, to prevent drying out and to keep the slurry flowing with ease.
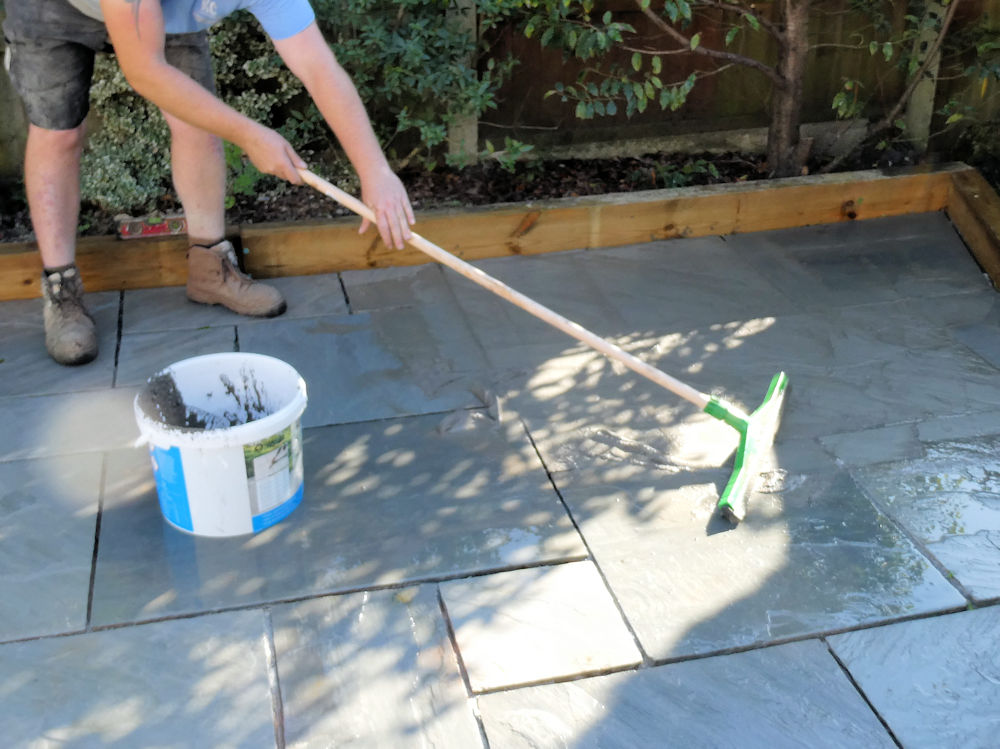
Remove as much of the surplus Tufftop from the pavement surface as possible using the squeegee. The more mortar removed at this stage means less to be sponged off later.
Work methodically, progressing across the pavement, using the first pour of Tufftop as far as it will stretch before bringing in more. Keep the surface misted – sometimes, a light drizzle can be amazingly beneficial – and use the additional wetting to help remove excess mortar with the squeegee, until the joints are completely filled and there is little more than a thin smear of the Tufftop remaining on the surface.
Skilled installers will often remove almost all the excess using the squeegee alone, leaving minimal tidying-up work for the Washboay and Sponge.
At this stage, it’s time to start the cleaning process.
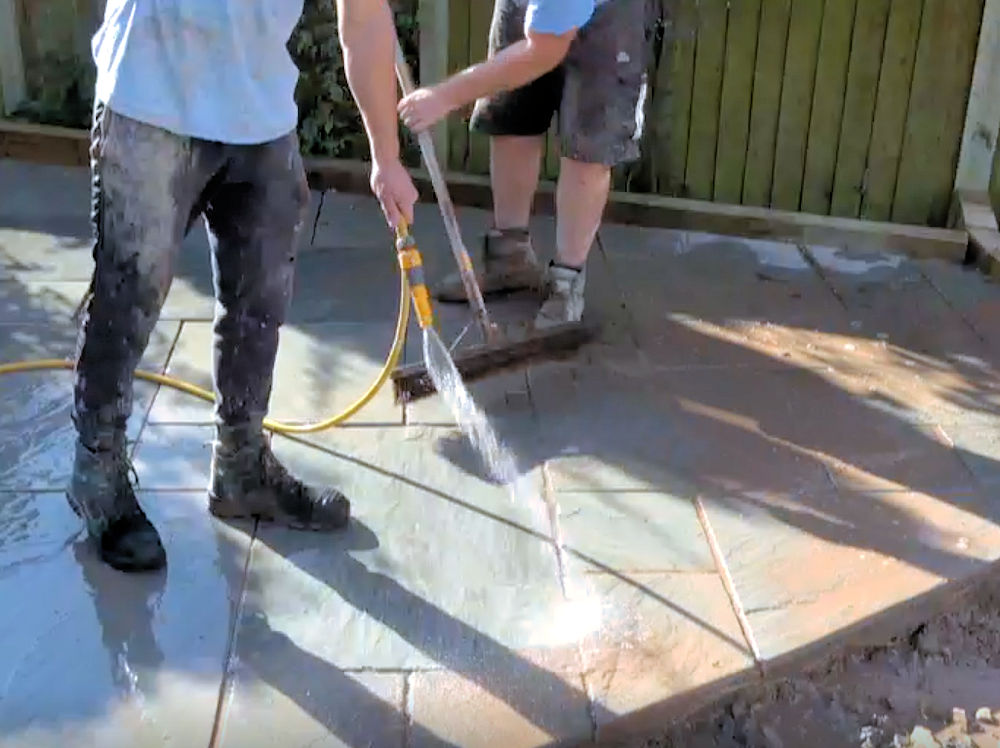
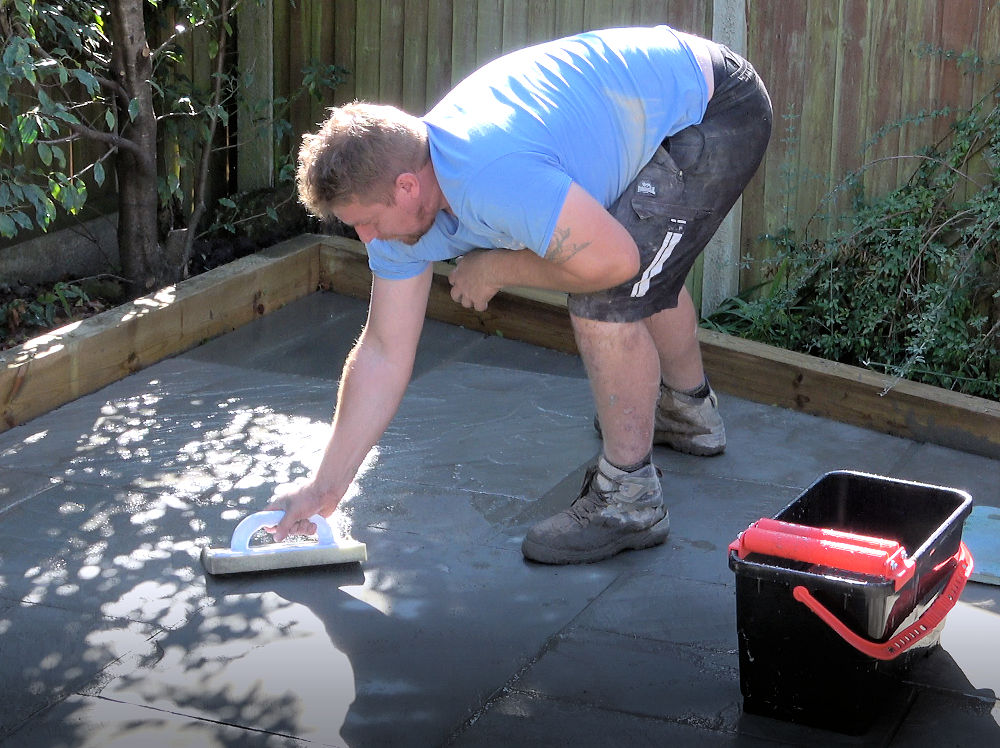
Cleaning Tufftop:
There is a myth that slurry jointing mortars require a short period of time to start to harden before commencing the cleaning work, but this isn't true for Tufftop, which is specially formulated to begin hardening immediately, allowing cleaning to commence as soon as the joints are filled. However, if the mortar is to be left for a while, ensure the surface is kept moist by regular misting. Do NOT allow the mortar to dry onto the paving.
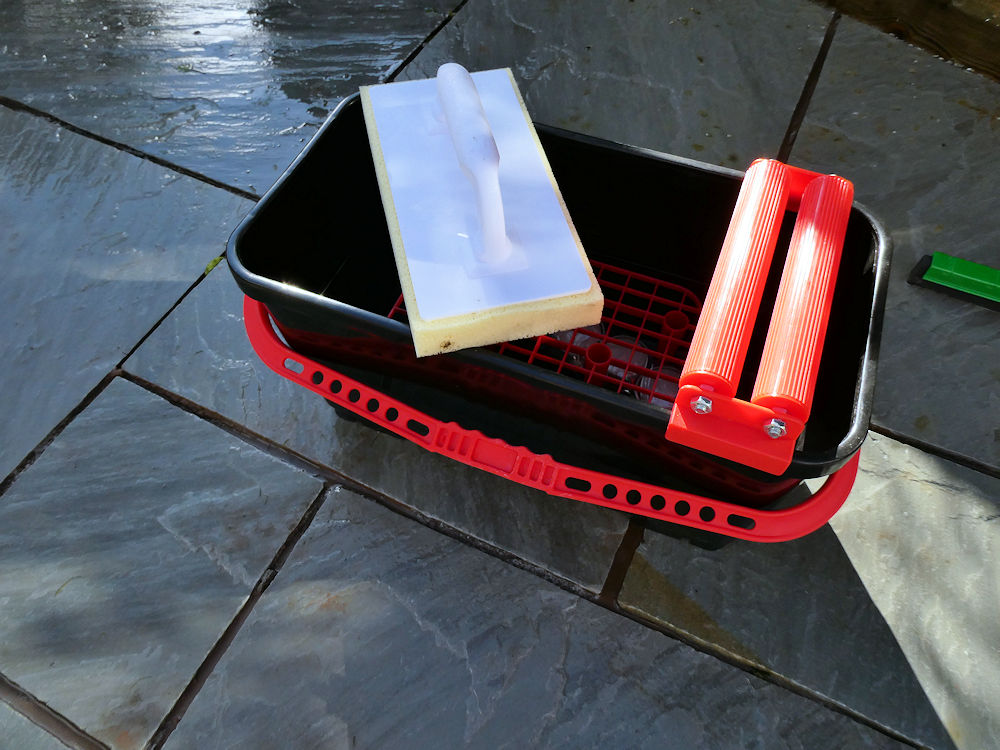
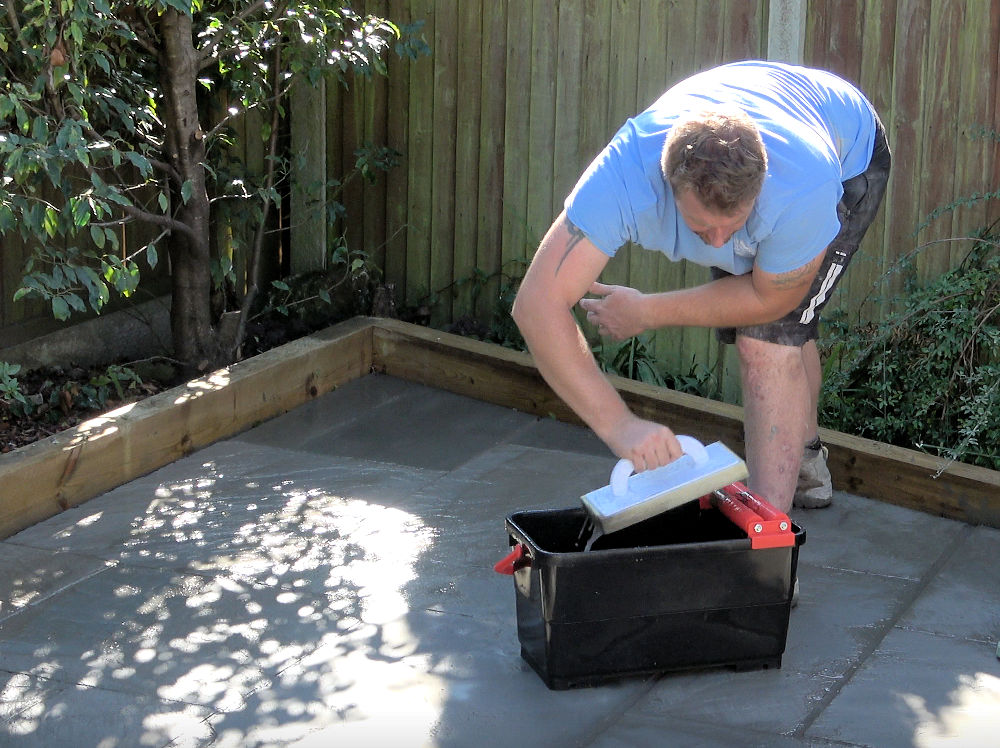
On the dedicated Tufftop page, much of the cleaning work was done using a motorised belt cleaner. Due to the scale and access limitations on this project, this patio will be completely cleaned using hand-held sponges and a Washboy, a specially-adapted bucket that helps keep sponges clean and moist.
The single most important fact to bear in mind throughout the manual cleaning process is “Single Swipe”. Rather than ‘scrubbing’ the surface by moving the sponge back-and-forth, side-to-side, the most effective cleaning motion is a single pass in one direction, and then clean the sponge. This method removes the excess mortar from the surface rather than smearing it around.
Fill the Washboy with clean water until it just covers the internal cleaning grating. Dip the sponge into the water, let it absorb what it wants, then run it across the dual rollers, applying pressure to squeeze out all the excess water. The aim is for the sponge to be damp, not wet.
Make a single pass with the sponge. One continuous movement, either a straight line or an arc, but just the one pass, applying pressure, to remove mortar from the surface but not from the joints, and then lift it clear of the surface.
Rinse the sponge by pressing and shaking it over the submerged grating inside the Washboy. This will disperse the collected mortar from the sponge and allow it to fall to the base of the bucket. Once the sponge is reasonably clean (it will never be completely clean), run it across the dual rollers again, pressing down and squeezing out any excess water. It’s now ready for the next single pass wipe.
Repeat this process. Single swipe across the paving, rinse, roll, repeat.

Provided that most of the mortar has been removed using the squeegee, as described above, use of the Sponge should be little more than a general tidying-up, cleaning those areas that were awkward for the squeegee or accidentally missed.
It will probably be necessary to change the water in the Washboy after a few square metres. Even after as littlke as 5-6 square metres, it will have become excessively dirty with wiped-off mortar. Do NOT pour this water into any drainage openings: it is cementitious and will harden within the pipes underground, possibly causing blockages. Tip it onto an area of open ground, sub-base, or sand, where the cementitious content can be filtered off and shovelled up later.
Keep the paving surface moist and repeatedly wipe until you feel it is sufficiently clean. It can be a little awkward to determine “just how clean is clean” when the surface is damp, but with experience, it becomes easier to identify when the paving is about as clean as it is going to be and it’s safe to allow it to dry.
Although there is no necessity whatsoever to tool (“strike” or “iron”) the joints, this can be done on completion of the cleaning works, if desired.
Video II:
Tufftop
This is the second part of a video showing the use of Tufftop to joint the patio. The first part, showing paving installation using Tuffbed and Tuffbond is located earlier on this page. As mentioned for the first video, remember that this was filmed under actual site conditions, and is not a staged and scripted perfomance piece. The operatives don't always follow strict Health and Safety procedure to the letter, and there may be some "earthy" comments overheard. The video is intended to show Tufftop being used in real life in a real situation, employing practices which are not always quite as the manufacturers' would like them to be.....but they still provide excellent results.
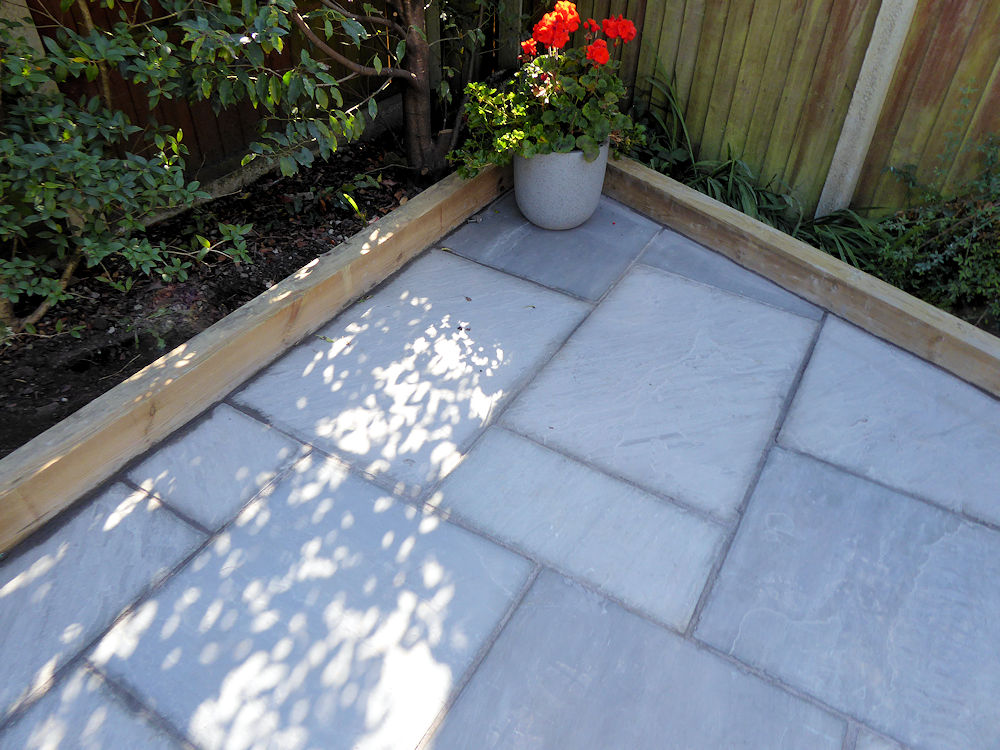
Finishing Off:
There may be a very slight haze of residual mortar but, in almost all cases, this will weather away in a few days under the action of wind and rain.
Tufftop jointing mortar will start to cure relatively quickly and should be touch-hard within about 24 hours. For that initial period, it’s a good idea to cordon off the area to protect it from curious by-passers. After around three days, it will be adequately hard to withstand careful foot traffic. When used on vehicular pavements, it’s best to allow it at least a full week to develop adequate strength and resilience.
Summary:
Traditionally, proprietary pavement mortars have been reserved for public realm works, deemed to be “over engineering” or even too costly for the everyday paving used for patios and driveways, but that’s always been flawed thinking. There has never been any valid justification for NOT using proprietary mortars for all types and classes of paving.
Nowadays, we are increasingly using relatively expensive pavings – the days of simple two-by-two concrete flags are long gone – and so it makes even less sense to rely on sub-standard, inferior, low-grade mortars to support that gorgeous-but-pricey stone/porcelain/whatever. If you’re driving an Aston Martin or a Porsche, would you really be fuelling it with unbranded petrol from a back-street garage?
To get the best from our amazing selection of pavings, they need consistent, reliable, and proven bedding and jointing materials. Steintec have built their brand around precisely that premise, and that’s why they are the specification choice of more large projects than any other brand.
Further Information:

Steintec Tuffbau
1 Northwick Road,
Canvey Island,
Essex,
SS8 0PU

Tel: +44 (0) 203 598 9800

