Introduction:
Although this case study follows a clay paver edge course being constructed, the principles illustrated are the same for whatever edging unit is used, whether it is a pre-cast edging kerb, a course of granite setts, a natural stone kerb or plain and simple concrete block pavers. It's the technique which matters, not the form of paving.
Similarly, the nature of the concrete used for bedding and haunching is less important than the technique. This is a light-use patio project, and so the contractor chose to use a site-mixed fine concrete (6:1) rather than a ready-mix coarse aggregate concrete.
For bedding, a semi-dry mix is used, which is then wetted-up to a moist mix for the haunching. A semi-dry mix provides good support and compactability without being too springy or overly plastic. With a wetter mix (higher slump ), the highly plastic concrete can wobble like a blancmange, and this will often allow already-laid units to be moved, either out of line or out of level, as it responds to the consolidation of adjacent, newly-placed units.
However, when it comes to haunching, the concrete needs to be capable of being smoothed or polished to a finish. Further, a wetter mix has a higher degree of self-compaction and holds itself together better, which makes it easier to place and gives a harder, tighter, more firmly bound finish than would be the case with a semi-dry concrete.
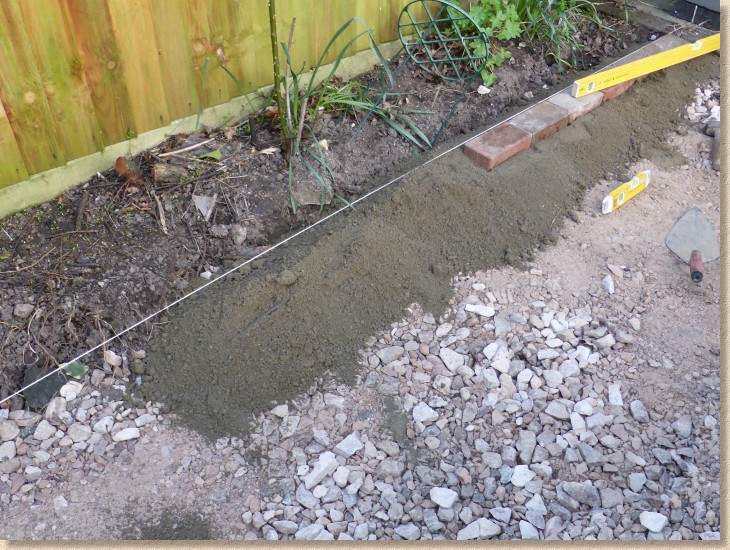
Place bedding
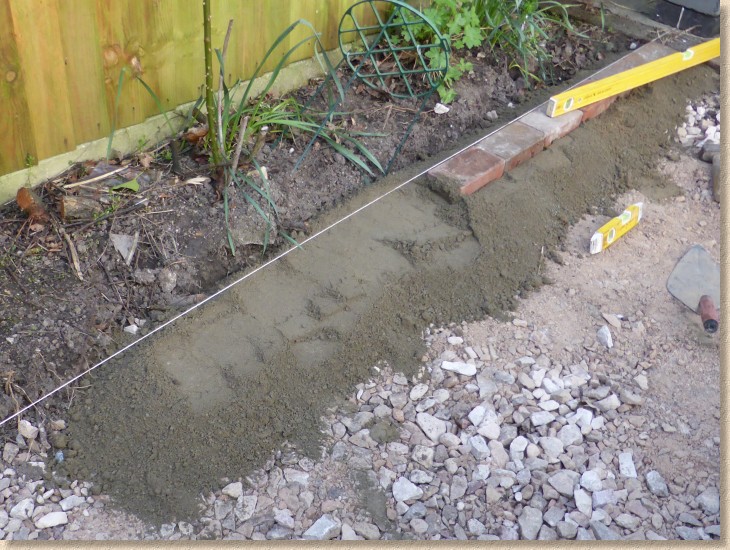
So, once a taut string line is set up to guide alignment and level, the actual laying can begin, and the first stage is to place bedding in a line known as a 'windrow' onto which the edge units will eventually be laid. The first batch of bedding is laid out roughly to the height of the string line.
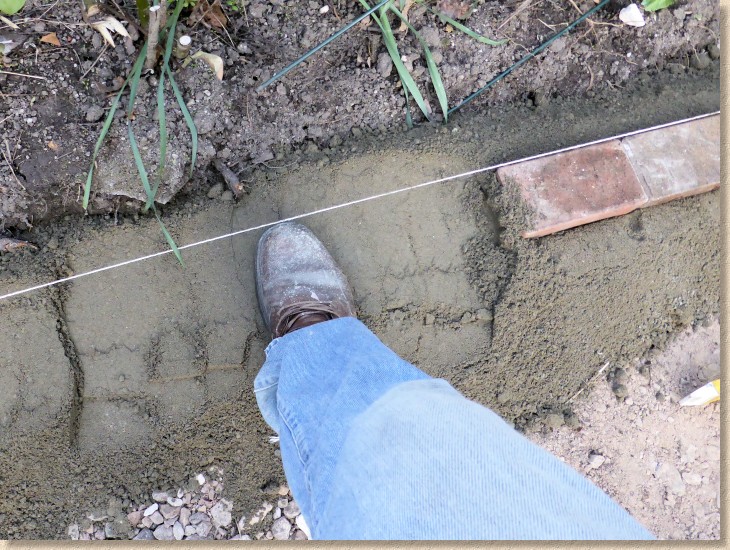
Compacting the bed
Semi-dry bedding is not as dense as a moist or wet mix, so when placed in this manner, it will contain a high percentage of air voids, and if the pavers were to be laid on it immediately, they would require a high degree of consolidation to ensure the concrete is sufficiently dense and compact to provide a form, reliable and competent bed. So, this first placement of bedding mix is trampled into position which helps consolidate the bedding, but not overly so, to the point where there would be no 'give' remaining.
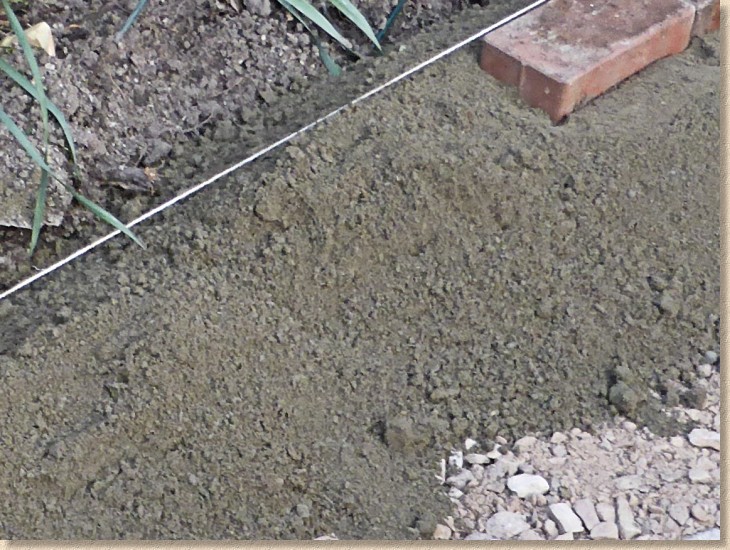
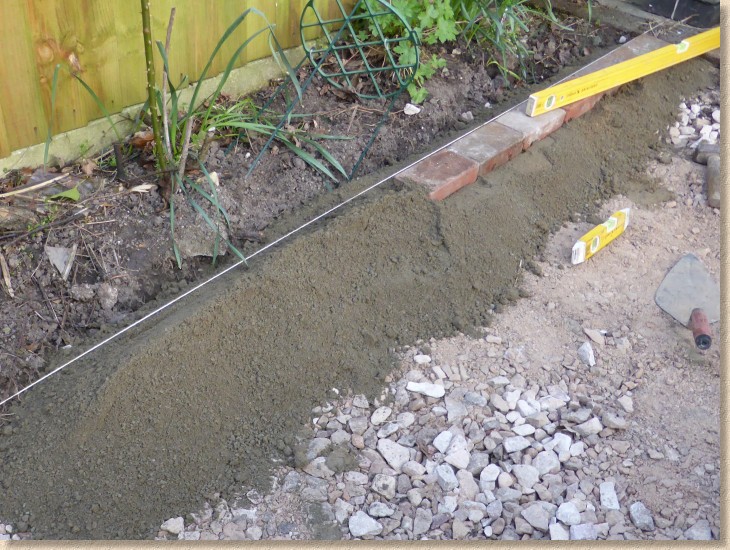
Topping-Up
This partly-consolidated bed is next topped-up with more of the same mix, once again placing sufficient additional concrete to bring the level up to the string line, or thereabouts, and then levelled down using a trowel to form a flat bed which will accept the edging unit.
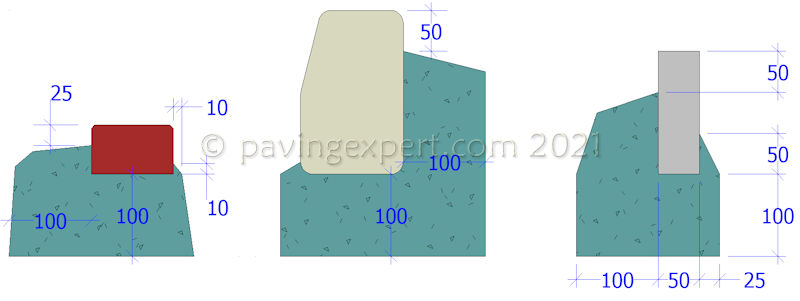
The bed should be at a level that will result in the edging unit sitting proud of the string line level guide. For a smaller unit such as a block or sett edging, the unit should sit 10-25mm proud, but larger units, such as edging kerbs or road kerbs will tolerate much more compaction so can be 20-30mm proud.
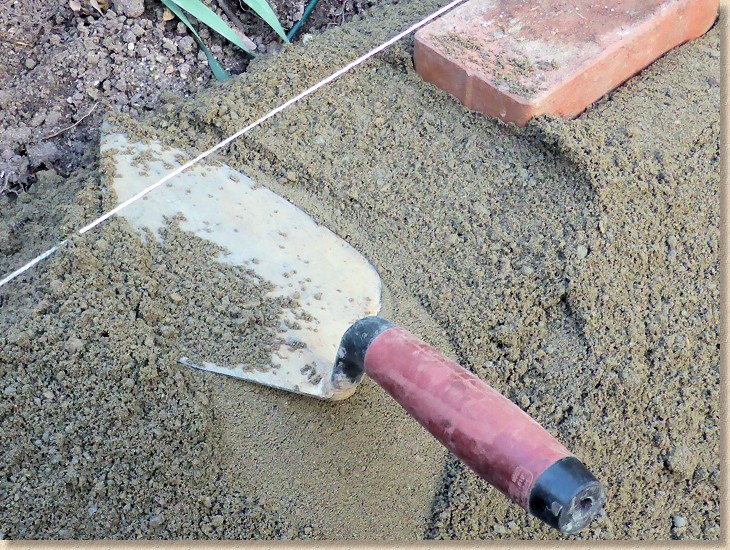
Prepare bed
As with all bedding jobs, only trial and error will reveal just how much compaction a particular unit will take on a particular depth bed of a particular concrete or mortar, which in turn determines the most suitable level for the prepared bed.
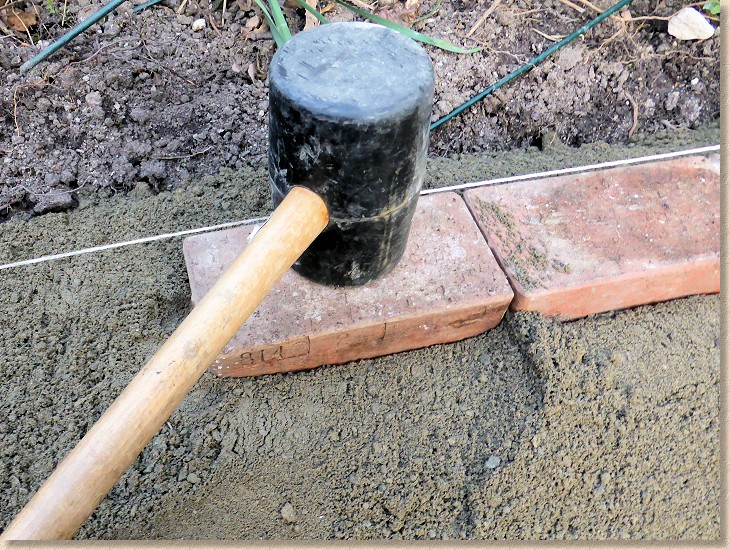
Place block
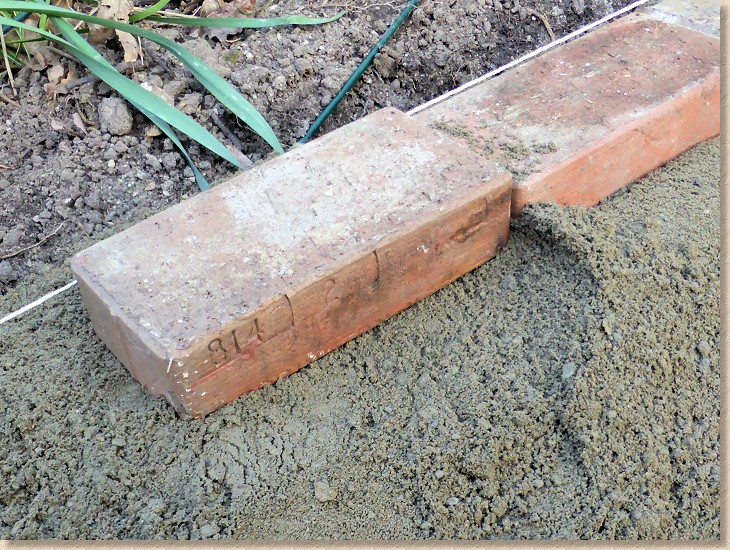
A rubber mallet is used to tap down the unit to the required level. Use firm but measured blows to take the unit down to level a little at a time. Aim for points halfway between the centre of the unit and the outside edges, and drive it down evenly, not one end first - blows to alternating ends of the unit will 'persuade' it to settle down more evenly.
Where a placed unit lies too proud of the string line level guide, it is often better to lift the unit off its bed, which can then be scraped down using a trowel to a more suitable level. Battering down a unit on a proud bed will often result in adjacent units being dislodged, and could even result in the affected unit becoming damaged or even broken. Besides, it's a lot of needless effort hammering away at a kerb or edging, generating little more than arm ache and frustration when a quick adjustment of the bed is a much easier task.
Similarly, if a unit is too easily settled to level, it's likely that the bed beneath has not been adequately compacted and will remain open and friable, which makes it more prone to failure in the medium-long term. When a bed is low, better to add a sprinkling of extra material to ensure that, when compacted, it is firm and solid.
Check levels
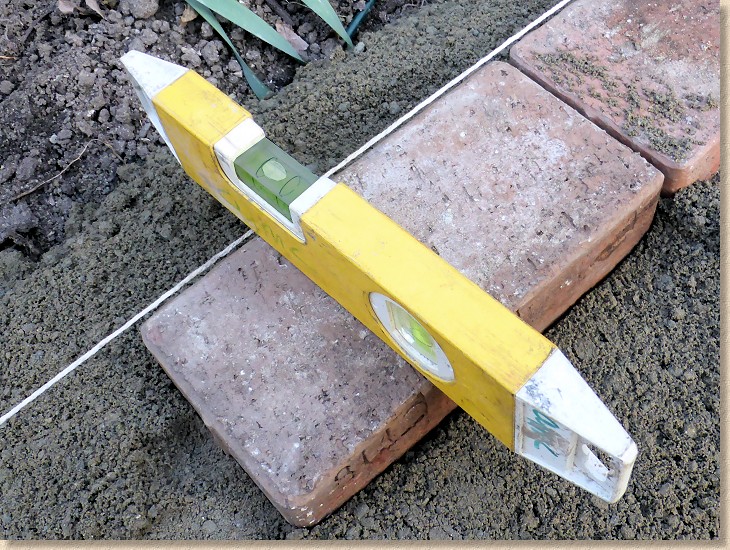
While the taut string line acts as a good guide for longitudinal level ( endfall ) and alignment, the transverse attitude ( crossfall ) of an edging unit should be checked regularly, at least every other unit. A small boat level is ideal for this. Narrower units, such as edging kerbs or tiles can be laid flat, with no crossfall in either direction, but wider units, such as blocks, setts or road kerbs, are better laid with just a touch of fall to one edge, so that water is less likely to sit on the surface. As a rough guide, if the bubble just reaches one of the marker lines on the vial of a spirit level, this is usually considered sufficient crossfall for an edging unit.
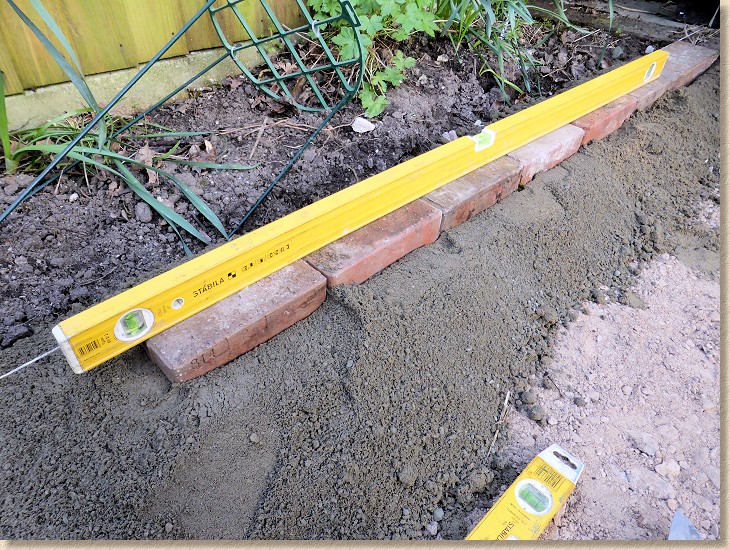
And even though the string line guides alignment and level, once a number of units have been laid, it's good practice to use a longer spirit level or a straightedge to check the surface profile over the top to ensure there are no high spots or hollows that may have escaped attention. This is especially true when laying units that have an uneven or variable surface, such as setts, riven stone or, as in this example, clay pavers.
If necessary, use the rubber mallet to tap down a timber straightedge as it spans several units at a time to ensure profile uniformity.
Align and haunch
Obviously, this procedure is repeated until all the edge units are laid, at which point the alignment of the units, whether it is a straight line or a sweeping arc, should be checked and adjustments made as necessary, nudging individual units backwards or forwards to create an alignment that pleases the eye. Straight lines should look straight, and arcs should look sweet and regular, not staggered or jerky. With natural materials in particular, strict adherence to a string line can sometimes produce uneven looking alignments as there will be some variation in the width, and even the straightness, of individual units.
Generally speaking, if the alignment looks right to the eye, that is often a better guide than a string line. Art triumphs over science in this case.
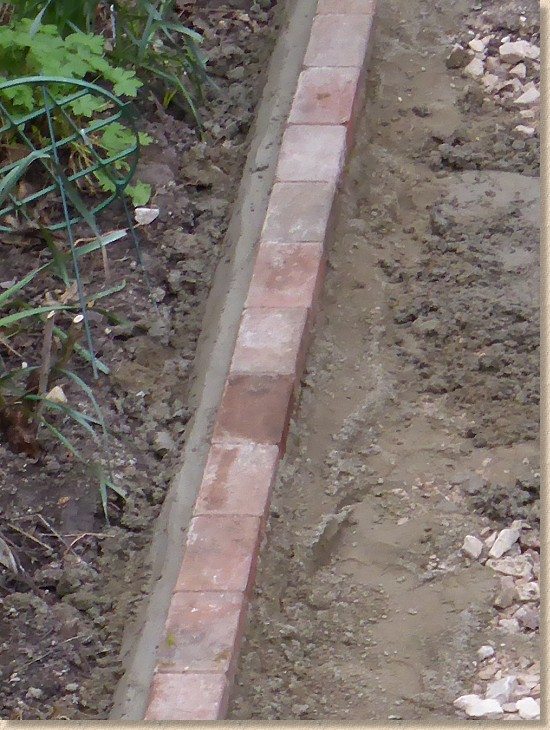
The final task, once a satisfactory alignment is achieved, is to haunch the edgings. Depending on how the edge course is to be used, it may be haunched on just one edge or on both. Where the edge course is being used a simple demarcation strip, having haunching on both sides will ensure it stays in its intended position, but when an edge course is being used as a restraint for other paving, haunching to the outside edge alone is the norm, with the so-called front edge left unhaunched so that it can accommodate the eventual paving or surfacing to full depth.
A wetter concrete is used for haunching as it needs to be compacted and then smoothed to a tight finish using a shovel or a trowel. The haunching concrete should never be less than 75mm width – anything less will probably not have sufficient mass to hold the edging units securely. When an edge course is being used to restrain paving used for vehicles, or as a check to vehicles, the haunching should never be less than 100mm in width, preferably 150mm or even more when haunching road kerbs.
The haunching should not be brought right up to the top surface of the edge unit, but should be levelled off and smoothed out at least 25mm below the top. With deeper units such as concrete edging kerbs, the haunching should always reach at least half the depth of the kerb, which means it could be smoothed off, say, 50-60mm below the top of the kerb.
Bear in mind that, where paving or turf is to be laid against an edge course, there needs to be sufficient depth over the haunching to accommodate the paviors, surfacing or soil.
Remember: the bedding and the haunching need time to harden, so no load should be placed on or against them for at least the first 24 hours, and 72 hours if possible. If necessary, cordon off the area to keep out pets, the curious, and the plain stupid. Never underestimate the idiocy of some who want to see how things turned out by poking, prodding and nudging your carefully laid work.
Video: