Introduction:
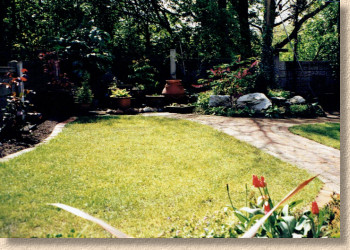
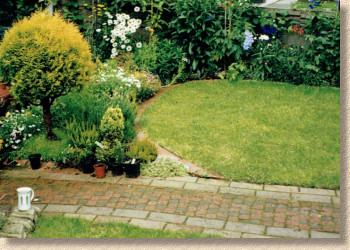
Once upon a time, there was a rather nice patch of grass in the rear garden at Borlochs Hall. In fact, it might be worthy of being described as a lawn! It was lush and green and neat and weed-free and provided a comfortable space for children to loll about in the summer. The only drawbacks were that it was relatively small, under 10m², and it needed mowing every week or so during the growing season.
The need to extract the mower from the other junk irreverently dumped in the shed just to crop a few square metres of grass became more and more tiresome, and as the big tree at the bottom of the garden grew bigger and bigger, casting more and more shade, it became harder and harder to keep the grass healthy and moss-free.
So, once the kids were that bit older and beyond the need for a safe and secure play area within the grounds of the house, the small lawn was replaced with an area of paving. No more mowing, no more coaxing with weed'n'feed, no more tedious strimming of edges.
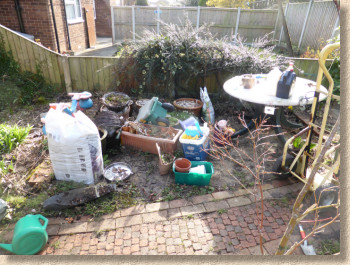
I was never really taken with the paving, though (bet you never thought you'd hear me say that!) It wasn't particularly attractive, and it didn't really suit the rest of the garden, with its cottagey styling and effusive planting. There is ample paving as paths and patios, so this extra patch of hard-standing looked incongruous. It looked like what it was: a lawn that had been replaced.
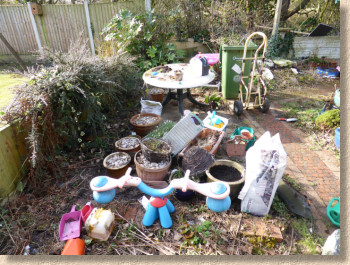
And before long, the unwritten rule that any area of paving or hardstanding that isn't actively used must be re-tasked as a general dumping area came into force. Surplus plant pots, a wheelbarrow, an old table that was destined for the tip (at some point), a space hopper(!), bags of compost and all sorts of other junk was piled onto the patch of paving and the whole feel and tone of the garden effectively ruined.
Something had to be done. The grass needed to return. But, with the shade-casting tree bigger than ever, and the willingness to mow diminished even further, the thought of re-turfing was not exactly appealing.
In a conversation with one of the Brew Cabin Irregulars , the subject of artificial grass arose, and he convinced me to look anew at the latest generation of lawns-on-a-roll, as they had moved on significantly from the days of looking like a badly dyed merkin. So I did, and I was impressed, and so I decided to bite the bullet and re-create the small lawn with a modern plastic alternative.
But which product to use? There is so much on offer, and, to the untrained eye, they can all seem much-of-a-muchness. But there must be some way of differentiating the magnificent from the meadow, surely? It can't all be down to price and taking pot luck.
I turned to the hundreds of contractors who use this website regularly and asked them for guidance. I had not expected the emphatic response which came. Over 80% of those who could be arsed replying suggested the same brand. Over and over and over again, emails, tweets and calls came in recommending Namgrass .
Preparation:
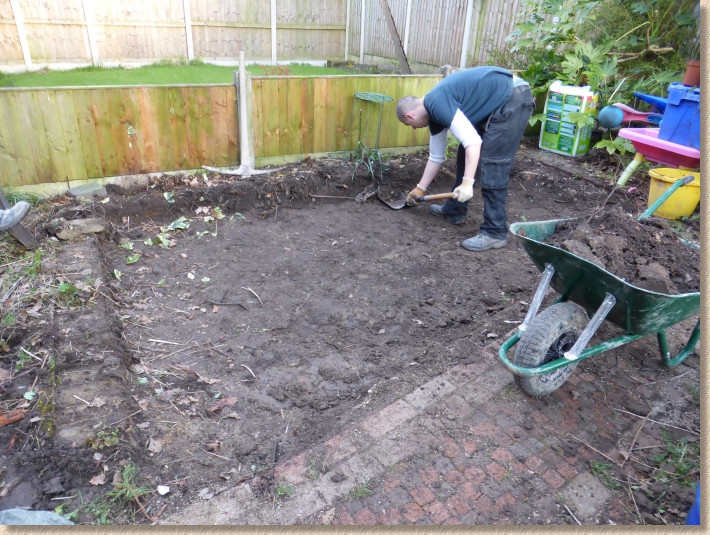
The first step in creating the new artificial lawn is to clear the area and then excavate the existing ground to a depth of approximately 125mm below the intended level of the new lawn. This is to allow for a 100mm sub-base plus 25mm of bedding aggregate.
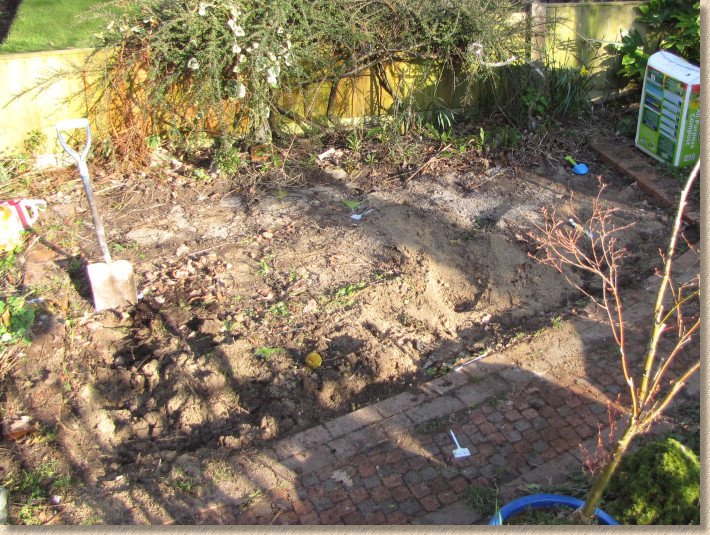
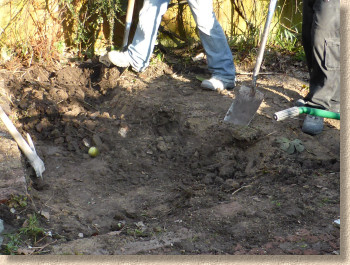
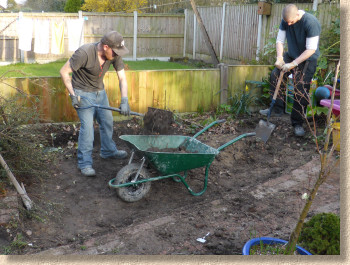
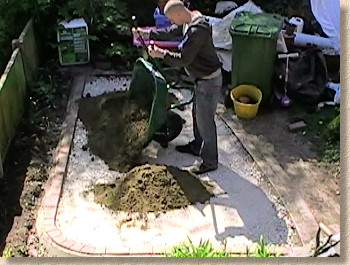
Once we can see the working area, time to bring in the son & heir, along with his workmate, and get them to do all the digging and barrowing.
On larger areas, it would make sense to use a mini-excavator, but as the area of the proposed lawn is barely 8m², generating only around a cubic metre (1m³) of spoil - around a quarter of a builder's skip, it hardly seemed worth effort of bringing the digger to site, negotiating it through a narrow garden gate, and tracking it to where it's required without trashing the rest of the garden. By the time we'd done all that, these two boyoes would have it all hand-dug and dumped into the skip.
The sub-base will need to be of a reasonably uniform depth so the excavation is bottomed out, removing any last humps or high spots to create a fairly flat and even base onto which the subsequent layers can be built up.
Sub-base:
One of the questions that keeps coming up with regard to the installation of artificial grass is just why a sub-base is needed when there is little, if any, chance of the lawn being subjected to vehicular traffic.
Unlike load-bearing pavements, the purpose of a sub-base for this project is to create a sub-layer that we know is even and level and, most importantly, stable. Top-soil and sub-soil have a habit of shrinking and swelling as moisture content changes, with frost heave, and they are susceptible to being mined or tunnelled by everything from worms to moles, rabbits and rats. All this can cause the surface level of a soil base to move, which could result in an uneven lawn surface.
By installing a sub-base, we can be sure we have a substrate that is not subject to level change with moisture, that is immune to all but the harshest of deep frosts in Britain and Ireland, and is of zero interest to any tunnelling fauna. Think of the sub-base as a carpet underlay: it removes the uncertainties and helps ensure a smooth and even upper surface.
A 'standard' sub-base material, DTp 1, is used on this project because it's easiest to obtain in smaller quantities. The 8m² lawn will only need around a tonne and a half at 100-125mm compacted depth so it's easiest to buy this in bulk bags delivered direct to site.
On larger jobs, where full loads of sub-base material might be required (so: greater than around 100m²), it may be possible to obtain the slightly cheaper DTp 2 material, or even a 50mm crusher run aggregate.
No separation membrane is required between sub-grade and sub-base. The underlying ground is hard and stable, and with no traffic loading, there is little pressure on the sub-base material which could cause it to mix with the sub-grade, which could be a problem on trafficked pavements.
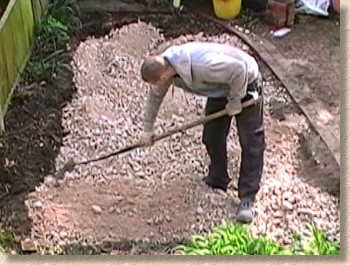
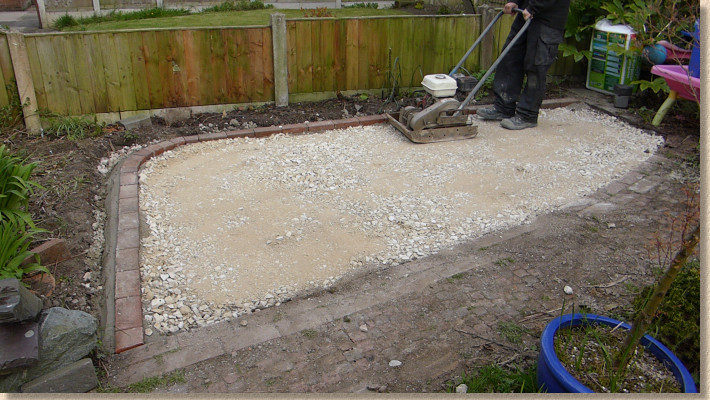
The Type 1 material is barrowed in and dumped directly onto the sub-grade, before being levelled out with spades and rakes. The aim is to create a sub-base that, when compacted, is flat and even and around 25-30mm below the planned lawn level.
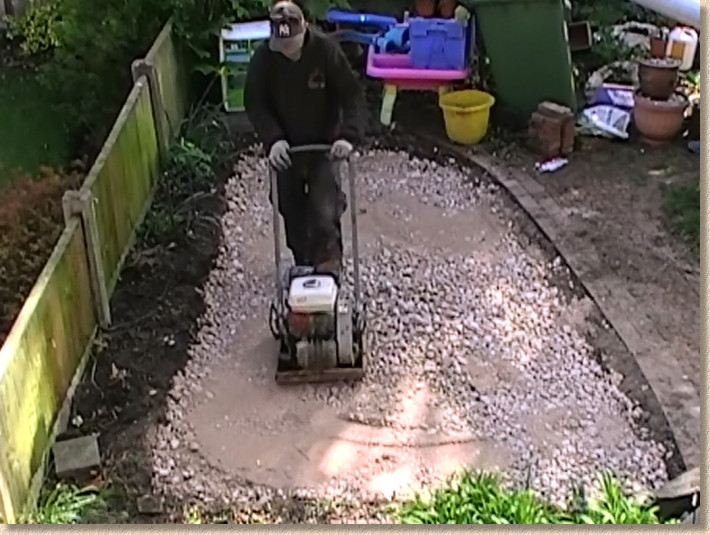
Once the sub-base is levelled out, it needs to be compacted. This is done using a vibrating plate compactor, passing up-and-down, and then side-to-side, to ensure the sub-base is firm and no further compaction is possible. This takes around 8 passes with a 75kg plate such as this one.
Edge course restraint:
Unlike conventional lawns which can have free edges (often chopped vertically to expose a cliff face of soil for God-knows what reason!), artificial lawns require an edging or restraint of some form to keep everything neat, tidy and in place. On some installations, this might be a wall or fence, or, as we have here, an existing pathway or patio.
However, in many installations there will be an edge or part of an edge which abuts a flower bed, or an area of loose mulch (such as gravel , slate or bark ) or possibly an actual grass lawn! In these cases, some form of restraint is required.
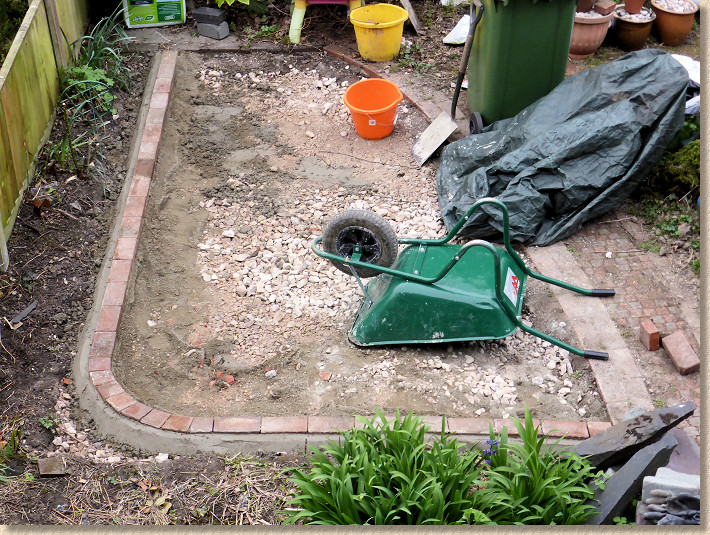
On this project, there is a path to one side, and a hard paved water feature to another, but two sides will need an edge restraint of some description.
All sorts of items can be used to form a restraining edge and many of the more popular options are considered elsewhere on this site . A narrow steel edging is very discreet, while a flat mowing strip formed using a 275-300mm wide flagstone can look very distinctive.
As the garden paths are formed from clay pavers, it was decided to use the same to form an edge to the two open sides. After all, that's what was used for the original lawn.
The construction of the brick edging is detailed on a separate page , complete with video
Bedding Layer:
With the restraining edge course now in place and the haunching hardened sufficiently, the sub-base level can be topped-up, if necessary, regulated as required by adding further sub-base aggregate, and compacted thoroughly prior to placing the fine aggregate (ie: sand) bed layer.
The fine aggregate (which is how we have to refer to 'sand' nowadays!) has to be the right type. Anyone familiar with flexible pavement construction will know that we only ever use a coarse, gritty, free-draining sand for this type of work. In theory, a grit (4mm down) could be used, but as that tends to be a bit pricier in our part of the world, we would typically use a grit sand.
Building sand, plastering sand, all-in ballast, play pit sand, silver sand, kiln-dried sand, whin dust - none of these are suitable. None of them. Ever. They are too fine-grained, some of them have too high a clay content, and they will simply waterlog, allowing the eventual lawn to sink and pit.
So: grit/coarse/sharp/concreting sand or clean grit, and nowt else!

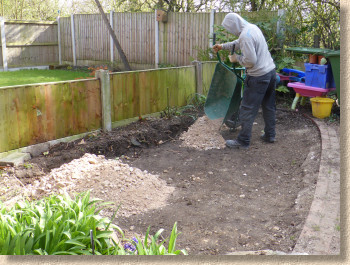
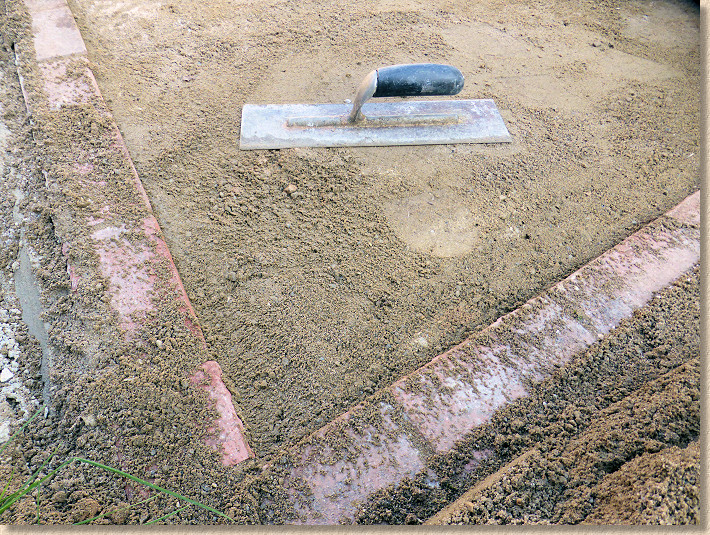
The sand is placed onto the prepared sub-base, roughly levelled out using a rake or a lute, and then very lightly compacted - just one or, at most, two passes with the vibrating plate compactor - to firm it up without making it hard and unyielding. We need the underside of the artificial grass to key into the sand, so some 'give' is necessary.
Once compacted, the bed can be screeded to level and then finished with a float trowel to give a smooth, even and perfect bed.
The bed needs to be approximately 3-5mm below the top of the surrounding edge restraints. This is to ensure the turf, once in position, can't slip out of place.
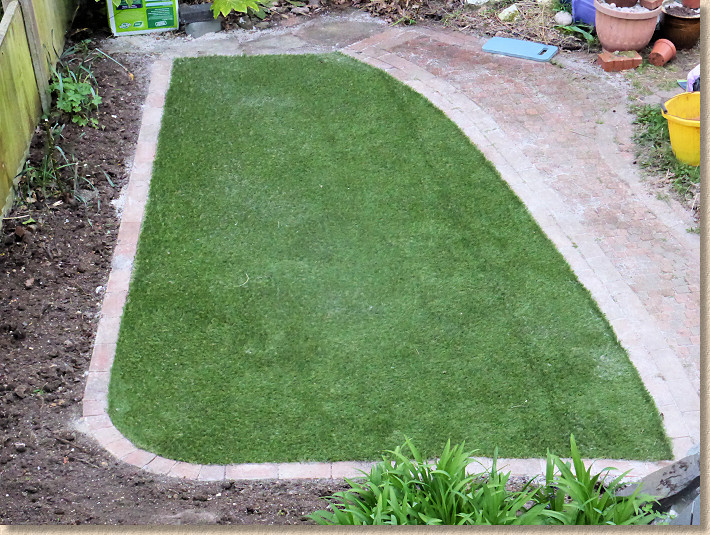
We're now ready for the exciting bit - putting the lawn in place!
Laying the lawn:
The artificial grass comes supplied as a roll (or rolls, for bigger areas)
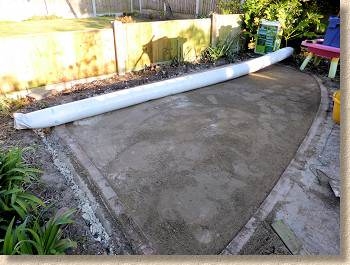
The roll is placed square to the longer straight edge on the left-hand side of the lawn and then simply unrolled, ensuring it remains flat with no wrinkles or humps in it.
To be fair, the grass roll *wants* to stay flat and wrinkle-free, so, as long as the unrolling is even, not allowing one end to get ahead of the other, it tends to sort itself out and present you with a lovel, even and flat lawn in next to no time.
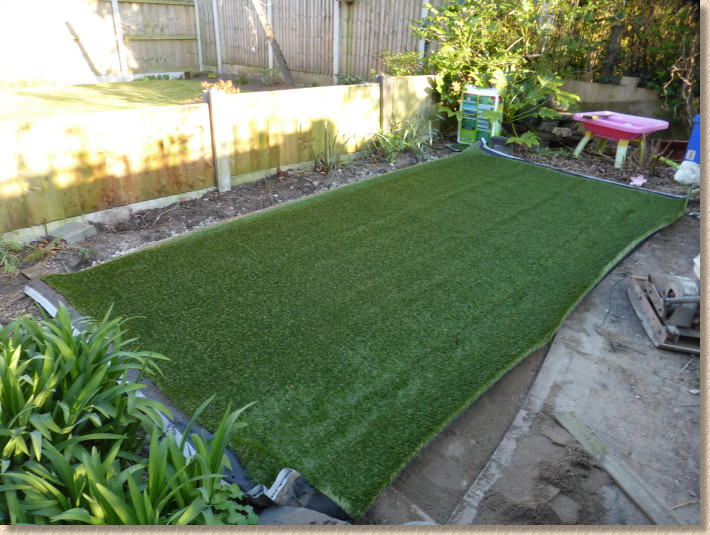
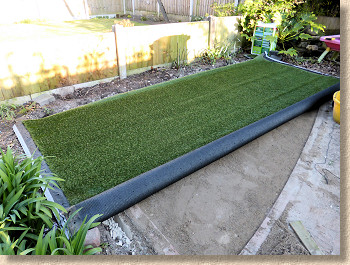
It's then simply a matter of ensuring the mat of artificial grass is in the best position, covering all the edges. It may be necessary to jiggle it slightly one way or the other to get the best alignment.
On larger projects, mats may have to meet up with other pieces laid earlier, and so it's vital to ensure a tight fit which will help hide the joint between adjacent rolls.
Where more than one mat is used, adjacent pieces need to be glued together using a jointing strip which is affixed to the underside of each piece with high-strength outdoor grade glue which will ensure the individual mats can't drift apart or allow the joint to open.
On this small project, the entire area was able to be covered with a single mat, so no jointing or gluing to worry about.
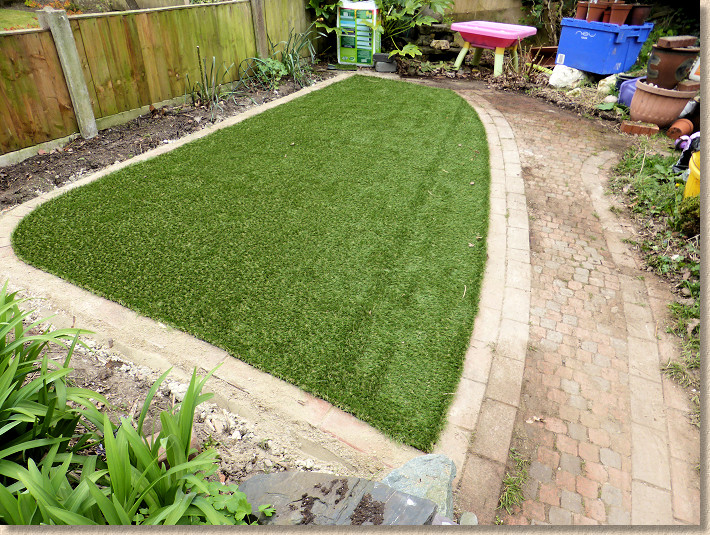
Obviously, the edges need to be trimmed to fit neatly against the fixed edges.
Originally, I tried cutting from the top using a very sharp craft knife, but found that the tufts of grass were constantly impeding the cut, making it awkward and very hard work. So, I then switched to cutting from the underside, cutting directly into the mat backing and so avoiding the tufting. This required very careful folding of the mat along the line of the desired cut, and then cutting just a few centimetres at a time, particularly on the curved sections. On the tight curves in the corners, it became a process of cutting-off a little bit at a time, then folding back the mat to see how good a fit had been achieved, and lifting to trim a little bit more as necessary until a perfect fit was made.
On longer straight sections, it was possible to cut longer runs against a straight edge.
Sanding:
The final task is to apply a sand covering to the laid mat to help weight it down and bring up the pile of the grass.
This simply involves scattering a dried sand (kiln dried sand was used here) over the surface of the lawn and then scrubbing it in using a stiff brush, driving the sand down into the mat and simultaneously bring up the pile of the artificial grass making it look even more realistic.
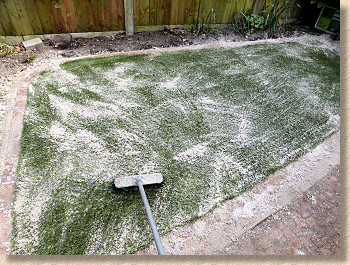
It can take a fair bit of brushing to get all the sand to seemingly disappear, but the result is well worth the effort as the finished look is very convincing and feels wonderful underfoot.
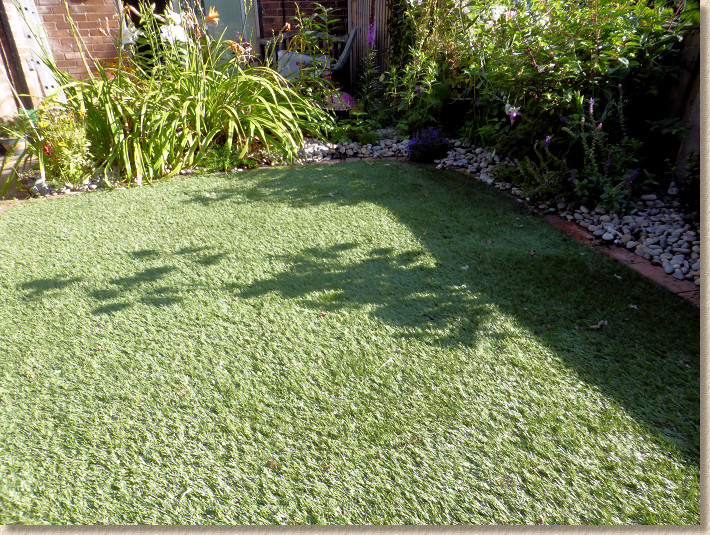
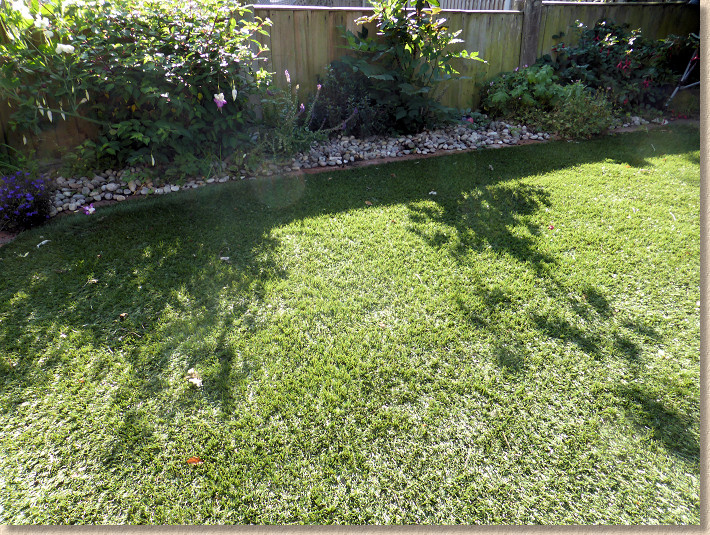
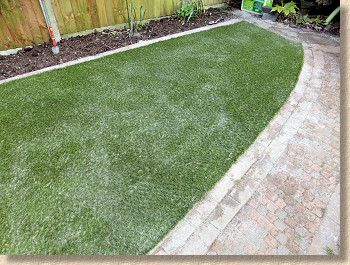
Finished:
All it needs now is a few weeks for the planting to establish itself, and a bit of sunshine, and we have the perfect small lawn, the ideal replacement for what was there previously!