Introduction:
All modern buildings have what is known as a Damp Proof Course. It is usually abbreviated to 'DPC', and in most buildings less than 30 years old, it consists of a DPM, which is a Damp Proof Membrane, an impermeable layer of material, most often a polyethylene or bitumen-polymer, that is laid in the bedding joint between two courses of bricks. Its purpose is to prevent moisture from the outdoor environment and the ground rising up through the brickwork via capillary action, which can render the walls damp and the building unusable. Ground-level damp proof courses have been mandatory in all British buildings since the Public Health Act of 1875.
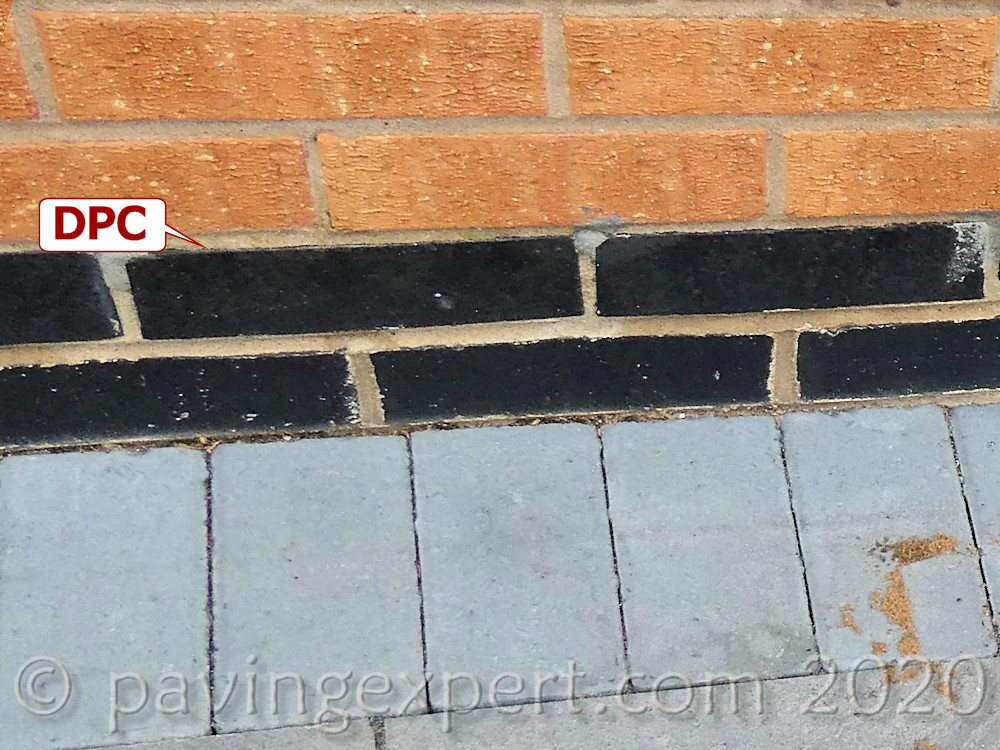
There are a number of alternatives to the modern dpc-on-a-roll, and these are sometimes found on older properties, particularly those built prior to the Second World War. The most commonly encountered alternatives are the brick damp course and the slate dpc. The brick dpc uses a clay brick with a very low absorption rate as a barrier to rising damp. The slate versions also rely on the impermeability of the slate to stop the 'wicking' of water via capillary action.
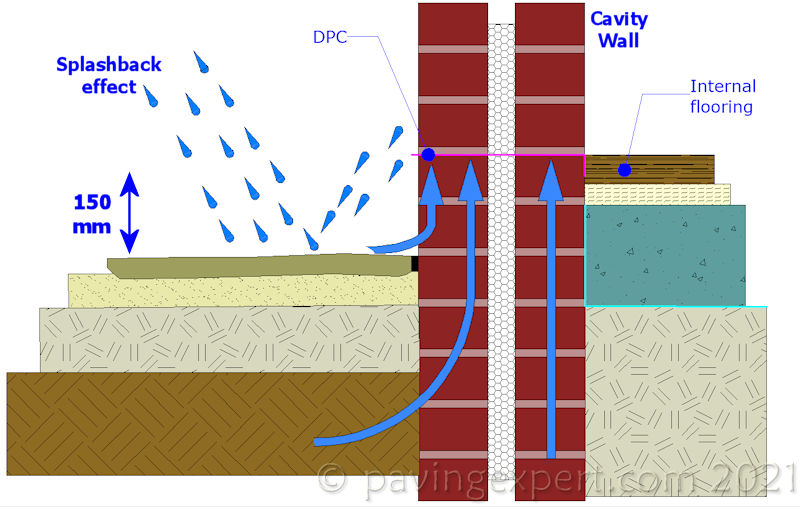
The "ground-level dpc" is actually required to be at least 150mm above the ground level (See Building Regulations for England & Wales - Part C, Section 5.5 ). This is to reduce the incidence of 'splashback' from rain, and to ensure a minimum amount of elevation above standing water that may come about in exceptionally heavy rain or other incidents, such as allowing the hosepipe to run unchecked.
Identifying the damp proof course
For many paving and drainage projects, it is essential that the level of the damp proof course is known, so that the paving or drainage can be established at the correct level.
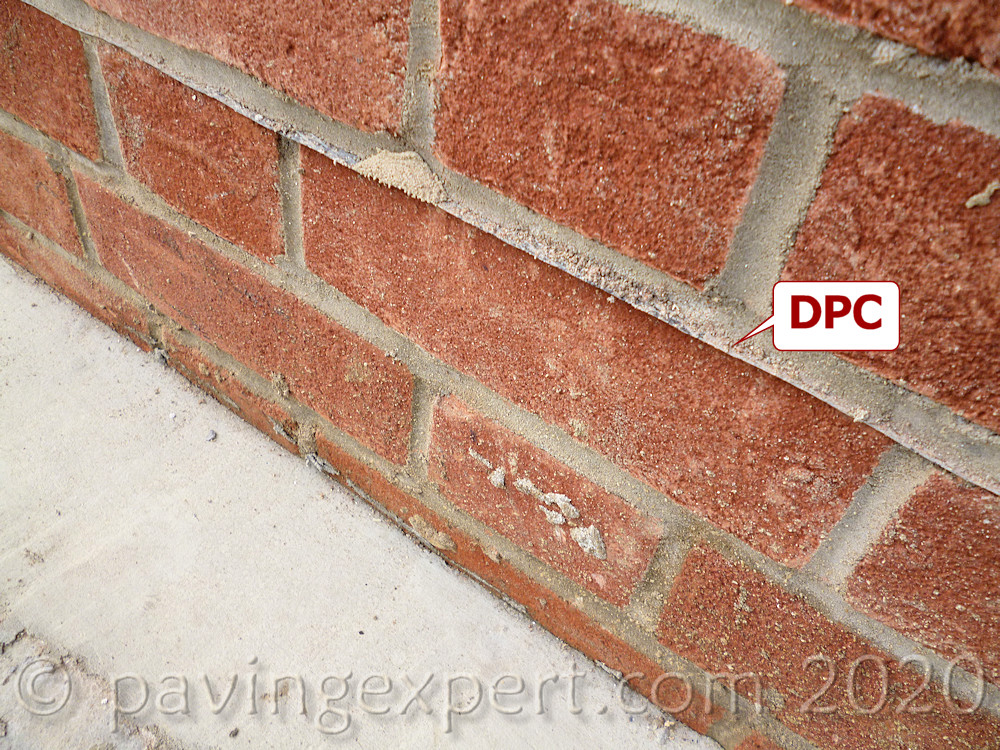
On some properties, identifying the dpc is quite straightforward: it protrudes slightly from the bed joint and could be spotted by the proverbial blind man on a galloping horse. However, on other properties it can be less obvious and may take some poking about and investigating to pinpoint its position.
Where the dpc doesn't jump out and announce its presence, there are a few key indicators that can help in identifying the position.
- - On many established properties, the dpc will usually be somewhere between 100mm and 450mm above the paving or ground level
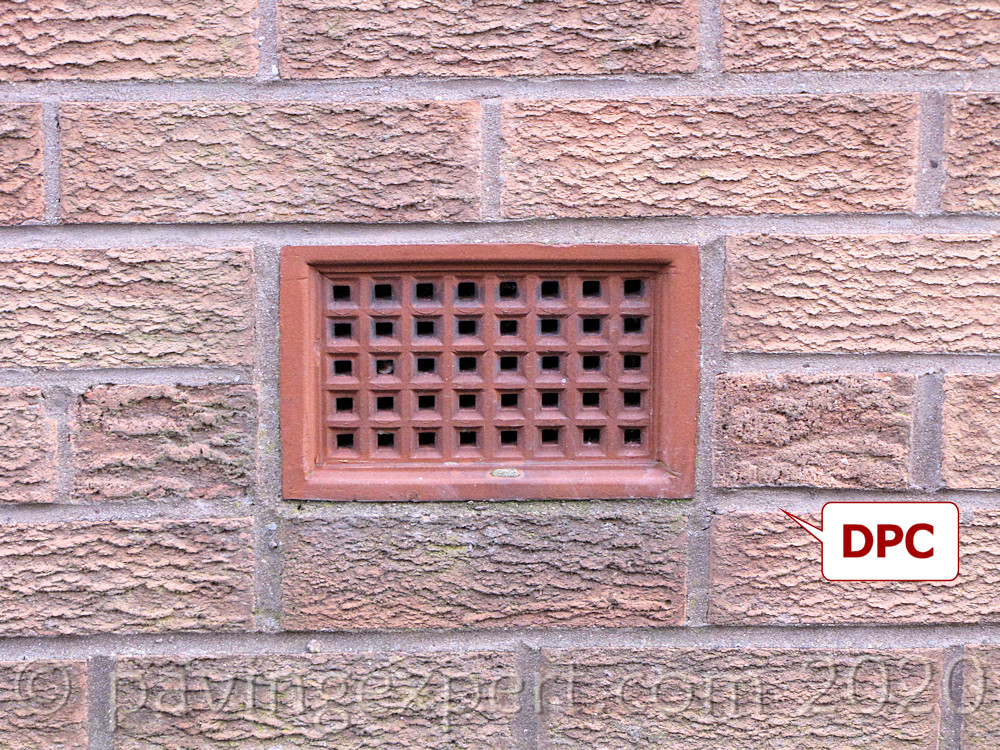
- - There is often a difference in brick type or brick appearance at the dpc
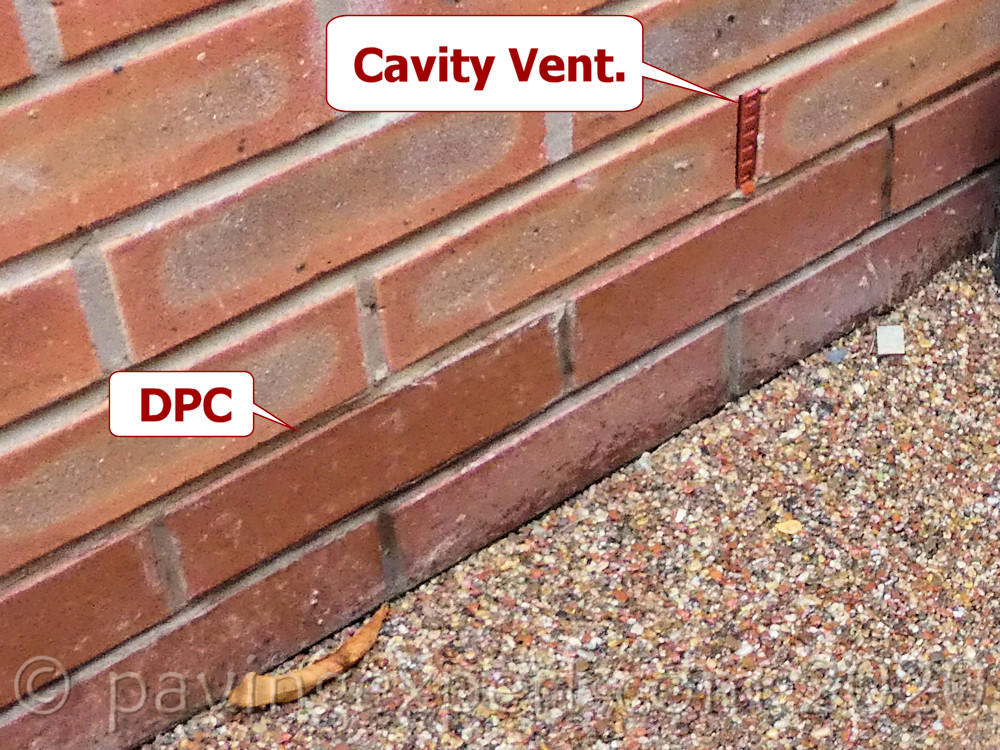
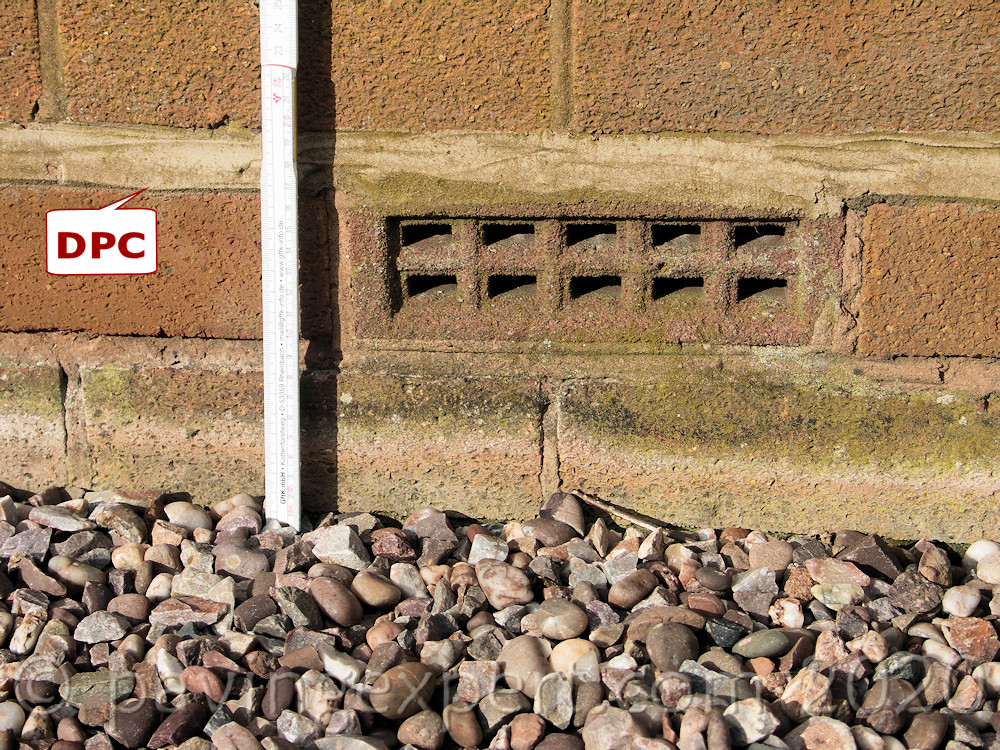
- - Air-bricks are usually (but not always!) directly above or directly below dpc*
* - one older properties with suspended timber floors, an airbrick may be below the DPC whereas modern properties with solid concrete floors usually have an airbrick (or cavity ventilators) above the DPC)

...and just to confuse matters, there are a couple of traits that can confound the hunt for the dpc....
- - The dpc can be considerably more than 150mm above ground or paving level
- - It can be stepped, changing level along the length of a building on sloping ground.
Bending The Rules
The Building Regulations require at least 150mm between the dpc and the ground or any paving. This is what is known as 'Best Practice'. However, there are situations where it is just not possible, or practical, to maintain this regulation. On professional work, and new build projects, every possible effort should be made to ensure the 150mm rule is not breached, but, for small, domestic projects, such as a driveway or patio, there are cases where keeping the paving to 150mm below dpc would involve a huge amount of work that cannot be justified. In such cases, the 150mm rule can be 'bent' a little, but with the following provisos...
- The rule should only ever be 'bent' on private property, never on public or commercial properties.
- The property owner must consent to the breach.
- The paving/ground level should always be at least 75mm below the DPC. Anything less than that is just asking for trouble.*
* The trend for 'level threshold' access at patio doors, where the internal floor and external paving are more-or-less at the same level, is the one exception and is considered in far nmore detail on a separate page
It should be noted that breaches of the 150mm rule are the sort of thing that is noticed by Surveyors when valuing a property and it can lead to a reduced valuation or a requirement for remedial work to be undertaken.
Steps and Ramps
One notable exception to this advice is the construction of steps and/or ramps to doorways, which may be constructed to be 'flush' with the internal floor in order to create a ' level threshold ' as described in Document M of the Building Regulations (Disabled Access). This is 'tolerated', as long as the dpc is not 'bridged', because the high paving level usually extends for only a short length of brickwork and a membrane can be used to create extra protection from the damp.
Workarounds
There are various methods of dealing with the problem of high paving levels, and the following diagrams illustrate some of the more usual solutions....
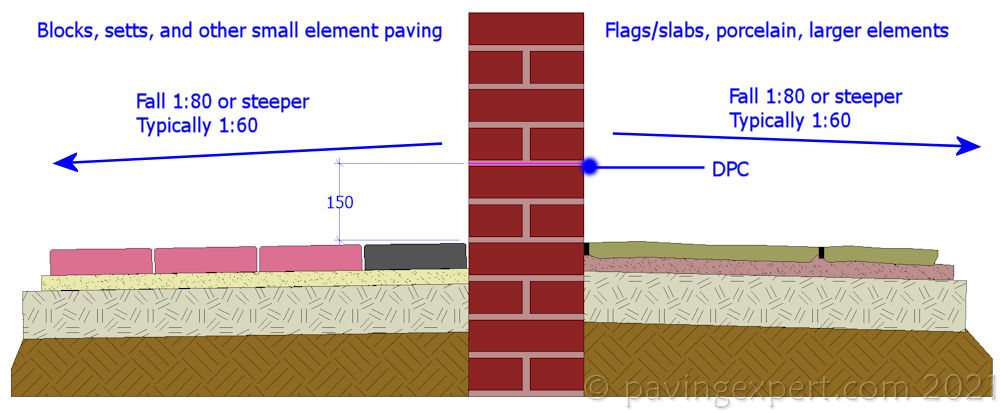
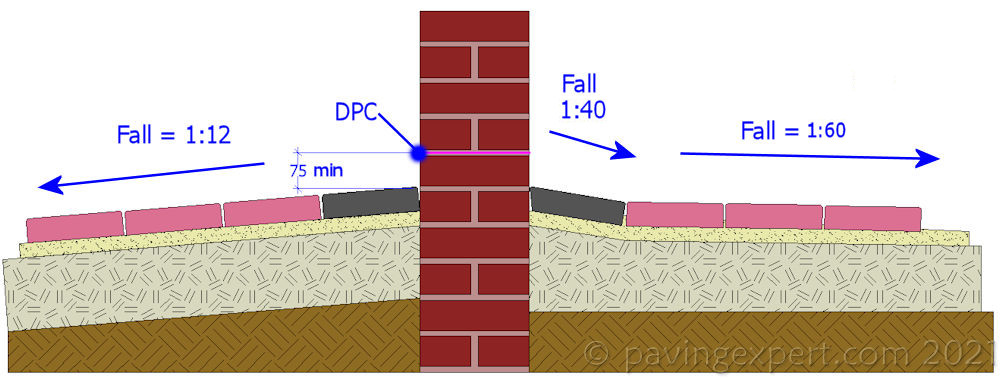
The standard arrangement
Paving is kept at least 150mm below the dpc and slopes away from the wall at around 1:60. This may need to be increased to 1:40 for some 'difficult to drain' pavings, such as riven flags, or may be decreased for well-draining pavings, such as blocks or plain concrete.
The Dry Area arrangement
This is the preferred method for dealing with a conflict between paving or ground level and the level of the dpc. A channel is created alongside the wall with the base of the channel at least 150mm below dpc. The base of the channel can be formed with concrete of some a paving unit, and should fall away from the walling at a minimum of 1:40. The retainer edge of the channel can be formed with a kerb, such as the small block paving kerbs shown in this diagram. The channel itself should have longitudinal fall to direct any collected surface water to the nearest outfall point such as a gully.
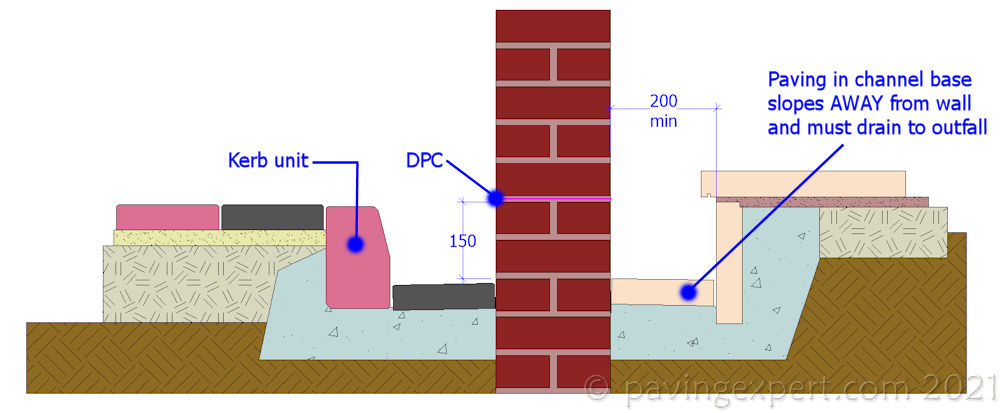
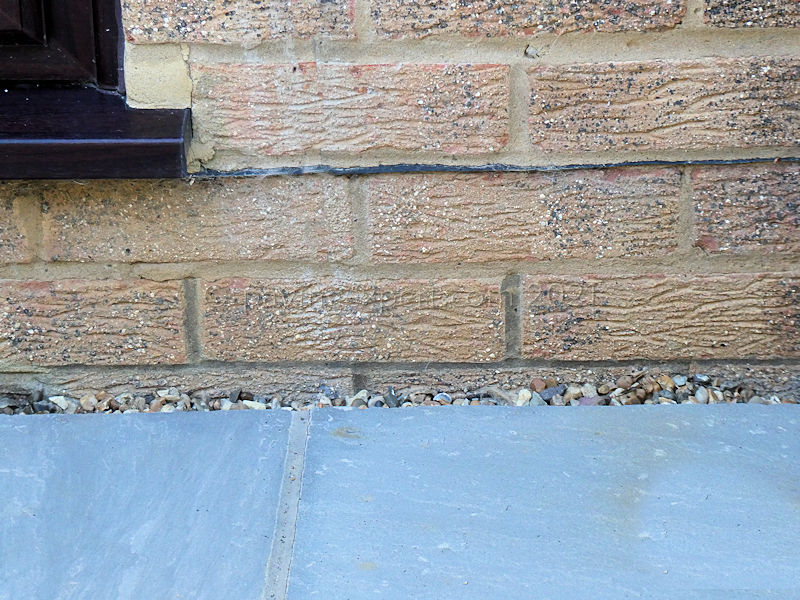
In the example shown here, a ramp to internal floor level has been created, which, obviously, causes a breach of the 150mm rule, and so, to minimise damp issues, a dry channel has been created by keeping the paving 200mm away from the wall, using an edging kerb to protect the gap, and then dressing the channel with a decorative gravel.
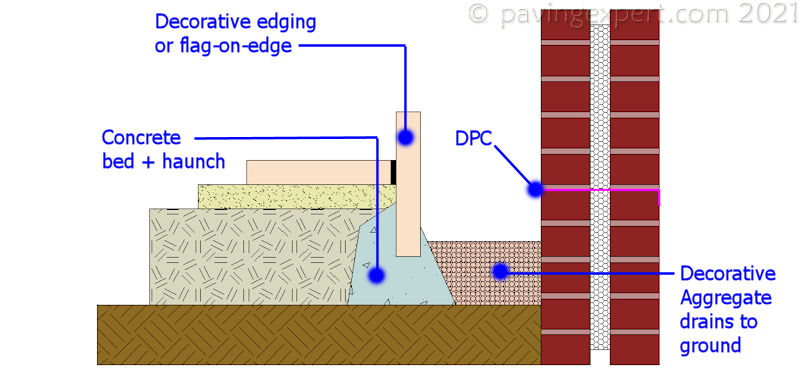
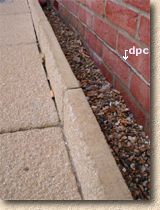
If you look carefully, you can see the biggest drawback of this solution - the channel becomes a collecting point for fag ends and other litter.
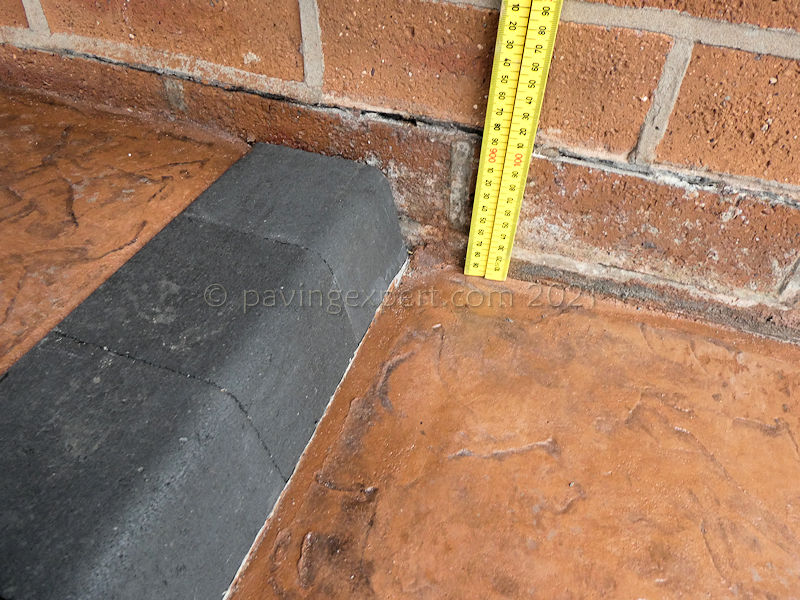
An alternative Dry Area arrangement
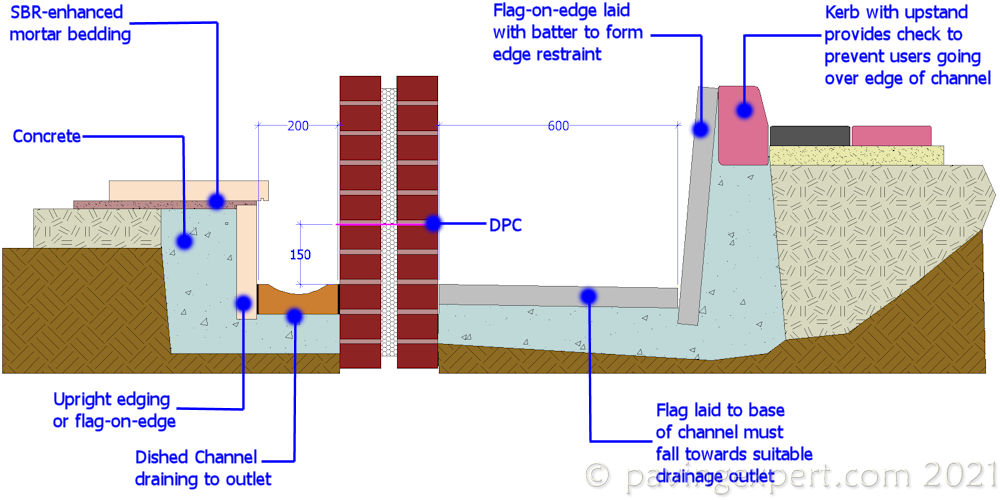
A variation on the workaround illustrated above. On the left-hand side, a pre-cast concrete edging has been used to create the retainer and the paving is significantly higher than the dpc. A dished channel unit has been used at the base to direct any surface water to the gullies. Although a relatively narrow channel is shown here, these 'dry area' solutions can feature much wider channel, often 600mm or more, and so consideration must be given to safe-guarding the edge to prevent accidental falls.
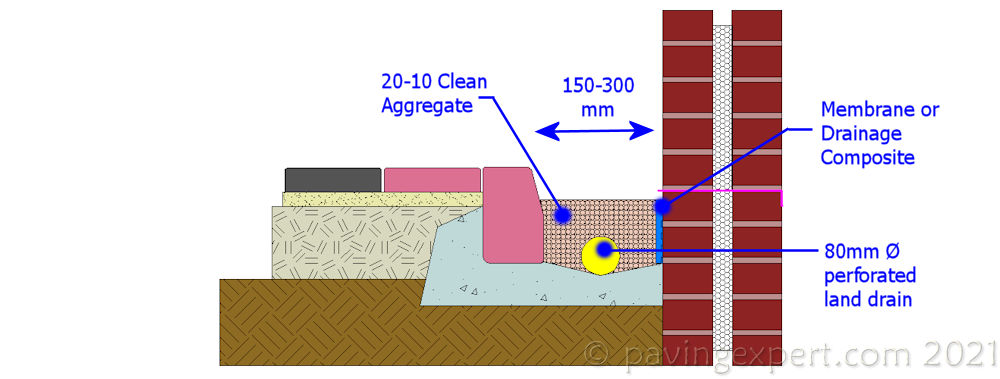
Drained channel arrangement
This is a workaround used where there is a problem with accumulation of litter or other concerns that render an open 'dry area' channel impractical. A land drainage pipe, usually a perforated plastic type, is laid at the base of the channel, connected to the SW drainage system at a convenient point and covered with a clean gravel to a level no higher than the dpc. The walling may be protected by a drainage composite or tanking. This is a 'last-resort' workaround, usually restricted to special cases, where there is little risk of damp bridging the dpc.
The Enhanced Fall arrangement
This method should only be used when there is no alternative but to creep up towards the dpc with the paving and the 'Dry Area' method is not possible. The paving should fall away from the walling quite sharply, at least 1:12. Where a relatively narrow edge course of block pavers is used, the fall can be increased to 1 in 6 or more to reduce the incidence of 'splashback' and ensure any surface water is directed away from the walling as quickly as possible.
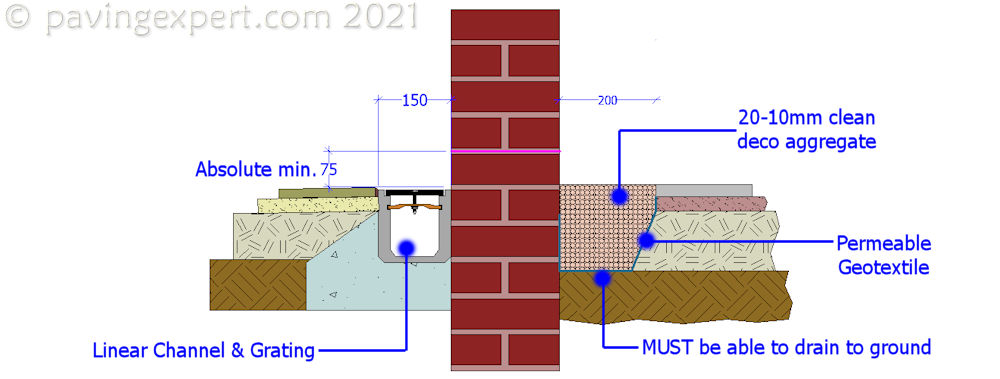
Linear Drain and a 'DIY' arrangement
On the left, a linear drain is used against the walling and may be laid to within 75mm of the dpc, or even closer if used in conjunction with a step or access ramp.
And on the right, a low-tech workaround (upmarket phrase meaning a 'bodge') for private patios. This is a workaround favoured by DIY'ers but rarely, if ever, employed within the trade. The paving is kept away from the walling by 200-300mm and the gap filled or dressed with a decorative gravel. Because the paving is not restrained by the walling, it needs to be firmly anchored in place to prevent it 'slipping' back topwards the walling.