
Refurbishing a block paved driveway
This page is one in a series which documents the refurbishment of an existing block paved driveway. Although the page can be read as a standalone article, it will probably make more sense if read in conjunction with the associated pages listed below.
Part Four: Remedial Works
The Problem
After almost two decades of service, it would be surprising if there weren't a couple of problem areas on a driveway of this size. However, one of the features that makes block paving (and other modular pavings) ideal for residential driveways and patios is that repairs and replacements are relatively simple, very low cost and, most importantly, practically invisible when carried out properly. On this project, there were two areas of minor settlement, plus some re-seating of cut blocks around gullies where surcharging waste water had washed out some of the bedding. This case study looks at the remedial work to the settled areas, as these portray all the elements necessary for effective repair of a block pavement.
Identifying the problems:
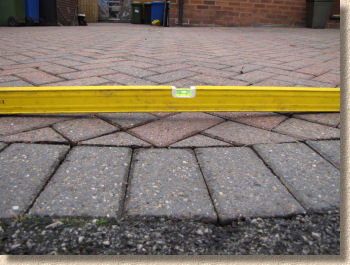
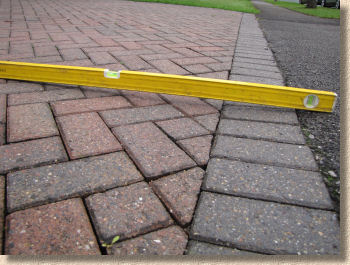
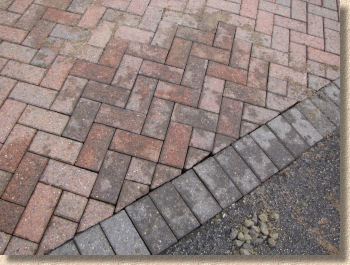
This low spot made itself apparent during the cleaning process (although its presence was noted long before then!) There is ample fall from the left to the right (as shown in the longitudinal photo below) but this is a classic example of a transition failure: a known effect which usually occurs at the point where one surface (in this case block paving) abuts another ( bitmac ) and the effect of long-term vehicular traffic causes the flexible surface (the blocks) to shift and/or settle. Large scale examples can often be seen in town centres where rumble strips or pedestrian crossings slice through an asphalt or macadam surface.
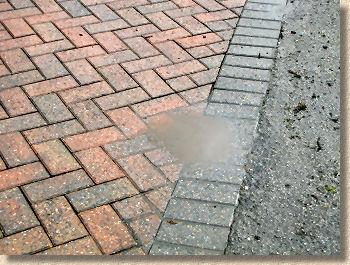
Although this is a minor puddle-ette, there is little point in cleaning and sealing the driveway if a fault such as this is allowed to remain in place. As shown in the photos, the low spot extends over an area that is roughly 500mm transverse (1st photo) x 700mm longitudinal (2nd photo) with the lowest point being somewhere around 25mm below the correct level.
The remedial work will require the low area and adjacent blocks to be lifted and cleaned of any jointing sand clinging to the edges, then for the laying course to be removed and replaced with fresh material, which is then screeded to the requisite level before the salvaged blocks are re-laid, compacted and re-jointed. The British Standard covering pavement reinstatement ( BS 7533:Part 11 ) and the Interpave guidance on reinstatement require that 'used' laying course material should be removed and discarded and not be re-used. This is particularly important in areas subject to vehicular traffic as the effect of that trafficking can, over time, cause crushing of the sand/grit grains and thereby render it too fine for use as a laying course material. Given the relatively low cost of the bedding, compared to the cost of repair, it's not worth arguing over the extra few pence this practice adds to the price of the job.
Removing blocks:
The first task, then is to get one block out which then gives access to all the others. The best tool for this goes by the far-too-clever-by-half name of a "Block Extractor Tool", aka a 'block grab'. This works by having two slender, adjustable, high-tensile steel blades which are inserted into the joints on either end/side of a block. A scissor action is then used to exert a force onto the block, which can then be jiggled loose from the pavement. Yeah! It really is that easy! Honest!
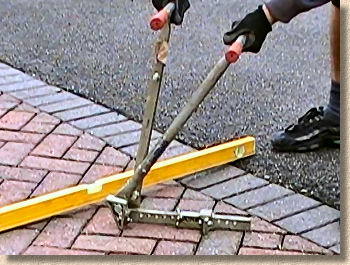
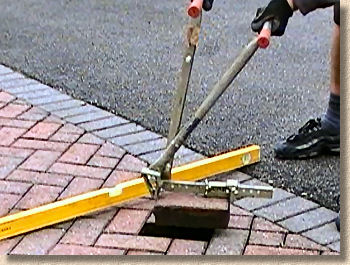
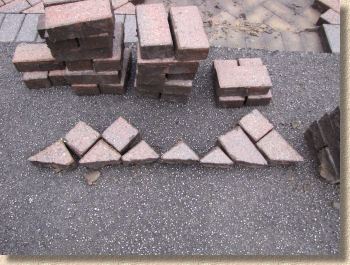
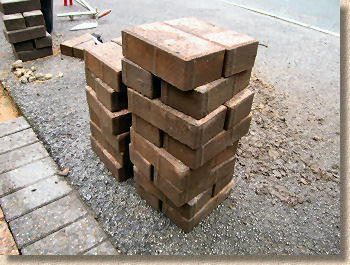
Once the first block has been removed, the Block Extractor Tool can be used to remove further blocks as required. These subsequent blocks tend to offer much less resistance to being plucked from their bed and in a few minutes all of the blocks needing to be removed are out and stacked to one side out of the way.
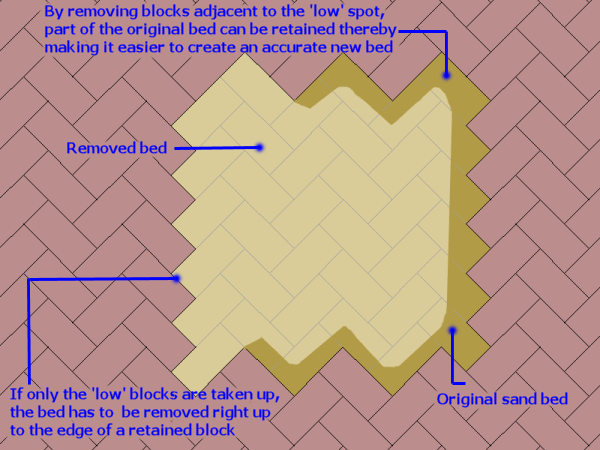
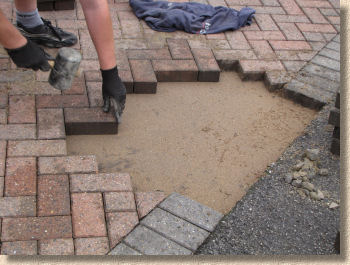
Removing a few extra blocks from around the periphery of the 'low spot' makes it easier to screed the new bed to an accurate level without needing to remove the old bedding right up to the edge of a block that is still in place. In effect, by leaving in a width of 50mm or so of the old bed, this can be used as a 'ledge' or level to guide the screeding of the new bed.
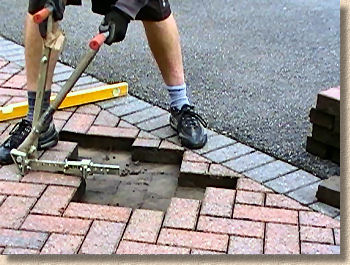
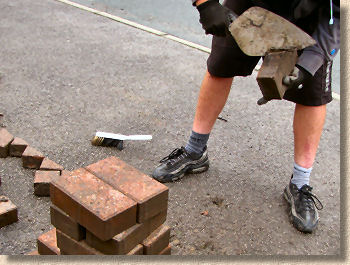
Full blocks can be re-fitted wherever, but cut blocks must go back in their original position. For this repair, there are a number of cut blocks along one edge and because these have been specifically cut to fit in one particular location, they will need to be kept 'in order' when removed.
For those not fortunate enough to have a Block Extractor Tool in their van or shed, it is possible to remove blocks using pointing trowels, chisels, brute force and lots of patience, as shown in the accompanying video clip.
Bed Preparation
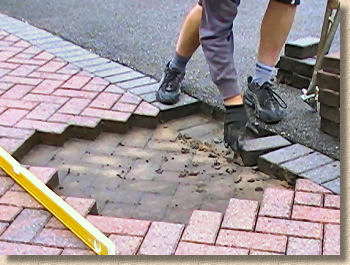
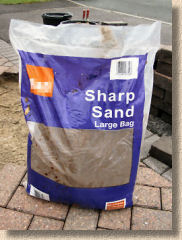
The existing bed needs to be scraped out and removed before being replaced with fresh laying course material, namely a coarse grit sand. Very often, the existing bedding has become so well compacted it is almost solid and so may need to be 'persuaded' using a brick hammer or a small pick to loosen the material before digging it out and removing it.
Unless it is a significant dip or low spot, there should be no need to disturb the sub-base.
Why replace the bedding sand?
There is actually a sound reason why the original laying course material should not be re-used. During its service life, the sand will most likely have become crushed to some degree by the regular trafficking and consequently the grading (ie; the distribution and range of particle sizes) will probably not be quite as good as intended.
While this is much more likely to occur on highways and large public areas, and is therefore highly recommended in such areas, it may appear to be a bit of nonsense for private driveways and the like, and so it is a judgement call whether to replace or re-use on such jobs. If the sand is heavily contaminated with silt or organic material that has filtered in via the joints, then it should be replaced, but as with all such repair jobs, if it's worth doing, it's worth doing well, so our advice would be to replace the sand.
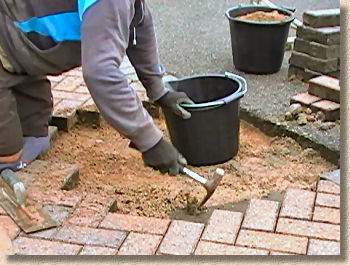
So, having established that there is no need to re-grade the sub-base on this example, it simply becomes a matter of placing and levelling a new laying course of grit sand.
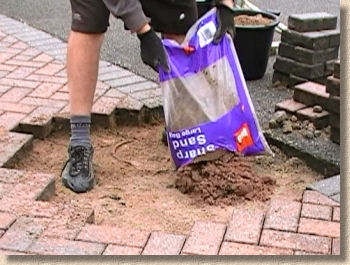
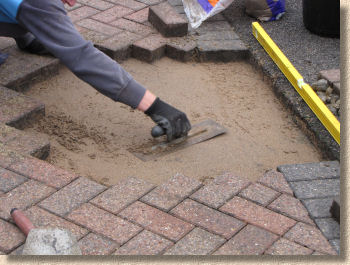
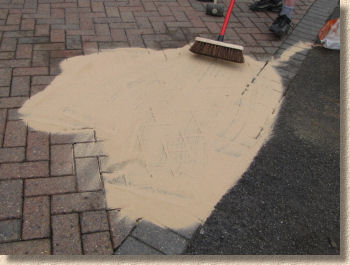
The fresh sand is placed and then levelled out using a float or trowel to create a smooth and even bed on which the blocks can be re-laid.
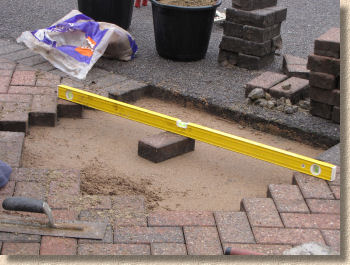
There is a good argument to be made for allowing the area of repair to be screeded to a level that is slightly proud (3-6mm) of the required level as this will be 'ironed out' over a few weeks once the pavement is open to vehicular traffic. This is pretty much standard practice on public areas where traffic levels are significantly higher, but for a private driveway, re-laying to flush, as we refer to it, is perfectly adequate.
The level of the new bed is checked by placing a block upon it and then checking against a straightedge spanning the gap.
Cleaning Off
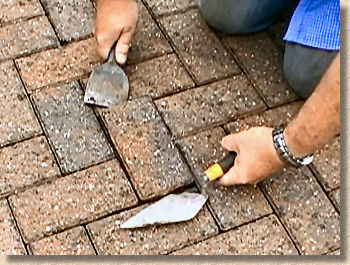
When blocks have been lifted out of the pavement, they will usually have some jointing sand and possibly some of the bedding sand adhering to the edges and the base. This will need to be cleaned off before the blocks can be re-laid. This is best done using the blade of a trowel to scrape the blocks clean and then use a soft hand brush to remove any remaining sand. There is no need for the blocks to be pristine: as long as most of the sand is removed so that it cannot interfere with accurate re-laying of the pavement, that will be adequate.
Note in the photos above how the spacer lugs are visible once the jointing sand has been cleaned from the sides.
Re-laying the blocks
Once the new bed has been prepared, it's simply a matter of replacing the salvaged blocks, starting with the full units and leaving the cut pieces until last.
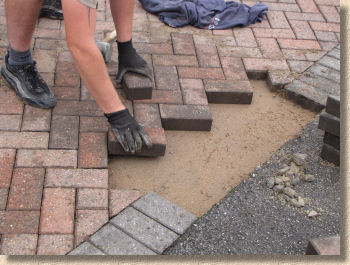
Occasionally, when an area of block paving including cut pieces is re-laid, it is found that the original pieces no longer fit snugly. More often than not, the pieces are too small and result in an overly wide joint (>5mm). This is usually due to the fact that, during the service life of the pavement, the blocks have shifted slightly, and joints have opened to take up the slack. Once the blocks have been re-laid to the requisite 'hand-tight' 2-5mm joint width, a larger-than-previous gap can appear where the cut pieces fit. In such cases, rather than turning a blind eye to the gaping joint and hoping that the jointing sand will hold everything in place (it won't!), it's best to cut new pieces and so ensure a tight and firm pavement surface.
Finishing Off
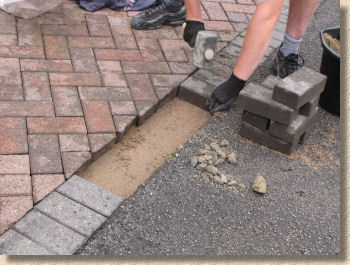
Blocks can be consolidated using a rubber mallet. This also helps squeeze in any blocks that may be a bit of a tight fit.
On bigger repairs, say areas of more than a square metre, it's common practice to use a vibrating plate compactor to consolidate the newly laid patch, but for this relatively small repair, a few whacks with the rubber malklet was deemed sufficient. However, a plate could have been used if so desired.
Once all the blocks and pieces are back in place, the repaired area can be jointed using the usual kiln dried jointing sand.
If several repairs are being carried out (as was the case on this project) then the re-jointing can be left until all the areas are rectified. As ever, re-jointing is best done when blocks are dry as it helps ensure the kiln-dried sand will flow properly.
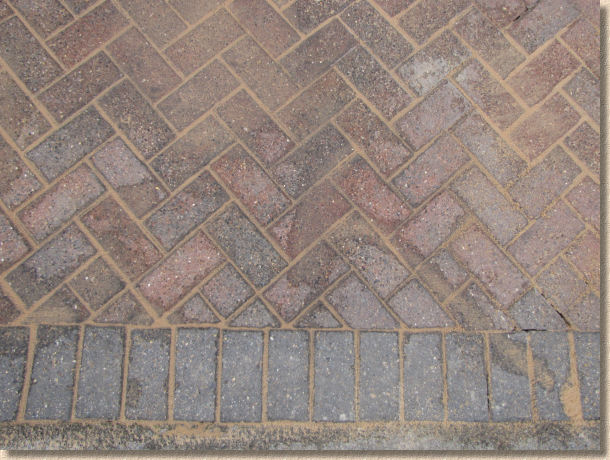
Bear in mind that this repair was carried out shortly after the cleaning job, and so when the jointing sand was applied, after a few minutes it started to wick moisture up to the surface, giving an overall damp appearance to the finished job. This serves to emphasise just how important it is to allow the pavement to thoroughly dry out over a number of days before even thinking about applying the sealant.
The other minor repairs undertaken on the driveway follow the same methodology, so there is no point in repeating them here. The key points to bear in mind are that it is better to take up an area slightly larger than the immediate problem; that blocks need to be cleaned before replacing; and that cut pieces need to go back exactly from where they came or to be replaced with new.
Video: