Introduction:
This technique creates a pattern where the chevrons formed by a 45° layout run parallel to the baseline. This looks best when laid longitudinally, in the main direction of traffic flow, and so it is best to select an edge course that is located at one of the 'sides' of a typical driveway, where that side is perpendicular to the building.
Chevrons are formed when two courses of blocks are laid orientated at 90° to each other. The image on the right shows this effect highlighted by the use of differently coloured blocks
Select Baseline
Start with a straight baseline.
Choose an edge course that is parallel to the desired pattern orientation.

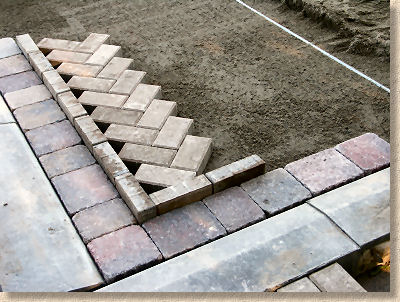
Next, place a course of blocks laid "on edge" against the baseline edge course.
These blocks will act as temporary spacers and will be removed when the cutting-in is done.
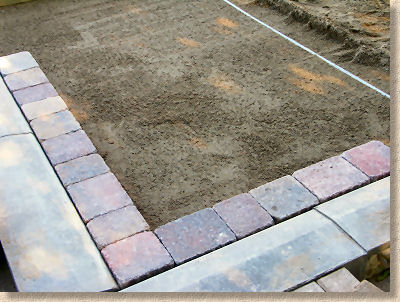
When there is a 90° corner formed by the edge courses, the temporary blocks-on-edge can be extended along both edge courses as this will help to position whole blocks most accurately and to minimise wastage in both directions when cutting-in is done.
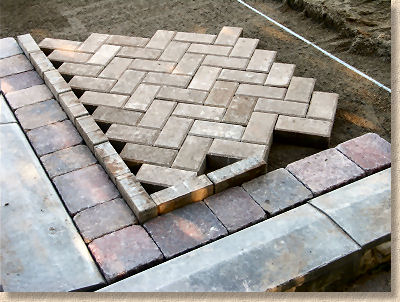
Place first blocks
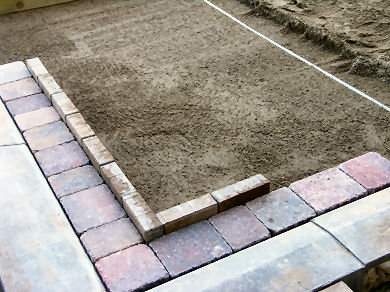
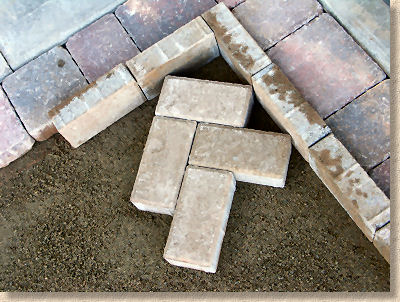
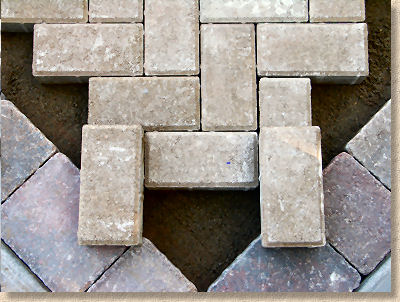
Place the first pair of blocks at approximately 45°, ensuring that the corner of the left-hand block is in direct contact with the blocks-on-edge.
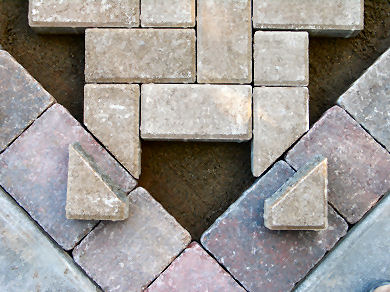
When laid to a 90° corner, both right-hand and left-hand starter blocks should touch both the longitudinal and the transverse temporary courses of blocks-on-edge, as shown in the next image.
As long as that first block (on the right in this photo) is in contact with the temporary course of blocks-on-edge, accurate alignment to 45° will come about when subsequent blocks are placed. For now, having the blocks at roughly 45° will be adequate.
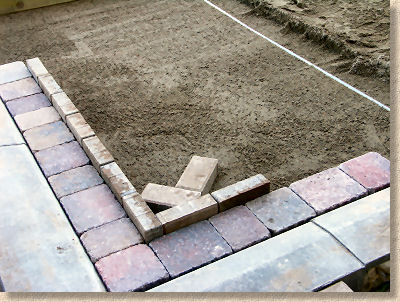
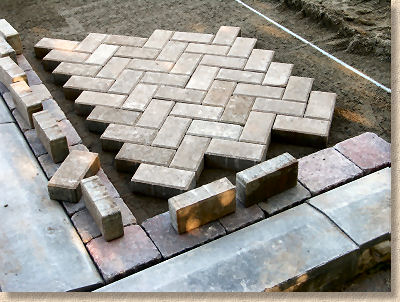
Place another pair of blocks, ensuring that the corner of the block closest to the baseline edge course is in contact with the temporary block-on-edge. It will probably be necessary to adjust the alignment of all four blocks to ensure that the three corners indicated are each in contact with the temporary blocks-on-edge.
This is explained below with the aid of diagrams.
Align to 45°
When working with a single baseline, as long as the corners of the placed blocks are in contact with the checkline, a discrepancy will become apparent once the second course of blocks are placed.
When the first course of blocks is laid with their corners just touching the baseline at what appears to be around 45°, all may seem OK until the second course of blocks is placed, and then it becomes apparent that the alignment is incorrect, as there is no way the blocks can be properly fitted together at that incorrect angle.
A quick check reveals the first course of blocks were laid at 51° to the baseline. Once the angle is corrected, the blocks will align perfectly!
At a right-angle 90° corner, when all three indicated block corners are in contact with the two check lines (as shown by the orange circles) there will be no discrepancy in the alignment of the blocks at the point indicated by the red circle once the alignment is exactly 45°. This ONLY occurs when the 45° alignment is correct.
The diagrams above illustrate what happens when the alignment is not exactly 45°. Once all three corners are positioned to ensure they are touching the check lines, there's a significant discrepancy at the red circle, whenever the alignment is less than (left) or more than (right) exactly 45°.
So: whether working with a single baseline or at a 90° corner, a bit of adjustment, rotating blocks one way or another will eventually reveal the correct, bang-on-45° alignment as soon as four blocks are in position.
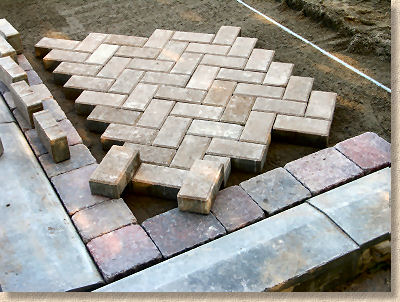
First chevron
Once those first four blocks are in position and correctly aligned, the two courses are extended to create the first 'chevron', which will subsequently guide the accurate placement of all later courses.
This first double course or 'chevron pair' can be continued for the whole length of the baseline. By laying a chevron pair, the blocks effectively 'self check' for alignment, and as long as the corner of the blocks nearest the edge are in contact with the baseline, the alignment will be accurate. The further this initial chevron is extended, to more accurate it will become.
To double-check alignment accuracy, a string line can be pulled along the outside corners of that second course. If it's true, the corner of each block wil just touch the taut string line.
Block laying can now continue to cover the whole of the screeded area. As long as joints don't start to open or tighten excessively, the alignment MUST be correct.
Remove temporary spacer blocks
Now comes the clever part. First of all, the temporary blocks-on-edge that have acted as spacers are removed and will be used for cutting-in.
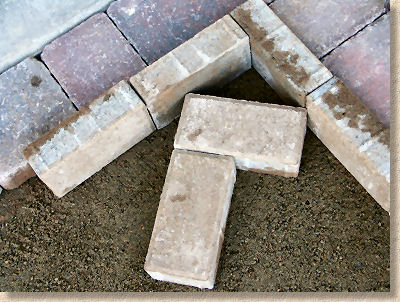
The salvaged blocks are positioned and marked for cutting-in.
Cutting-in
Note how by using the temporary blocks-on-edge the cut pieces are all larger pieces, significantly more than the 'not less than one-quarter of a full block' as required by the British Standards, that all the pieces kave three moulded edges, and that the amount of wastage is minimised.
Cutting-in should be done once all the whole blocks have been laid and the temporary spacer blocks removed.
As shown below, when used to position blocks at a 90° corner, this technique results in first-class cutting-in, abiding by all the rules for inboard cutting and creating a neat, professional finish to the paving.
Suitability
This technique works well with both 50mm and 60mm thick blocks, as shown in this diagram, and the use of blocks-on-edge requires no additional special tools or effort.