Introduction:
Like it or not, the way we lay paving in Britain, and that usually means it will be adopted in Ireland weeks later, is undergoing a huge change, possibly the most significant since the widespread introduction of concrete block paving in the late 1970s.
And this is not simply change for change's sake or because of some doolally Euro-harmonisation project. This stems from a better understanding of how pavements function, how the individual components interact, and, possibly most importantly, a clearer appreciation of how we can get the best from the types of materials we are now using as the uppermost paving layer, be it natural stone , concrete , ceramic or anything else.
Background:
Traditionally, paving units were laid on an unbound laying course. In Britain and Ireland, certainly up to the end of the 1970s, this was often cinders, ash, colliery spoil, quarry waste or other 'cheap' materials such as 'all-in ballast'. From the 1970s onwards, as we massively increased the traffic loads imposed on pavements, whether that was in terms of vehicular numbers, gross weights, or increased pedestrian usage, the answer coming from the engineers always seemed to be to "throw ever more cement at it".
So we went from paving laid on boiler ash or sand, to using a 'twenty-to-plenty' mix of coarse and fine aggregate, before losing much of the fine aggregate and focussing on coarse/sharp/grit sand, then we were told we had to upgrade to a prescribed 4:1 mix, and latterly it's been pre-batched, quality-assured, how-bloody-much??? proprietary mortars.


While all this was going on, more and more pavement engineers devoted to the academic study of why pavements fail were coming to realise that the ancient methodology of shedding water off the pavement, allowing it to run for often not-insignificant distances across a completed pavement surface, was actually contributing to the shortcomings and failures that were being increasingly documented. Allowing water to remain on the surface for any significant length of time, even if it was eventually being channelled into a gully, was causing the paving units themselves, and the jointing, to become saturated.

This didn't stop at the paving layer, either: excess water would penetrate the laying course (what we used to call 'the bedding') and, on some sites, groundwater from the sub-layers could actively be wicked-up through the laying course by capillary action, bringing potentially aggressive groundwater into contact with the paving and jointing.
It came to be understood that allowing the paving and the critical support layers, particularly the laying course (bed) and the jointing, was the cause of many of the problems being reported, from degradation of paving units (due to them being kept in near permanent damp) to frost heave and slippage.


Meanwhile, in some parts of Europe, a tradition of laying paving onto clean grit (splitt) or small gravel had persisted for decades and many of these pavements didn't exhibit some of the more troublesome issues observed with the more familiar mortar-bedded paving common elsewhere (Britain in particular). Could it be that by using a highly-permeable laying course, the chance of water, whether it originated at the surface as precipitation or from beneath as groundwater, coming into long-term contact with the underside of the paving layer was all but eliminated?

Modern bound permeable bedding mortars combine the best of both worlds. By being a bound material, they are firm, reliable and will stay in place, but their permeability ensures that all that troublesome water is kept well away from anywhere it can cause problems.
In some parts of Europe, this cement bound (we are supposed to say 'hydraulically bound' , nowadays) material is referred to as 'Trass Bedding'.

Pros & Cons:
As with so many other things in life, permeable bedding offers both pros and cons for its use. The main points are summarised below.....
Pros:
- Bed provides full uniform support
- The cowboy methodology of spot bedding is all-but impossible
- Surface water passes through and can't be held in contact with paver underside
- An end to reflective staining
- Groundwater cannot rise up to come into contact with paver underside (except in flood conditions)
- Use of standardised grit/gravel eliminates some of the dubious variation seen with sands from different parts of the country
- Potential to create permeable pavements from almost any rigid paving system
Cons:
- Preference to use pre-batched and/or proprietary products
- Will initially be slightly more expensive than the usual sand/cement mix
- Less compaction possible so more accurate bed preparation required
- Shortage of suitable coarse aggregates in Lower Britain may impact on price
What's needed of permeable bedding?
Permeability
Obviously! But how is this achieved? Well, it's largely a matter of using slightly larger aggregate, somewhere in the 1mm to 6mm range, and the aggregate needs to be angular, so there is plenty of interlock. Note also that the lack of sub 1mm aggregate means NO FINES as these would clog up the voids created by all those chunkier particles and thereby reduce the permeability.
Support
The bedding material needs to be strong enough to support the paving laid on top of it. This means using a hard aggregate, usually igneous in origin, and with that aforementioned angular shape to provide good interlock.
Adhesion
All the permeability and support in the world is no use if the paving is slip-sliding about on top of it. The paving units need to be stuck down, fixed in place, so they can't move once they've been laid. Naturally, having restraining edges of one sort or another will help with this, but, unless it's an unusually narrow pavement, there could still be the possibility of some creep or slippage between restraining edges.
A permeable bedding mortar with all that larger-than-usual aggregate doesn't really provide enough adhesion on its own, so a primer slurry is used to improve the bond between paving unit and bed.
Stiffness /
elasticity
It may seem odd to talk of elasticity with a bedding mortar. Common sense seems to tell us that a mortar is stiff, rigid, firm, solid, not elastic. On a microscopic level, we actually do need some elasticity because, believe it or not, pavements move, and we need the support systems within the pavement to be capable of enabling and absorbing these micro-movements.
Pavements can shrink, deflect or expand depending on the stresses placed upon them. This might be an obvious stress such as traffic passing over or across the pavement, but there are stresses caused by temperature, which can cause materials to shrink or expand, and stresses arising from differences in material properties.
Accordingly, any bedding mortar needs to be sufficiently stiff to support the paving and its load, but sufficiently "elastic" to cope with these internal stresses. All this is measured by a quantity known as the Modulus of Elasticity or Young's Modulus , often written as E and measured (by damned clever scientists) in Newtons per square millimetre (Nmm²)
Frost-proof
This quality might seem obvious but there are some materials used to bed paving that are actually frost susceptible, especially if they are keen on retaining moisture. A good bedding mortar has to capable of withstanding frost, so there is little risk of frost heave damaging the pavement, and, just as importantly, that frost will not damage or break-up the mortar itself, which can happens with some moisture-retaining mortars.
Key Parameters:
So, to achieve a reliable, quality permeable bedding mortar, the British Standard BS 7533 sets out a series of parameters that such a mortar would meet or exceed. Full details regarding just what is required can be found in the British Standard, but the key parameters are usually considered to be as follows:
Compressive Strength
30N/mm²
Adhesive Strength
2.0N/mm²
Elasticity Modulus
18,000 ± 3,500 N/mm²
Shrinkage
0.15%
After Table 3 BS7533:12
It should also be readily available throughout the country, easy to store and prepare, offer superior technical support and be reasonably priced.
Permeable Bedding In Use:
So much for the theory - let's see how permeable bedding mortar is used on site.
The Components:
We are using SteinTec TuffBau Tuffbed as the exemplar in this case study.
The mortar comprises a specially selected aggregate, TuffGrit , which is combined with the binder, TuffBed 2-Pack , to create the bedding material.
The TuffGrit aggregate is delivered to this site in 850kg bulk bags which can be dropped off where needed, although it can also be supplied in 25kg packs.
The aggregate itself is a specially selected crushed igneous rock with high flexural and compressive strengths and an angular shape to enhance interlock. It is *not* just any old grit that was lying around in a quarry looking for a use.


TuffBed 2-Pack is the cement-based binder and this is supplied in 25kg moisture-resistant paper sacks, with 20 bags per pallet (500kg) for bulk purchasers.


The only other item that is needed is around 5 litres of clean water.
The mixing:
On larger projects, a dedicated mixing area is usually set up. This should be at a location that is not too far from the laying area, but somewhere that accidental spillages of the TuffBed 2-Pack binder and/or the prepared bedding mortar will not cause a problem. It's also a good idea to fence-off the area to keep enquiring passers-by at a safe distance.
Also, be aware that, in breezy conditions, the TuffBed 2-Pack binder may blow about, so protect eyes with goggles and wear an appropriate face mask. And, as with all cementitious products, suitable gloves and fully covered arms are essential. Cement burns are more painful than you can imagine!
TuffBed is best mixed using a forced action (pan) mixer.
A gravity/tumble mixer (the type commonly used to mix bricklaying mortar) is not as efficient at distributing the binder component right through the mix. As anyone who has ever used a standard mixer will tell you, they have a tendency to 'ball-up' the aggregates and so the cement content ends up coating only the outside of a 'clump' of fine aggregate and were this to happen with a paving bedding mortar, it could present a weakness in the pavement.
The blades within a forced action mixer plough through the aggregate, ensuring the binder is thoroughly and evenly distributed.

On a larger commercial project such as this, two or more forced action mixers may be needed to churn out sufficient bedding mortar to keep the laying gangs going.
The mixed mortar has a working life of 30-45 minutes, so it's important not to prepare too much or there is a risk it will stiffen and become unworkable, but there needs to be enough to keep the installation team ticking over.
With the mixer stopped (very important!) the mixing operative loads 100kg of the TuffBed aggregate into the open pan.
For novice operatives, it may be necessary to weigh out 100kg, but the more experienced users can judge by how full is the pan as to when they have 100kg. For a forced action mixer such as this model, it is roughly half-full, so the operative may have a mark on the inside of the pan as a guide.


Once the mixing operative is satisfied there are 100kg of aggregate in the pan, a full bag of the TuffBed 2-Pack is added. Usually, a bag is dropped onto the side of the pan, split open with a shovel, and then emptied into the pan.
The cover for the pan is dropped down, and the mixer started up. It is allowed to run for a minute or two, blending the aggregate with the binder, dispersing it methodically and evenly throughout the mix before any water is added.
The British Standard 7533:Part 4 talks about a slump for bedding mortar of 150mm. However, any of us that have ever laid paving for a living know that, at such a high slump, while a near-perfect contact with the bedding and excellent adhesion may be achieved, it's practically impossible to lay more than one paving unit. As soon as you attempt to lay an adjacent unit, tapping it down to level causes the bed to fluidise and the previously laid units rise up!

Most installers are happier with a slump of around 30-60mm - damp, but not runny.
So, once the dry ingredients are mixed, approximately 4 to 5 litres of clean cold water are added to the pan, drizzled in via the grille opening in the cover.

The mixing is allowed to continue for another 2 to 3 minutes, until the mixing operative is satisfied it is all thoroughly mixed and evenly moist.
This is where the skill of a good mixing operative comes into its own. It takes a degree of skill, experience and familiarity with the laying operatives preferences to prepare a mix that is ideally suited to the job in hand. A good mixing operative will keep the pavior fully supplied with good quality bedding mortar at a consistent and perfect slump to suit their working method. It's a job that should not be underestimated.


Once it's judged to be ready, the mixing operative turns off the mixer (it is NOT left running as is often the case with a gravity mixer) and the bedding mortar is tipped out into a waiting wheelbarrow. The last dregs often need to be 'encouraged' out of the pan by means of a shovel.
Note especially that any recalcitrant mortar is NEVER left in the pan to be mixed into the next batch. All of the mixed mortar is emptied out so that each batch is fresh and accurately dosed.

The ideal bedding mortar slump for laying paving will allow the mortar to clump together as a ball, and when squeezed, no water will dribble out through the fingers, but the 'ball' or 'clump' will hold together on its own.
The Laying:
The one question every pavior asks before using a permeable bedding mortar for the first time is: " It's just like a normal bedding mortar, isn't it? "
No! It's not. It doesn't move the same; it doesn't spread the same; and it certainly doesn't compact the same!
However: don't panic! It's not radically different and, generally speaking, a good pavior will get used to the feel of it in well under an hour.
The base:


The base for paving laid on permeable bedding is often a rigid or bound layer, often a concrete but, in some situations, a macadam will be used. The exact specification, and the placement of essential movement joints is the responsibility of the site engineer and need not concern us further. The exact nature of the base makes little, if any, difference to the laying process and has no discernible effect on the behaviour of the bedding mortar.


The mixed mortar is brought close to the laying face, usually in a wheelbarrow, and dumped on the base. The pavior will feed from this stockpile and lay out bedding to accommodate a single course of paving.
Obviously, the exact layout of the paving, the pattern being used, and allowances for pavement intrusions such as ironwork (MH covers, drainage fittings, etc.) and street furniture (bollards, lighting columns, etc.) will impact on just how much paving is laid at a time.

Priming - Bond Bridges
It's worth noting that there is no need to prime the base or use a bond bridge on it prior to placing the bedding mortar. The bedding mortar will develop sufficient adhesion to keep it in place. The only need for a primer or bond bridge is between the underside of the paving units and the bedding mortar itself.

That primer or bond bridge is usually applied just a few seconds before the paving unit is placed onto the prepared bed.
With TuffBed 2-Pack, the standard primer is its sister product, TuffBond , which is made up into a slurry paste and then painted onto the underside of a series of pavers immediately prior to laying. The primer needs to cover at least 80% of the underside to ensure proper adhesion and a firm bond between paver and bedding.
Bed Preparation:
Nearly every pavior has their own, idiosyncratic way of working. Some like to level out the bedding mortar with a trowel; some will manage just as well using nothing more delicate than a shovel; some use a short notched board to screed the bedding to level; and some, like this highly experienced pavior, use a gloved hand to 'fine tune' the level of the placed bedding mortar so that it is the exact level they judge to be right for the paving units being laid.


And this is critical: permeable bedding mortar base on an angular grit or 'splitt' does not compact as much as a 'normal' sand-cement mortar and so the bed preparation must take this into account.
Based on a 50mm thick bed, as in this case, the pavior expects only 7-10mm of compaction before the paving unit would require such heavy compaction to drive it further down that there would be a real risk of damaging the surface. Accordingly, the bed he prepares allows for this.

Laying the pavers
The paver is settled down to the correct level using a mallet. It's noticeable how little the paver goes down with each hit due to the reduced compactibility of the bedding mortar.
It takes very little time for an installer not familiar with this form of bedding to adjust their working method to allow for this initially strange compaction, but a good pavior will rapidly adapt.

The process is repeated, over and over, as each course is completed, and progress is rapid. This experienced installer will regularly lay 30-40m² of these exposed aggregate concrete blocks each shift, making a good wage and safe in the knowledge that his work will last for decades.
Note that this pavior chooses not to use spacers to regulate joint width, but relies instead on his many years of experience. Some projects will insist on the use of spacers and some installers prefer to use them, but it is often best left to personal choice.
Note also the use of a compressible strip between the rear edge of the paving and the wall. This is to accommodate any minor movement (expansion/contraction) that might occur during the pavement's service life. Not all projects will incorporate such a strip but it is increasingly being specified as 'best practice'.
Completion:


Once cut-in, the bedding mortar is allowed to harden over a day or so, during which time the paving remains fenced-off to protect from stray pedestrians and wandering idiots.
The next task is the jointing, and as luck would have it, there is a perfectly compatible permeable jointing mortar in the SteinTec range - TuffTop - but's that's a story for another time......


Video
Revisited:
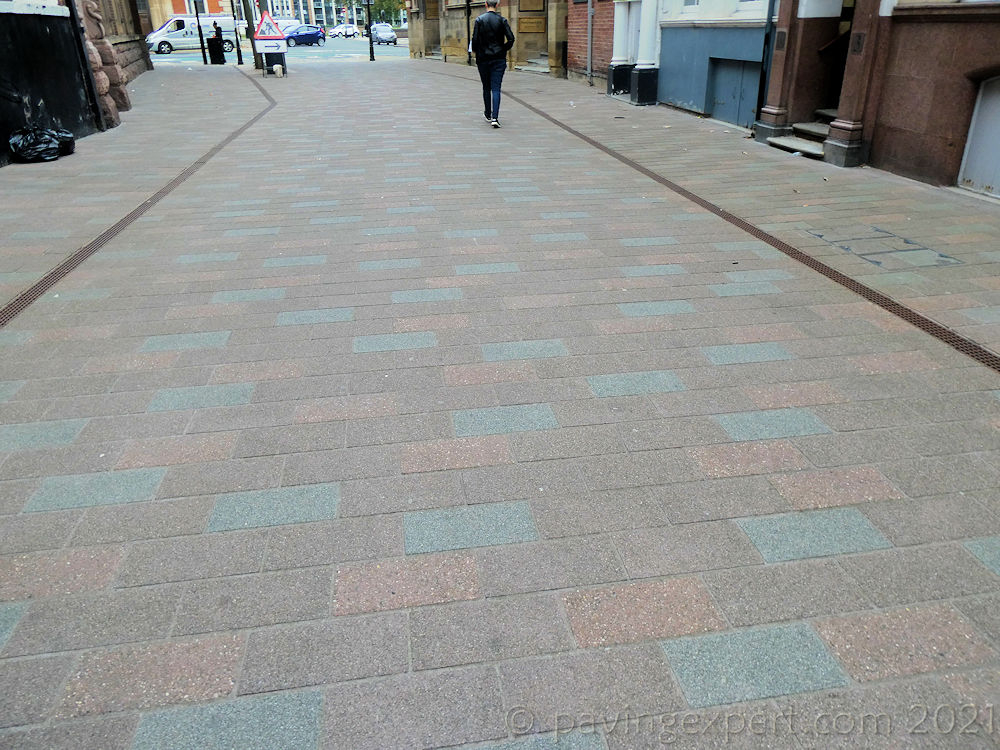
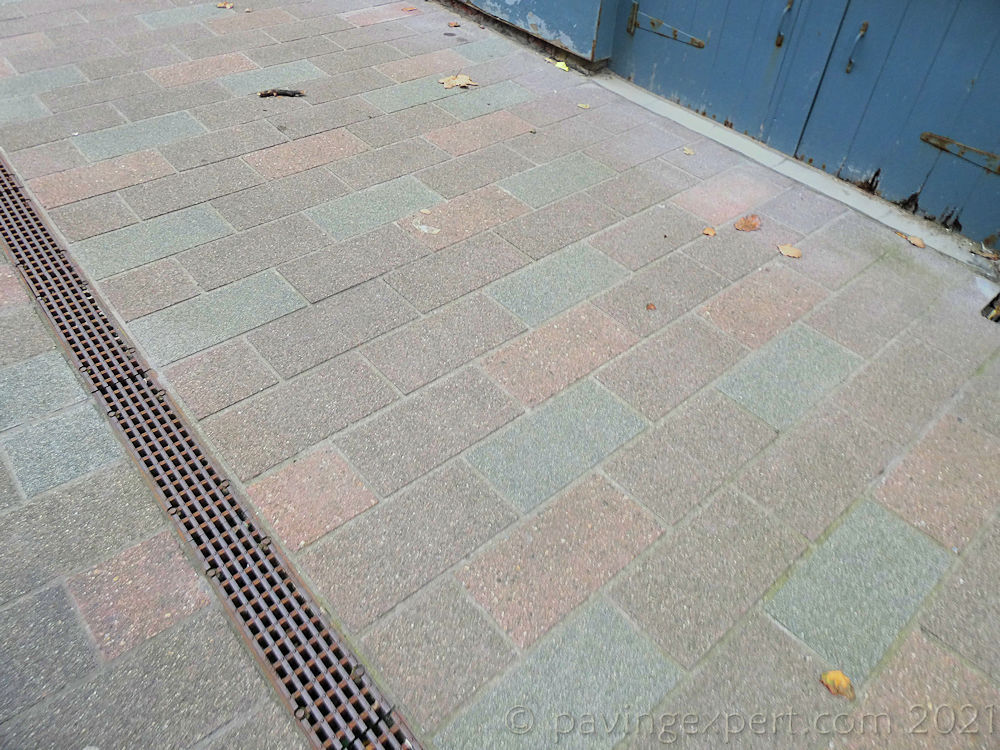
More than four years later, the opportunity to revisit the charming city of Hull arose. Officially on other business, it would have been churlish to spurn the chance to take a look at how the Steintec Bedding, Priming and Jointing materials had fared after a healthy pounding by vehicular and pedestrian traffic.
Is this really four year old paving? Not a mortar crack to be seen, not a single failure, no patched potholes, no loose and rocking blocks. This is how properly constructed paving should be!
Further Information:

SteinTec Tuffbau
1 Northwick Road,
Canvey Island,
Essex,
SS8 0PU

Tel: +44 (0) 203 598 9800

