Introduction:
The method used to build all sorts of walls is covered on the Brickwork Basics page, which should be read in conjunction with this page unless you are already familiar with bricklaying techniques.
Simple Wall
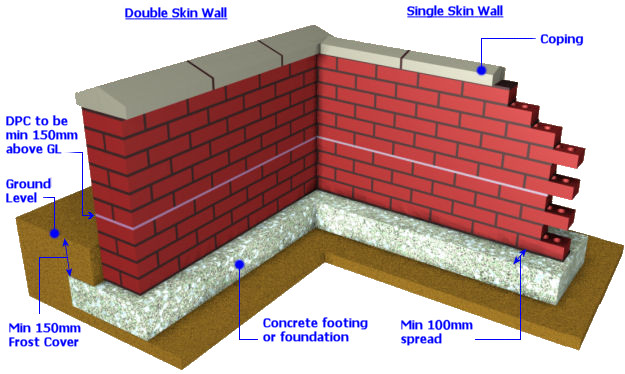
The diagram below illustrates the salient points of constructing a low wall of the type found in most landscaping applications. This shows a double skin wall, 225mm wide on the left and a single skin wall, 100mm wide, on the right.
A single skin wall is only suitable to a height of around 450mm; anything higher should be double-skinned for stability. Any wall higher than 1.2 metres must be designed by a structural engineer, who will take account of prevailing ground conditions, planned usage etc. and design a wall suitable to the project.
Foundations
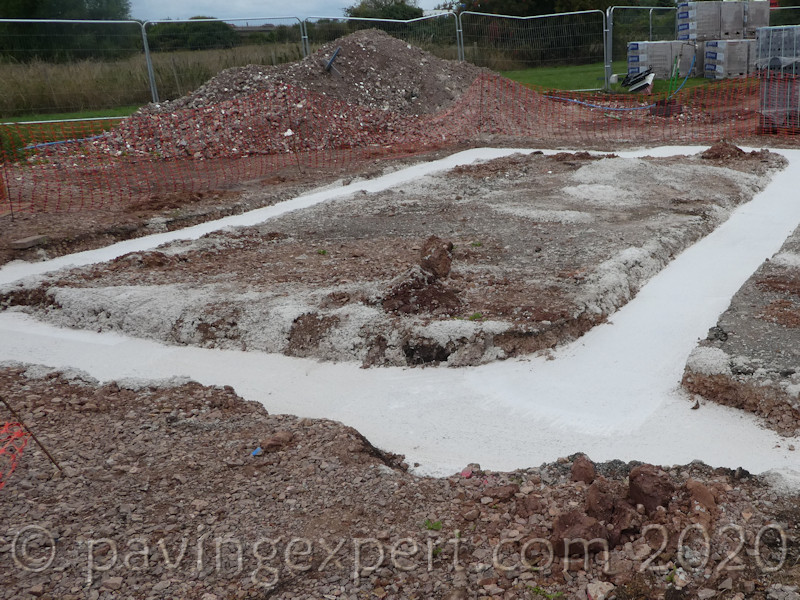
Walls must be built on a solid foundation. Nowadays, we use a concrete strip footing which is basically a trench filled with mass concrete of strength C20 or greater, with reinforcing steel for high, heavy or load-bearing walls.
Where the strip footing will be carrying a heavy and/or structural wall, the trenches are commonly lined with a flexible sheet material that is designed to accommodate any slight movement from ground heave and so protect the building from additional stresses. These liners, known as 'clayboard' and the like, are not essential for small garden walls but would not cause any problems if included.
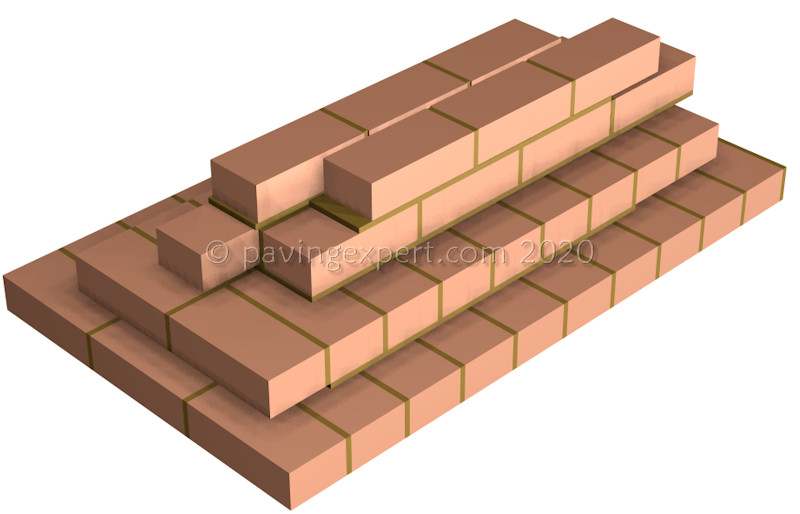
In some parts of the country, we come across walls built directly onto solid clay with spreader courses used to distribute the weight of the wall over a larger area. These comprise a number of courses of bricks that successively decrease in width as they head upwards, the theory being that the load of the wall is 'spread' over a larger footprint. As some of the properties supported by these spreader courses have managed to remain upright for in excess of a century, ther must be some validity to the method, even though it would not be used nowadays, thanks to the advent of reliable concretes.
It is permissible to build a wall on top of an existing concrete slab for small outbuildings, but again, any wall higher than 1.2m, which most walls for buildings will be, must be professionally designed.
Any footing should be at least 100mm wider on each edge than the thickness of the intended brickwork. So, for a 225mm thick wall, we will typically pour a 450mm wide footing. For load-bearing walls, the strip footing may be 600mm wide. The footing is typically 150mm thick, though this may be reduced to 100mm for smaller walls on good ground, or increased for heavier walls on bad ground.
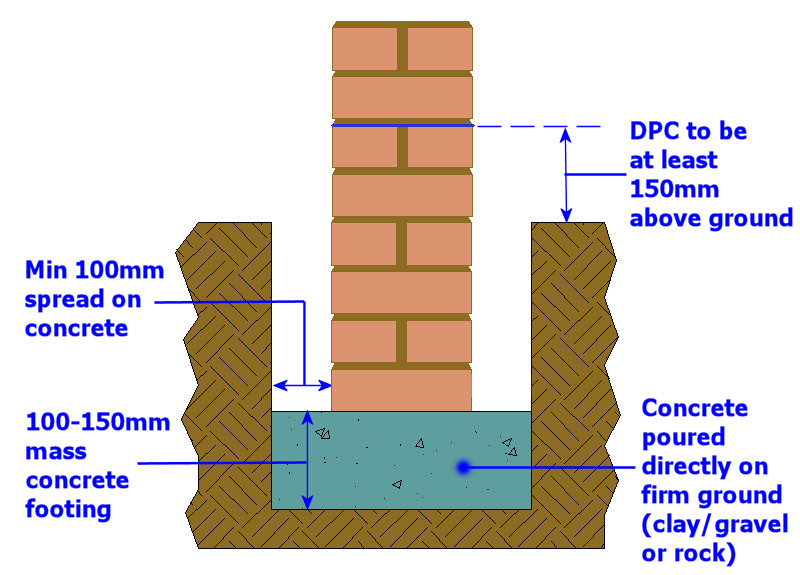
The depth of the footing depends on ground conditions. Ideally, the footing should be poured on top of bedrock or solid, firm clay, but this is not always possible, and so, on bad ground, the footing may be made wider and used to distribute the weight over a larger area of sub-grade, a process sometimes known as 'rafting'. In the relatively mild climate of Britain and Ireland, the top of the footing should be at least 150mm below ground level to give 'frost cover', but in areas where the good clay or bedrock is deeper, it can be 1 metre or more below ground level.
A word about Frost Cover
Frost cover is provided to prevent the foundation being affected by frost heave ; Freezing causes an expansion in volume of water which can 'swell' a sub-grade (normally a clay), lifting the foundation and the wall it carries in the process, only for the whole lot to subside once again when a thaw occurs. Repeated freeze-thaw cycles can have devastating and/or catastrophic results.
The temperate maritime climate of Britain and Ireland means we are not severely affected by this phenomenon, so 150-300mm is usually regarded as sufficient depth for frost cover, but continental Europe and North America are, and their building codes and practices reflect this with frost cover requirements of 600mm or more.
Damp Proof Course
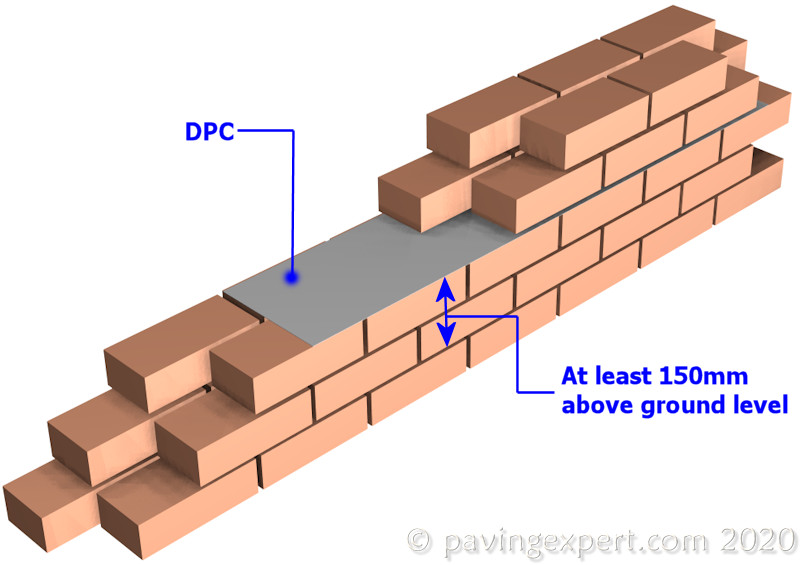
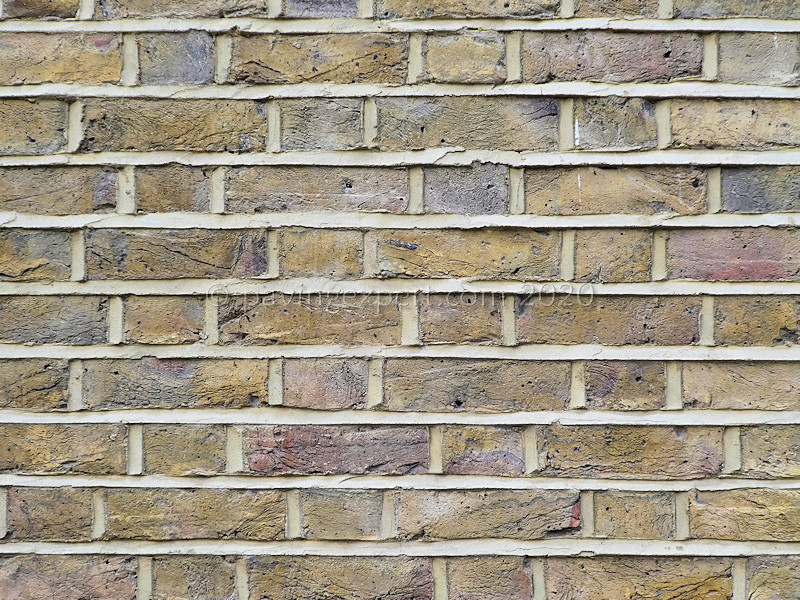
A damp proof course (dpc) is a layer of impermeable material built into the wall to prevent upward migration of ground water. The easiest dpc to install is the polymer sheet, supplied in rolls to suit all widths of brickwork. It is always laid to a course at least 150mm above ground level and is simply rolled out on top of the preceding course. Once in position, the brick laying continues as normal, covering the dpc with a bed of mortar and then laying the first course of bricks above dpc.
Not all freestanding walls will have a dpc, but we never build any wall without one - it costs very little and guarantees a longer life for the wall, as damp cannot rise above the dpc to saturate the facing brickwork.
In places where the dpc runs out, the next roll should start by overlapping the preceding roll by at least 400mm to ensure dpc integrity.
Engineering bricks can also be used to create a dpc in freestanding walls. Two courses of engineering bricks are laid and, because of their very low water absorption capability, they prevent the upward migration of groundwater.
For more information on Damp Proof Courses see the Dealing with DPCs page.
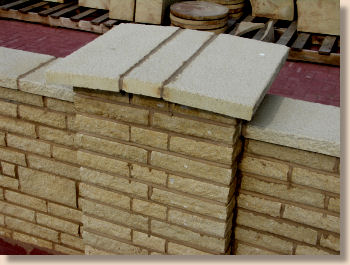
Copings and Pier Caps
Copings are the topping for a wall. Pier Caps are the topping for a pillar, also known as a 'pier'. Their purpose is to prevent rainwater running down the face of the brickwork, which can lead to problems with damp and colonisation by algae and other vegetation.
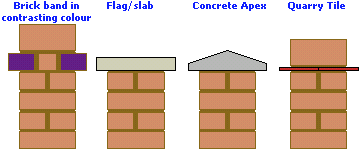
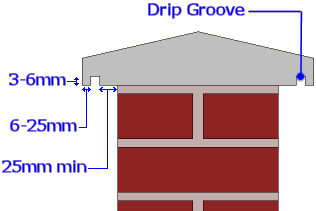
There is a vast range of items that could be used as copings; the only requirement being that the coping is at least 25mm, preferably 50mm, wider than the wall on each face. So, for a single skin 100mm wide wall, we would use a 150mm wide coping, for a 215mm wide wall, we'd choose a 300mm wide coping, and so on.

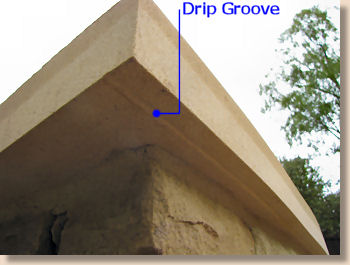
Many copings and pier caps will feature a 'drip strip' or 'drip groove' on the underside, set back 25mm or so from the front face but not so far back that it would be close to the masonry face. The purpose of this groove is to prevent water running back under the coping and from there transferring to the masonry where it could discolour the facing. Water collects in the groove due to capillary forces and reaches a point where the surface tension which keeps the water in contact with the coping is overcome by gravity and a drip form, falling from the coping or pier cap before it can get to the masonry.

Securely bedding copings and pier caps
Both copings and pier caps are notorious for coming loose, and this is most commonly due to poor adhesion of the coping or cap to the mortar bed, and possibly poor adhesion of that mortar bed to the underlying structure.
So, it should be easy to spot that the weak link in all this is the mortar, but even using a stronger (i.e. higher cement content) mortar may not be adequate to prevent copings and caps becoming loose. Often, these 'finishing touches' have porosity problems which make them awkward to bond to almost any mortar.
However, there is a method of more-or-less ensuring that, once bedded, they stay in place, and won't come loose even if someone was to lean on them or actively try to pull them off.
Use of a Bond Bridge usually ensures better adhesion between mortar and walling, and if an SBR-enhanced mortar is used for the bed, there is little chance of the units coming loose at all. The use of an SBR-enhanced mortar *and* a Bond Bridge primer is especially useful when bedding narrow copings, such as those used on single skin walls where there is often not much mortar present to provide adequate adhesion to prevent loosening.

A Bond Bridge between the mortar bed and the coping unit is strongly recommended as a minimum requirement. Use of an SBR mortar will give an even more resilient job, and for maximum security, an optional, secondary Bond Bridge primer between mortar bed and underlying brick- or stonework can be used.
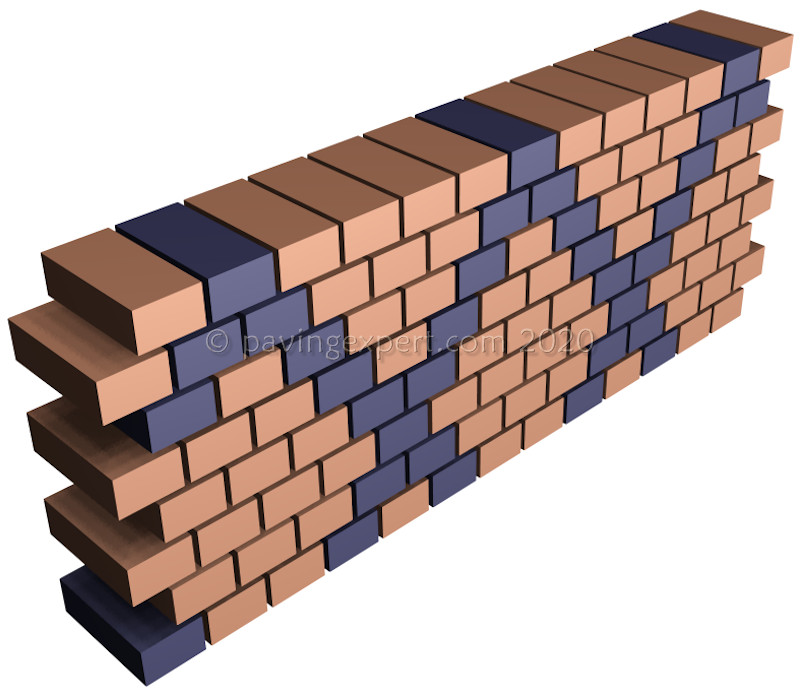
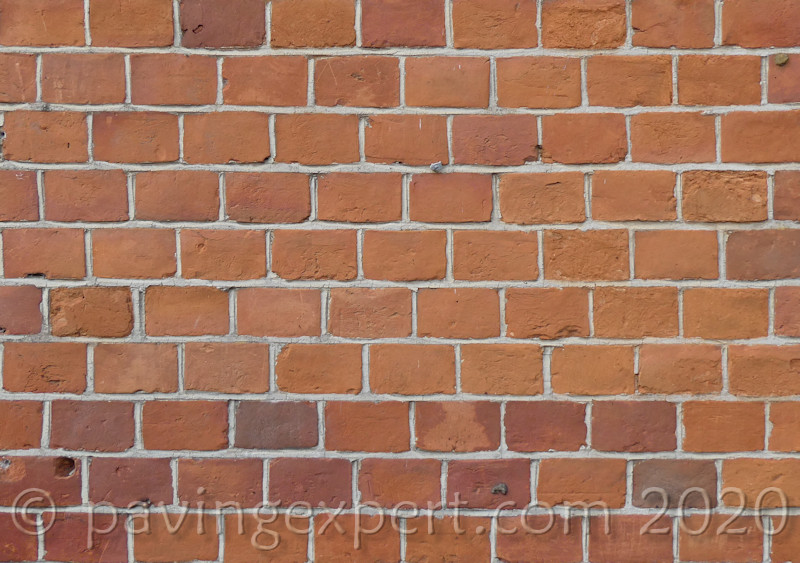
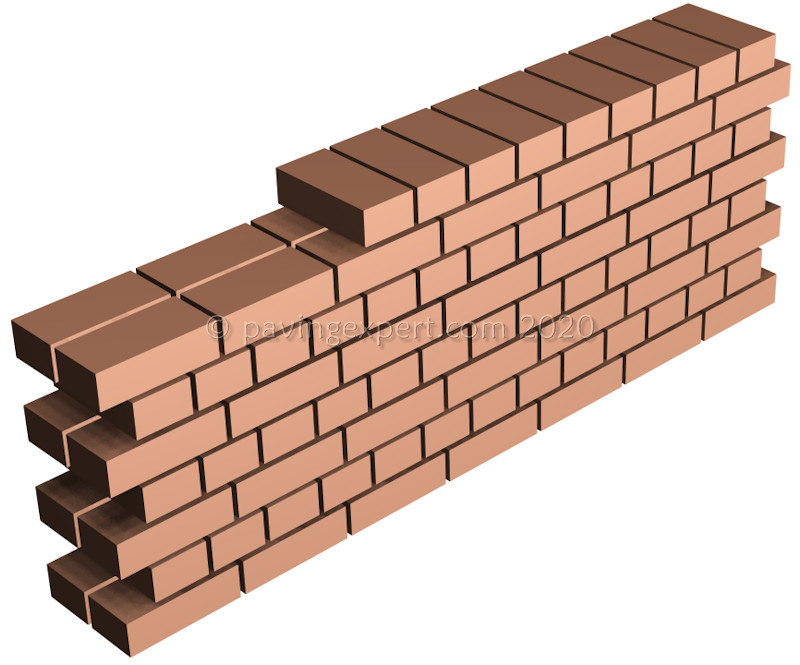
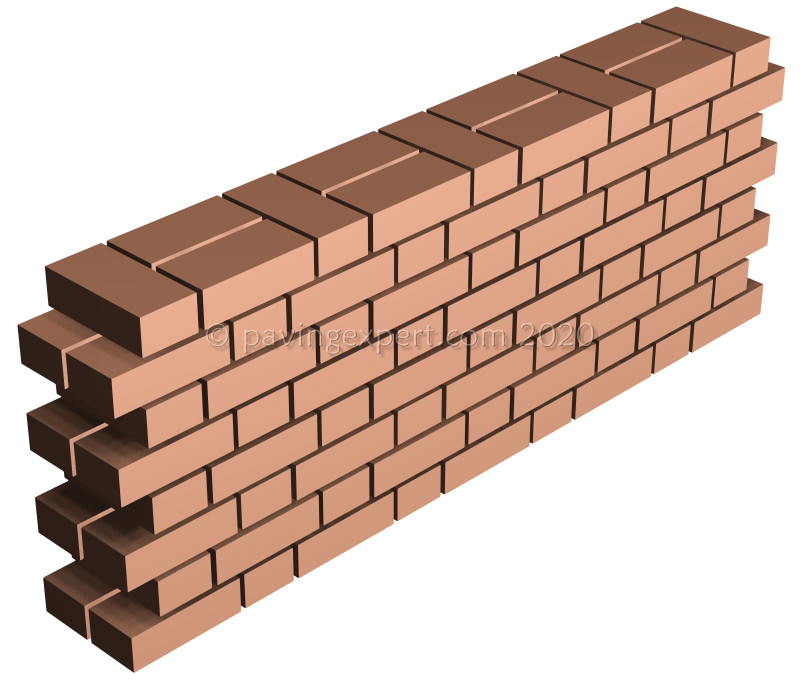
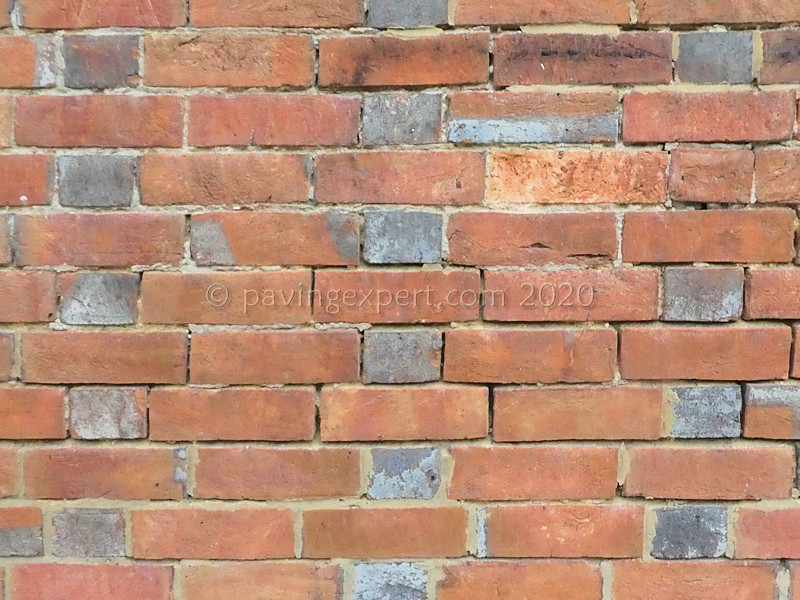
Common Brickwork Bonds
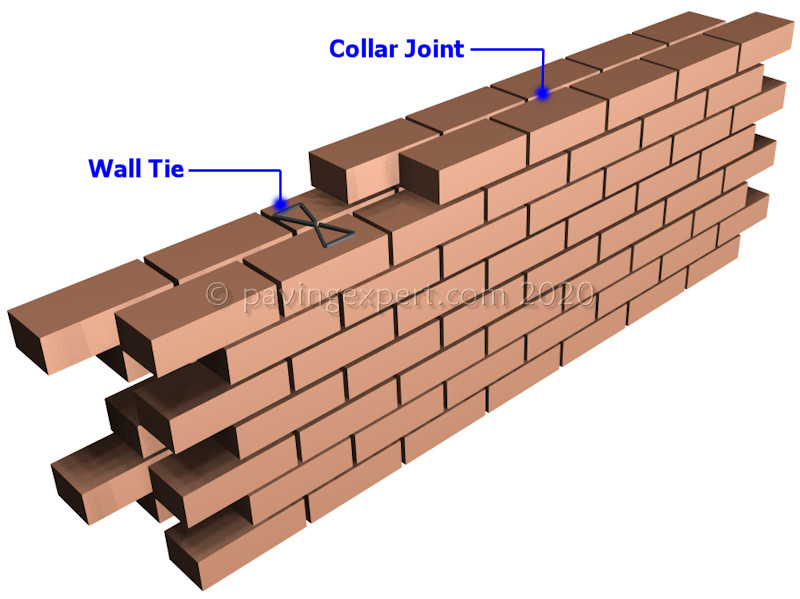
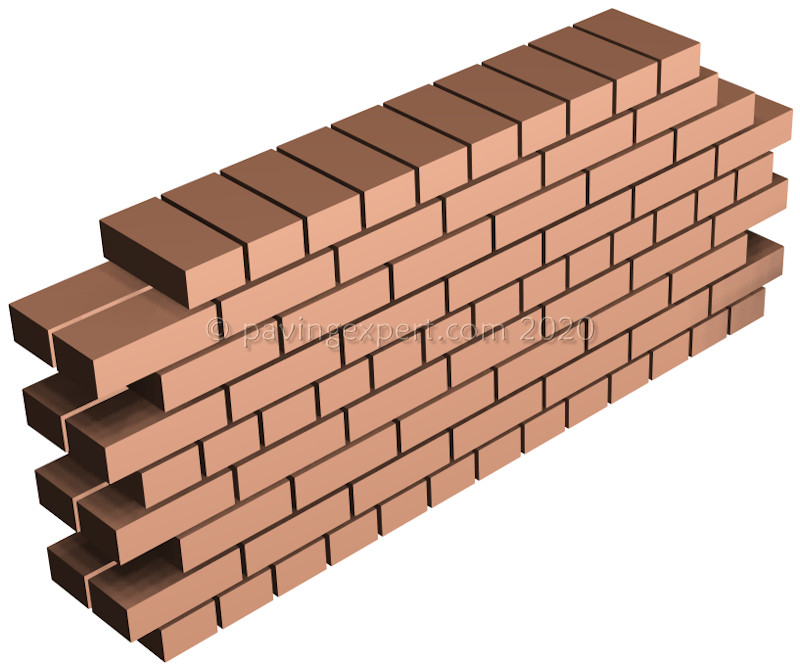
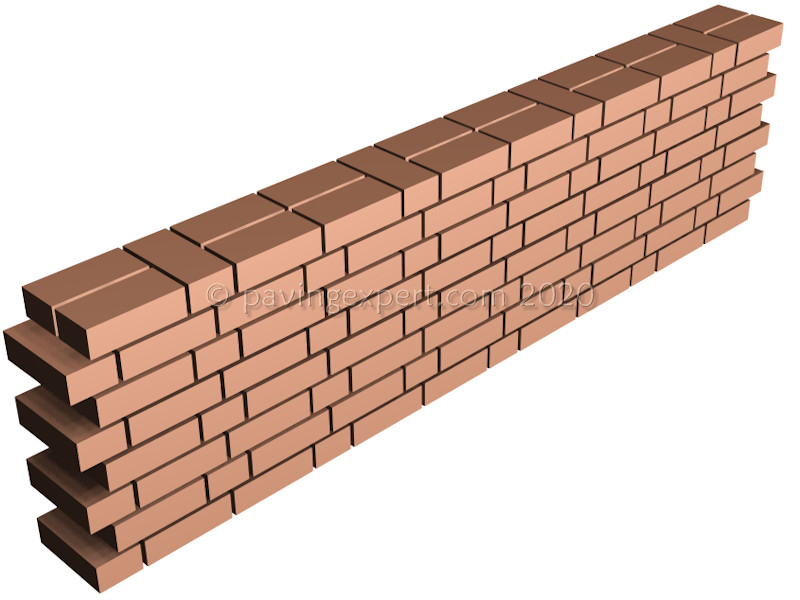
Stretcher Bond is the easiest bond to lay and minimises the amount of cutting required. It can be used for single skin walls quite easily. When used as a double skin wall, the two skins are locked together across the collar joint by means of wall ties.
Header bond is not used as often as stretcher bond, but is equally simple. It's impractical for single skin walls, but is popular for diaper work, where patterns, usually diamonds or criss-crosses are picked out in bricks of different colours, and for walls following fast curves/arcs.
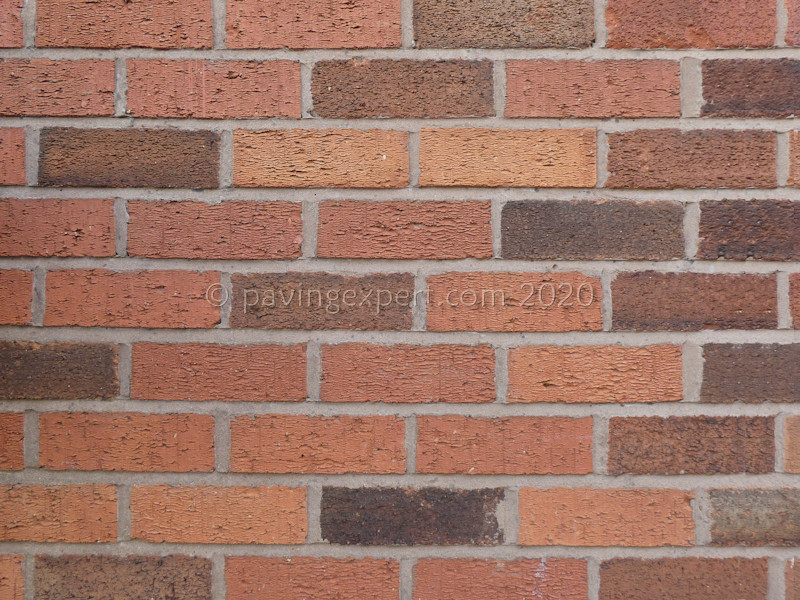
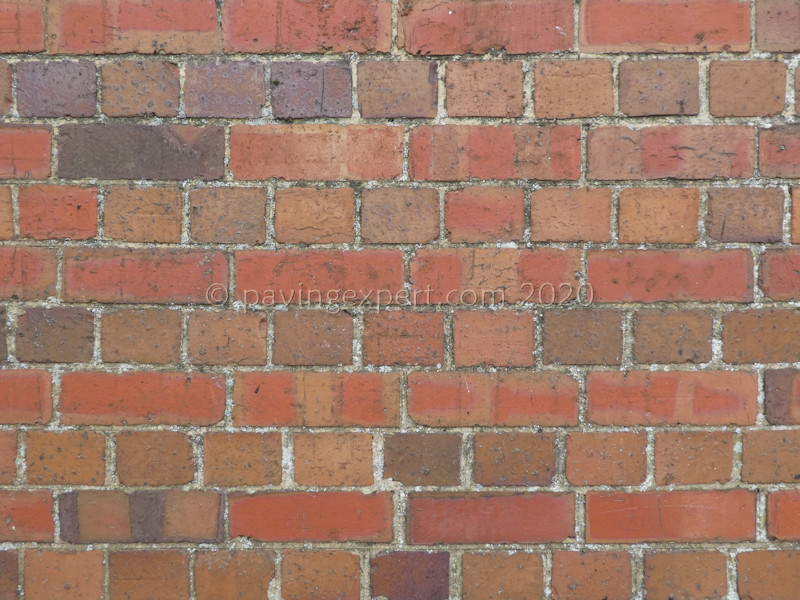
English Bond is a traditional bond dating back hundreds of years and features alternating courses of stretchers and headers. This is one of the strongest brickwork bond patterns.
Flemish bond features alternating headers and stretchers within the course. This is a more decorative pattern than English bond, especially if the headers use a differently coloured brick.

English Garden Wall Bond is a simple variation of English bond, where the header courses are separated either 3 or 4 courses of stretchers.
There is also a 'Scottish Bond' featuring 5 courses of stretchers between courses of headers.
Flemish Garden Wall Bond increases the ratio of stretchers to headers in each course from 1:1 to 3:1. The header bricks are separated by 3 stretchers. The headers of even numbered courses are set to the centre on the middle stretchers of the underlying odd-numbered course.


Monk Bond can be thought of as an intermediate between Flemish Bond and Flemish Garden Wall Bond. In this pattern, the header bricks are separated by 2 stretchers. The headers of even numbered courses straddle the joint between the two stretchers of the underlying odd-numbered course.
Retaining Walls
Retainer walls are used to hold back a bank of earth or similar. They range from small walls in a garden, holding back raised beds, to massive structures, 10m or more high, retaining a motorway embankment.
Retainer walls are not as straightforward as simple walls, and any such walls greater than 1m high should be designed by a civil or structural engineer who is familiar with site and ground conditions.
For low embankments, 600mm or less, a flag on edge retainer may well be adequate, and will certainly be cheaper than a brick-built wall. Other options include gabions , timber crib structures or proprietary retaining wall systems. Contact details suppliers of these products can be found on the links page.
For other applications, pre-cast retainer structures can be the most appropriate solution and these are considered below .
This diagram illustrates a basic retainer wall for heights up to about one metre. The important points to note are that the foundation is laid on a solid base of clay or stable ground, or with 300mm of cover; that the rear of the wall, in contact with the earth, should be protected with a damp-proof membrane such as PIFA 1200 or a drainage copmposite, and that there should be some method of draining the bank, either via weepholes or by means of a perforated drain .
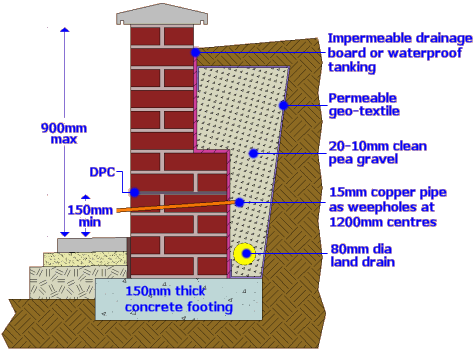
It is essential that the correct bricks are used. 'House bricks' may or may not be suitable, depending on classification. Engineering bricks are fine, as are any other bricks with a FL classification (frost resistant/low salt content). Stone or suitable concrete blocks could also be used.
If in doubt, seek professional guidance.
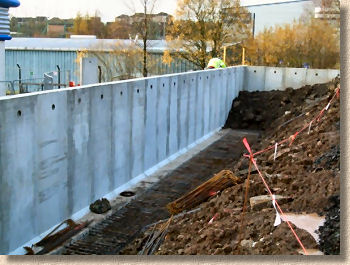
Pre-cast retainer structures
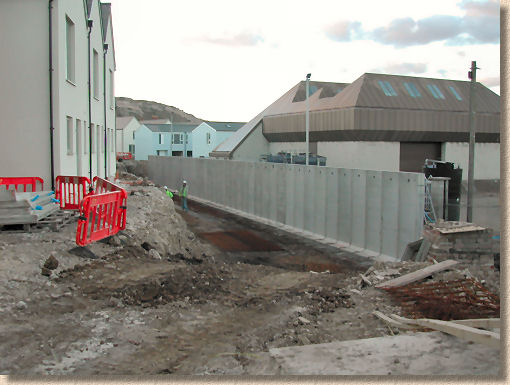
For some projects, it's much easier, and considerably cheaper, to use a precast retainer rather than have one constructed using masonry. Pre-cast components are prepared off-site to a specific performance standard so that all that is required on-site is some means of getting the components into position, which usually means a crane of some description
Precast retainer structures come in a variety of styles to suit the most popular applications, such as constructing both free-standing and bolted-down walls, creating aggregate bins, and forming dividers or all types.
In fact, there is such a wide variety of precast retaining structures available that it is not possible to cover them fully in this section - they could (and actually do) fill websites devoted to nothing else!
It's important to note that whenever a retainer structure is required, bespoke, constructed on-site masonry walls are not always the answer but precast is always worth considering. It can't provide a solution every time, but as the technology advances, the number of potential applications grows each year.
For further information regarding pre-cast retainer structures of all types, have a look at the JP Concrete website