Introduction:
The methods and materials used during this installation provide a valuable case study for the construction of all land drain systems.
In this particular case, the garden is approximately 500mm lower than the adjacent agricultural land, and each winter run off and excess groundwater washes in from the field and submerges the garden for several days. The natural ground is heavy clay and it can take a week or longer for the flooding to dissipate naturally, leaving the garden and the patio areas in an unmanageable condition.
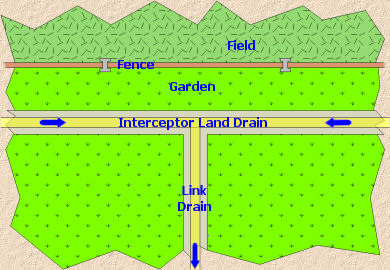
The plan involved installing an interceptor drain just inside the boundary with the adjacent field and then linking this to an outfall agreed with the local water authority. While it would have been possible to use a standard non-perforated pipe to construct the link pipe, it was decided to use a perforated land drain to help drain the garden through which it runs which is naturally damp even during the summer months.
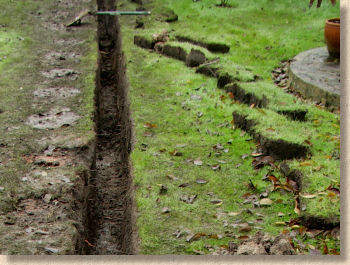
Obviously, the first thing is to get the trench dug and the resulting spoil carted away. An interceptor drain involves replacing a strip of natural ground with a trench of pipe-bedding standard gravel, so there will be a significant quantity of material to be removed from the site.
Clay bulks-up by approximately 60%, so each cubic metre excavated will generate somewhere around 1.6m³ of spoil.
As the excavated material tends to be heavy clay (as in this case) the potential for losing it on-site is limited. Any turf or topsoil that is stripped should be stored for re-use - it will be needed as top cover for the drain once it is completed.
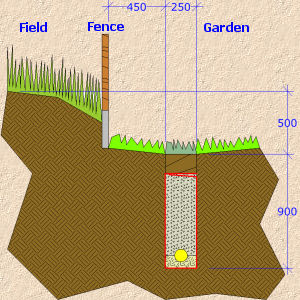
The trench should be as narrow as necessary to facilitate working. There is little to be gained by constructing an over-wide trench, as the flow capacity of a 250mm wide trench is usually more than adequate for most projects.
Ideally, the ground would be protected using decking sheets, large 2.4 x 1.2m boards of ply or other timber. Using decking sheets minimises damage to the existing ground, provides a surer surface for men, wheelbarrows and mini-diggers, and makes the final clean-up that much easier.
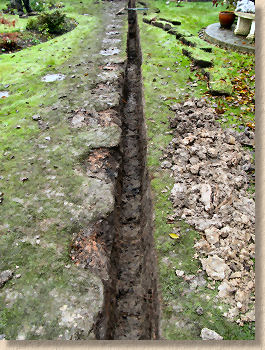
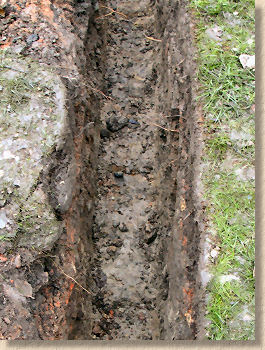
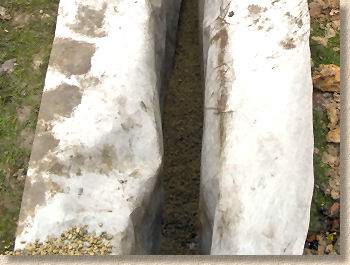
The trench should be trimmed as neatly as is feasible, but there is no great need for perfection. The sides should be vertical or battered back slightly, and the base should be flat and even with as true a profile as possible. The pipe-bedding material will even-out any minor ups-and-downs in the base, but the aim is to avoid any low spots that might hold water or high spots that could compromise the geo-textile.
Remember: all trenches are potential death traps and each must be assessed on its merits to determine whether shoring is required. As a rough-and-ready guide, any trenches deeper than 1.2m SHOULD be shored. Trenches are inherently unstable and unpredictable - don't take chances!

Busy Builder Fact Sheet from Britain's HSE
https://www.hse.gov.uk/pubns/cis64.pdf


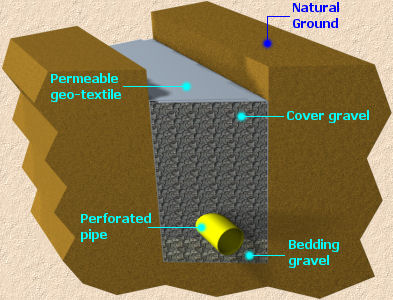
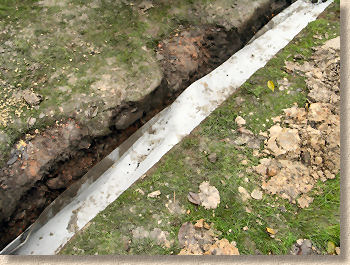
Once the trench is completed, it can be lined with the geo-textile. This MUST be a construction grade geo-textile and not a weak landscape fabric which will tear and fall apart when buried, offering no protection whatsoever to the gravel.
The geo-textile is often supplied on a roll, and this roll can be cut to a suitable width, which would be...
(2 x depth of gravel) + (3 x width)
...the additional width allows for the wrap-over on top of the gravel backfill.
On this project, the trench is 900mm deep and 250mm wide, with the top 150mm to be re-filled with topsoil, so....
(2 x [900-150]) + (3 x 250) = (2 x 750) + 750 = 2250mm
...which is rather convenient as the geo-textile comes in rolls that are 4.5m wide, allowing them to be cut in half to create two correct-width pieces.
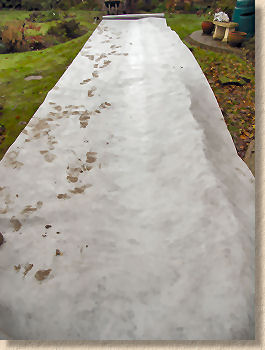
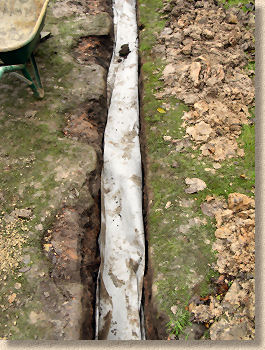
When the geo-textile has been rolled out, it can be pushed into the trench using a spade or other long handled tool. The top edges should remain above the trench.
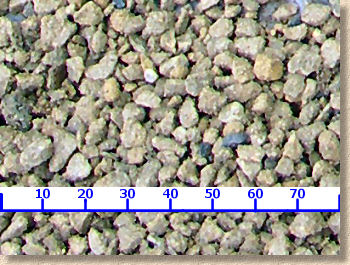
The gravel to be used for this interceptor drain is a 10mm clean angular gravel. This particular gravel is a crushed sandstone, although a 10mm pea-gravel could have been used. It's best to avoid limestone unless there is no viable alternative material available.
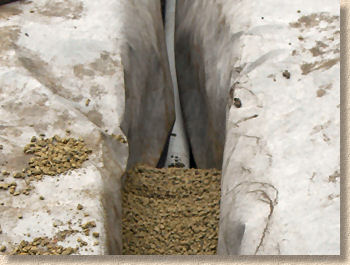
A bedding layer of the gravel is placed in the base of the trench and spread along its length. This bed layer should be approximately 100mm in depth and levelled out to create an even bed for the pipe that will be installed next.
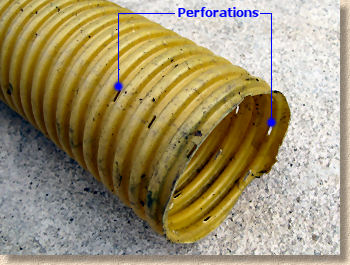
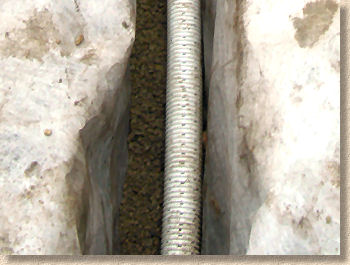
The perforated pipe used on this project is a flexible corrugated 100mm diameter pipe that is supplied in 25m coils. The pipe is extremely flexible and features a series of small perforations along its entire length and all around its circumference.
Individual lengths of pipe can be joined together using the connector, one of which is usually attached to each 25m coil. This is a simple 'push' connector that uses a ridge on its inside to clip one of the many furrows on the connecting pipe.
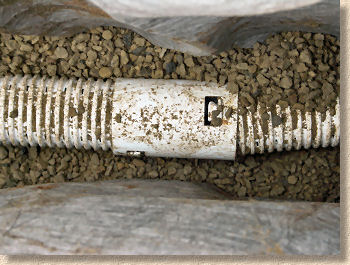
The pipe in unfurled into the trench and, as far as possible, positioned centrally. Due to the springy nature of this type of pipe, and its desire to return to a coil, it's often necessary to weight it down in place with a shovelful of the pipe bedding.
Once the pipe is correctly positioned, the trench can be backfilled with the pipe bedding material.
Eventually, the whole trench is backfilled with the pipe bedding gravel to a level approximately 150mm below the top. Gravel is largely self-compacting, and given the relatively narrow width of the trench, attempting to compact it using a vibrating plate is unlikely to be successful, but quite likely to make a complete mess of the trench edges. Trampling by the laying operatives will achieve adequate compaction at this stage.
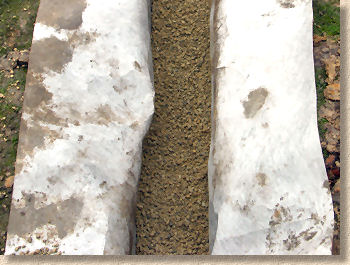

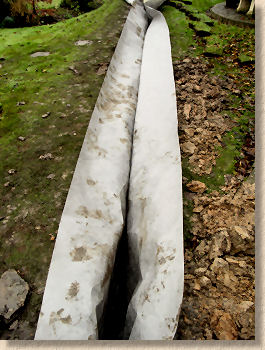
The geo-textile is then wrapped over the top of the pipe bed gravel, totally enclosing it and protecting it from contamination from the surrounding ground and, more importantly, preventing the gravel from becoming 'lost' to the earth on each side of the trench.
The geo-textile should overlap by the full width of the trench. This provides double protection from trickle-down of the soil that will be used to cover the buried land drain. Any excess geo-textile can be folded over or trimmed as desired.
The final step is to backfill the top of the trench with the topsoil that was salvaged earlier and then, if necessary, to replace the turf.
There will, of courses, be some slight settlement of the trench over the following few weeks as it 'settles in', and it may be necessary to top-up the topsoil or re-bed the turf cover. Over the next few months, the ground will recover and the installation will become virtually undetectable.
Sadly, our photographer was elsewhere when the soil and turf was replaced, so there are no pictures, but the system as a whole does work, and the garden is no longer subjected to winter inundation.