Uses and Types
Timber or wooden edgings are fairly common, as they are slightly cheaper to construct than a concrete bedded edging , but this cost saving has its own shortcomings, in that many timber edgings have a limited lifespan of 5-10 years. The advances made in preservative technology in recent years has brought us 'Tanalised' or CCA treated timbers with guaranteed life-spans of up to 25 years. However, there is some concern regarding the use of these treated timbers, particularly the CCA (Chrome-Copper-Arsenic) types, in organic gardens and near vegetable plots.
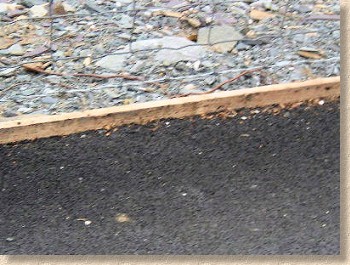
For driveway or path use, they should present no discernible hazard, and many of the tarmac drives laid to new houses are retained by a simple timber edging, primarily because it saves the builder £20-£30 per property. Personally, we prefer concrete-bedded edgings and kerbs for any pavement taking vehicular traffic, and we restrict the use of timber edgings to garden and access paths, unless instructed otherwise by the client or specifier.
They are a good choice for gravel paths, helping to keep the costs to a minimum, and for bark-mulched paths. Their use on tarmacadam drives and footpaths is an accepted practice, but not one we would recommend, and we would never consider their use as a restraint for block-paving , as they are too liable to movement which allows the paving to move and possibly settle.
They are typically laid flush with the surface as any upstand is prone to rapid wear or splintering. If a kerb or edging with upstand is required, a stone, concrete or brick edging should be used, rather than timber.
Construction
Preparation
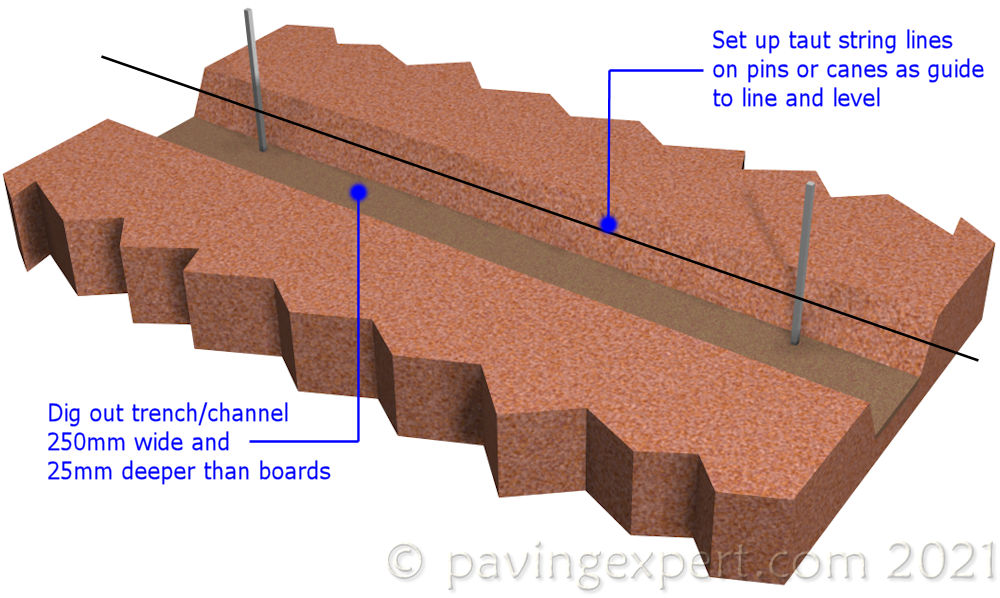
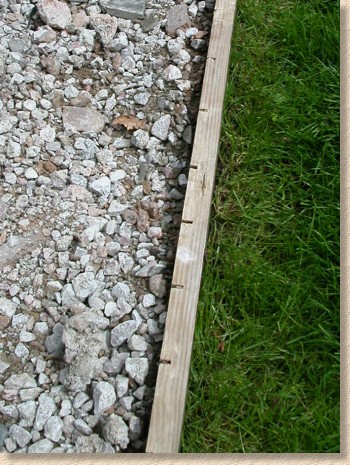
Decide where the edging is to run, and mark out with sand guide-lines or spray paint if required. It is assumed that the edging is to be flush i.e. level, with the existing ground. It is a good idea to dig wider than the planned width, allowing an extra 50-75mm at the edges makes handling much easier. We find a spade's width trench (around 250-350mm) is adequate for the construction of timber edgings. Keep the excavated material close by as it may be needed for backfill once the edging is complete.
Materials
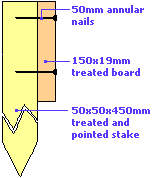
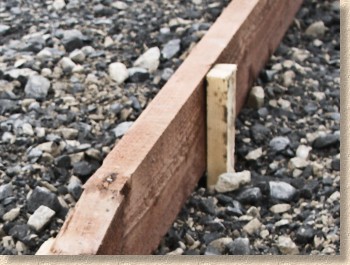
Timber edgings are very simple to construct, consisting of only two parts - the stakes and the rails. All timber used in the construction should be treated with a preservative, preferably 'tanalised', a system that injects the preservative into the lumber under high pressure, thereby ensuring fuller penetration.
Many DIY stores sell pre-packs of 'Gravel Boards' in 100mm or 150mm depths which are ideal if only a small quantity is required. For quantities of 100m or above, a local builders' merchant or timber yard will probably be able to supply all the required timber at a better price.
The stakes should be a minimum 40x40mm or 50x50mm treated timber, approximately 450-600mm in length, and preferably pointed at one end. These can be fashioned on site from longer lengths of rough sawn timber, or again, many local builders and/or timber merchants will stock them as standard items.
Fixing
Set up a taut string line as a guide to alignment and level. See >Setting-out page for further detail on setting up a working string line.
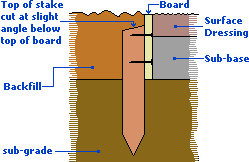
The stakes are forced into the underlying ground with a sledge hammer, or pavior's mall, driving them a minimum of 250mm into the earth. Note that the stakes are usually positioned at the 'back' or outside face of the edging.
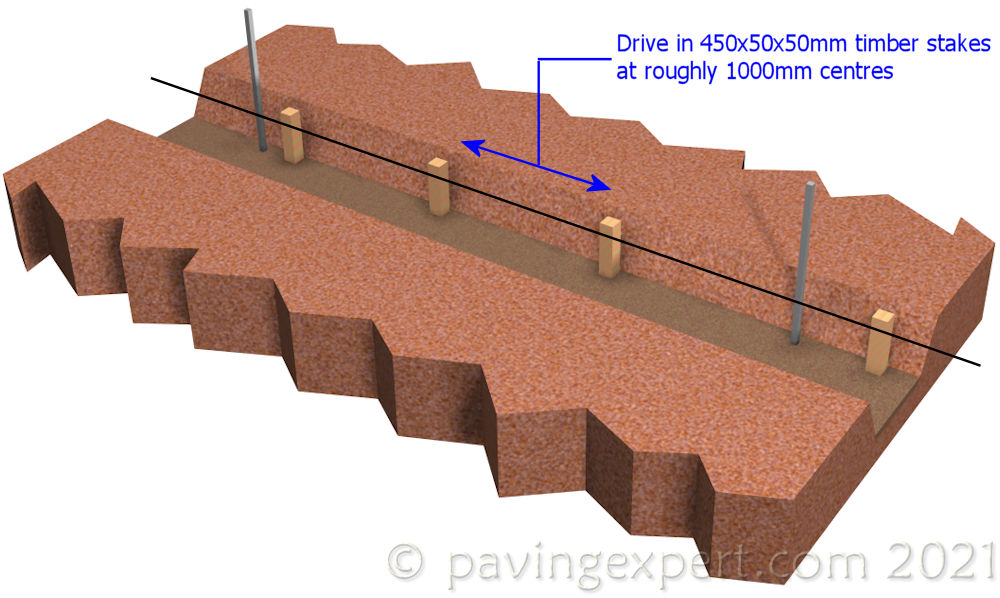
Don't worry if the top of the stake is higher than the string line guide, surplus can always be sawn off after the rails have been attached. Stakes are ideally placed approximately 1m apart, but circumstances will dictate the most effective spacing.
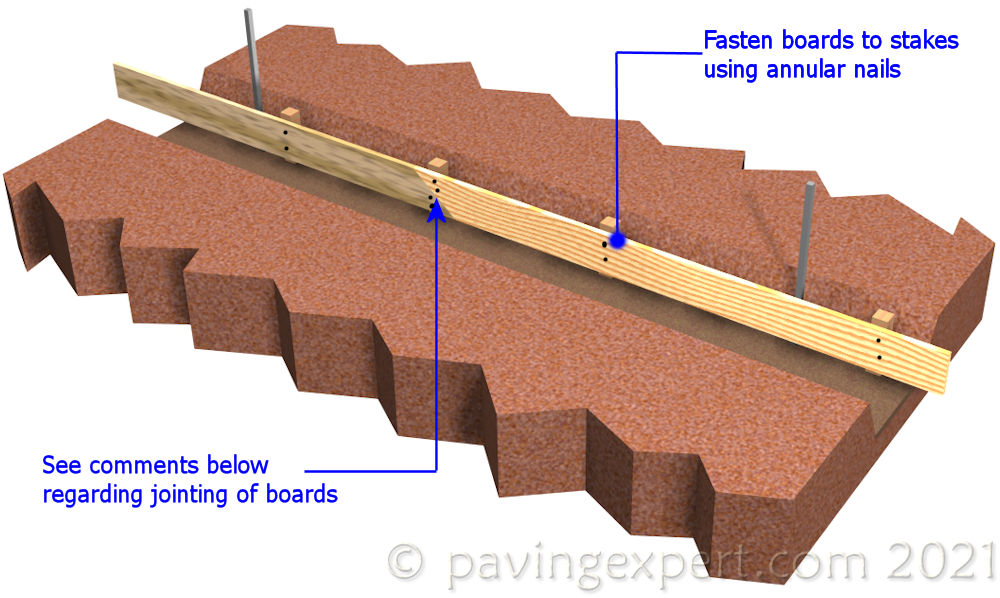
The rails are simply nailed to the stakes, using the string line to guide your levels. 50-75mm annular nails are ideal, as the 'barbed' shaft of these nails resists the levering pressures exerted by curved rails. Allow for 2 nails per stake.
To prevent the stake being loosened during the process of fixing on the boards, place a heavy object at the back of the stake before nailing the boards. The head of a sledgehammer or a concrete block is ideal. This will help hold the stake steady while the nails are driven home, ensuring the stake isn't worked loose by the hammering forces.
Any upstand on the stakes can now be cut off with a hand-saw. Where the surface appearance of the edging is important, the stakes are usually sawn off 12-30mm below the top of the rail and then covered over with the backfill material or turf. Where final appearance is less critical, the stakes can simply be sawn off flush with the top of the rail prior to backfilling.


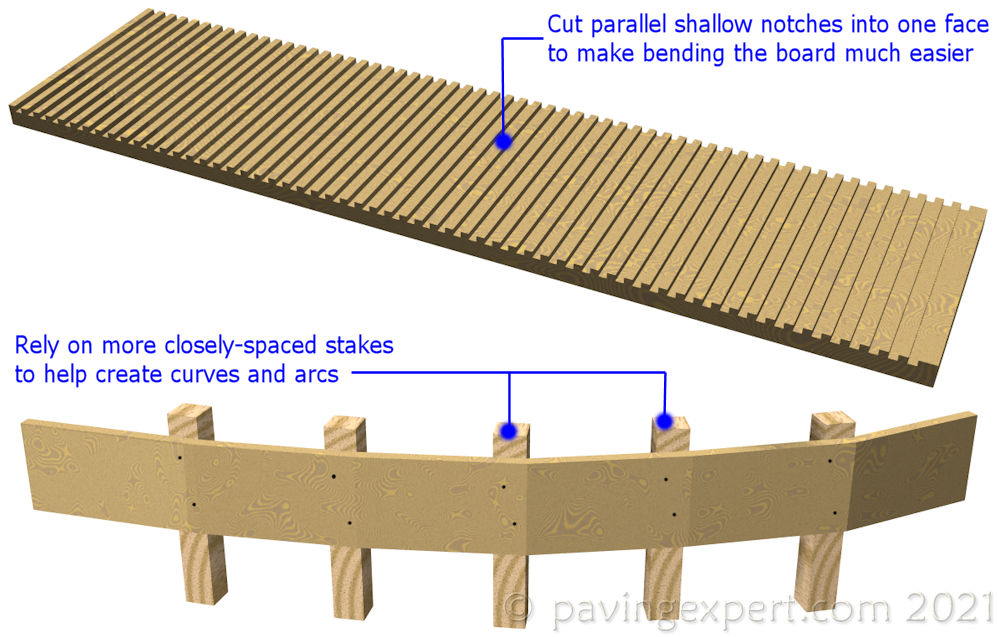
Dealing with curves
Curves, arcs or radii will need the stakes to be spaced closer together, to achieve a 'sweet' curve. The stakes may be only 300mm apart on tight curves, and it is sometimes necessary to cut the boards into short lengths, as forcing a full-length board around the curve could cause it to split or crack.
On slow or medium curves, cut shallow notches, no more than 8mm deep at roughly 25mm centres, into one face of the board, as this will help the board to bend and reduce the risk of splitting the timber. This is sometimes known as "kerfing".
Jointing
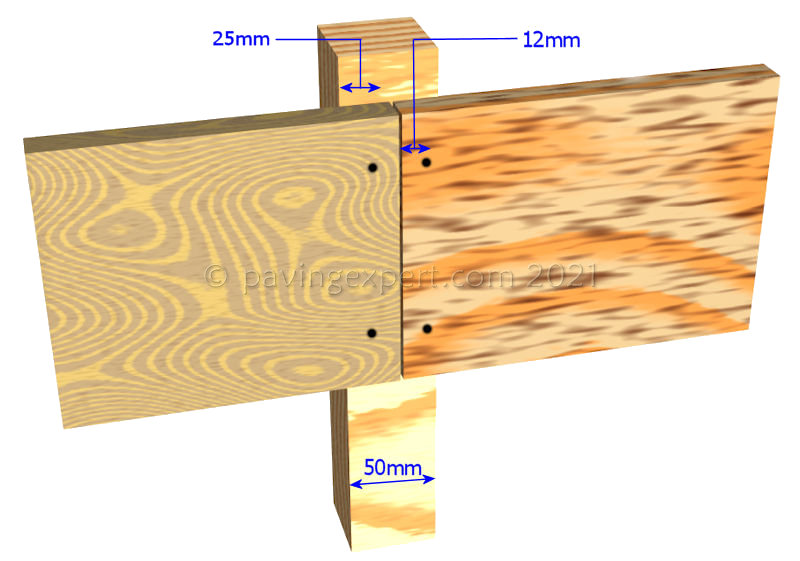
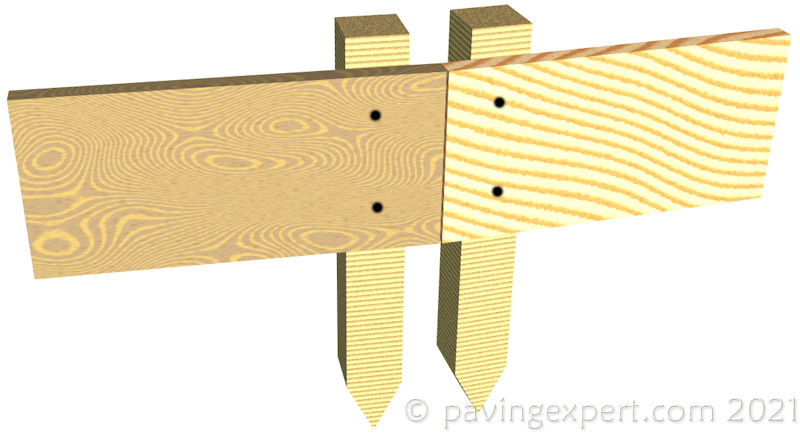
Where two rails meet, there needs to be some arrangement to maintain the line of the edging while ensuring the boards are firmly attached to the stakes. Assuming a 50x50mm stake is being used, a staight butt-joint, as shown opposite, would result in each board having a mere 25mm straddling the stake, and further assuming that the fixing nails need to be driven in as far from the edge of the stake and the edge of the board as is possible, this means they would be a wholly inadequate 12.5mm from the respective edges, a position that means they are not fully gripped by the wood and are, in fact, quite likely to split the timber.
On straight runs, there are a couple of preferred options - using a brace piece, and mitre-cutting. On curves, the same methods may be used or double-staking can be used, especially on faster curves where short lengths or kerfed sections of timber rail are used.
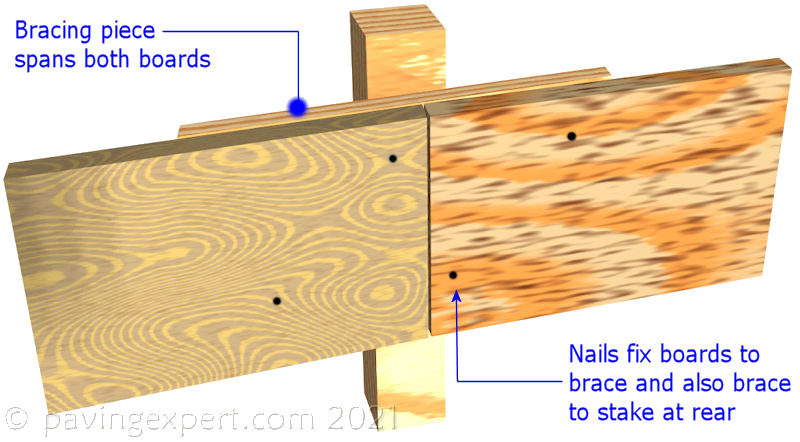
Using a bracing piece:
A short length of board, normally around 300m, is used to span two adjacent rails. The boards are nailed to the brace piece and then the brace piece itself can be nailed to the stake as shown opposite. The brace piece is normally positioned at the back of the boards and is often set lower than the top of the rails so that it can be buried by the backfill.
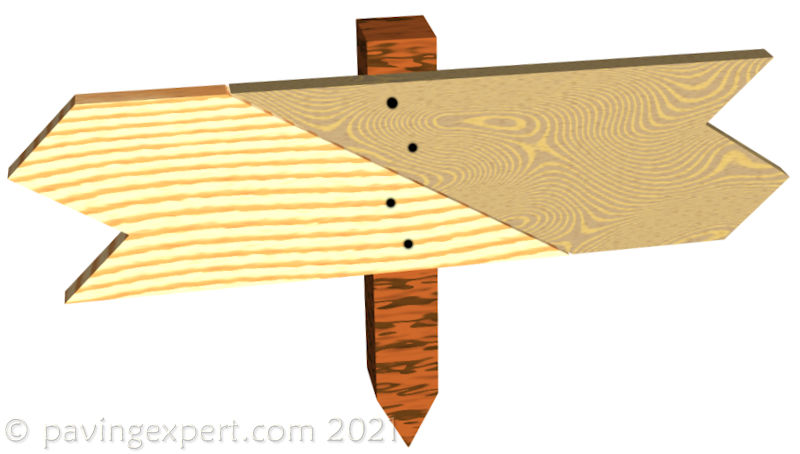
Using a Mitre cut:
This method works best on straight runs with non-warped timbers. The ends of each board are cut at roughly 60° and positioned so that both can be safely nailed to the supporting stake with a couple of nails, while still presenting a good line at the top surface.
Double Staking:
Double staking is normally used where there is a change of direction in the edging or on fast curves, where shorter lengths of timber board are used to construct the edging. Care needs to be exercised when driving the the second of the pair of stakes to prevent it dislodging the first.
Other Edgings Pages